
One feature of Dapr we've yet to explore is Azure Logic App workflow support. Let me explain a bit since I think the offering might be confusing. Microsoft open-sourced Azure Logic Apps, or at least the workflow part, back in May of last year. They did this by exposing the Workflow JSON into Dapr (see this GH Repo).
What this means is the Azure Logic App workflow JSON you can export out of the graphical editor of Azure Logic Workflow Designer can be used, nearly verbatim, in Dapr as a Workflow object. Workflows are not listed as one of the primary "Building Blocks" of Dapr, however they are a rich value-add that is worth us exploring.
We will be implementing a Workflow to post to Twitter on our behalf. Then exposing it and using it as a proper Service Hook in Azure Devops. Let's get started!
Containerizing a Twitter Poster
Let's pickup where we left off in Dapr Part 4. We can pull down our Twitter binding values
$ kubectl get Component snsnotify -o yaml | tail -n12
spec:
  metadata:
  - name: consumerKey
    value: bXljb25zdW1lcmtleQo=
  - name: consumerSecret
    value: bXkgY29uc3VtZXIgc2VjcmV0IGlzIHByZXR0eSBzZWNyZXQsIGVoPwo=
  - name: accessToken
    value: eWVhaCwgdGhlc2UgYXJlIG5vdCByZWFsIHZhbHVlcwo=
  - name: accessSecret
    value: Z29vZCBvbiB5YSBmb3IgZGVjcnlwdGluZyBhbGwgb2YgdGhlbQo=
  type: bindings.twitter
  version: v1
We can go to the Twitter Developer portal : https://developer.twitter.com/en/portal/dashboard
Looking at the scheduled tweets api, we can see the method is from POST accounts/:account_id/scheduled_tweets
Let's for now, just do a non-scheduled (immediate) tweet: POST accounts/:account_id/tweet
We have to first install "twurl" that handles the auth for us.
$ sudo gem install twurl
Password:
Sorry, try again.
Password:
Fetching twurl-0.9.6.gem
Fetching oauth-0.5.6.gem
Successfully installed oauth-0.5.6
Successfully installed twurl-0.9.6
Parsing documentation for oauth-0.5.6
Installing ri documentation for oauth-0.5.6
Parsing documentation for twurl-0.9.6
Installing ri documentation for twurl-0.9.6
Done installing documentation for oauth, twurl after 1 seconds
2 gems installed
Then you'll have to auth.. this requires an interactive remote login:
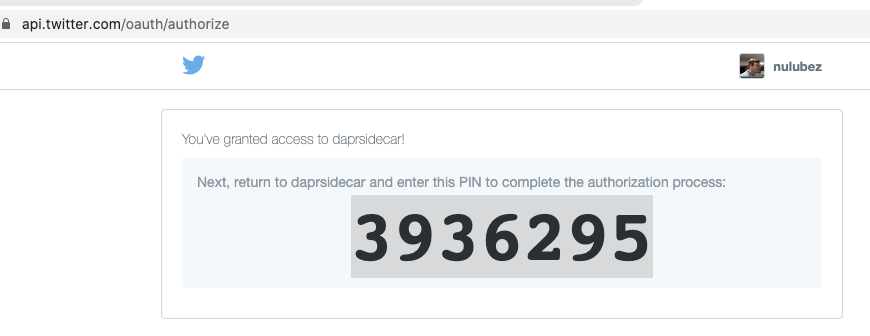
$ twurl authorize --consumer-key bXljb25zdW1lcmtleQo= --consumer-secret bXkgY29uc3VtZXIgc2VjcmV0IGlzIHByZXR0eSBzZWNyZXQsIGVoPwo=
Go to https://api.twitter.com/oauth/authorize?oauth_consumer_key=bXljb25zdW1lcmtleQo&oauth_nonce=bXljb25zdW1lcmtleQo&oauth_signature=bXljb25zdW1lcmtleQo%253D&oauth_signature_method=HMAC-SHA1&oauth_timestamp=1621265716&oauth_token=RuBU-bXljb25zdW1lcmtleQo&oauth_version=1.0 and paste in the supplied PIN
3936295
Authorization successful
Next we need our account ID for posting:
twurl -H "https://ads-api.twitter.com" "/9/accounts/"
$ twurl -H "https://ads-api.twitter.com" "/9/accounts/"
{"errors":[{"code":"UNAUTHORIZED_CLIENT_APPLICATION","message":"The client application making this request does not have access to Twitter Ads API"}],"request":{"params":{}}}
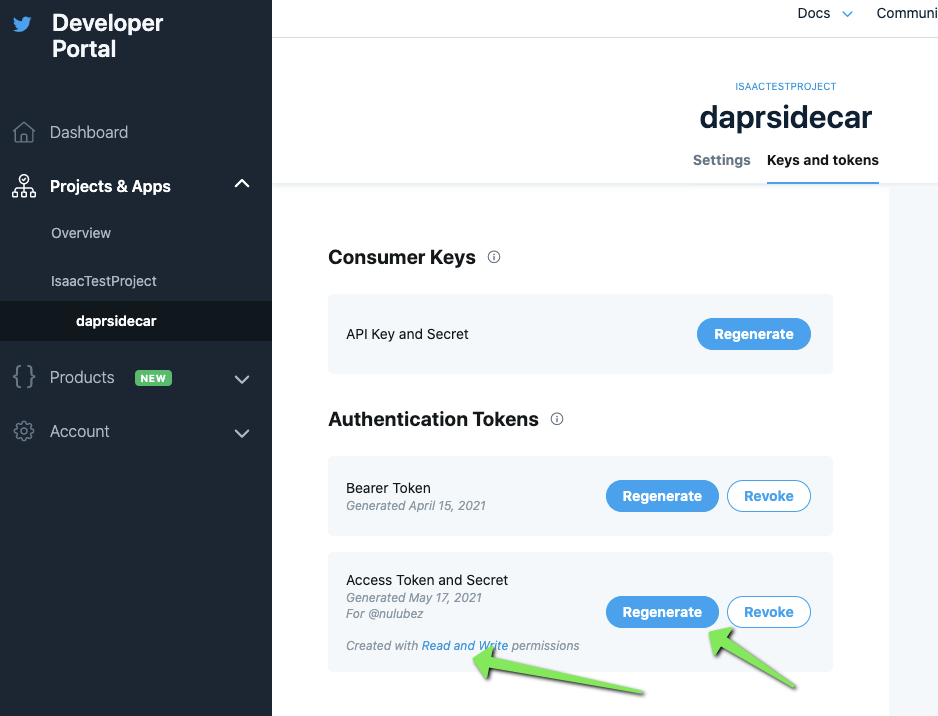
I changed from readonly, but that didnt help

I even re-authed..
Trying with the status API
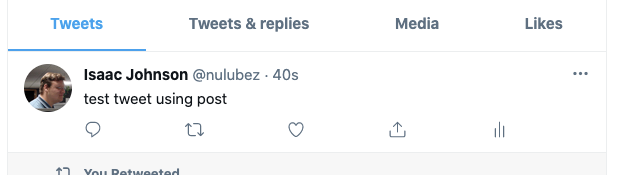
$ twurl -d 'status=test tweet using post' /1.1/statuses/update.json
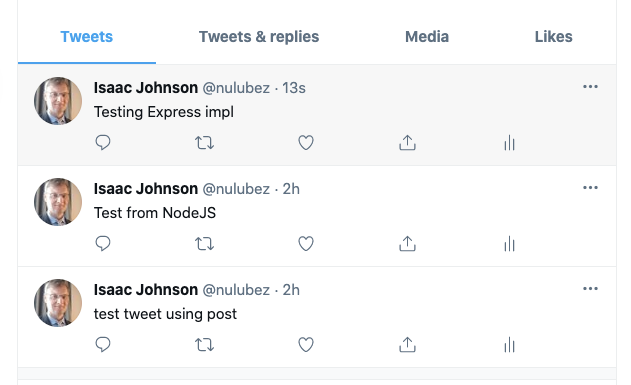
{"created_at":"Mon May 17 15:40:06 +0000 2021","id":1394316806416855047,"id_str":"1394316806416855047","text":"test tweet using post","truncated":false,"entities":{"hashtags":[],"symbols":[],"user_mentions":[],"urls":[]},"source":"\u003ca href=\"https:\/\/help.twitter.com\/en\/using-twitter\/how-to-tweet#source-labels\" rel=\"nofollow\"\u003edaprsidecar\u003c\/a\u003e","in_reply_to_status_id":null,"in_reply_to_status_id_str":null,"in_reply_to_user_id":null,"in_reply_to_user_id_str":null,"in_reply_to_screen_name":null,"user":{"id":2039861,"id_str":"2039861","name":"Isaac Johnson","screen_name":"nulubez","location":"iPhone: 37.548531,-122.237801","description":"SCM software dude. MN transplanted to SoCal (San Diego).","url":"http:\/\/t.co\/wv0mdCKBXV","entities":{"url":{"urls":[{"url":"http:\/\/t.co\/wv0mdCKBXV","expanded_url":"http:\/\/isaac.inkrunway.com","display_url":"isaac.inkrunway.com","indices":[0,22]}]},"description":{"urls":[]}},"protected":false,"followers_count":50,"friends_count":48,"listed_count":3,"created_at":"Fri Mar 23 18:39:12 +0000 2007","favourites_count":17,"utc_offset":null,"time_zone":null,"geo_enabled":true,"verified":false,"statuses_count":2173,"lang":null,"contributors_enabled":false,"is_translator":false,"is_translation_enabled":false,"profile_background_color":"9AE4E8","profile_background_image_url":"http:\/\/abs.twimg.com\/images\/themes\/theme1\/bg.png","profile_background_image_url_https":"https:\/\/abs.twimg.com\/images\/themes\/theme1\/bg.png","profile_background_tile":false,"profile_image_url":"http:\/\/pbs.twimg.com\/profile_images\/29208852\/me_icon3_48_normal.jpg","profile_image_url_https":"https:\/\/pbs.twimg.com\/profile_images\/29208852\/me_icon3_48_normal.jpg","profile_link_color":"0000FF","profile_sidebar_border_color":"87BC44","profile_sidebar_fill_color":"E0FF92","profile_text_color":"000000","profile_use_background_image":true,"has_extended_profile":false,"default_profile":false,"default_profile_image":false,"following":false,"follow_request_sent":false,"notifications":false,"translator_type":"none","withheld_in_countries":[]},"geo":null,"coordinates":null,"place":null,"contributors":null,"is_quote_status":false,"retweet_count":0,"favorite_count":0,"favorited":false,"retweeted":false,"lang":"en"}
And we see that posted:
Let's now see if we can accomplish the same thing with straight OAuth2. See this gist: https://gist.github.com/jaredpalmer/138f17a142d2d8770a1d752b0e00bd31
/*
*	Code snippet for posting tweets to your own twitter account from node.js.
*	You must first create an app through twitter, grab the apps key/secret,
*	and generate your access token/secret (should be same page that you get the
*	app key/secret).
* 	Uses oauth package found below:
*		https://github.com/ciaranj/node-oauth
*		npm install oauth
*	For additional usage beyond status updates, refer to twitter api
*		https://dev.twitter.com/docs/api/1.1
*/

var OAuth = require('oauth');

var twitter_application_consumer_key = '';  // API Key
var twitter_application_secret = '';  // API Secret
var twitter_user_access_token = '';  // Access Token
var twitter_user_secret = '';  // Access Token Secret

var oauth = new OAuth.OAuth(
	'https://api.twitter.com/oauth/request_token',
	'https://api.twitter.com/oauth/access_token',
	twitter_application_consumer_key,
	twitter_application_secret,
	'1.0A',
	null,
	'HMAC-SHA1'
);

var status = '';  // This is the tweet (ie status)

var postBody = {
	'status': status
};

// console.log('Ready to Tweet article:\n\t', postBody.status);
oauth.post('https://api.twitter.com/1.1/statuses/update.json',
	twitter_user_access_token,  // oauth_token (user access token)
    twitter_user_secret,  // oauth_secret (user secret)
    postBody,  // post body
    '',  // post content type ?
	function(err, data, res) {
		if (err) {
			console.log(err);
		} else {
			// console.log(data);
		}
	});
We'll use Node 10
$ nvm list
        v8.16.2
       v10.14.2
->     v10.16.3
       v12.13.1
we'll add npm install ---save oauth to our package.json first
I tweaked it to pull in env vars from shell (since i want to containerize it)
JOHNSI10-C02ZC3P6LVDQ:blog-dapr-workflow johnsi10$ node index.js
ERROR: must set env vars : TWITTERCONSUMERKEY, TWITTERCONSUMERSECRET, TWITTERUSERACCESSTOKEN, TWITTERUSERSECRET
We can set and run
$ node index.js
{ statusCode: 401,
  data:
   '{"errors":[{"code":89,"message":"Invalid or expired token."}]}' }
This is because I initially created these with read only perms. Now set them with read-write
$ export TWITTERUSERACCESSTOKEN=YWdhaW4sIG5vdCBhIHJlYWwgYWNjZXNzIHRva2VuCg==
$ export TWITTERUSERSECRET=eXVwLCBtYWRlIHVwIHZhbHVlcy4gYnV0IGdvb2QgdGhhdCB5b3UgY2hlY2tlZAo=

$ node index.js
{ statusCode: 403,
  data:
   '{"errors":[{"code":170,"message":"Missing required parameter: status."}]}' }
by default status was empty, let's set that
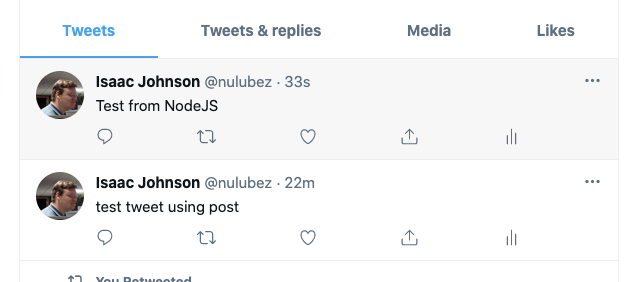
var status = 'Test from NodeJS';  // This is the tweet (ie status)

var postBody = {
	'status': status
};
$ node index.js
JOHNSI10-C02ZC3P6LVDQ:blog-dapr-workflow johnsi10$
And that posted!
with a few tweaks and adding Express JS, we can now post a tweet via the microservice
*/

const express = require('express')
const app = express()
const port = process.env.PORT || 3000;

const twitter_application_consumer_key = process.env.TWITTERCONSUMERKEY || 'not set';
const twitter_application_secret = process.env.TWITTERCONSUMERSECRET || 'not set';
const twitter_user_access_token = process.env.TWITTERUSERACCESSTOKEN || 'not set';
const twitter_user_secret = process.env.TWITTERUSERSECRET || 'not set';

var OAuth = require('oauth');
/*
var twitter_application_consumer_key = '';  // API Key
var twitter_application_secret = '';  // API Secret
var twitter_user_access_token = '';  // Access Token
var twitter_user_secret = '';  // Access Token Secret
*/

if ((twitter_application_consumer_key == 'not set') ||
   (twitter_application_secret == 'not set') ||
   (twitter_user_access_token == 'not set') ||
   (twitter_user_secret == 'not set')) {
   console.log('ERROR: must set env vars : TWITTERCONSUMERKEY, TWITTERCONSUMERSECRET, TWITTERUSERACCESSTOKEN, TWITTERUSERSECRET');
   return;
}

app.get('/tweet/:tweet', function(req, res){

   var oauth = new OAuth.OAuth(
       'https://api.twitter.com/oauth/request_token',
       'https://api.twitter.com/oauth/access_token',
       twitter_application_consumer_key,
       twitter_application_secret,
       '1.0',
       null,
       'HMAC-SHA1'
   );

   var status = req.params['tweet'];  // This is the tweet (ie status)

   var postBody = {
       'status': status
   };

   // console.log('Ready to Tweet article:\n\t', postBody.status);
   oauth.post('https://api.twitter.com/1.1/statuses/update.json',
       twitter_user_access_token,  // oauth_token (user access token)
       twitter_user_secret,  // oauth_secret (user secret)
       postBody,  // post body
       '',  // post content type ?
       function(err, data, res) {
           if (err) {
               console.log(err);
           } else {
               // console.log(data);
           }
       });

   res.send('Tweeting ' + req.params['tweet']);
 });


app.listen(port, () => {
   console.log(`Example app listening at http://localhost:${port}`)
   })
Launch it
$ node index.js
Example app listening at http://localhost:3000
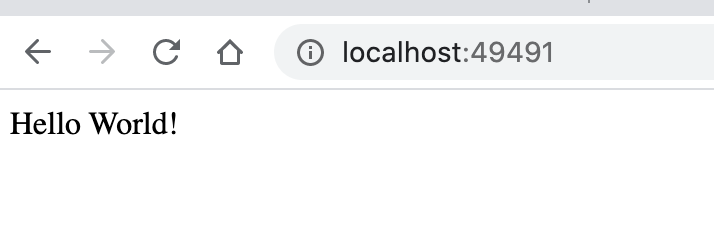
Then hit the URL with a tweet

Testing
Testing with Dockerfile
$ cat .dockerignore
node_modules
npm-debug.log

$ cat Dockerfile
FROM node:14

# Create app directory
WORKDIR /usr/src/app

# Install app dependencies
# A wildcard is used to ensure both package.json AND package-lock.json are copied
# where available (npm@5+)
COPY package*.json ./

RUN npm install
# If you are building your code for production
# RUN npm ci --only=production

# Bundle app source
COPY . .

EXPOSE 8080
ENV PORT=8080
CMD [ "node", "index.js" ]
Build and tag the Dockerfile
$ docker build . -t testing-twitter-c
[+] Building 34.7s (11/11) FINISHED
 => [internal] load build definition from Dockerfile                                                                                          0.1s
 => => transferring dockerfile: 440B                                                                                                          0.0s
 => [internal] load .dockerignore                                                                                                             0.0s
 => => transferring context: 67B                                                                                                              0.0s
 => [internal] load metadata for docker.io/library/node:14                                                                                    2.0s
 => [auth] library/node:pull token for registry-1.docker.io                                                                                   0.0s
 => [1/5] FROM docker.io/library/node:14@sha256:9025a77b2f37fcda3bbd367587367a9f2251d16a756ed544550b8a571e16a653                             26.4s
 => => resolve docker.io/library/node:14@sha256:9025a77b2f37fcda3bbd367587367a9f2251d16a756ed544550b8a571e16a653                              0.0s
 => => sha256:9025a77b2f37fcda3bbd367587367a9f2251d16a756ed544550b8a571e16a653 776B / 776B                                                    0.0s
 => => sha256:787f5e2f10471c11a2064774062aeeb400f76e9eef1ca768156a23678f005f3e 11.29MB / 11.29MB                                              2.0s
 => => sha256:c441936a8aad0da25eb24dfbb53ec6d159595186762d636db356f62f2991d71b 2.21kB / 2.21kB                                                0.0s
 => => sha256:9153ee3e2ced316fb30612aa14f7b787711e94ca65afa452af9ca9b79574dce3 7.83kB / 7.83kB                                                0.0s
 => => sha256:bfde2ec33fbca3c74c6e91bca3fbcb22ed2972671d49a1accb7089c9473cac12 45.38MB / 45.38MB                                              4.4s
 => => sha256:7b6173a10eb81a318ed53df74c8b80d29656f68194682e51f46f9b7b24c6ba03 4.34MB / 4.34MB                                                1.0s
 => => sha256:dc05be471d511acb4574f2f3630582527220c59d0abf0b8b905769916b550da7 49.76MB / 49.76MB                                              4.4s
 => => sha256:55fab5cadd3cc0fb680b701177abf2c36dde0de9f1e3f3b233aab8ba622c4d48 214.35MB / 214.35MB                                           10.1s
 => => sha256:9b7ece606ebf0a0f6488414e45f06ca2355687ab9b784d428542b843feb899f6 34.94MB / 34.94MB                                              6.4s
 => => sha256:bd821d20ef8c23c1c474d4b014889cfd2fcffb063a86dea8769347a630d0d558 4.19kB / 4.19kB                                                4.6s
 => => sha256:85c5bb1fa3e3e86e4f9ccbf2480ac768a80bf25f48f8d2f17b6c7e119e4e7e6b 2.38MB / 2.38MB                                                5.0s
 => => extracting sha256:bfde2ec33fbca3c74c6e91bca3fbcb22ed2972671d49a1accb7089c9473cac12                                                     3.6s
 => => sha256:94ab3cac57c49280dec1fbcdb22af539cb18f628b50b9b6b55a9d0b32f77c5fd 294B / 294B                                                    5.1s
 => => extracting sha256:787f5e2f10471c11a2064774062aeeb400f76e9eef1ca768156a23678f005f3e                                                     0.7s
 => => extracting sha256:7b6173a10eb81a318ed53df74c8b80d29656f68194682e51f46f9b7b24c6ba03                                                     0.4s
 => => extracting sha256:dc05be471d511acb4574f2f3630582527220c59d0abf0b8b905769916b550da7                                                     3.4s
 => => extracting sha256:55fab5cadd3cc0fb680b701177abf2c36dde0de9f1e3f3b233aab8ba622c4d48                                                     9.5s
 => => extracting sha256:bd821d20ef8c23c1c474d4b014889cfd2fcffb063a86dea8769347a630d0d558                                                     0.1s
 => => extracting sha256:9b7ece606ebf0a0f6488414e45f06ca2355687ab9b784d428542b843feb899f6                                                     2.1s
 => => extracting sha256:85c5bb1fa3e3e86e4f9ccbf2480ac768a80bf25f48f8d2f17b6c7e119e4e7e6b                                                     0.2s
 => => extracting sha256:94ab3cac57c49280dec1fbcdb22af539cb18f628b50b9b6b55a9d0b32f77c5fd                                                     0.0s
 => [internal] load build context                                                                                                             0.0s
 => => transferring context: 57.21kB                                                                                                          0.0s
 => [2/5] WORKDIR /usr/src/app                                                                                                                2.3s
 => [3/5] COPY package*.json ./                                                                                                               0.1s
 => [4/5] RUN npm install                                                                                                                     3.5s
 => [5/5] COPY . .                                                                                                                            0.1s
 => exporting to image                                                                                                                        0.2s
 => => exporting layers                                                                                                                       0.1s
 => => writing image sha256:a3354b7c786e81e8b243fa8aeee14e6ce37f630eb25092abcdf6560631c6156c                                                  0.0s
 => => naming to docker.io/library/testing-twitter-c                                                                                          0.0s


$ docker images
REPOSITORY                                                                TAG                                                     IMAGE ID       CREATED         SIZE
testing-twitter-c                                                         latest                                                  a3354b7c786e   3 minutes ago   946MB
We will pass in the existing ENV Vars we need
$ docker run --env TWITTERCONSUMERKEY --env TWITTERCONSUMERSECRET --env TWITTERUSERACCESSTOKEN --env TWITTERUSERSECRET -p 49491:8080 testing-twitter-c
Example app listening at http://localhost:8080
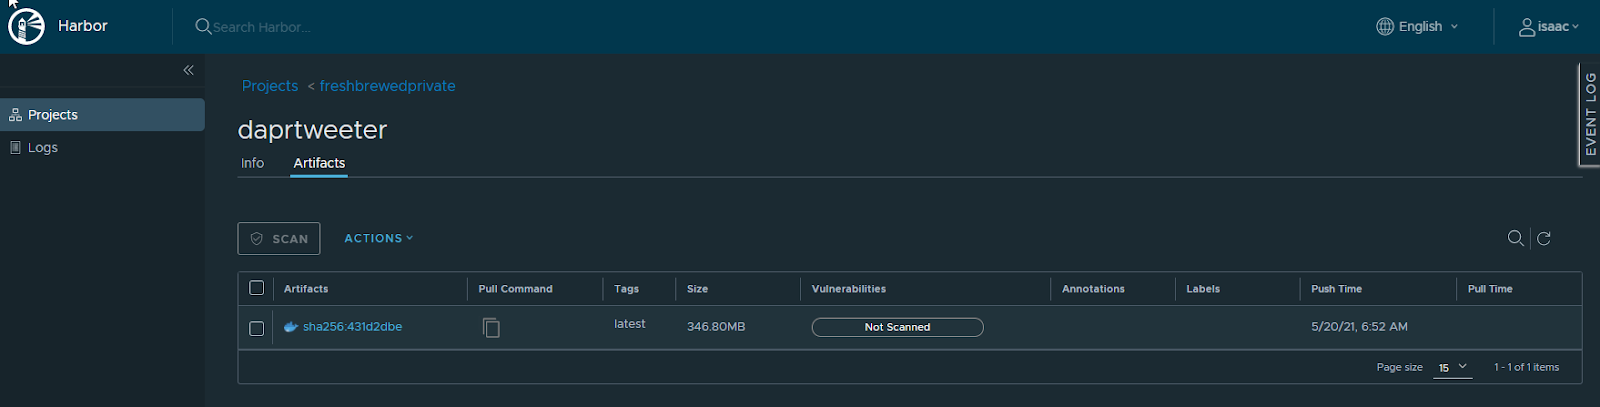
Push the container
Pushing the container to our Local Harbor
I have been fighting Harbor on large containers..
$ docker push harbor.freshbrewed.science/freshbrewedprivate/daprtweeter
The push refers to repository [harbor.freshbrewed.science/freshbrewedprivate/daprtweeter]
5b022723c4e5: Layer already exists
bb177490b6da: Pushing [==================================================>]  2.783MB
7c90804c29f5: Layer already exists
a3249c28ea92: Layer already exists
b238f928d38b: Layer already exists
4a844761bb65: Waiting
b1501adb3037: Waiting
b257e69d416f: Waiting
1e9c28d06610: Waiting
cddb98d77163: Waiting
ed0a3d9cbcc7: Waiting
8c8e652ecd8f: Waiting
2f4ee6a2e1b5: Waiting
error parsing HTTP 413 response body: invalid character '<' looking for beginning of value: "<html>\r\n<head><title>413 Request Entity Too Large</title></head>\r\n<body>\r\n<center><h1>413 Request Entity Too Large</h1></center>\r\n<hr><center>nginx/1.19.3</center>\r\n</body>\r\n</html>\r\n"
I tested many things. My ingress controller is Nginx 0.7.1
While this worked, I'm thinking I likely have too many annotations.
$ cat my-release-nginx-ingress.cm.yaml
apiVersion: v1
kind: ConfigMap
metadata:
  annotations:
    ingress.kubernetes.io/proxy-body-size: "0"
    meta.helm.sh/release-name: my-release
    meta.helm.sh/release-namespace: default
    nginx.ingress.kubernetes.io/proxy-body-size: "2048m"
    nginx.org/proxy-body-size: "2048m"
    nginx.org/client-max-body-size: "2048m"
  creationTimestamp: "2021-01-02T17:17:36Z"
  labels:
    app.kubernetes.io/instance: my-release
    app.kubernetes.io/managed-by: Helm
    app.kubernetes.io/name: my-release-nginx-ingress
    helm.sh/chart: nginx-ingress-0.7.1
  managedFields:
….


$ cat harbor-registry-harbor-ingress.ingress.yaml
apiVersion: extensions/v1beta1
kind: Ingress
metadata:
  annotations:
    cert-manager.io/cluster-issuer: letsencrypt-production
    ingress.kubernetes.io/proxy-body-size: "2048m"
    nginx.org/client-max-body-size: "2048m"
    ingress.kubernetes.io/ssl-redirect: "true"
    meta.helm.sh/release-name: harbor-registry
    meta.helm.sh/release-namespace: default
    nginx.ingress.kubernetes.io/proxy-body-size: "2048m"
    nginx.ingress.kubernetes.io/proxy-read-timeout: "900"
    nginx.ingress.kubernetes.io/proxy-send-timeout: "900"
    nginx.ingress.kubernetes.io/ssl-redirect: "true"
  creationTimestamp: "2021-05-06T12:58:10Z"
  generation: 1
  labels:
    app: harbor
    app.kubernetes.io/managed-by: Helm
    chart: harbor
    heritage: Helm
    release: harbor-registry
  managedFields:
…
I tried "0" with and without quotes.. but in the end, the above settings for "2048m" seemed to get the 1Gb container to upload
$ !docker
docker push harbor.freshbrewed.science/freshbrewedprivate/daprtweeter
The push refers to repository [harbor.freshbrewed.science/freshbrewedprivate/daprtweeter]
5b022723c4e5: Layer already exists
bb177490b6da: Pushed
7c90804c29f5: Layer already exists
a3249c28ea92: Layer already exists
b238f928d38b: Layer already exists
4a844761bb65: Pushed
b1501adb3037: Pushed
b257e69d416f: Layer already exists
1e9c28d06610: Pushed
cddb98d77163: Pushed
ed0a3d9cbcc7: Pushed
8c8e652ecd8f: Pushed
2f4ee6a2e1b5: Pushed
latest: digest: sha256:431d2dbe90b78b5c26850ac94bd0e01148111027f557075bc74bc37c560caeb1 size: 3050
Testing a deployment
$ kubectl create secret docker-registry myharborreg --docker-server=harbor.freshbrewed.science --doc
ker-username=user@freshbrewed.science --docker-password='notrealpassword!'
secret/myharborreg created
The deployment YAML
$ cat deployment.yaml
apiVersion: apps/v1
kind: Deployment
metadata:
  name: daprtweeter-deployment
  labels:
    app: daprtweeter
spec:
  replicas: 1
  selector:
    matchLabels:
      app: daprtweeter
  template:
    metadata:
      labels:
        app: daprtweeter
    spec:
      containers:
      - name: daprtweeter
        image: harbor.freshbrewed.science/freshbrewedprivate/daprtweeter:latest
        env:
        - name: TWITTERCONSUMERKEY
          value: "bXljb25zdW1lcmtleQo="
        - name: TWITTERCONSUMERSECRET
          value: "bXkgY29uc3VtZXIgc2VjcmV0IGlzIHByZXR0eSBzZWNyZXQsIGVoPwo="
        - name: TWITTERUSERACCESSTOKEN
          value: "YWdhaW4sIG5vdCBhIHJlYWwgYWNjZXNzIHRva2VuCg=="
        - name: TWITTERUSERSECRET
          value: "eXVwLCBtYWRlIHVwIHZhbHVlcy4gYnV0IGdvb2QgdGhhdCB5b3UgY2hlY2tlZAo="
        - name: PORT
          value: "8080"
        ports:
        - containerPort: 8080
      imagePullSecrets:
      - name: myharborreg
After deploying with kubectl apply -f deployment.yaml, test it with a port-forward

And we can see it worked

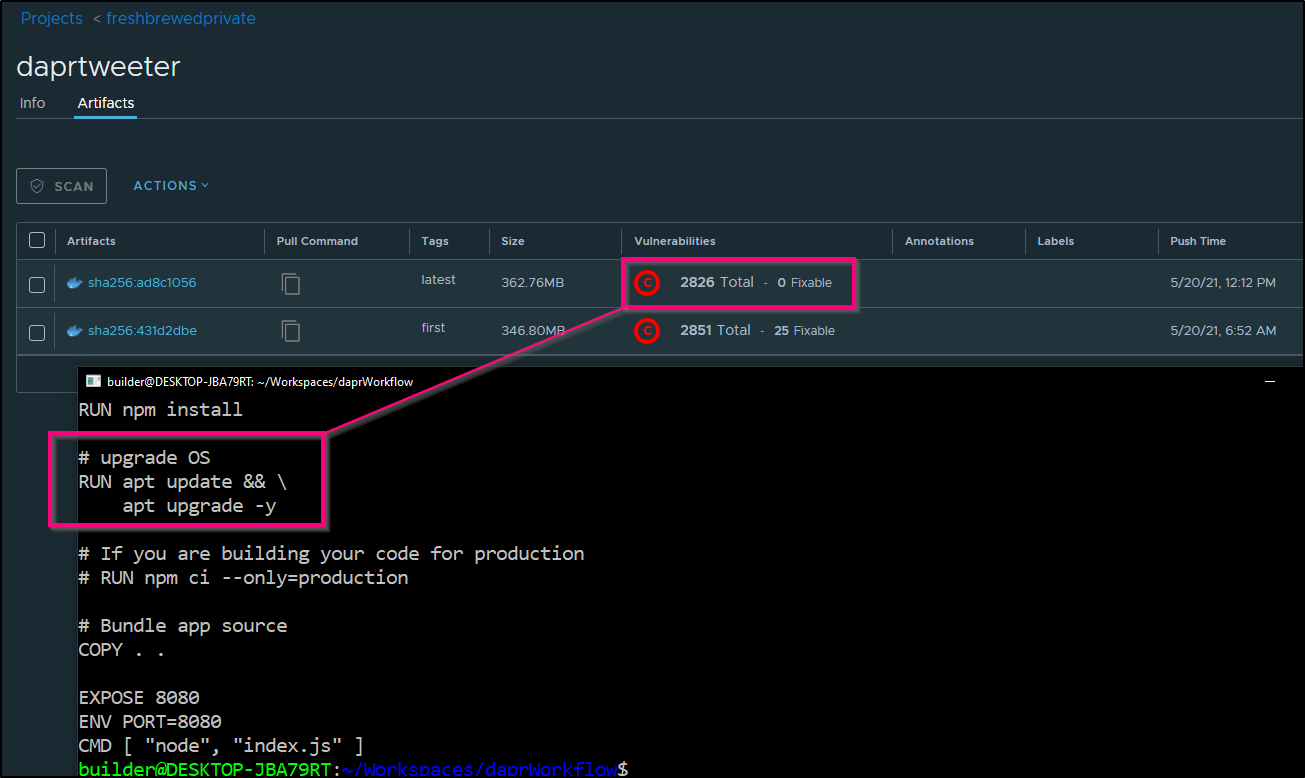
We can scan this image in Harbor. Just using a base NodeJS image, we have a lot of issues.
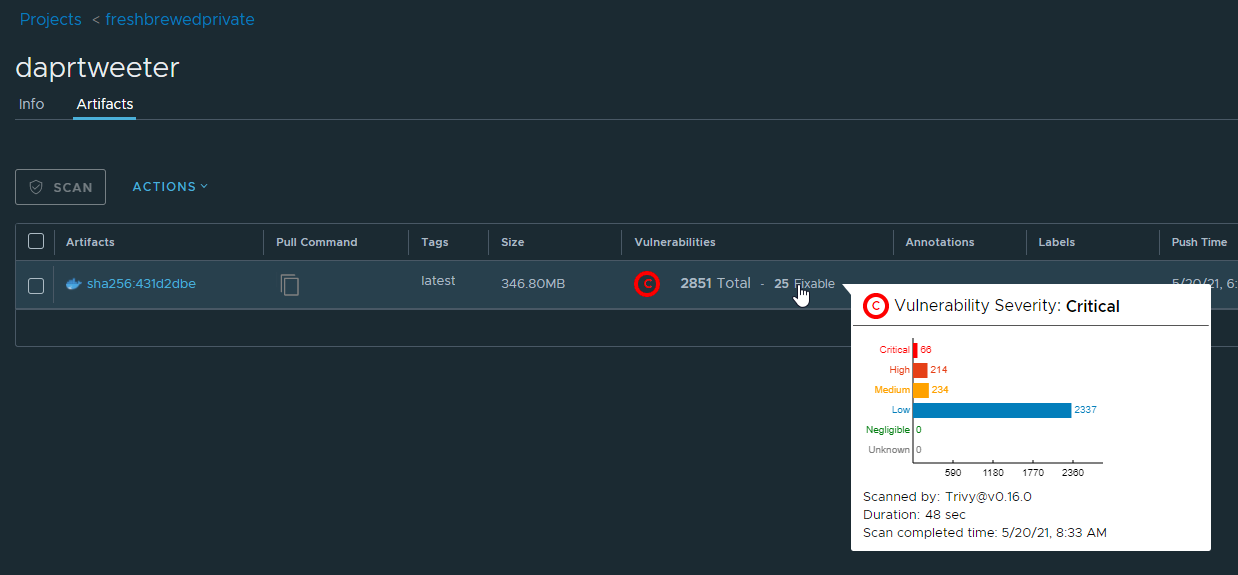
we can easily mitigate some with just an OS upgrade. Add the following to the Dockerfile
# upgrade OS
RUN apt update && \
    apt upgrade -y
Creating the Dapr Workflow
Let's start with the sample repo: https://github.com/dapr/workflows
$ az storage account create....
However i did already create one so we can use it
$ az storage account list -o table | grep dapr
2021-04-20T03:13:08.681886+00:00  True                      StorageV2  centralus       daprstate                 centralus          Succeeded            daprstaterg                 available          Hot
Let's set the name and get a storage account key
$ export STORAGE_ACCOUNT_NAME=daprstate

$ export STORAGE_ACCOUNT_KEY=`az storage account keys list -n daprstate -g daprstaterg -o json | jq -r '.[] | .value' | head -n1 | tr -d '\n'`
Let's now create the requisite CMs and secrets
$ kubectl create configmap workflows --from-file ./samples/workflow1.json
configmap/workflows created

$ kubectl get configmap workflows -o yaml
apiVersion: v1
data:
  workflow1.json: |-
    {
…
Create the secret for the workflow
$ kubectl create secret generic dapr-workflows --from-literal=accountName=$STORAGE_ACCOUNT_NAME --from-literal=accountKey=$STORAGE_ACCOUNT_KEY
secret/dapr-workflows created
and deploy it
$ kubectl apply -f deploy/deploy.yaml
deployment.apps/dapr-workflows-host created
We can port-forward to test
$ kubectl port-forward deploy/dapr-workflows-host 3500:3500
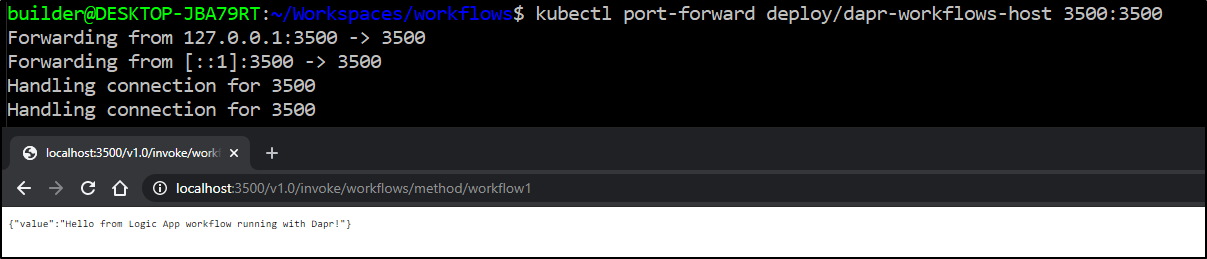
This was a very basic hello world example. Now let's plug in our Tweeter app
We need to annotate the deployment so we can route traffic in the workflow to the tweeter app
$ kubectl get deployments daprtweeter-deployment -o yaml > daprtweeter.yaml
$ vi daprtweeter.yaml
$ kubectl get deployments daprtweeter-deployment -o yaml > daprtweeter.yaml.old
$ diff daprtweeter.yaml daprtweeter.yaml.old
148,151d147
<       annotations:
<         dapr.io/enabled: "true"
<         dapr.io/app-id: "daprtweeter"
<         dapr.io/app-port: "8080"
$ kubectl apply -f daprtweeter.yaml
deployment.apps/daprtweeter-deployment configured
We need to create a workflow that we can use to trigger this….
$ cat samples/workflow3.json
{
    "definition": {
      "$schema": "https://schema.management.azure.com/providers/Microsoft.Logic/schemas/2016-06-01/workflowdefinition.json#",
      "actions": {
        "Compose": {
          "type": "compose",
          "runAfter": {},
          "inputs": { "body": "Hello from Logic App workflow running with Dapr!" }
        },
        "Function": {
          "type": "Http",
          "inputs": {
            "method": "GET",
            "uri": "http://localhost:3500/v1.0/invoke/daprtweeter/method/tweet/thisisatest"
          },
          "runAfter": { "Compose": [ "Succeeded" ] }
        },
        "Response": {
          "inputs": {
            "body": {
              "value": "@body('compose')"
            },
            "statusCode": 200
          },
          "runAfter": {
            "Function": [
              "Succeeded"
            ]
          },
          "type": "Response"
        }
      },
      "contentVersion": "1.0.0.0",
      "outputs": {},
      "parameters": {},
      "triggers": {
        "manual": {
          "inputs": {
            "schema": {}
          },
          "kind": "Http",
          "type": "Request"
        }
      }
    }
  }
In fact, we can create a new flow and still keep the first
$ kubectl delete configmap workflows
configmap "workflows" deleted
$ kubectl create configmap workflows --from-file ./samples/workflow3.json --from-file ./samples/workflow1.json
configmap/workflows created
we need to rotate the pod to get it to pull in new flows
$ kubectl delete pod dapr-workflows-host-5b64f58f8d-bpd79
pod "dapr-workflows-host-5b64f58f8d-bpd79" deleted
$ kubectl get pods | grep dapr
dapr-sentry-958fdd984-nzmq9                             1/1     Running            0          3d3h
dapr-sidecar-injector-56b8954855-4kbb4                  1/1     Running            0          3d3h
dapr-placement-server-0                                 1/1     Running            0          3d3h
dapr-dashboard-6ff6f44778-dssmt                         1/1     Running            0          3d3h
dapr-operator-7867c79bf9-4w2jr                          1/1     Running            0          3d3h
daprtweeter-deployment-7fcb5876f-9zjq6                  2/2     Running            0          60m
dapr-workflows-host-5b64f58f8d-zdbc7                    2/2     Running            0          23s
$ kubectl logs dapr-workflows-host-5b64f58f8d-zdbc7
error: a container name must be specified for pod dapr-workflows-host-5b64f58f8d-zdbc7, choose one of: [host daprd]
$ kubectl logs dapr-workflows-host-5b64f58f8d-zdbc7 host
Loading Configuration
Creating Edge Configuration
Registering Web Environment
Loading workflow: workflow3.json
Flow Created
Loading workflow: workflow1.json
Flow Created
Dapr LogicApps Server listening on port 50003
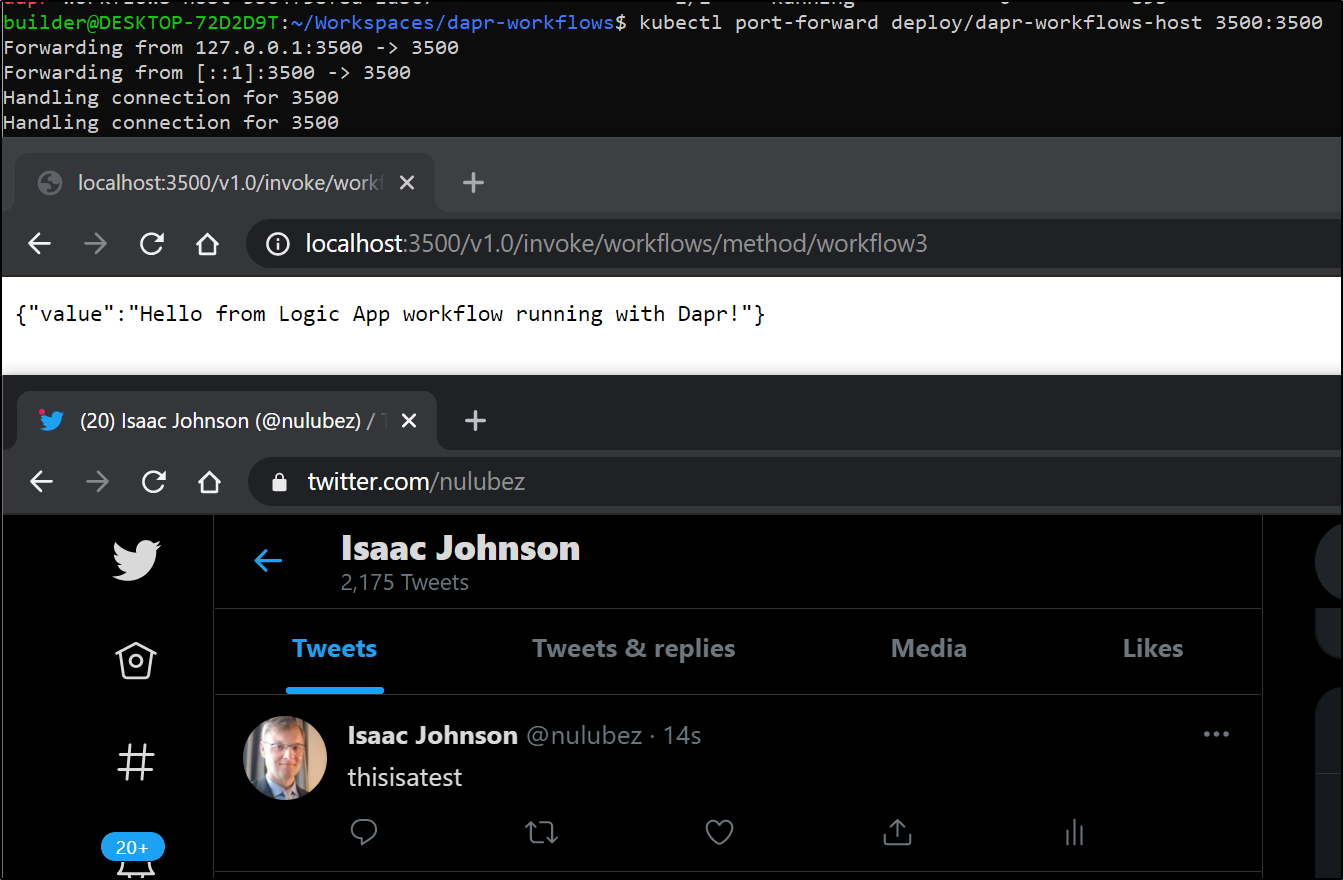
we can now test it
$ kubectl port-forward deploy/dapr-workflows-host 3500:3500
Forwarding from 127.0.0.1:3500 -> 3500
Forwarding from [::1]:3500 -> 3500
Handling connection for 3500
Handling connection for 3500
Exposing our Workflow
This next part is a bit tricky until we secure our endpoint. So be aware that our next blog will cover securing this.
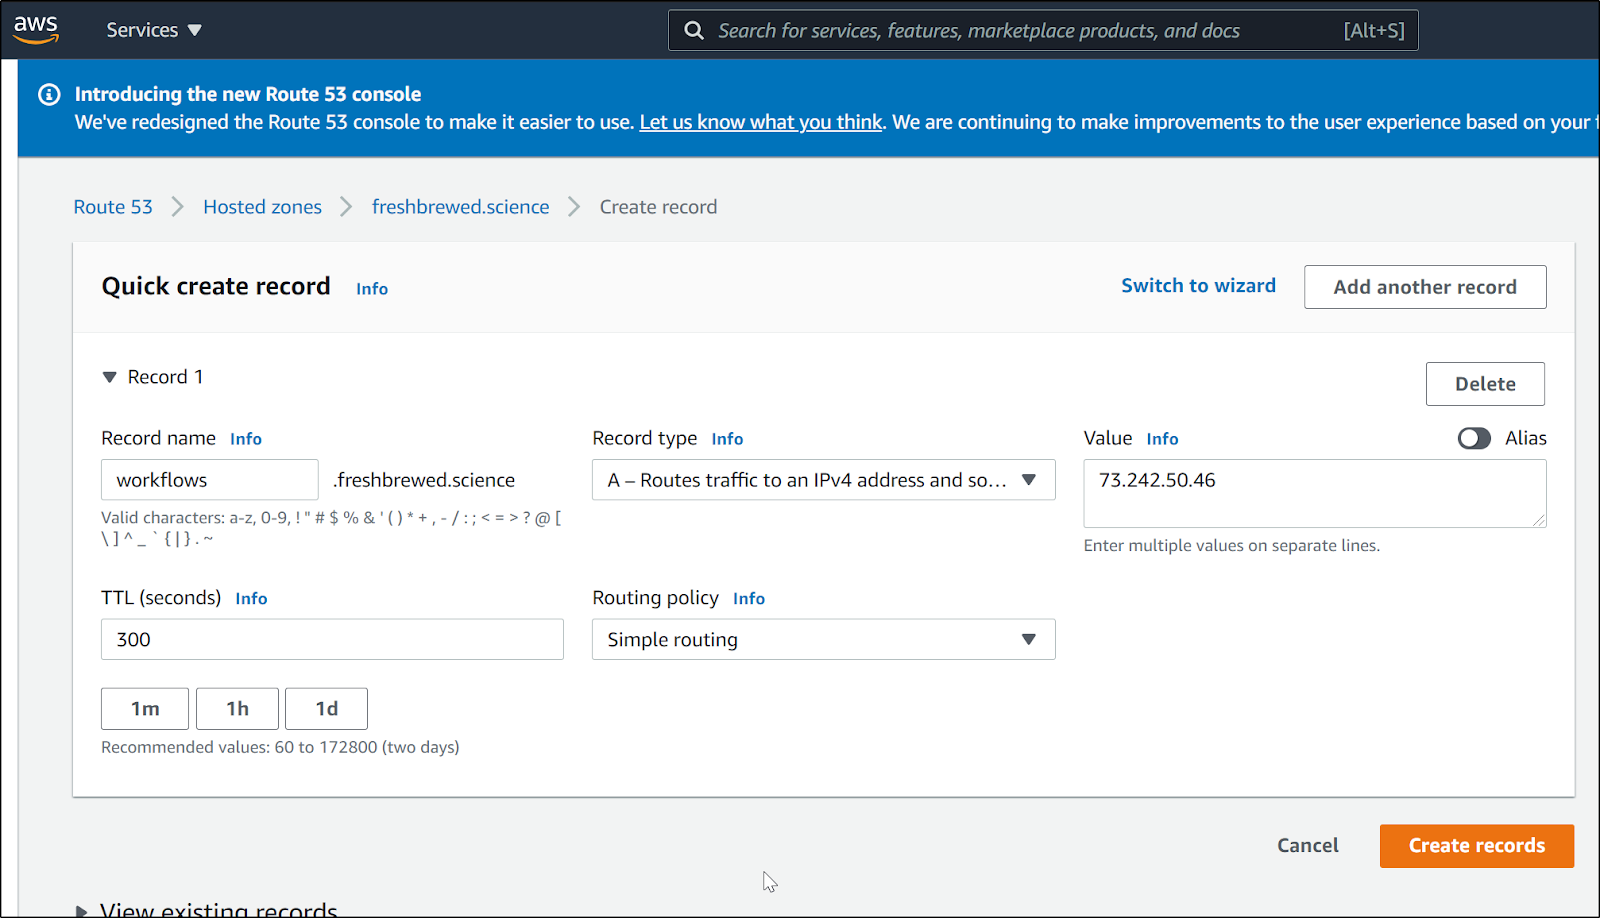
First, create a DNS A record for our IP
Use cert-manager to get a new certificate
$ cat workflow.cert.yaml
apiVersion: cert-manager.io/v1
kind: Certificate
metadata:
  name: workflows-fb-science
  namespace: default
spec:
  commonName: workflows.freshbrewed.science
  dnsNames:
  - workflows.freshbrewed.science
  issuerRef:
    kind: ClusterIssuer
    name: letsencrypt-prod
  secretName: workflows.freshbrewed.science-cert
$ kubectl apply -f workflow.cert.yaml
certificate.cert-manager.io/workflows-fb-science created
Verify it created
$ kubectl get certificate
NAME                              READY   SECRET                               AGE
….
workflows-fb-science              False   workflows.freshbrewed.science-cert   13s
$ kubectl get certificate
NAME                              READY   SECRET                               AGE
...
workflows-fb-science              True    workflows.freshbrewed.science-cert   37s
Next we need to create a service and ingress
apiVersion: v1
kind: Service
metadata:
  name: dapr-workflows-svc
spec:
  selector:
    app: dapr-workflows-host
  ports:
    - protocol: TCP
      port: 80
      targetPort: 3500
---
apiVersion: extensions/v1beta1
kind: Ingress
metadata:
  annotations:
    cert-manager.io/cluster-issuer: letsencrypt-production
    ingress.kubernetes.io/proxy-body-size: 2048m
    ingress.kubernetes.io/ssl-redirect: "true"
    nginx.ingress.kubernetes.io/proxy-body-size: 2048m
    nginx.ingress.kubernetes.io/proxy-read-timeout: "900"
    nginx.ingress.kubernetes.io/proxy-send-timeout: "900"
    nginx.ingress.kubernetes.io/ssl-redirect: "true"
    nginx.org/client-max-body-size: 2048m
  generation: 1
  labels:
    app: workflows
  name: workflows-registry-workflows-ingress
  namespace: default
spec:
  ingressClassName: nginx
  rules:
  - host: workflows.freshbrewed.science
    http:
      paths:
      - backend:
          serviceName: dapr-workflows-svc
          servicePort: 80
        path: /
        pathType: Prefix
  tls:
  - hosts:
    - workflows.freshbrewed.science
    secretName: workflows.freshbrewed.science-cert
status:
  loadBalancer:
    ingress:
    - ip: 192.168.1.205
Apply it
$ kubectl apply -f dapr-workflows-ingress.yaml
service/dapr-workflows-svc created
Warning: extensions/v1beta1 Ingress is deprecated in v1.14+, unavailable in v1.22+; use networking.k8s.io/v1 Ingress
ingress.extensions/workflows-registry-workflows-ingress configured
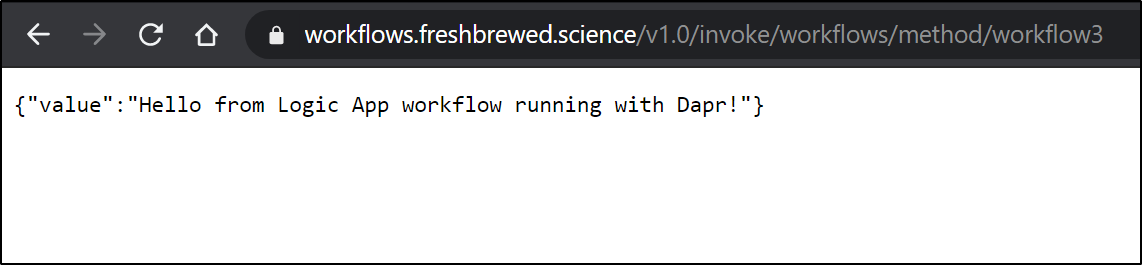
Testing

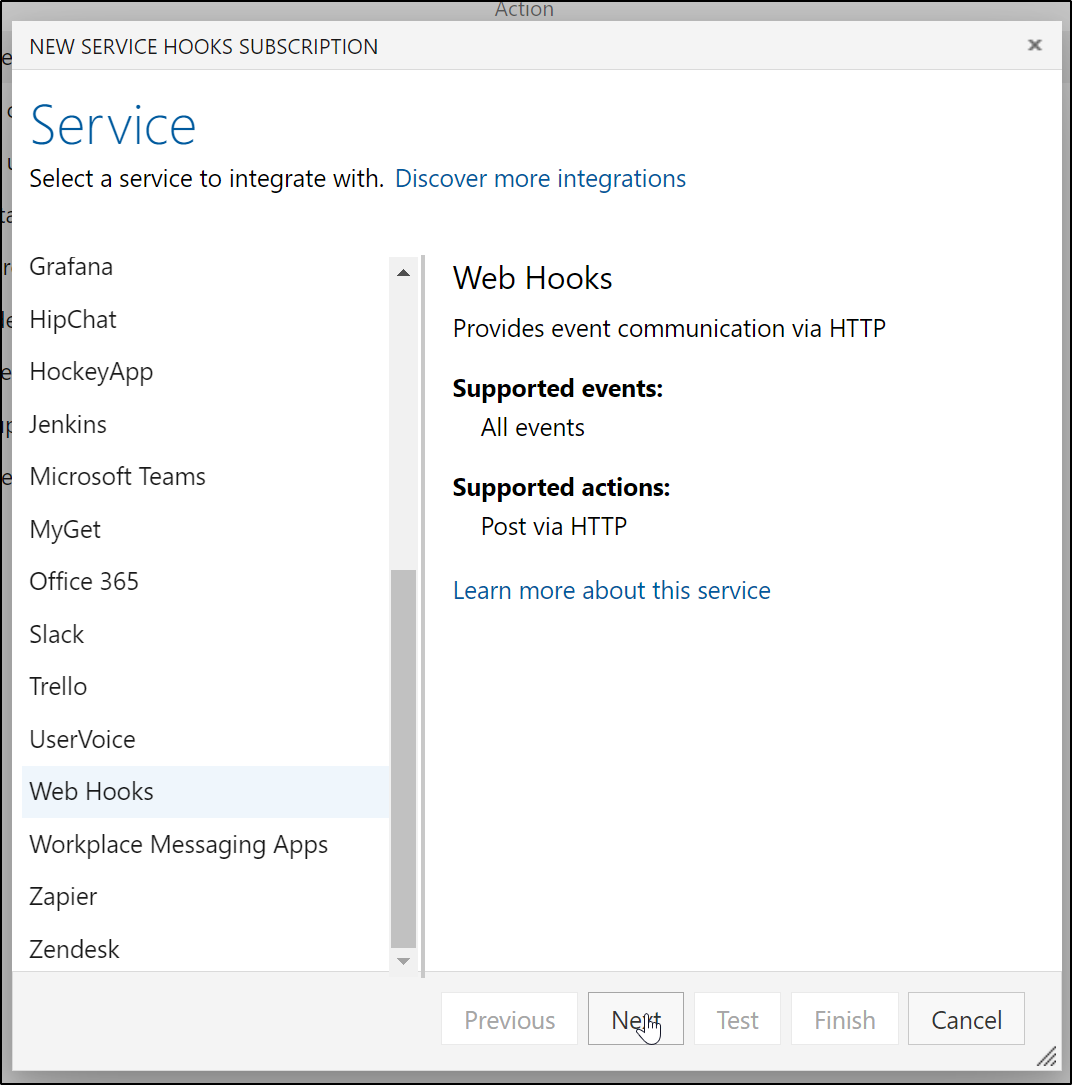
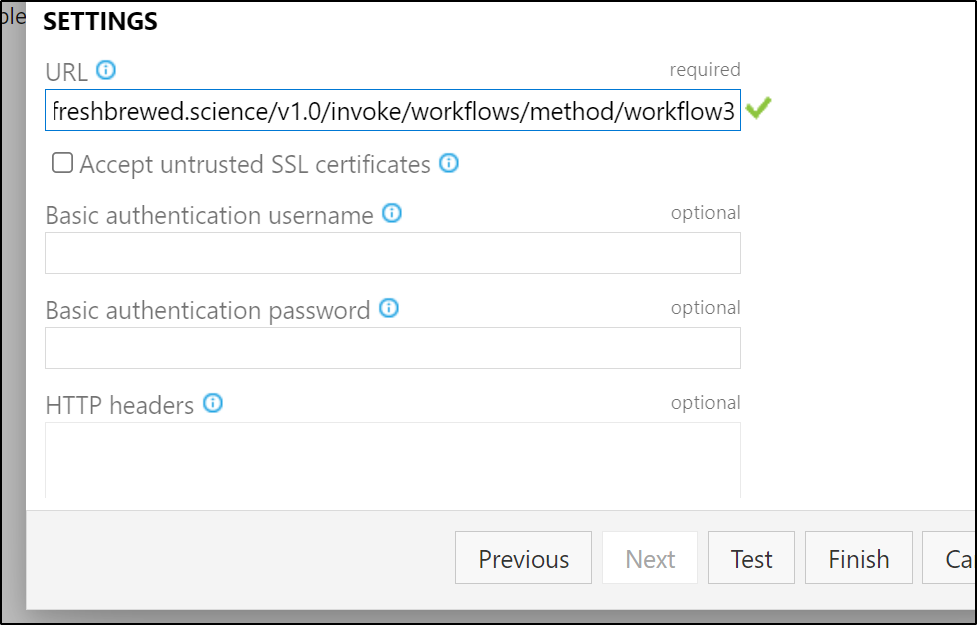
Applying to Azure DevOps
Let's wire this to an AzDO webhook
Create a new Service Hook
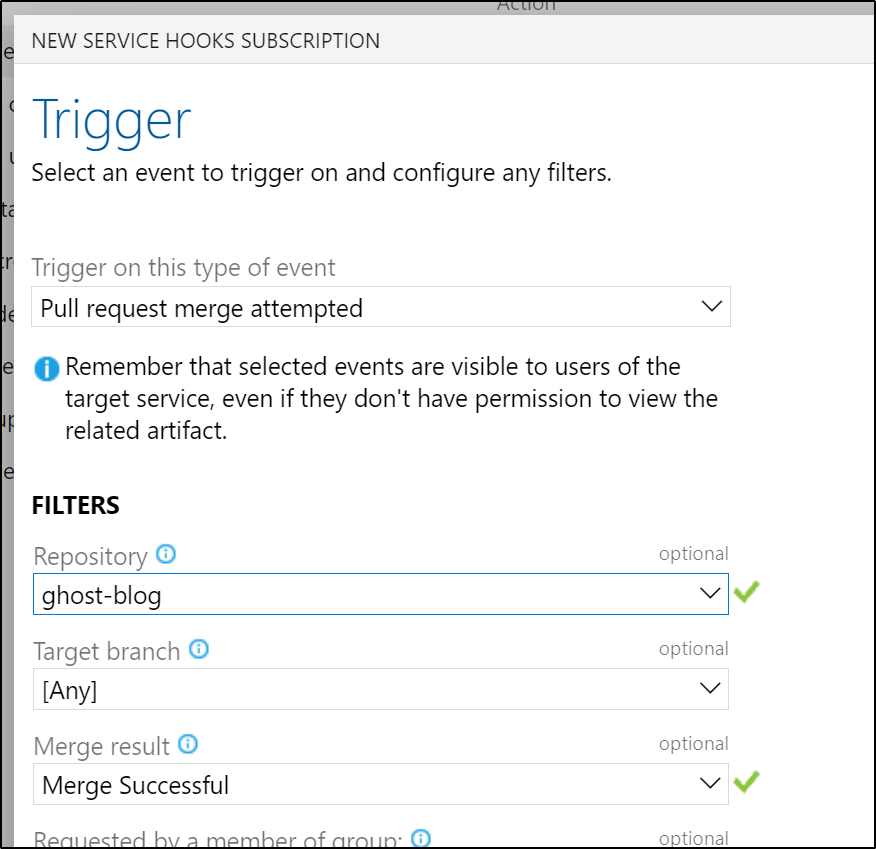
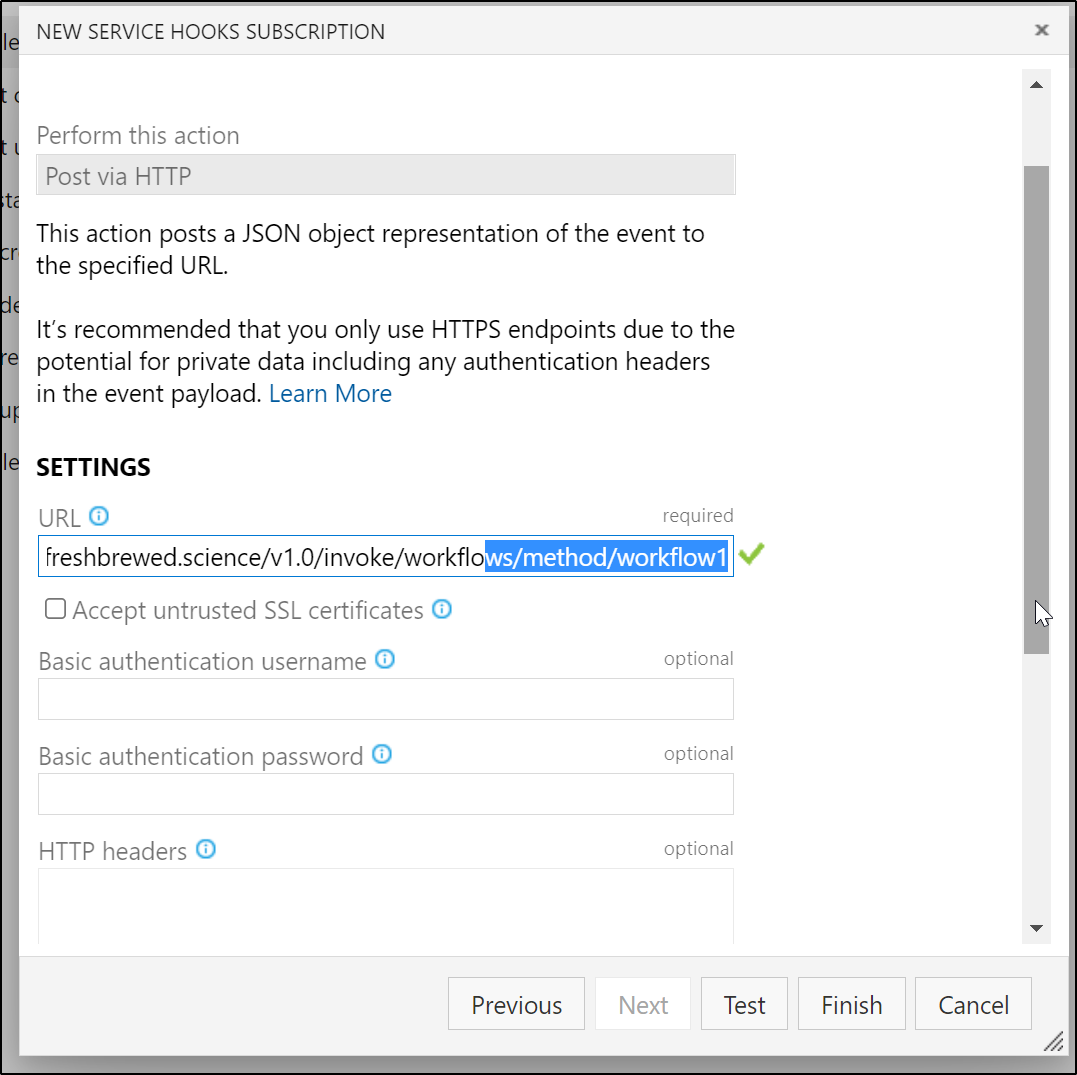
We want to post to Twitter when a blog post is up, so let's trigger this webhook from a PR completion
Testing it
let's set it to actually post …
First, let's update workflow3 to post a real message. I used https://meyerweb.com/eric/tools/dencoder/ to encode the message for posting

$ cat samples/workflow3.json | head -n 15 | tail -n3
            "method": "GET",
            "uri": "http://localhost:3500/v1.0/invoke/daprtweeter/method/tweet/freshbrewed.science%20updated%20with%20a%20new%20blog%20entry!"
          },
Now let's update the configmap and cycle the workflow pod to make it pick up the changes
$ kubectl delete configmap workflows && kubectl create configmap workflows --from-file ./samples/workflow3.json --from-file ./samples/workflow1.json && kubectl delete pod -l app=dapr-workflows-host
configmap "workflows" deleted
configmap/workflows created
pod "dapr-workflows-host-5b64f58f8d-hb6jt" deleted
We can test then save

and we can see it was updated

Now the limitation to this is the workflow presently just triggers this one notification and there is no security. At this point anyone who hits https://workflows.freshbrewed.science/v1.0/invoke/workflows/method/workflow3 would trigger a canned post.
Securing Endpoints
There are actually several approaches to use here.
- Obscure unauthenticated Ingress URL
- Using Dapr-api-token (https://docs.dapr.io/operations/security/api-token/). However, I have found some issues with the function redirect not passing forward a token and failing
- Using NGinx ingress basic authenticaion. However, at least for my Nginx, I've had some issues with applying it (doesnt really respect the auth annotations)
- Using another ingress controller (like Ambassador), however it has it's own nuances
We will be exploring all of these in our next blog post.
Summary
Dapr Workflows are a nice alternative to chained Pub/Subs to create Workflows using Dapr. The support for Azure Logic Apps meant that in some cases, I used the Azure Portal and the rich UI of Azure Logic App Designer to work out an idea then export to JSON.
The documentation, however, for Workflows is sparse. I found some issues when addressing authentication (we will cover next time). However, this is a promising feature and work exploring.