

Published: Jul 5, 2022 by Isaac Johnson
Devspace is an OSS toolset that let’s users easily launch interactive containers into managed namespaces. With just the source code and Dockerfile, It will discover any YAML, launch a container with port-forwarding and drop developers into an interactive shell to debug their code. Loft.sh which we covered back in May is a commercial tool with a nice free tier that lets one manage virtual clusters and namespaces.
Today, we’ll walk through using both, first Devspace on its own with our own Docker with Tests example. Then we’ll setup an example vcluster and use it with Devspace to see how our users could safely create self-contained clusters for testing their work. Lastly, we’ll create a demo user and show how non-admins can use the system.
Installing Devspace CLI
First, we need to install the Devspace CLI. We can follow the instructions on their site.
For me, I’ll use brew in WSL.
$ brew install devspace
==> Downloading https://ghcr.io/v2/homebrew/core/kubernetes-cli/manifests/1.24.2
######################################################################## 100.0%
==> Downloading https://ghcr.io/v2/homebrew/core/kubernetes-cli/blobs/sha256:42e2f4fbed12d8e5a55470f3d98e8d0a5f4c72da4377859cd280d67b224ee8e2
==> Downloading from https://pkg-containers.githubusercontent.com/ghcr1/blobs/sha256:42e2f4fbed12d8e5a55470f3d98e8d0a5f4c72da4377859cd280d67b224ee8e2?se=2022-07-04T20%3A45
######################################################################## 100.0%
==> Downloading https://ghcr.io/v2/homebrew/core/devspace/manifests/5.18.5
######################################################################## 100.0%
==> Downloading https://ghcr.io/v2/homebrew/core/devspace/blobs/sha256:e98e00b8e7de436cccc3417dcd9e74c7adf096352260f265a0ad06de61d16923
==> Downloading from https://pkg-containers.githubusercontent.com/ghcr1/blobs/sha256:e98e00b8e7de436cccc3417dcd9e74c7adf096352260f265a0ad06de61d16923?se=2022-07-04T20%3A45
######################################################################## 100.0%
==> Installing dependencies for devspace: kubernetes-cli
==> Installing devspace dependency: kubernetes-cli
==> Pouring kubernetes-cli--1.24.2.x86_64_linux.bottle.tar.gz
🍺  /home/linuxbrew/.linuxbrew/Cellar/kubernetes-cli/1.24.2: 228 files, 44.5MB
==> Installing devspace
==> Pouring devspace--5.18.5.x86_64_linux.bottle.tar.gz
🍺  /home/linuxbrew/.linuxbrew/Cellar/devspace/5.18.5: 5 files, 49.6MB
==> Running `brew cleanup devspace`...
Disable this behaviour by setting HOMEBREW_NO_INSTALL_CLEANUP.
Hide these hints with HOMEBREW_NO_ENV_HINTS (see `man brew`).
Alternatively, we could just use curl and move the binary
curl -s -L "https://github.com/loft-sh/devspace/releases/latest" | sed -nE 's!.*"([^"]*devspace-linux-amd64)".*!https://github.com\1!p' | xargs -n 1 curl -L -o devspace && chmod +x devspace;
sudo install devspace /usr/local/bin;
As of this moment, that will give us latest stable, 5.x
$ devspace --version
devspace version 5.18.5
If we wish to be bleeding edge (we do we do), then we can upgrade to the beta v6
$ devspace upgrade --version=v6.0.0-beta.0
[done] √ Successfully updated devspace to version v6.0.0-beta.0

$ devspace --version
devspace version 6.0.0-beta.0
Using Devspace with Loft
I was given the pro-tip that devspace + loft are a really solid combo so I’ll try mixing right at the start
First, I’ll login to my loft instance and create a Virtual Cluster for, let’s say the Super QC department.
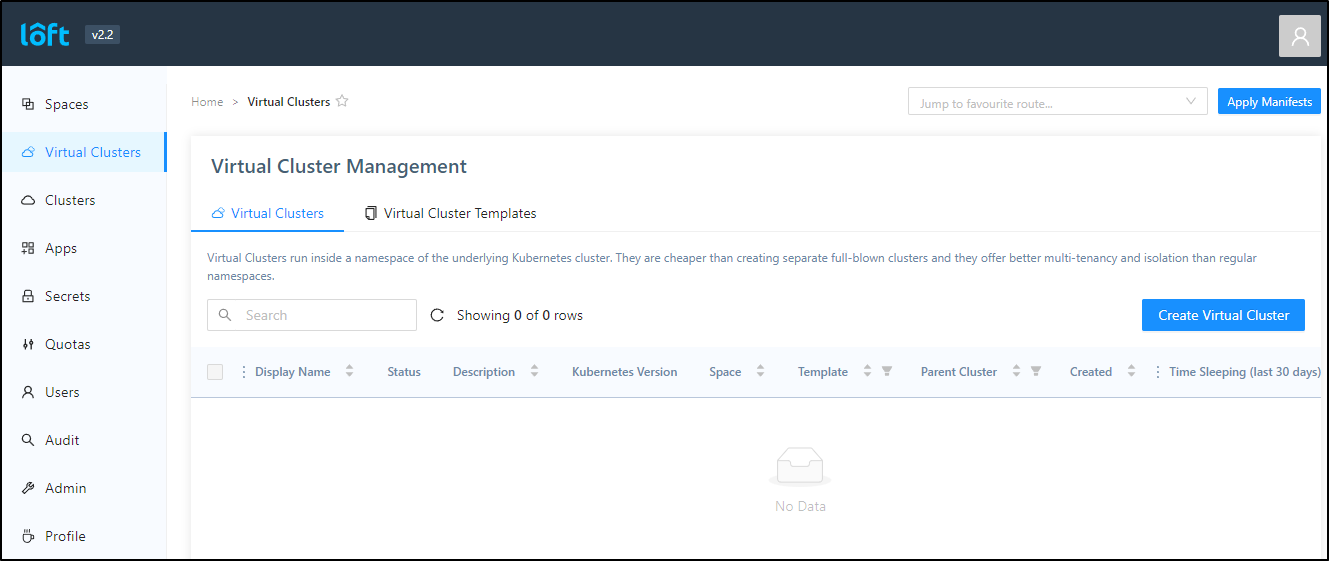
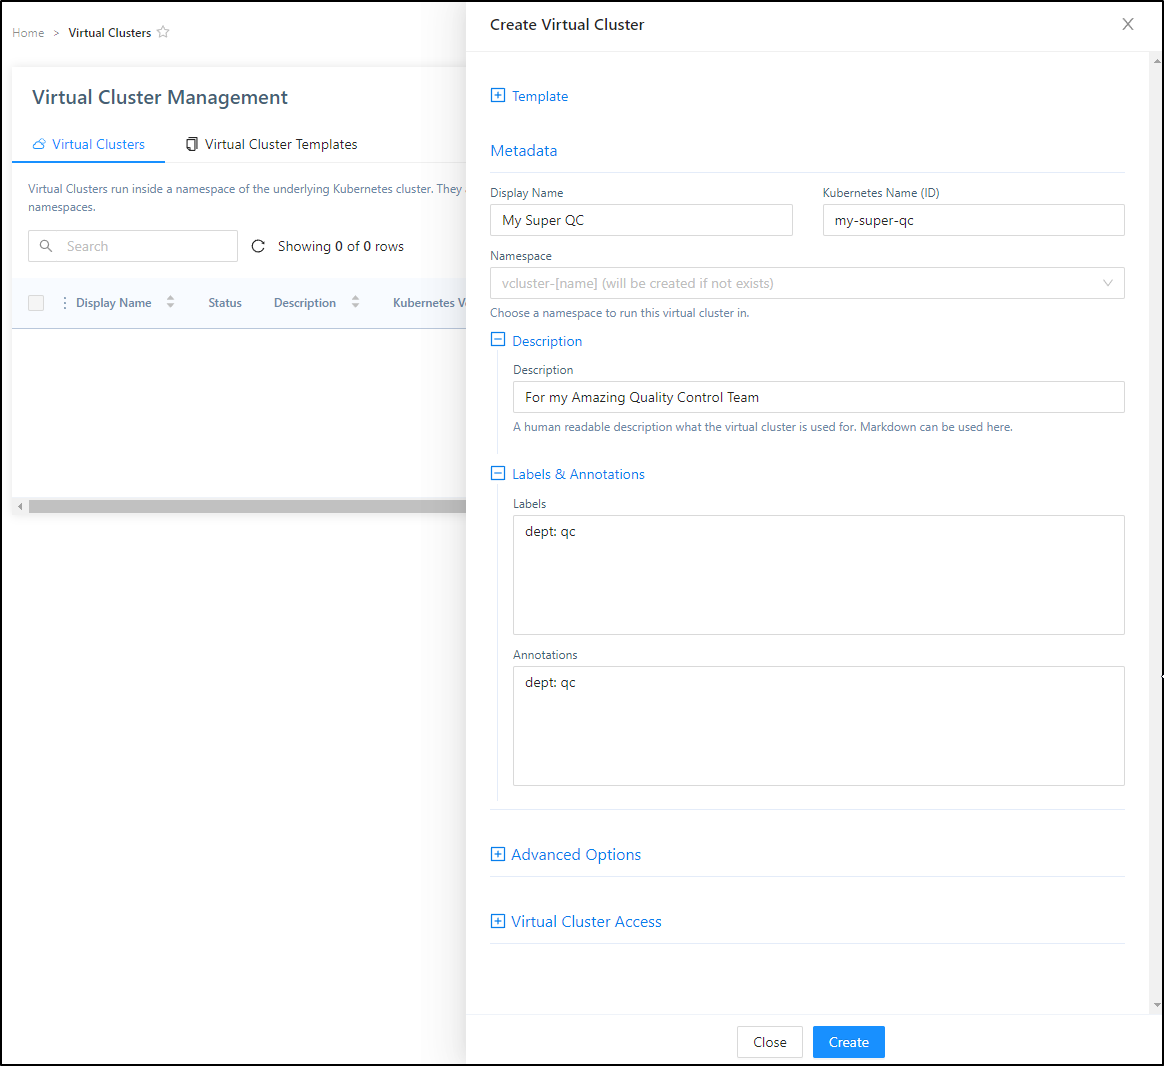
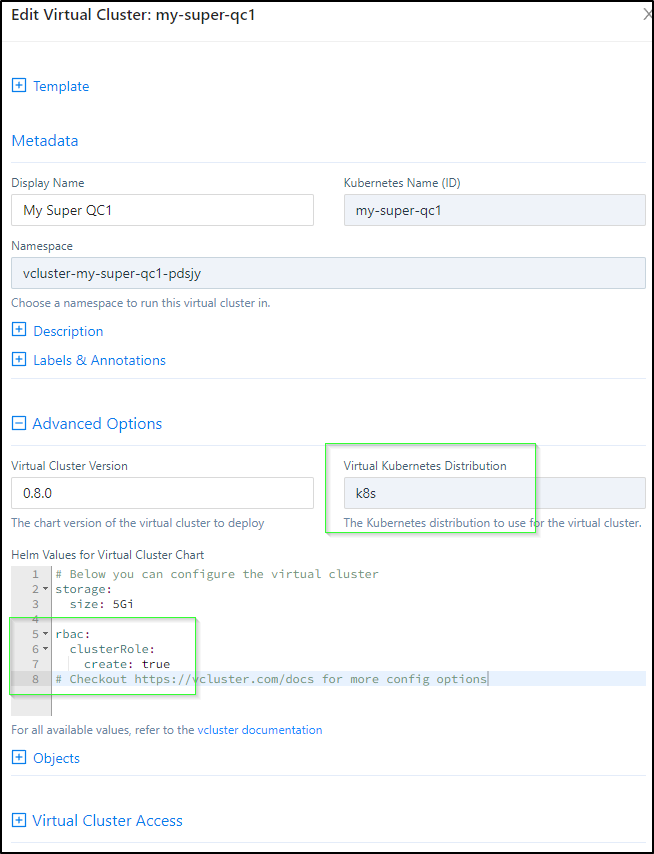
I’ll click Create Virtual Cluster and give it a name and ID. In fact, I’ll add a bit more details including some labels, annotations and a description
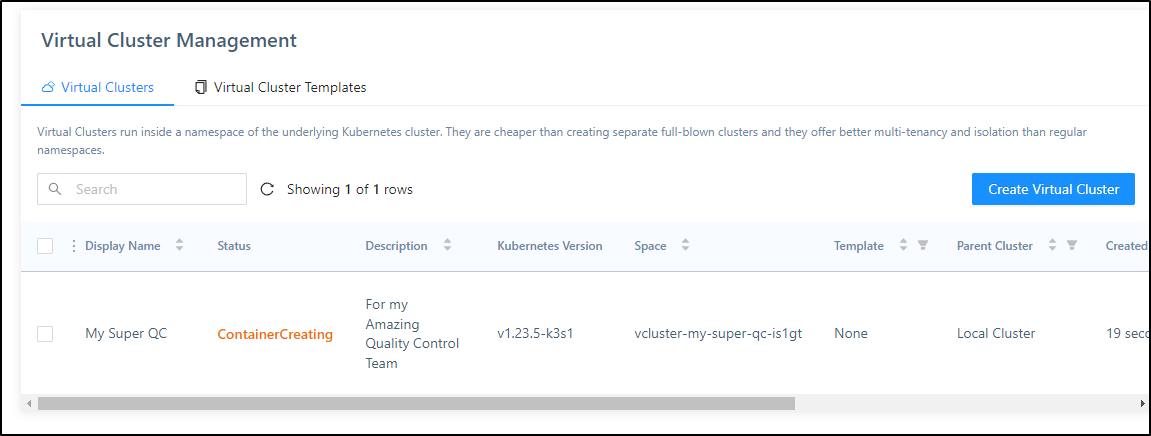
After I click create, the Status will go from Starting to Pending to ContainerCreating in short order
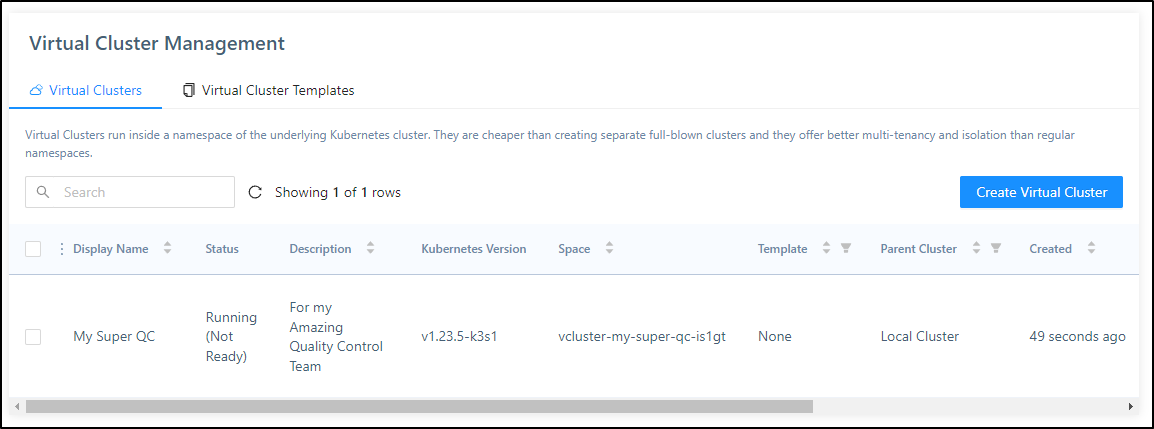
When it reaches Running, we can actually use it
I had a couple nuances with Loft, namely the “k3s” template didn’t work so hot, but the “K8s” did. I also added the rbac.clusterRole.create option to the helm chart (otherwise you may see a repeating “couldn’t find virtual cluster kube-config, will retry in 1 seconds” error in your logs)
Using the vCluster
We can now login and use the vcluster. These steps assume you’ve installed the Loft CLI.
If you haven’t, you can find the steps here.
Let’s login (It will pop up a window for login)
$ loft list vclusters
[fatal]  not logged in, please make sure you have run 'loft login [loft-url]'

$ loft login loft.freshbrewed.science
[info]   If the browser does not open automatically, please navigate to https://loft.freshbrewed.science/login?cli=true
[info]   If you have problems logging in, please navigate to https://loft.freshbrewed.science/profile/access-keys, click on 'Create Access Key' and then login via 'loft login https://loft.freshbrewed.science --access-key ACCESS_KEY'
[done] √ Successfully logged into Loft instance https://loft.freshbrewed.science
Now I can list my vClusters
$ loft list vclusters

 Name                          Space                         Cluster        Status   Age
 My Super QC1 (my-super-qc1)   vcluster-my-super-qc1-pdsjy   loft-cluster   Active   7m39s
And then use it:
$ loft use vcluster my-super-qc1
[done] √ Successfully updated kube context to use space vcluster-my-super-qc1-pdsjy in cluster loft-cluster

$ kubectl get ns
NAME              STATUS   AGE
default           Active   7m22s
kube-node-lease   Active   7m23s
kube-public       Active   7m24s
kube-system       Active   7m24s
We can also see that a context was added out our kubeconfig
$ kubectx
default
docker-desktop
loft-vcluster_my-super-qc1_vcluster-my-super-qc1-pdsjy_loft-cluster
And one more verification, we can switch to default and se the “my-super-qc1” namespace, then switch back and see just the namespaces in our virtual cluster
$ kubectx default
Switched to context "default".
$ kubectl get namespaces
NAME                          STATUS   AGE
default                       Active   29d
kube-system                   Active   29d
kube-public                   Active   29d
kube-node-lease               Active   29d
cert-manager                  Active   22d
actions-runner-system         Active   17d
dapr-system                   Active   13d
loft                          Active   13d
crossplane-system             Active   13d
test2                         Active   6d9h
test                          Active   6d9h
vcluster-my-super-qc1-pdsjy   Active   14m
$ kubectx loft-vcluster_my-super-qc1_vcluster-my-super-qc1-pdsjy_loft-cluster
Switched to context "loft-vcluster_my-super-qc1_vcluster-my-super-qc1-pdsjy_loft-cluster".
$ kubectl get namespaces
NAME              STATUS   AGE
default           Active   13m
kube-node-lease   Active   13m
kube-public       Active   13m
kube-system       Active   13m
An interesting note, if you add or restore nodes, they don’t automatically get added to the virtual cluster.
For instance, I had a powered off node I had to bring back online. The “main” cluster saw it, but the VirtualCluster did not
$ kubectx default
Switched to context "default".

$ kubectl get nodes
NAME                     STATUS   ROLES                  AGE   VERSION
anna-macbookair          Ready    control-plane,master   29d   v1.23.6+k3s1
builder-macbookpro2      Ready    <none>                 21d   v1.23.6+k3s1
hp-hp-elitebook-850-g2   Ready    <none>                 16d   v1.23.6+k3s1

$ kubectx loft-vcluster_my-super-qc1_vcluster-my-super-qc1-pdsjy_loft-cluster
Switched to context "loft-vcluster_my-super-qc1_vcluster-my-super-qc1-pdsjy_loft-cluster".

$ kubectl get nodes
NAME                  STATUS   ROLES    AGE     VERSION
anna-macbookair       Ready    <none>   3h32m   v1.23.5
builder-macbookpro2   Ready    <none>   3h8m    v1.23.5
Using Devspace with a local Repo
Now that we are in a virtual cluster, we can the devspaces CLI to init.
We’ll continue with the dockerWithTest2 repo I’ve been enjoying lately to launch the app. The main has a Dockerfile that should work just fine
builder@DESKTOP-QADGF36:~/Workspaces/dockerWithTests2$ git checkout main
Switched to branch 'main'
Your branch is behind 'origin/main' by 6 commits, and can be fast-forwarded.
  (use "git pull" to update your local branch)
$ git pull
Updating f119408..e9d01aa
Fast-forward
 k8s/deployment.yaml | 7 -------
 1 file changed, 7 deletions(-)
$ git remote show origin | head -n3
* remote origin
  Fetch URL: https://github.com/idjohnson/dockerWithTests2.git
  Push  URL: https://github.com/idjohnson/dockerWithTests2.git
Usuing init takes us through a questionare
$ devspace init


     %########%
     %###########%       ____                 _____
         %#########%    |  _ \   ___ __   __ / ___/  ____    ____   ____ ___
         %#########%    | | | | / _ \\ \ / / \___ \ |  _ \  / _  | / __// _ \
     %#############%    | |_| |(  __/ \ V /  ____) )| |_) )( (_| |( (__(  __/
     %#############%    |____/  \___|  \_/   \____/ |  __/  \__,_| \___\\___|
 %###############%                                  |_|
 %###########%


info Detecting programming language...

? Select the programming language of this project javascript

? How do you want to deploy this project? kustomize

? Please enter path to your Kustomization folder (e.g. ./kube/kustomization/) ./k8s

? Which image do you want to develop with DevSpace? idjacrdemo02.azurecr.io/dockerwithtests:devlatest

? How should DevSpace build the container image for this project? Use this existing Dockerfile: ./Dockerfile

? Which port is your application listening on? (Enter to skip)

done Project successfully initialized
info Configuration saved in devspace.yaml - you can make adjustments as needed

You can now run:
1. devspace use namespace - to pick which Kubernetes namespace to work in
2. devspace dev - to start developing your project in Kubernetes

Run `devspace -h` or `devspace [command] -h` to see a list of available commands and flags
We can see one folder and two files were added (and .gitignore updated to ignore the dotfolder)
$ ls -la | grep devspace
drwxr-xr-x   3 builder builder   4096 Jul  4 16:20 .devspace
-rw-r--r--   1 builder builder   3143 Jul  4 16:20 devspace.yaml
-rwxr-xr-x   1 builder builder   1447 Jul  4 16:20 devspace_start.sh
Next we want to tell devspace which cluster config to use. Devspace assumes we may not wish to use the currently selected one for this particular project
$ devspace use context

? Which context do you want to use? loft-vcluster_my-super-qc1_vcluster-my-super-qc1-pdsjy_loft-cluster
done Successfully set kube-context to 'loft-vcluster_my-super-qc1_vcluster-my-super-qc1-pdsjy_loft-cluster'
Lastly, I’ll tell devspace which namespace to create/use
$ devspace use namespace testingdockerwithtests2
info The default namespace of your current kube-context 'loft-vcluster_my-super-qc1_vcluster-my-super-qc1-pdsjy_loft-cluster' has been updated to 'testingdockerwithtests2'
         To revert this operation, run: devspace use namespace testingDockerWithTests2

done Successfully set default namespace to 'testingdockerwithtests2'
Then launch
$ devspace dev
info Using namespace 'testingdockerwithtests2'
info Using kube context 'loft-vcluster_my-super-qc1_vcluster-my-super-qc1-pdsjy_loft-cluster'
info Created namespace: testingdockerwithtests2
deploy:app Applying manifests with kubectl...
deploy:app Render manifests with 'kustomize build ./k8s'
deploy:app Error from server (NotFound): error when creating "STDIN": namespaces "test" not found
deploy:app Error from server (NotFound): error when creating "STDIN": namespaces "test" not found
create_deployments: error deploying app: error executing 'kubectl --context loft-vcluster_my-super-qc1_vcluster-my-super-qc1-pdsjy_loft-cluster apply --force -f -':
Please make sure the command `kubectl apply` does work locally with manifest `./k8s`
fatal exit status 1
I’ll remove the hardcoded namespace in the k8s deployment folder
$ find k8s -type f -exec sed -i 's/^.*namespace: test.*$//' {} \; -print
k8s/kustomization.yaml
k8s/flux-system/kustomization.yaml
k8s/flux-system/gotk-sync.yaml
k8s/flux-system/gotk-components.yaml
k8s/policies.yaml
k8s/deployment.yaml
Now I can do a dev deployment
$ devspace dev
info Using namespace 'testingdockerwithtests2'
info Using kube context 'loft-vcluster_my-super-qc1_vcluster-my-super-qc1-pdsjy_loft-cluster'
deploy:app Applying manifests with kubectl...
deploy:app Render manifests with 'kustomize build ./k8s'
deploy:app service/nginx-run-svc created
deploy:app deployment.apps/my-nginx created
deploy:app Successfully deployed app with kubectl
dev:app Waiting for pod to become ready...
dev:app DevSpace is waiting, because Pod my-nginx-devspace-5dd965c5d9-l59rs has status: ContainerCreating
In a few moments, we see it’s launched the container and is port-forwarding
$ devspace dev
info Using namespace 'testingdockerwithtests2'
info Using kube context 'loft-vcluster_my-super-qc1_vcluster-my-super-qc1-pdsjy_loft-cluster'
deploy:app Applying manifests with kubectl...
deploy:app Render manifests with 'kustomize build ./k8s'
deploy:app service/nginx-run-svc created
deploy:app deployment.apps/my-nginx created
deploy:app Successfully deployed app with kubectl
dev:app Waiting for pod to become ready...
dev:app DevSpace is waiting, because Pod my-nginx-devspace-5dd965c5d9-l59rs has status: ContainerCreating
dev:app DevSpace is waiting, because Pod my-nginx-devspace-5dd965c5d9-l59rs has status: ContainerCreating
dev:app DevSpace is waiting, because Pod my-nginx-devspace-5dd965c5d9-l59rs has status: ContainerCreating
dev:app Selected my-nginx-devspace-5dd965c5d9-l59rs:my-nginx (pod:container)
dev:app ssh   Port forwarding started on: 11103 -> 8022
dev:app ports Port forwarding started on: 9229 -> 9229
dev:app sync  Sync started on: ./ <-> ./
dev:app sync  Waiting for initial sync to complete
dev:app proxy Port forwarding started on: 10187 <- 10567
dev:app ssh   Use 'ssh app.dockerwithtests2.devspace' to connect via SSH
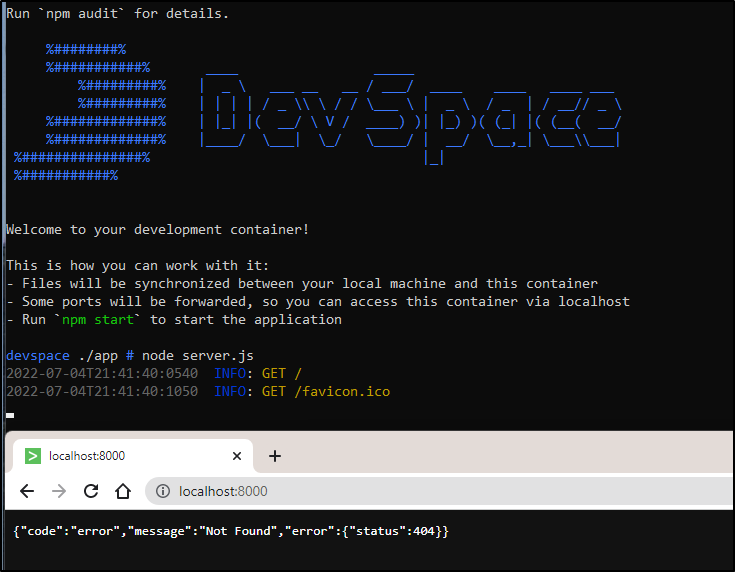
If I do nothing, in a few moments it logs me into the container so I can debug.
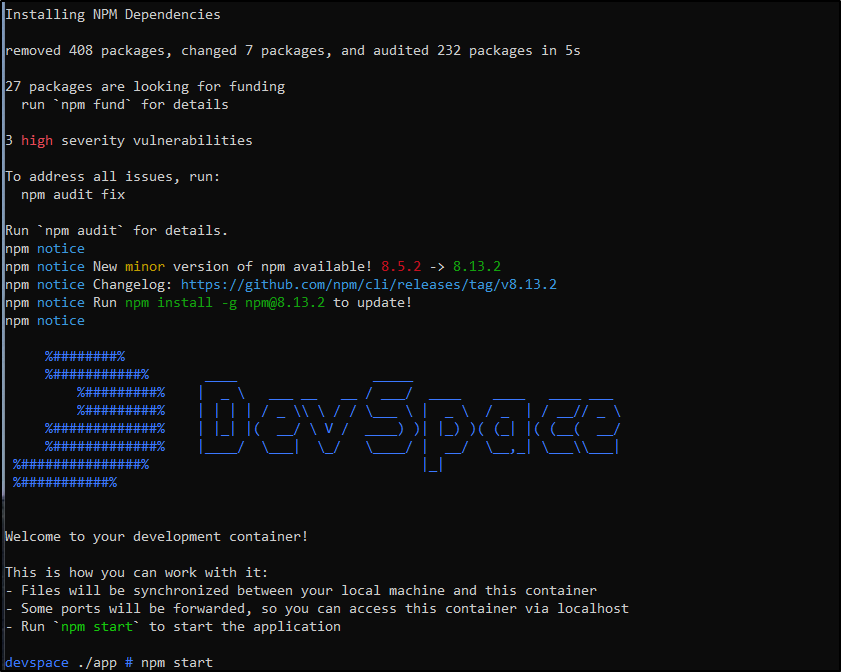
Trying npm start I realize I neglected to install nodemon
devspace ./app # npm start

> nodewithtests@1.0.0 start
> nodemon --inspect=0.0.0.0:9229 server.js

sh: nodemon: not found
devspace ./app # cat package.json
{
  "name": "nodewithtests",
  "version": "1.0.0",
  "description": "",
  "main": "index.js",
  "scripts": {
    "test": "mocha ./**/*.js",
    "start": "nodemon --inspect=0.0.0.0:9229 server.js",
    "testawesome": "mocha --reporter mochawesome ./**/*.js"
  },
  "keywords": [
    "nodejs"
  ],
  "author": "Isaac Johnson",
  "license": "MIT",
  "devDependencies": {
    "mocha": "^9.2.2"
  },
  "dependencies": {
    "mochawesome": "^7.1.3",
    "ronin-mocks": "^0.1.6",
    "ronin-server": "^0.1.3"
  }
}
I install my missing library
devspace ./app # npm install nodemon

added 81 packages, and audited 313 packages in 6s

37 packages are looking for funding
  run `npm fund` for details

8 vulnerabilities (5 moderate, 3 high)

To address all issues, run:
  npm audit fix

Run `npm audit` for details.
And now start works just fine
devspace ./app # npm start

> nodewithtests@1.0.0 start
> nodemon --inspect=0.0.0.0:9229 server.js

[nodemon] 2.0.18
[nodemon] to restart at any time, enter `rs`
[nodemon] watching path(s): *.*
[nodemon] watching extensions: js,mjs,json
[nodemon] starting `node --inspect=0.0.0.0:9229 server.js`
Debugger listening on ws://0.0.0.0:9229/01e942c5-8fe8-47f4-b7b7-56c10ea2ec66
For help, see: https://nodejs.org/en/docs/inspector
I can test locally and indeed see we can hit websockets on the 9229 port
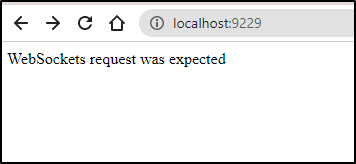
Adding ports
Because it noticed 9229 for websockets, but not the 8000 port used by server.js, I needed to go and update the devspaces.sh script to add a port
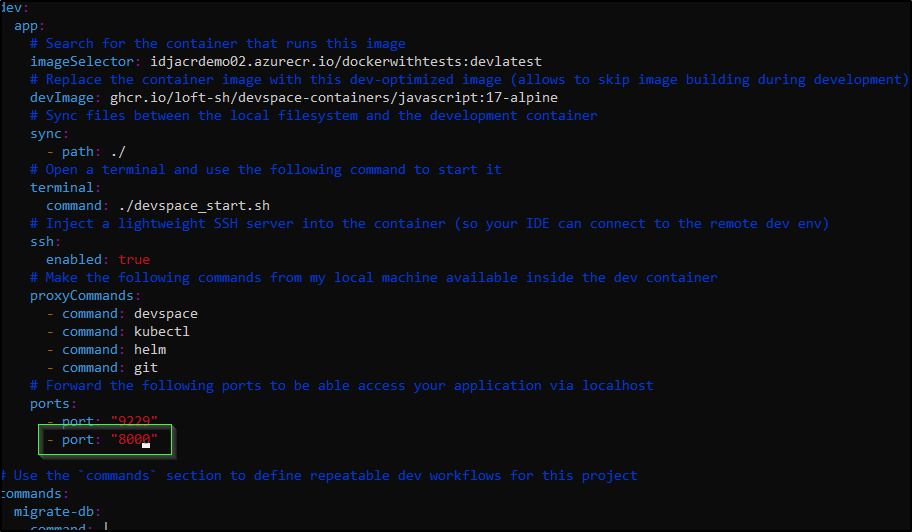
Now i can see the port in the list at invokation
builder@DESKTOP-QADGF36:~/Workspaces/dockerWithTests2$ devspace dev
info Using namespace 'testingdockerwithtests2'
info Using kube context 'loft-vcluster_my-super-qc1_vcluster-my-super-qc1-pdsjy_loft-cluster'
deploy:app Applying manifests with  kubectl...
deploy:app Render manifests with 'kustomize build ./k8s'
deploy:app service/nginx-run-svc unchanged
deploy:app deployment.apps/my-nginx configured
deploy:app Successfully deployed app with kubectl
dev:app Waiting for pod to become ready...
dev:app Selected my-nginx-devspace-5dd965c5d9-l59rs:my-nginx (pod:container)
dev:app ssh   Port forwarding started on: 11103 -> 8022
dev:app ports Port forwarding started on: 9229 -> 9229, 8000 -> 8000
dev:app proxy Port forwarding started on: 11956 <- 10567
dev:app sync  Sync started on: ./ <-> ./
dev:app sync  Waiting for initial sync to complete
dev:app ssh   Use 'ssh app.dockerwithtests2.devspace' to connect via SSH
dev:app sync  Initial sync completed
dev:app term  Opening shell to my-nginx:my-nginx-devspace-5dd965c5d9-l59rs (pod:container)
and can use it in debugging
Results
What exactly is this creating?
Inside our Virtual Cluster, we see Devspace created a new namespace and pod
$ kubectl get ns
NAME                      STATUS   AGE
default                   Active   3h24m
kube-node-lease           Active   3h24m
kube-public               Active   3h24m
kube-system               Active   3h24m
testingdockerwithtests2   Active   3h3m

$ kubectl get pods -n testingdockerwithtests2
NAME                                 READY   STATUS    RESTARTS   AGE
my-nginx-devspace-5dd965c5d9-l59rs   1/1     Running   0          179m
It has also created a Nginx Loadbalancer which is attempting to get an external IP
$ kubectl get svc -n testingdockerwithtests2
NAME            TYPE           CLUSTER-IP      EXTERNAL-IP   PORT(S)        AGE
nginx-run-svc   LoadBalancer   10.43.107.120   <pending>     80:30407/TCP   3h
If we free up a host or add a node, we can then see the nginx get served an external IP
$ kubectl get svc --all-namespaces
NAMESPACE                 NAME            TYPE           CLUSTER-IP      EXTERNAL-IP    PORT(S)                  AGE
default                   kubernetes      ClusterIP      10.43.130.208   <none>         443/TCP                  4h3m
kube-system               kube-dns        ClusterIP      10.43.155.248   <none>         53/UDP,53/TCP,9153/TCP   4h3m
testingdockerwithtests2   nginx-run-svc   LoadBalancer   10.43.107.120   192.168.1.57   80:30407/TCP             3h38m
which will server the traffic from our NodePort
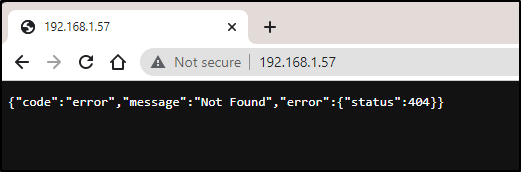
You’ll also notice that in my virtualcluster, the Loadbalancer is used by “testingdockerwithtests2” (using 1.57). But in my main cluster, we see that is really nginx-run-svc-x-testingdockerwithtests2-x-my-super-qc1.
$ kubectl get svc --all-namespaces
NAMESPACE                     NAME                                                       TYPE           CLUSTER-IP      EXTERNAL-IP                  PORT
..,snip...
vcluster-my-super-qc1-pdsjy   my-super-qc1-etcd-headless                                 ClusterIP      None            <none>                       2379/TCP,2380/TCP                                                                                           3h40m
vcluster-my-super-qc1-pdsjy   my-super-qc1                                               ClusterIP      10.43.130.208   <none>                       443/TCP                                                                                                     3h40m
vcluster-my-super-qc1-pdsjy   my-super-qc1-api                                           ClusterIP      10.43.56.248    <none>                       443/TCP                                                                                                     3h40m
vcluster-my-super-qc1-pdsjy   my-super-qc1-etcd                                          ClusterIP      10.43.99.253    <none>                       2379/TCP,2380/TCP                                                                                           3h40m
vcluster-my-super-qc1-pdsjy   kube-dns-x-kube-system-x-my-super-qc1                      ClusterIP      10.43.155.248   <none>                       53/UDP,53/TCP,9153/TCP                                                                                      3h39m
vcluster-my-super-qc1-pdsjy   my-super-qc1-node-anna-macbookair                          ClusterIP      10.43.157.178   <none>                       10250/TCP                                                                                                   3h39m
vcluster-my-super-qc1-pdsjy   my-super-qc1-node-builder-macbookpro2                      ClusterIP      10.43.225.168   <none>                       10250/TCP                                                                                                   3h14m
vcluster-my-super-qc1-pdsjy   nginx-run-svc-x-testingdockerwithtests2-x-my-super-qc1     LoadBalancer   10.43.107.120   192.168.1.57                 80:30407/TCP                                                                                                3h15m
default                       nginx-ingress-release-nginx-ingress                        LoadBalancer   10.43.209.58    192.168.1.159,192.168.1.81   80:30272/TCP,443:30558/
Loft with Users and Teams
Let’s create a Team in Loft for the QC Dept.
Under Users, in the Teams tab, we click “Add Team”
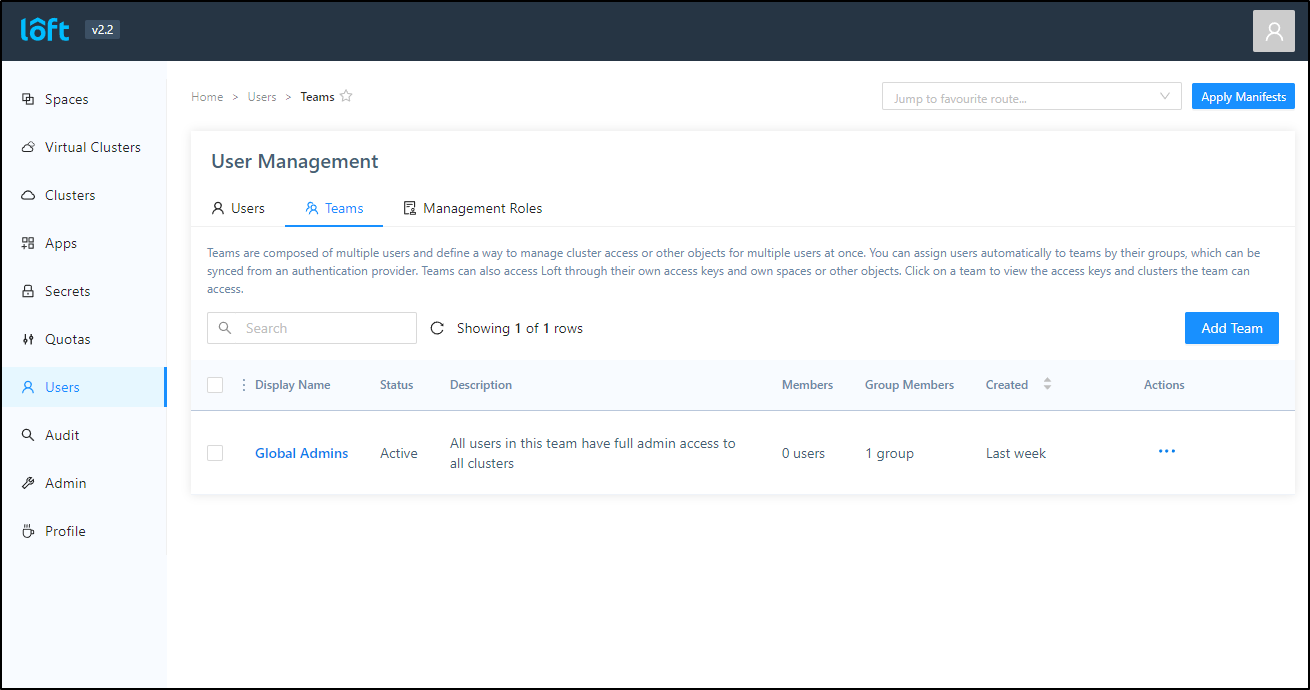
We can assign groups and users, but for now, we’ll just use a label
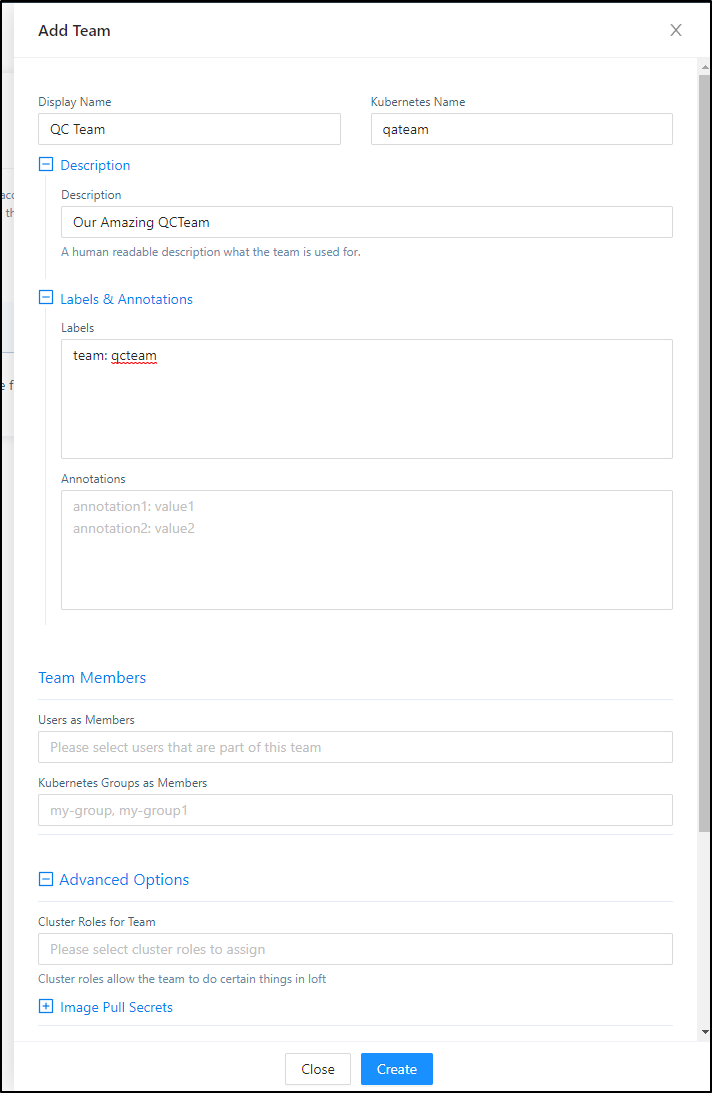
Now that I have my QC Team, let’s add some users. Under the Users tab, click “Add User”
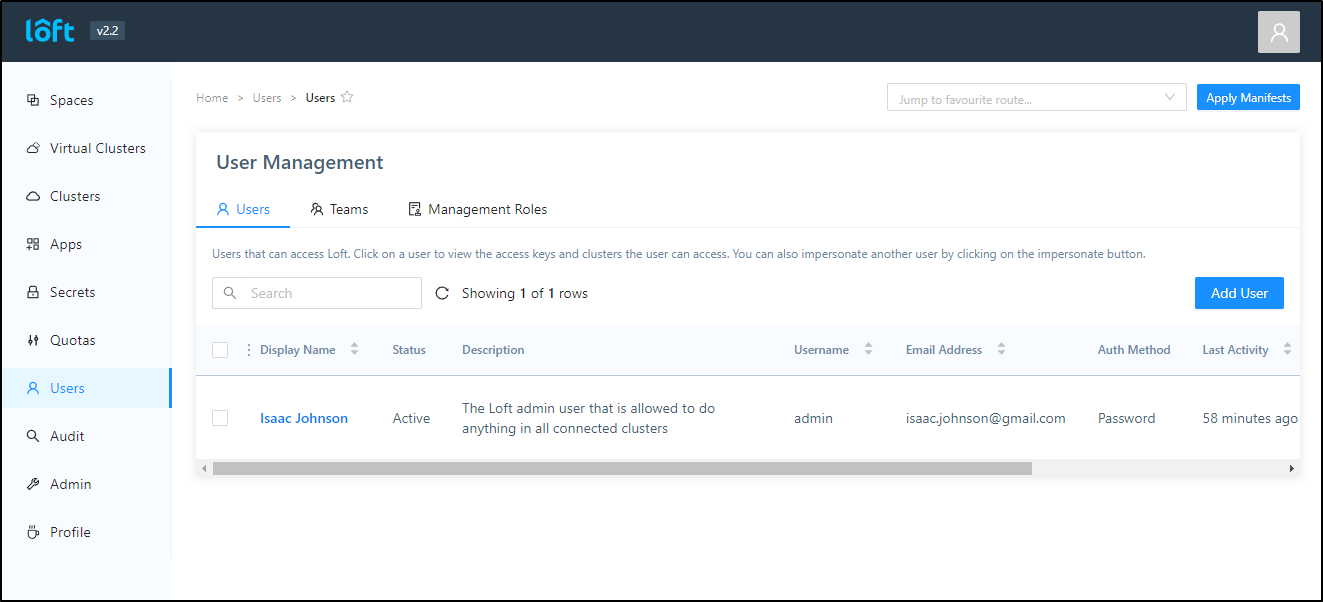
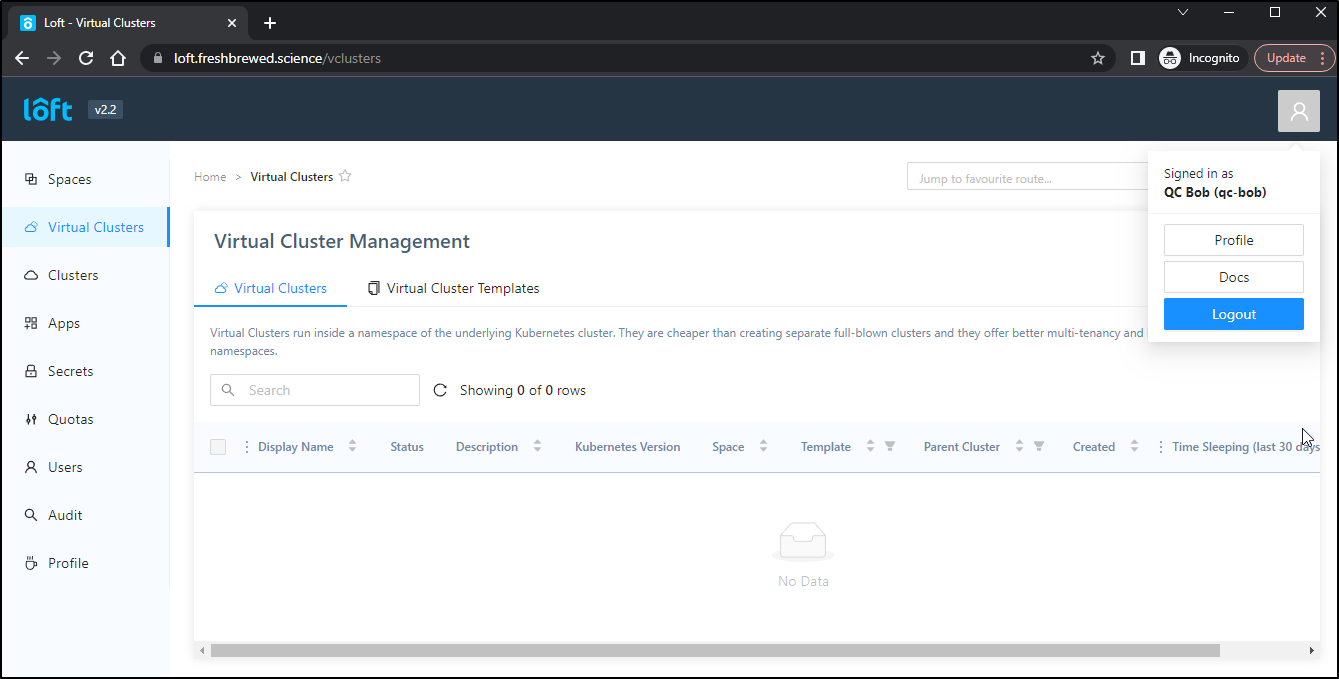
I’ll add a “QC Bob” user. This user can view most things and is now a member of the QC Team.
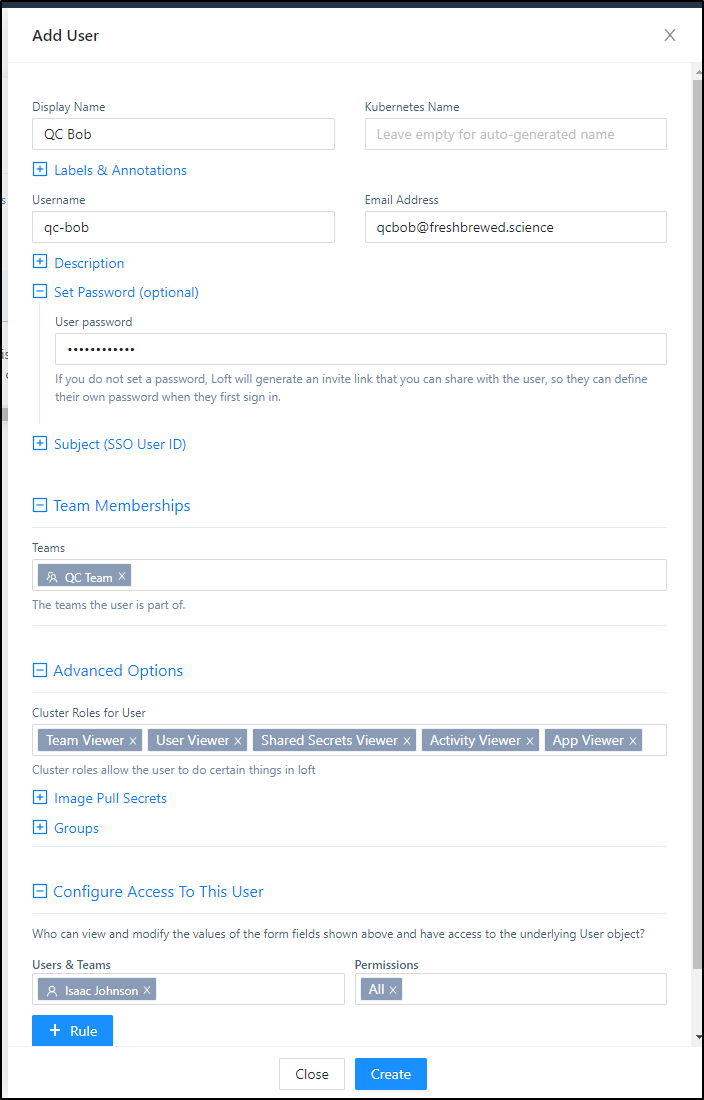
This will invite the user

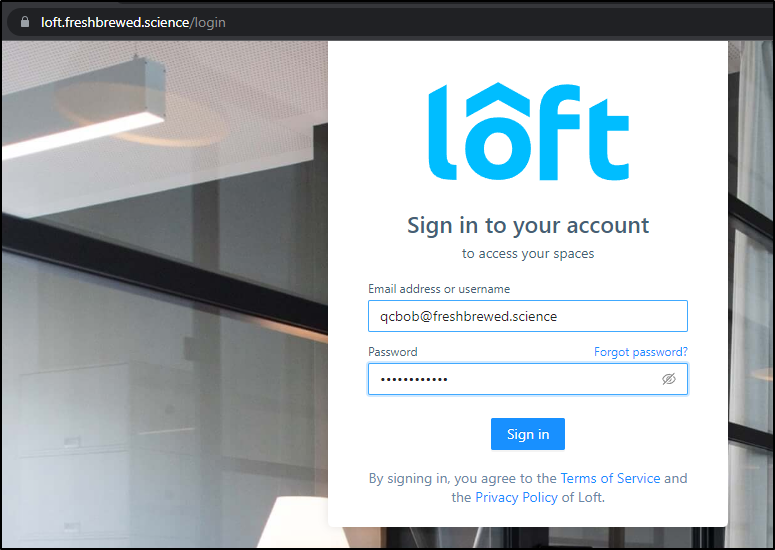
While I tried to login with the set password
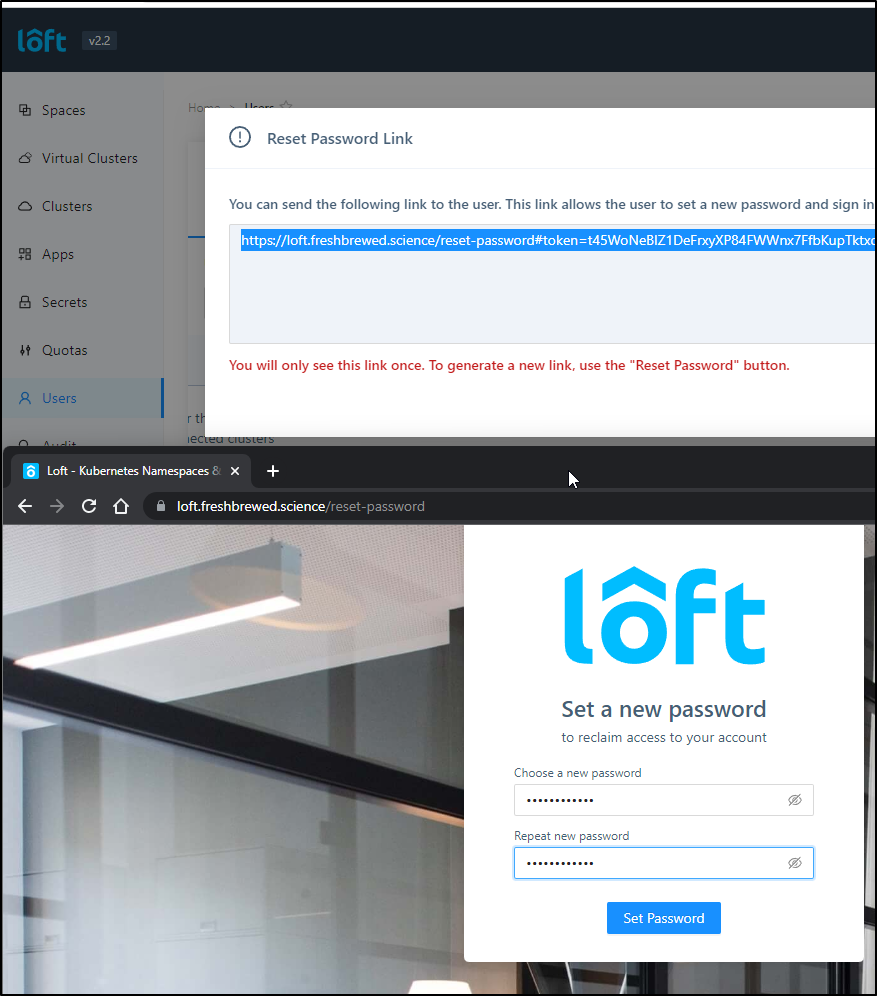
In the end, I had to reset it and use the reset link
By default, QC Bob has no clusters to view
However, if I go to Edit on the Virtual Cluster and add the QC Team
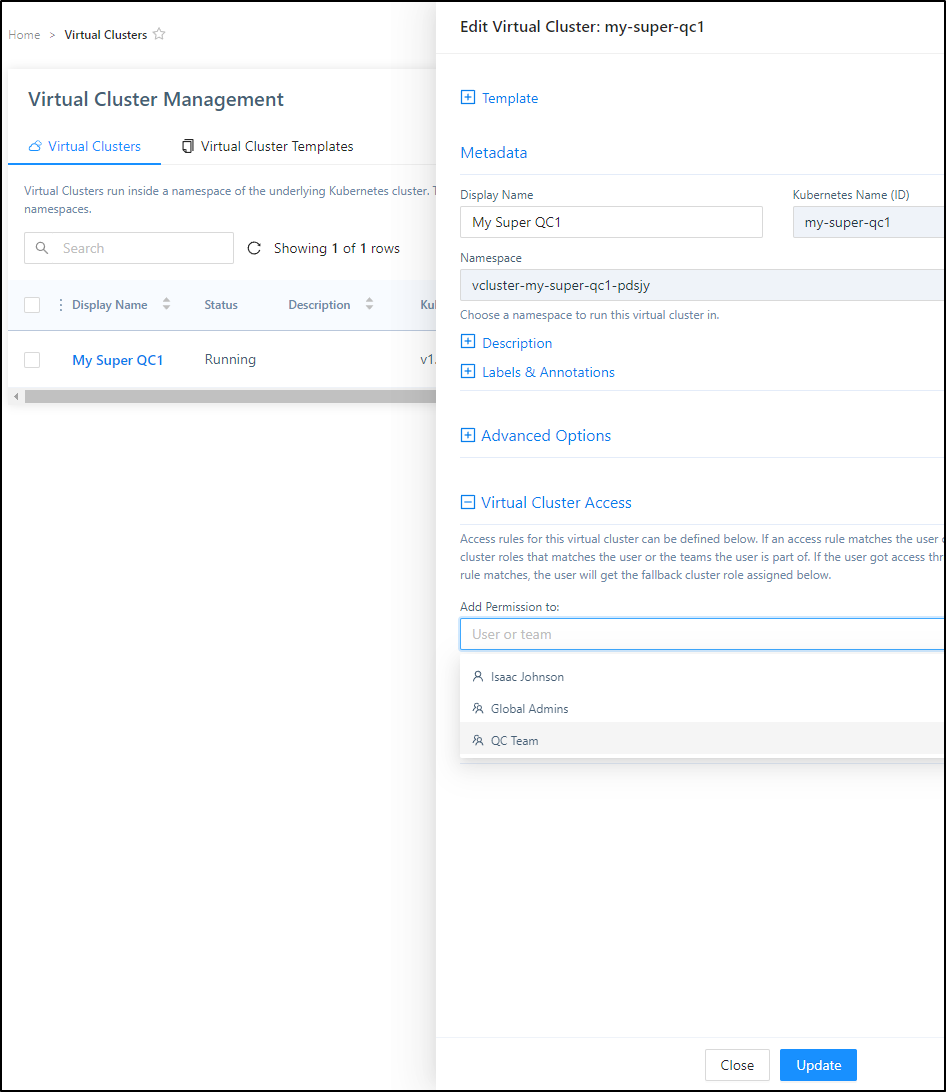
Then select the role level (here I’ll use Cluster Admin since I want to assume QC can manage themselves). I’ll set the value and click “Update”
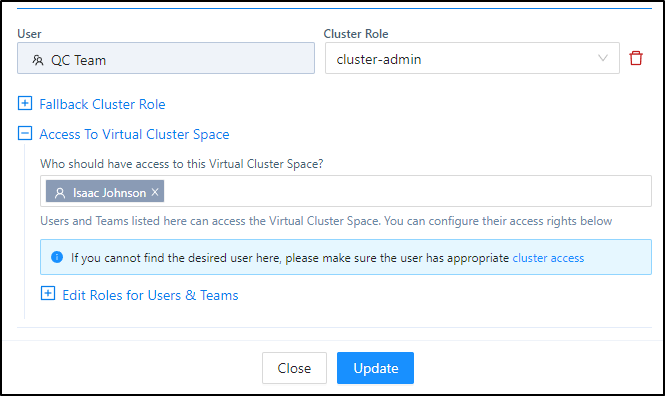
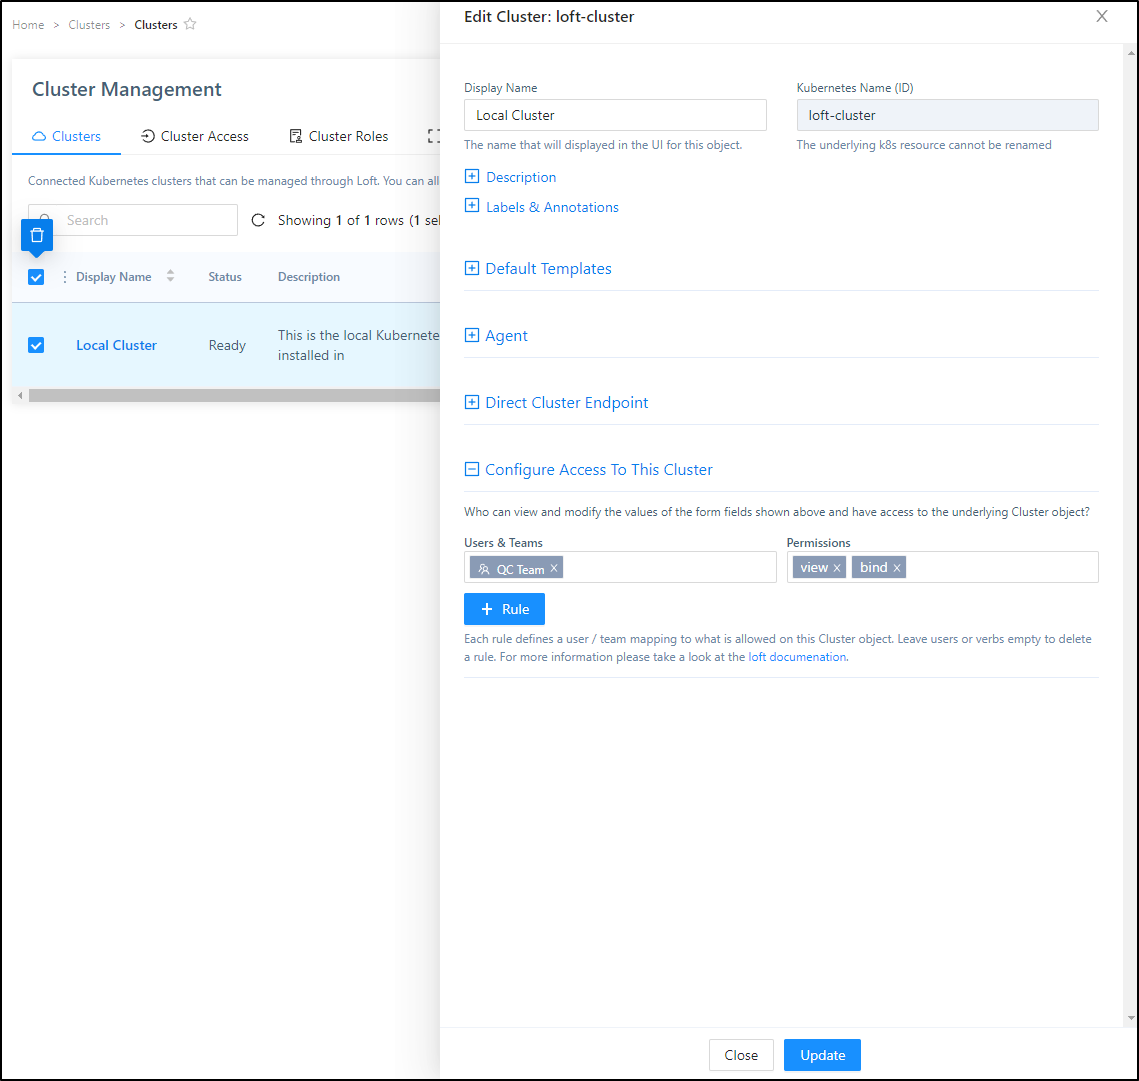
I had to play with permissions to get it to work. First, adding the team (and then user) to view the primary cluster
Then I added the user directly as cluster admin (the Team didn’t seem to suffice)
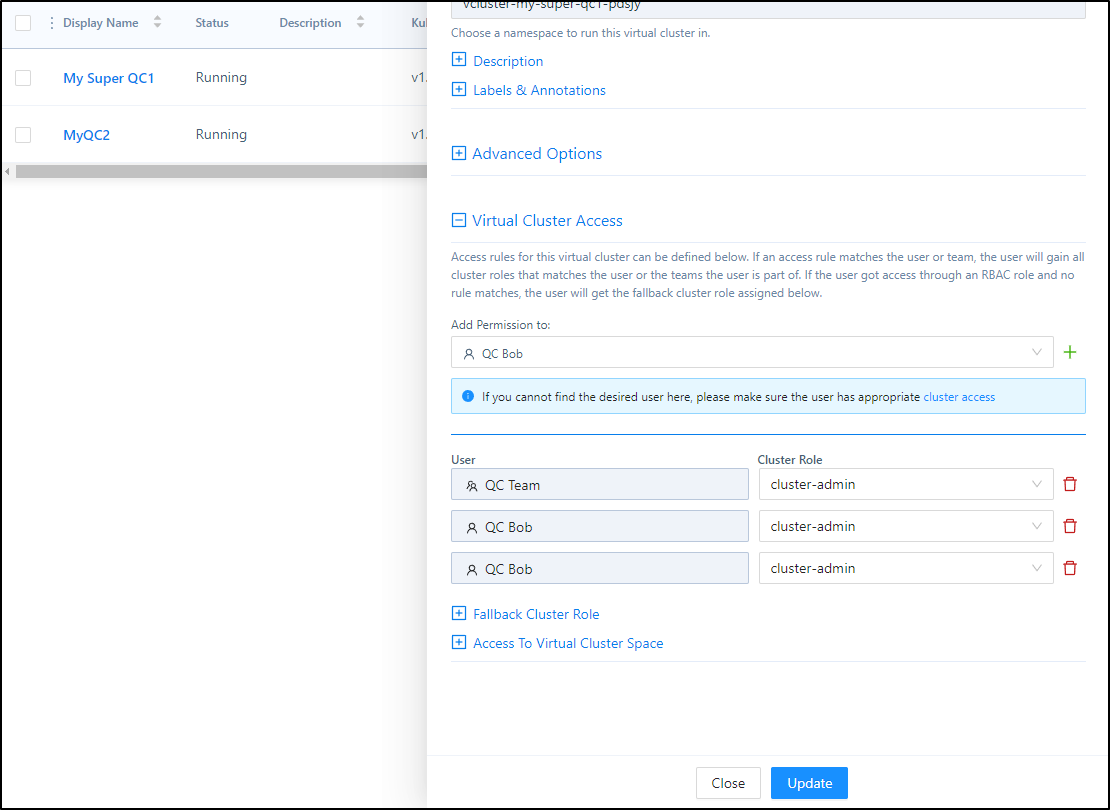
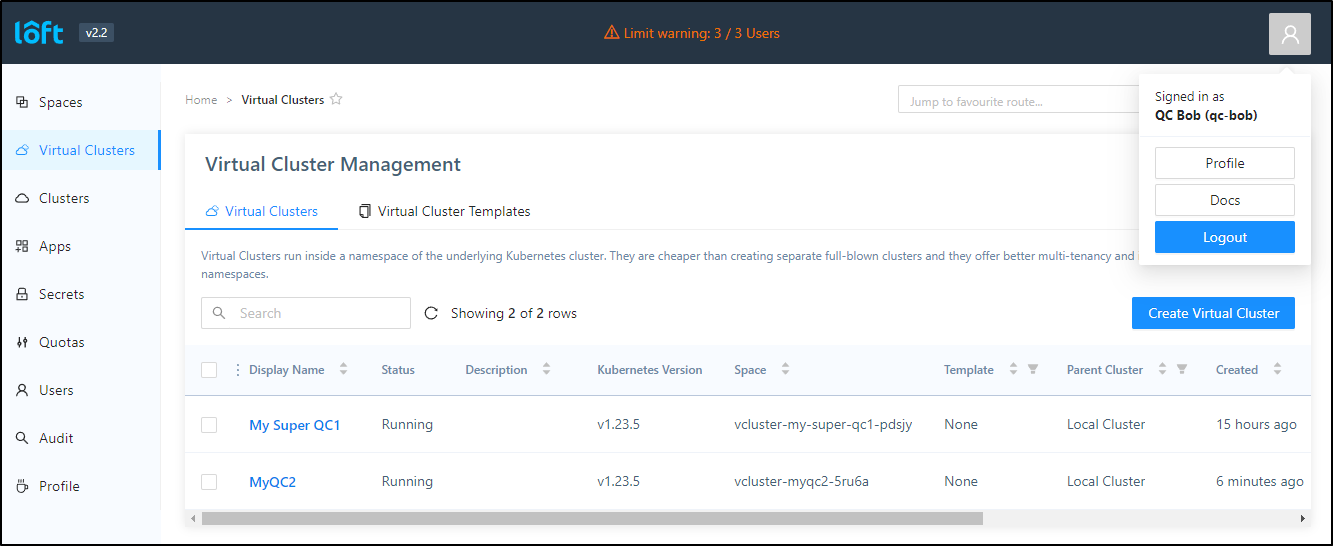
Now QC Bob can see the VirtualCluster
Using the Virtual Cluster as a User
On a different host (one without a GUI), I can login with an access key (create under user profile)
$ loft login https://loft.freshbrewed.science --access-key IBasdfasdfasdfsadfasdfasdfasdfasdfsadfasdfasdfasfdasdf69
[done] √ Successfully logged into Loft instance https://loft.freshbrewed.science
Then “use” the Virtual Cluster
$ loft use vcluster

? Please choose a virtual cluster to use
 vCluster: My Super QC1 (my-super-qc1) | Space: vcluster-my-super-qc1-pdsjy | Cluster: loft-cluster
[done] √ Successfully updated kube context to use space vcluster-my-super-qc1-pdsjy in cluster loft-cluster
Then we can see our nodes and namespaces
$ kubectl get nodes --kubeconfig=/home/isaac/.kube/config
NAME                  STATUS   ROLES    AGE   VERSION
anna-macbookair       Ready    <none>   15h   v1.23.5
builder-macbookpro2   Ready    <none>   14h   v1.23.5

$ kubectl get ns --kubeconfig=/home/isaac/.kube/config
NAME                      STATUS   AGE
default                   Active   15h
kube-node-lease           Active   15h
kube-public               Active   15h
kube-system               Active   15h
testingdockerwithtests2   Active   14h
(note: this host I used for test seemed to struggle with competing kubeconfigs so i was explicit with which kubeconfig to use)
Summary
Credit where credit is due; the idea of using Loft.sh and DevSpace was suggested by my colleague Chad Prey back in April.
I think the pairing is quit nice. Between the vCluster access which let’s our users have cluster admin to virtual clusters via Loft and the DevSpace ability to quickly grab ports and open a shell to a debug container, we have a very handy self service system for small organizations. This can also work handily for On-Prem or non SaaS Cloud Kubernetes.
I would argue that if one scales up using Cloud Offerings like AKS, switching to Clusters-per-team with VMSS based node pools and AAD based RBAC would work perhaps a bit better, but at a higher cost.
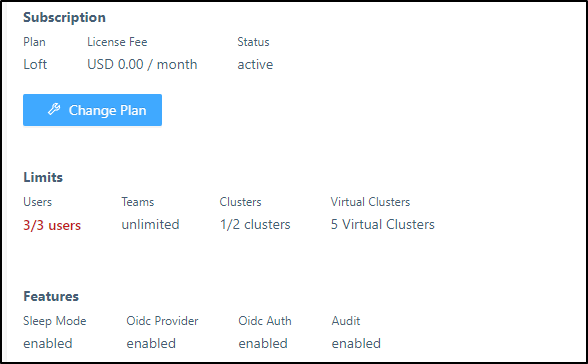
I should point that while Devspace is a truely Open Source project, Loft.sh is commercial with a solid free version.
The limits of that are just 3 users,2 clusters and 5 vclusters:
Their plans are $25/user/month (or $240/year)
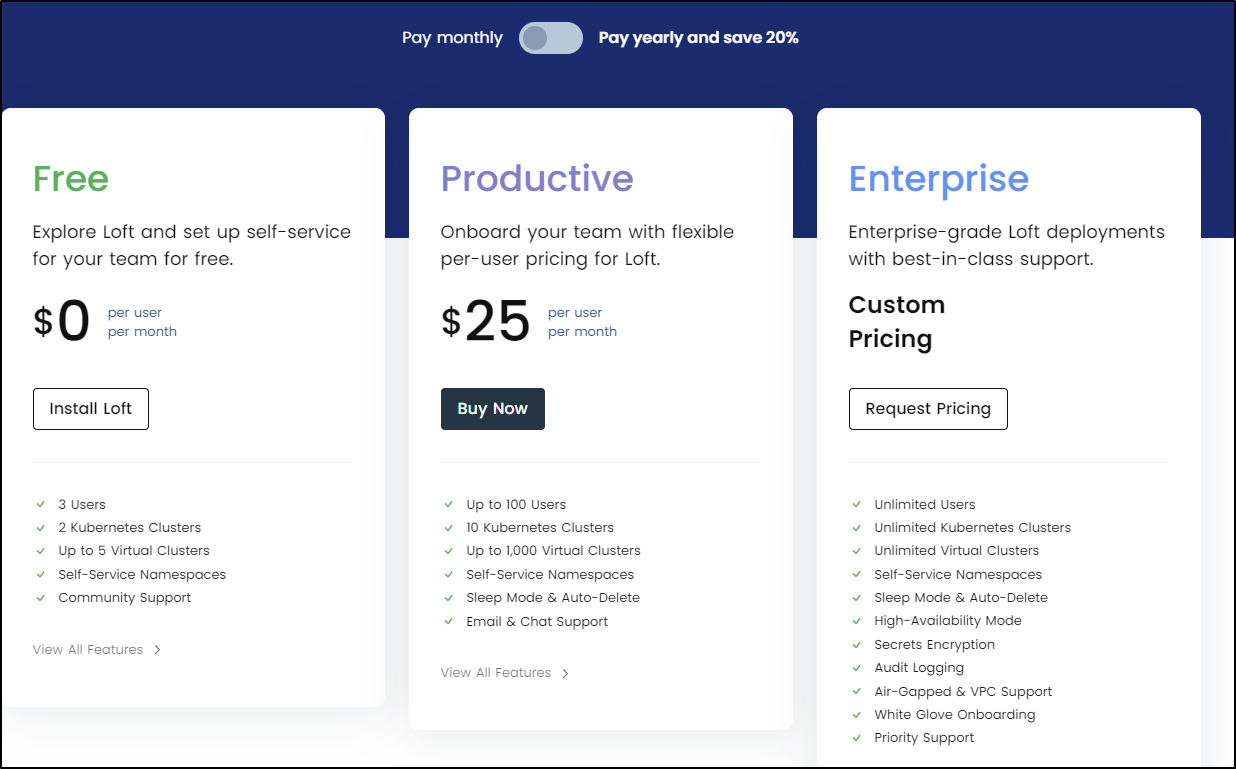
In my mind, for small teams, that could scale (10 users would run me $2400/year - the cost of 1 laptop).