

Published: May 18, 2022 by Isaac Johnson
A colleague of mine recently told me about Loft.sh as a system he uses to support self-service clusters for developers.
Loft is an easy to use OSS cluster management suite that includes quite a lot of features. Let’s get our feet wet installing and updating a Loft system in AKS. We’ll set up ingress with TLS. We’ll then create a user, team and show access controls and quotas.
Loft Labs Company Profile
Loft Labs is a small privately held company started in 2019 and based in the Bay Area. They are still in Seed funding stages and have 11-50 employees according to crunchbase.
It was founded by a Lukas Gentele and Fabian Kramm who both also founded Covexo
So far they have raised $4.6m in funding and report over $1m in revenue according to Datanyze.
Setup Loft
We’ll start by assuming we have a primary cluster for which we can use. Here I have an existing AKS cluster.
$ az aks list -o table
Name           Location    ResourceGroup    KubernetesVersion    ProvisioningState    Fqdn
-------------  ----------  ---------------  -------------------  -------------------  ------------------------------------------------------------
idjtest415aks  eastus      idjtest415rg     1.22.6               Succeeded            idjtest415-idjtest415rg-8defc6-b5064372.hcp.eastus.azmk8s.io

$ kubectl get nodes
NAME                                STATUS   ROLES   AGE   VERSION
aks-nodepool1-67027664-vmss000000   Ready    agent   45h   v1.22.6
aks-nodepool1-67027664-vmss000001   Ready    agent   45h   v1.22.6
aks-nodepool1-67027664-vmss000002   Ready    agent   45h   v1.22.6
We can follow the Getting Started steps to get our CLI
$ curl -s -L "https://github.com/loft-sh/loft/releases/latest" | sed -nE 's!.*"([^"]*loft-linux-amd64)".*!https://github.com\1!p' | xargs -n 1 curl -L -o loft && chmod +x loft;
udo mv loft /usr/local/bin;  % Total    % Received % Xferd  Average Speed   Time    Time     Time  Current
                                 Dload  Upload   Total   Spent    Left  Speed
  0     0    0     0    0     0      0      0 --:--:-- --:--:-- --:--:--     0
100 47.4M  100 47.4M    0     0  1725k      0  0:00:28  0:00:28 --:--:-- 1753k

$ sudo mv loft /usr/local/bin;
[sudo] password for builder:

$ loft --version
loft version 2.2.0
We can now install loft with loft start:
$ loft start

[info]   Welcome to Loft!
[info]   This installer will help you configure and deploy Loft.

? Enter your email address to create the login for your admin user isaac.johnson@gmail.com

[info]   Executing command: helm upgrade loft loft --install --reuse-values --create-namespace --repository-config='' --kube-context idjtest415aks-admin --namespace loft --repo https://charts.loft.sh/ --set admin.email=isaac.johnson@gmail.com --set admin.password=9b8c00b2-a7a9-4f1c-9c07-1cb70e28effb --reuse-values

[done] √ Loft has been deployed to your cluster!
[done] √ Loft pod successfully started

[info]   Starting port-forwarding to the Loft pod
[info]   Waiting until loft is reachable at https://localhost:9898


##########################   LOGIN   ############################

Username: admin
Password: 9b8c00b2-a7a9-4f1c-9c07-1cb70e28effb  # Change via UI or via: loft reset password

Login via UI:  https://localhost:9898
Login via CLI: loft login --insecure https://localhost:9898

!!! You must accept the untrusted certificate in your browser !!!

#################################################################

Loft was successfully installed and port-forwarding has been started.
If you stop this command, run 'loft start' again to restart port-forwarding.

Thanks for using Loft!
We now have a port forwarding loft instance running. I’ll need to leave that shell up to keep the port-forward going (though in the future, i could use & to background the process).
I’ll open https://localhost:9898/login
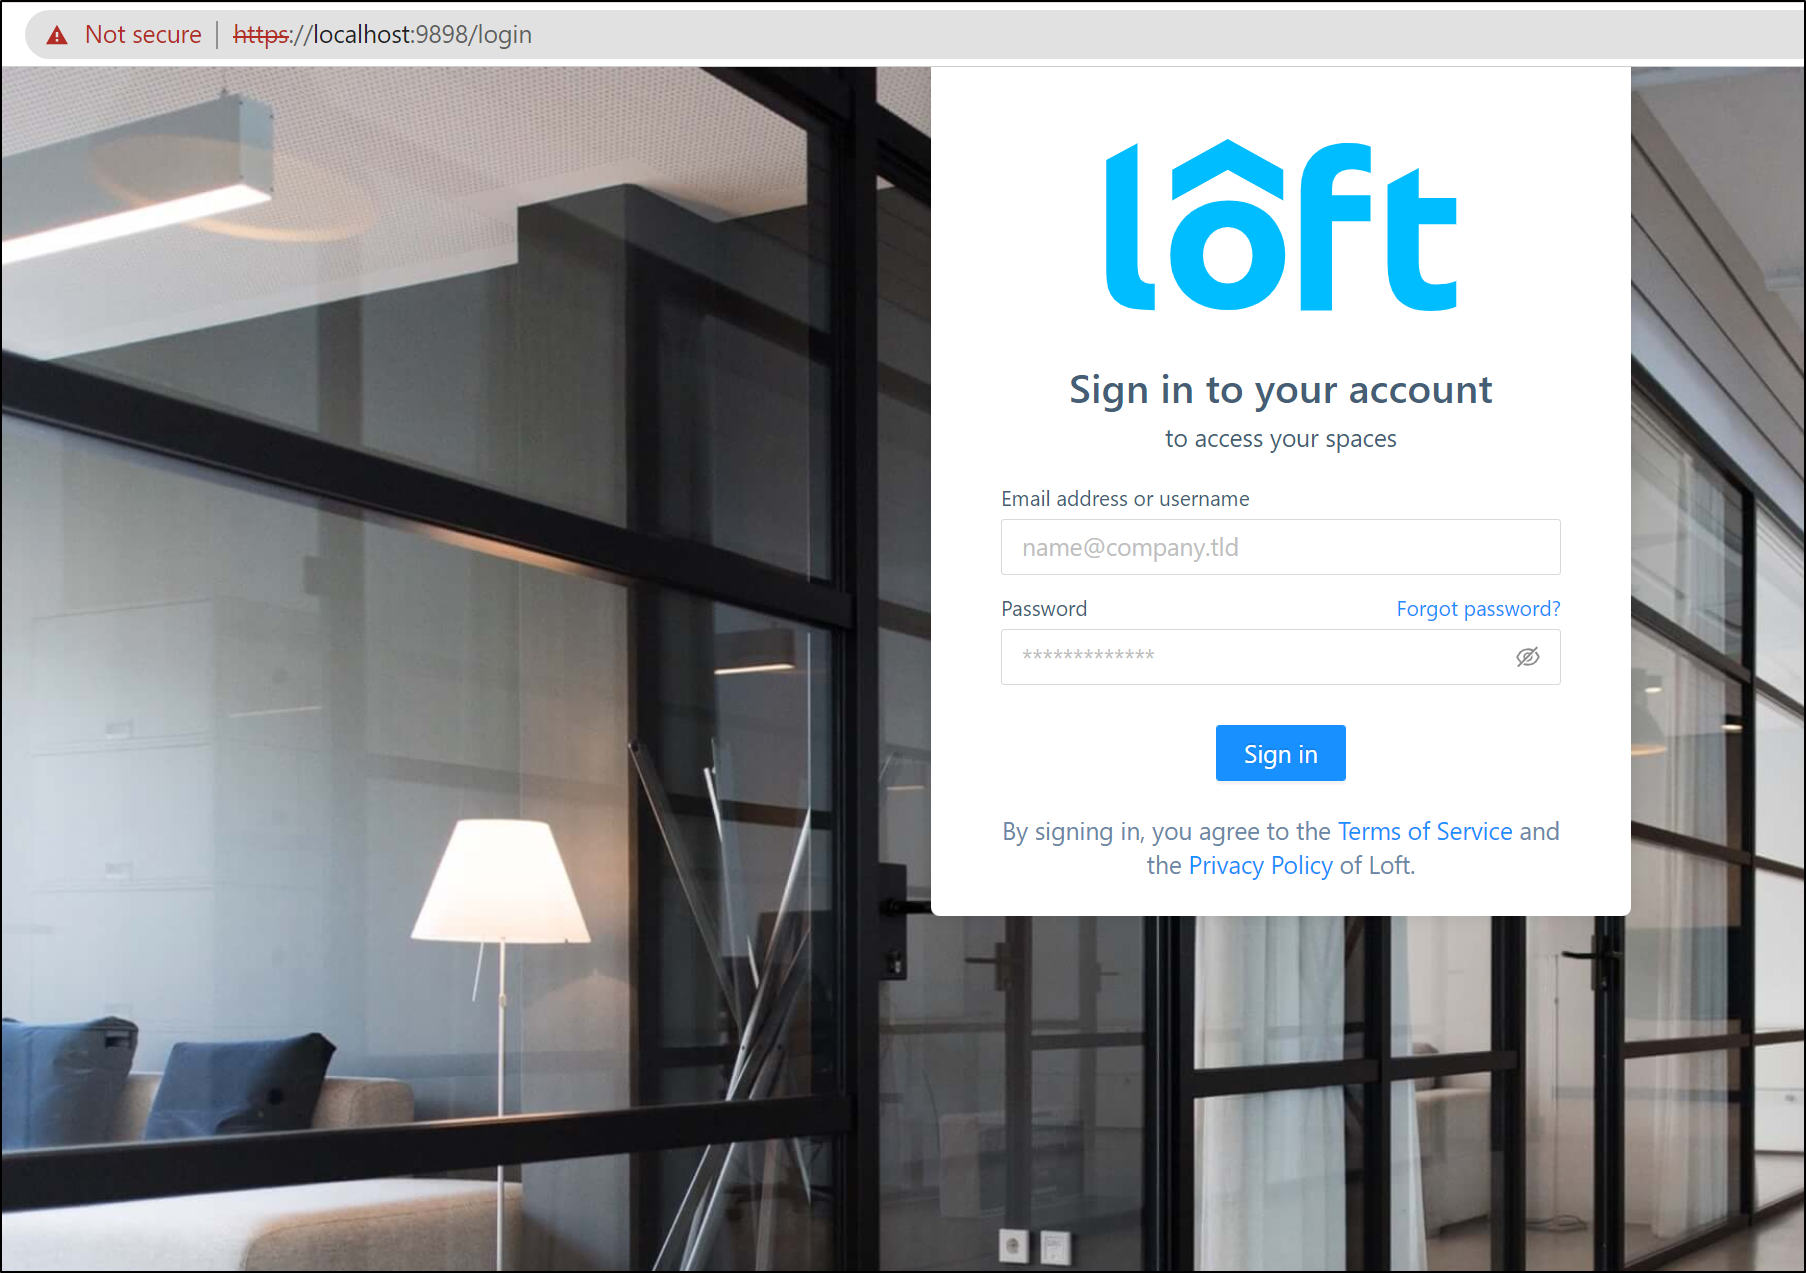
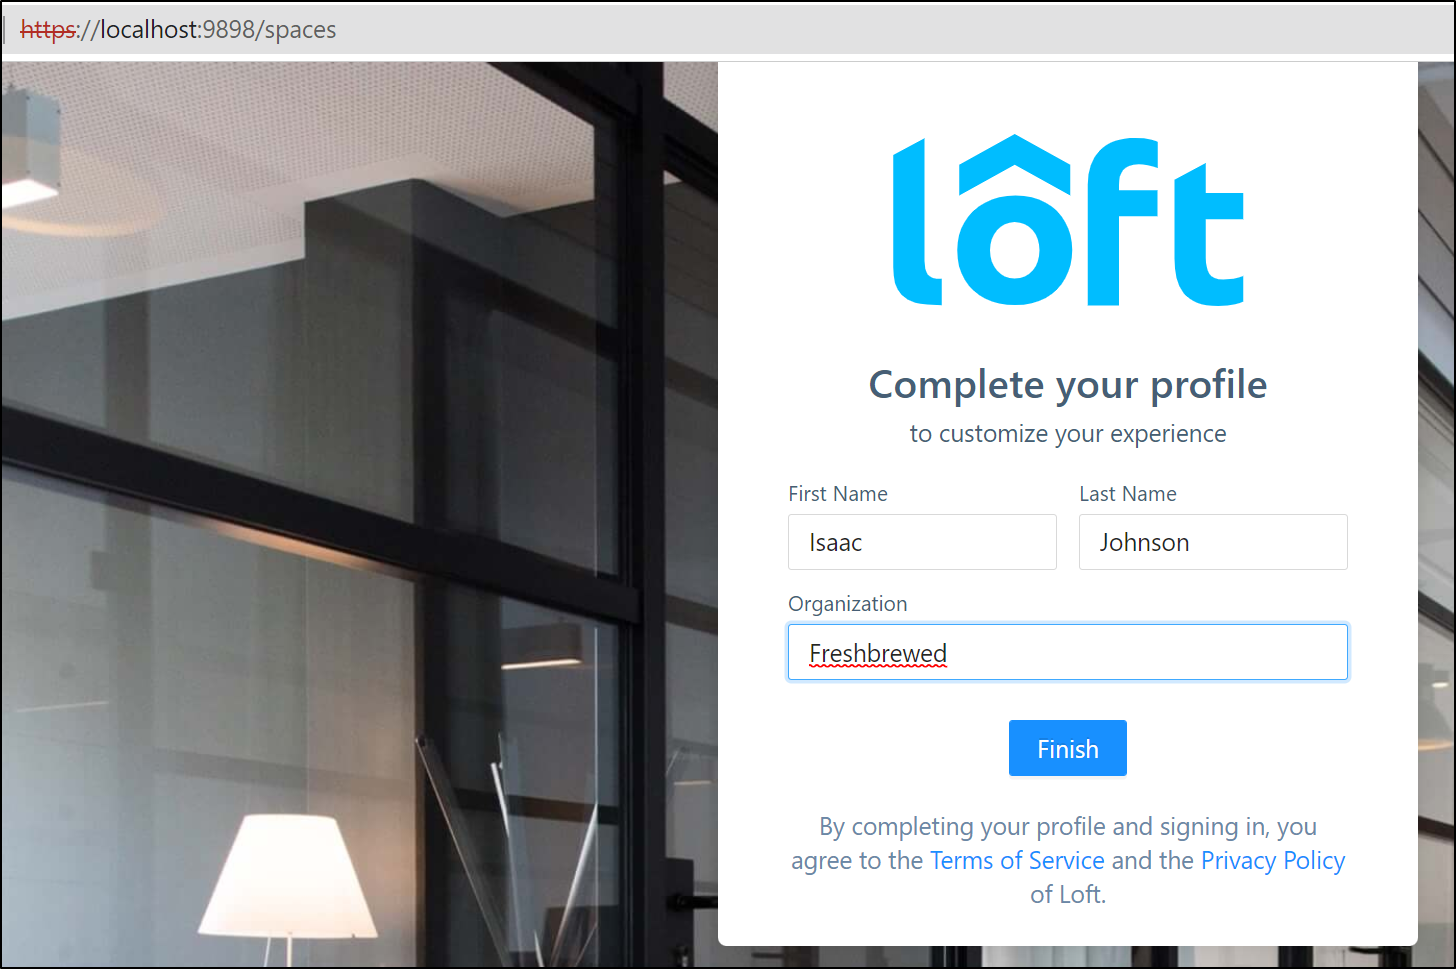
I sign in with admin and am then prompted to “complete your profile”.
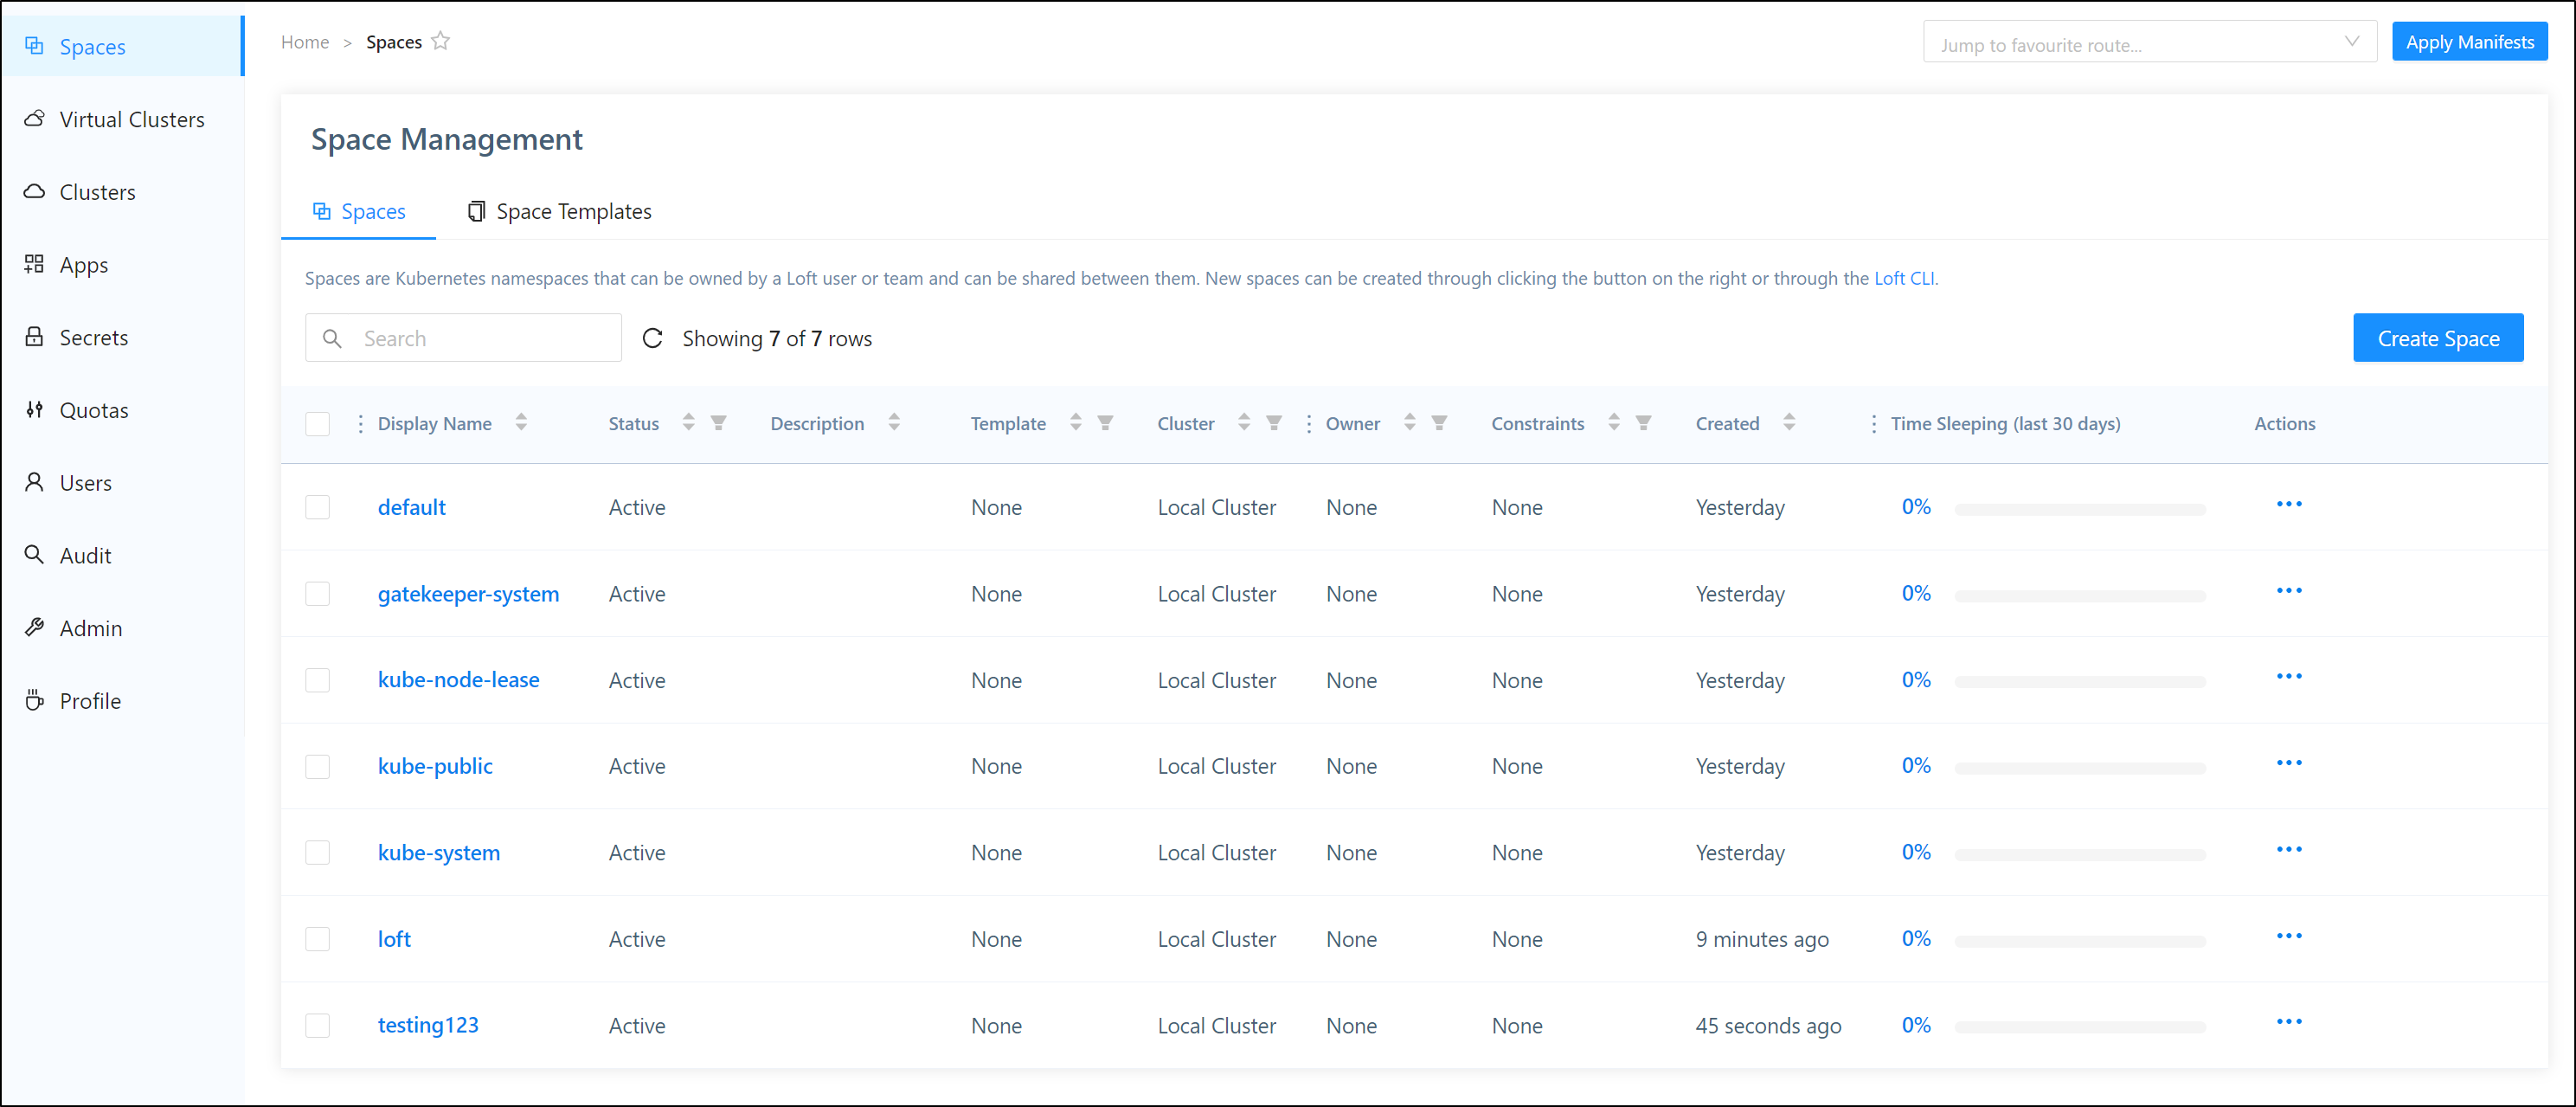
I’m now presented with a general overview of the cluster
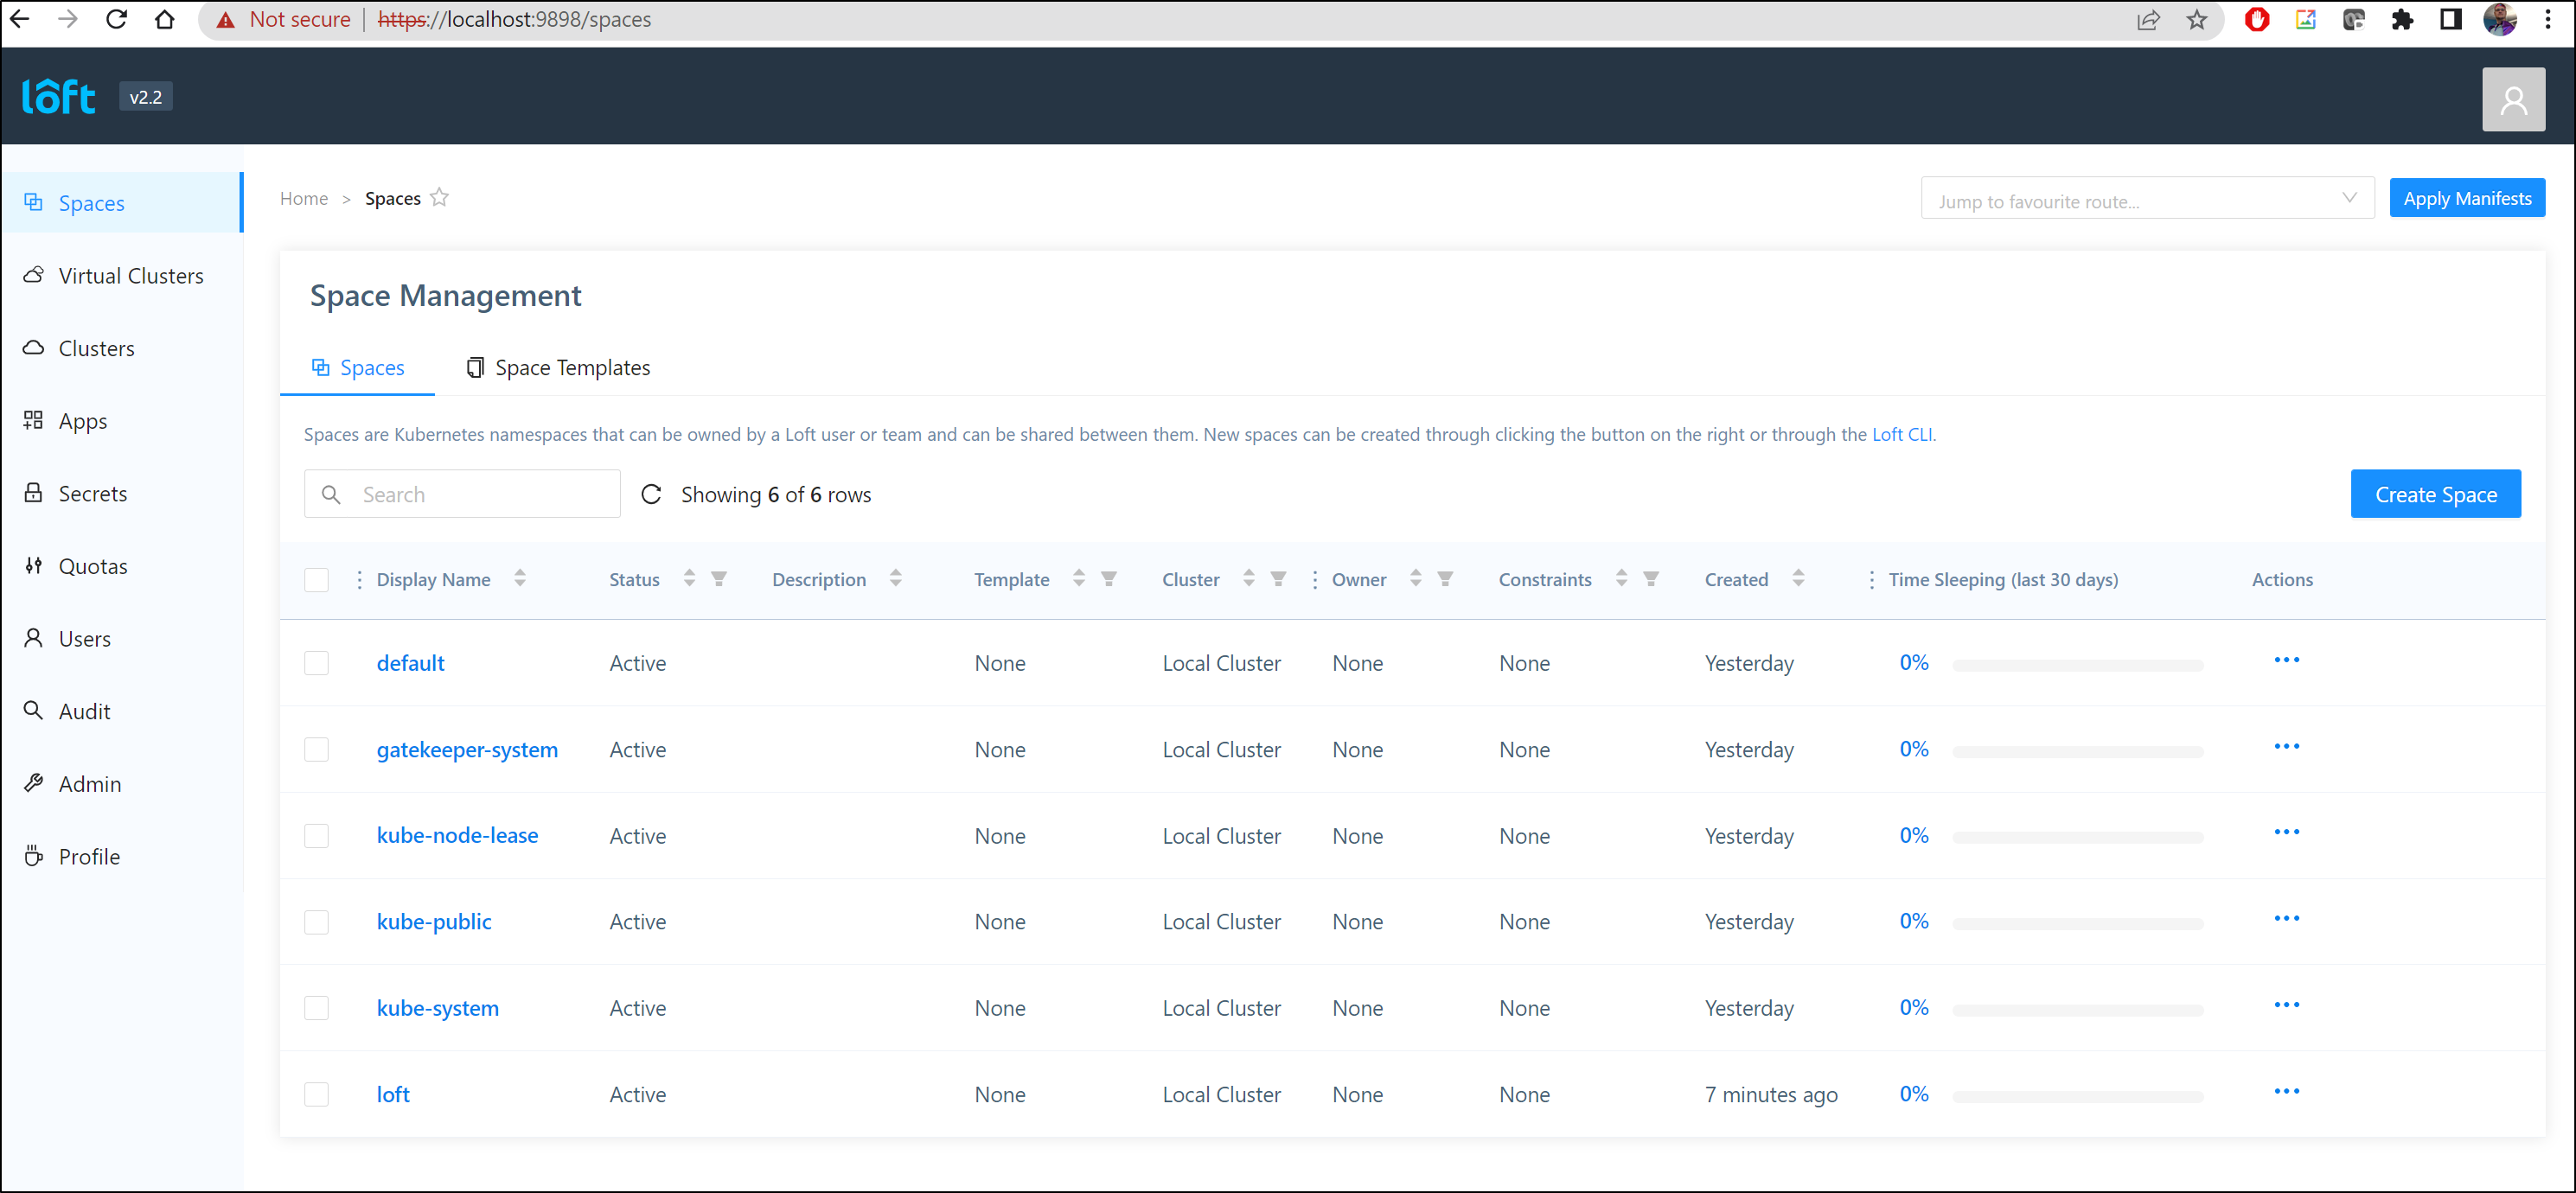
I did a quick kubectl create ns testing123 on the side to see if we are looking at the whole cluster or a virtual cluster in cluster. Indeed we are seeing the cluster as a whole
Setting up TLS
Port forwarding is fine locally, but we likely would want to expose this externally, and more-over, with proper TLS
First, I’ll verify the service is in the loft namespace
$ kubectl get svc -n loft
NAME                    TYPE        CLUSTER-IP     EXTERNAL-IP   PORT(S)                   AGE
loft                    ClusterIP   10.0.176.210   <none>        80/TCP,443/TCP            12m
loft-agent              ClusterIP   10.0.37.46     <none>        80/TCP,443/TCP,9090/TCP   12m
loft-agent-apiservice   ClusterIP   10.0.88.174    <none>        443/TCP                   12m
loft-agent-webhook      ClusterIP   10.0.42.173    <none>        443/TCP                   12m
Next, I’ll create an LB to expose it
$ cat loft-lb.yml
apiVersion: v1
kind: Service
metadata:
  name: loft-loadbalancer
  namespace: loft
spec:
  type: LoadBalancer
  ports:
    - name: https
      port: 443
      targetPort: 443
      protocol: TCP
  selector:
    app: loft
    release: loft

$ kubectl apply -f loft-lb.yml
service/loft-loadbalancer created
I can now see a provided external IP from AKS
$ kubectl get svc -n loft
NAME                    TYPE           CLUSTER-IP     EXTERNAL-IP    PORT(S)                   AGE
loft                    ClusterIP      10.0.176.210   <none>         80/TCP,443/TCP            14m
loft-agent              ClusterIP      10.0.37.46     <none>         80/TCP,443/TCP,9090/TCP   14m
loft-agent-apiservice   ClusterIP      10.0.88.174    <none>         443/TCP                   14m
loft-agent-webhook      ClusterIP      10.0.42.173    <none>         443/TCP                   14m
loft-loadbalancer       LoadBalancer   10.0.59.87     20.237.19.14   443:32204/TCP             61s
To get certs, I’ll need to setup Cert Manager with Acme (Lets Encrypt)
$ helm upgrade --install  cert-manager cert-manager  --repository-config='' --namespace cert-manager  --create-namespace --repo https://charts.jetstack.io --set installCRDs=true --wait

Release "cert-manager" does not exist. Installing it now.
NAME: cert-manager
LAST DEPLOYED: Wed May 18 05:53:03 2022
NAMESPACE: cert-manager
STATUS: deployed
REVISION: 1
TEST SUITE: None
NOTES:
cert-manager v1.8.0 has been deployed successfully!

In order to begin issuing certificates, you will need to set up a ClusterIssuer
or Issuer resource (for example, by creating a 'letsencrypt-staging' issuer).

More information on the different types of issuers and how to configure them
can be found in our documentation:

https://cert-manager.io/docs/configuration/

For information on how to configure cert-manager to automatically provision
Certificates for Ingress resources, take a look at the `ingress-shim`
documentation:

https://cert-manager.io/docs/usage/ingress/
We will create a values file to use TLS and the Cert Issuer
$ cat loft.yaml
ingress:
  annotations:
    cert-manager.io/cluster-issuer: lets-encrypt-http-issuer
  tls:
    enabled: true
    secret: tls-loft

certIssuer:
  create: true
  name: lets-encrypt-http-issuer
  email: "isaac.johnson@gmail.com"
  secretName: loft-letsencrypt-credentials
  httpResolver:
    enabled: true
    ingressClass: nginx
  resolvers: []
  server: https://acme-v02.api.letsencrypt.org/directory


$ CHART=`kubectl get service loft -n loft -o jsonpath={.metadata.labels.chart}`
$ VERSION=${CHART:5}
$ echo $CHART
loft-2.2.0
$ echo $VERSION
2.2.0
I’ll stop my current instance in the shell and upgrade loft to use the new values
$ loft start --upgrade --version=$VERSION --values=loft.yaml


[info]   Executing command: helm upgrade loft loft --install --reuse-values --create-namespace --repository-config='' --kube-context idjtest415aks-admin --namespace loft --repo https://charts.loft.sh/ --set admin.password=9b8c00b2-a7a9-4f1c-9c07-1cb70e28effb --version 2.2.0 --reuse-values --values /home/builder/Workspaces/tmp-loft/loft.yaml

[done] √ Loft has been deployed to your cluster!
[done] √ Loft pod successfully started

[info]   Starting port-forwarding to the Loft pod
[info]   Waiting until loft is reachable at https://localhost:9898


##########################   LOGIN   ############################

Username: admin
Password: 9b8c00b2-a7a9-4f1c-9c07-1cb70e28effb  # Change via UI or via: loft reset password

Login via UI:  https://localhost:9898
Login via CLI: loft login --insecure https://localhost:9898

!!! You must accept the untrusted certificate in your browser !!!

#################################################################

Loft was successfully installed and port-forwarding has been started.
If you stop this command, run 'loft start' again to restart port-forwarding.

Thanks for using Loft!
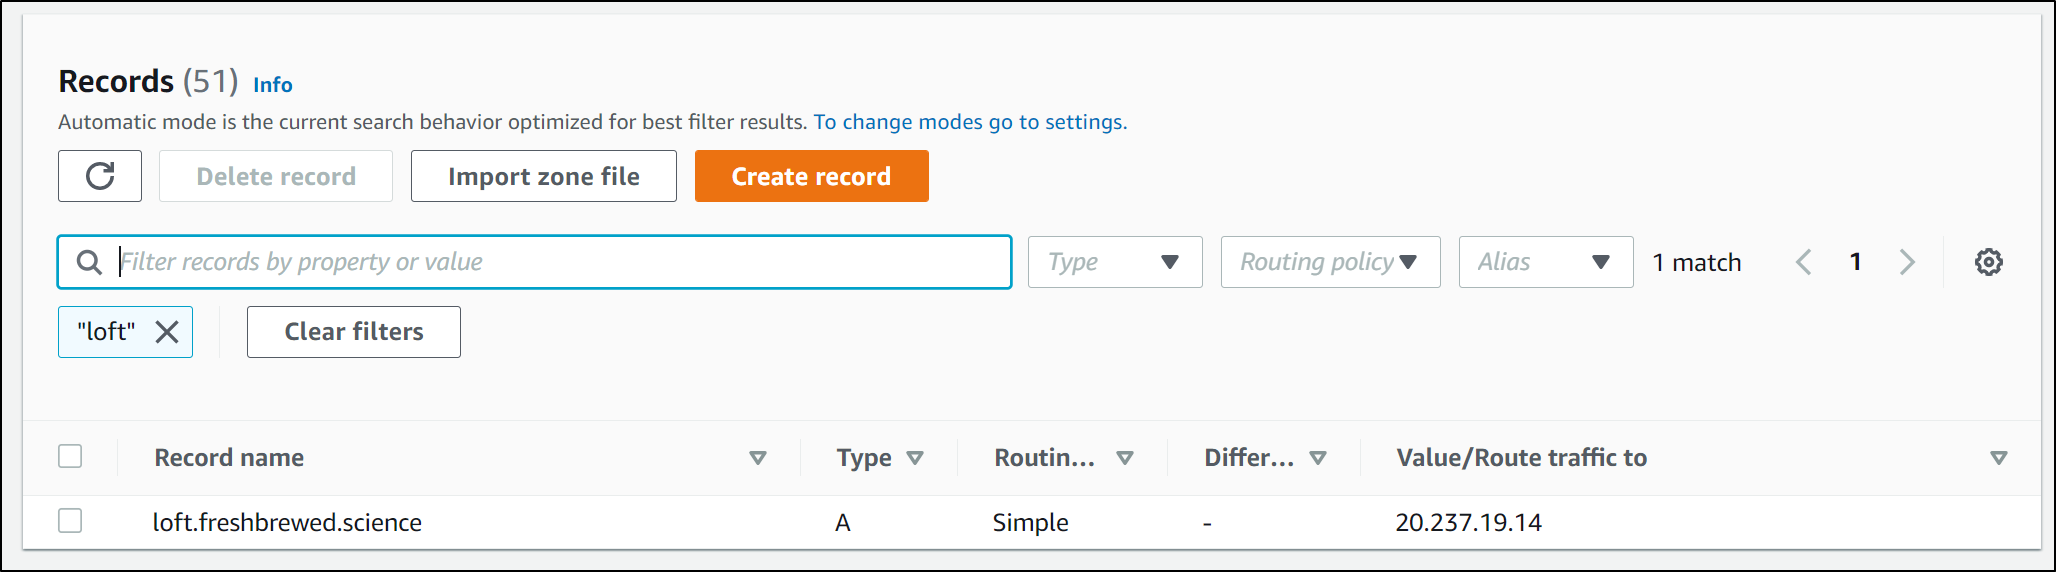
Next, I need to setup an A record for the Domain we want to use. I’ll use Route53 and update via the AWS CLI
$ cat r53-loft.json
{
  "Comment": "CREATE loft fb.s A record ",
  "Changes": [
    {
      "Action": "CREATE",
      "ResourceRecordSet": {
        "Name": "loft.freshbrewed.science",
        "Type": "A",
        "TTL": 300,
        "ResourceRecords": [
          {
            "Value": "20.237.19.14"
          }
        ]
      }
    }
  ]
}
and update
$ aws route53 change-resource-record-sets --hosted-zone-id Z39E8QFU0F9PZP --change-batch file://r53-loft.json
{
    "ChangeInfo": {
        "Id": "/change/C087400625Z6S42TSFBAW",
        "Status": "PENDING",
        "SubmittedAt": "2022-05-18T11:11:02.345Z",
        "Comment": "CREATE loft fb.s A record "
    }
}
I tried to set Loft to use the DNS name via the Helm chart upgrade method
$ helm upgrade loft loft --repo https://charts.loft.sh -n loft --reuse-values --set ingress.enabled=true --set ingress.host=loft.freshbrewed.science --set ingress.ingressClass=nginx
Release "loft" has been upgraded. Happy Helming!
NAME: loft
LAST DEPLOYED: Wed May 18 06:27:32 2022
NAMESPACE: loft
STATUS: deployed
REVISION: 4
TEST SUITE: None
NOTES:
Thank you for installing loft.

Your release is named loft.

To learn more about the release, try:

  $ helm status loft
  $ helm get all loft
I realized we used the secret name tls-loft but the cluster issuer creates a unique named cert tls-loft-z95kq.
$ helm get values -n loft loft
USER-SUPPLIED VALUES:
admin:
  email: isaac.johnson@gmail.com
  password: 9b8c00b2-a7a9-4f1c-9c07-1cb70e28effb
certIssuer:
  create: true
  email: isaac.johnson@gmail.com
  httpResolver:
    enabled: true
    ingressClass: nginx
  name: lets-encrypt-http-issuer
  resolvers: []
  secretName: loft-letsencrypt-credentials
  server: https://acme-v02.api.letsencrypt.org/directory
ingress:
  annotations:
    cert-manager.io/cluster-issuer: lets-encrypt-http-issuer
  enabled: true
  host: loft.freshbrewed.science
  ingressClass: nginx
  tls:
    enabled: true
    secret: tls-loft
A mistake I initially made was to skip creating the NGinx ingress. AKS will provide an Ingress service, but it won’t satisfy the ACME challenges.
I stopped, create the ingress controller:
$ helm upgrade --install ingress-nginx ingress-nginx --repository-config='' \
  -n ingress-nginx --create-namespace \
  --repo https://kubernetes.github.io/ingress-nginx \
  --set-string controller.config.hsts=false \
  --wait
I removed the manual LB i had made
$ kubectl delete -f loft-lb.yml
service "loft-loadbalancer" deleted
Then, just because I didn’t want to deal with DNS propagation issues, I set a “loft2” domain:
$ cat r53-loft.json
{
  "Comment": "CREATE loft fb.s A record ",
  "Changes": [
    {
      "Action": "CREATE",
      "ResourceRecordSet": {
        "Name": "loft2.freshbrewed.science",
        "Type": "A",
        "TTL": 300,
        "ResourceRecords": [
          {
            "Value": "20.237.114.203"
          }
        ]
      }
    }
  ]
}

$ aws route53 change-resource-record-sets --hosted-zone-id Z39E8QFU0F9PZP --change-batch file://r53-loft.json
{
    "ChangeInfo": {
        "Id": "/change/C014440115IZG10J29FUI",
        "Status": "PENDING",
        "SubmittedAt": "2022-05-18T11:47:02.275Z",
        "Comment": "CREATE loft fb.s A record "
    }
}
and lastly upgraded with helm to use the new DNS name
$ helm upgrade loft loft --repo https://charts.loft.sh -n loft --reuse-values --set ingress.enabled=true --set ingress.host=loft2.freshbrewed.science --set ingress.ingressClass=nginx --set ingress.tls.
secret=tls-loft
Release "loft" has been upgraded. Happy Helming!
NAME: loft
LAST DEPLOYED: Wed May 18 06:47:52 2022
NAMESPACE: loft
STATUS: deployed
REVISION: 7
TEST SUITE: None
NOTES:
Thank you for installing loft.

Your release is named loft.

To learn more about the release, try:

  $ helm status loft
  $ helm get all loft
I then saw the Cert request get satisified
$ kubectl get cert -n loft
NAME       READY   SECRET     AGE
tls-loft   True    tls-loft   42s
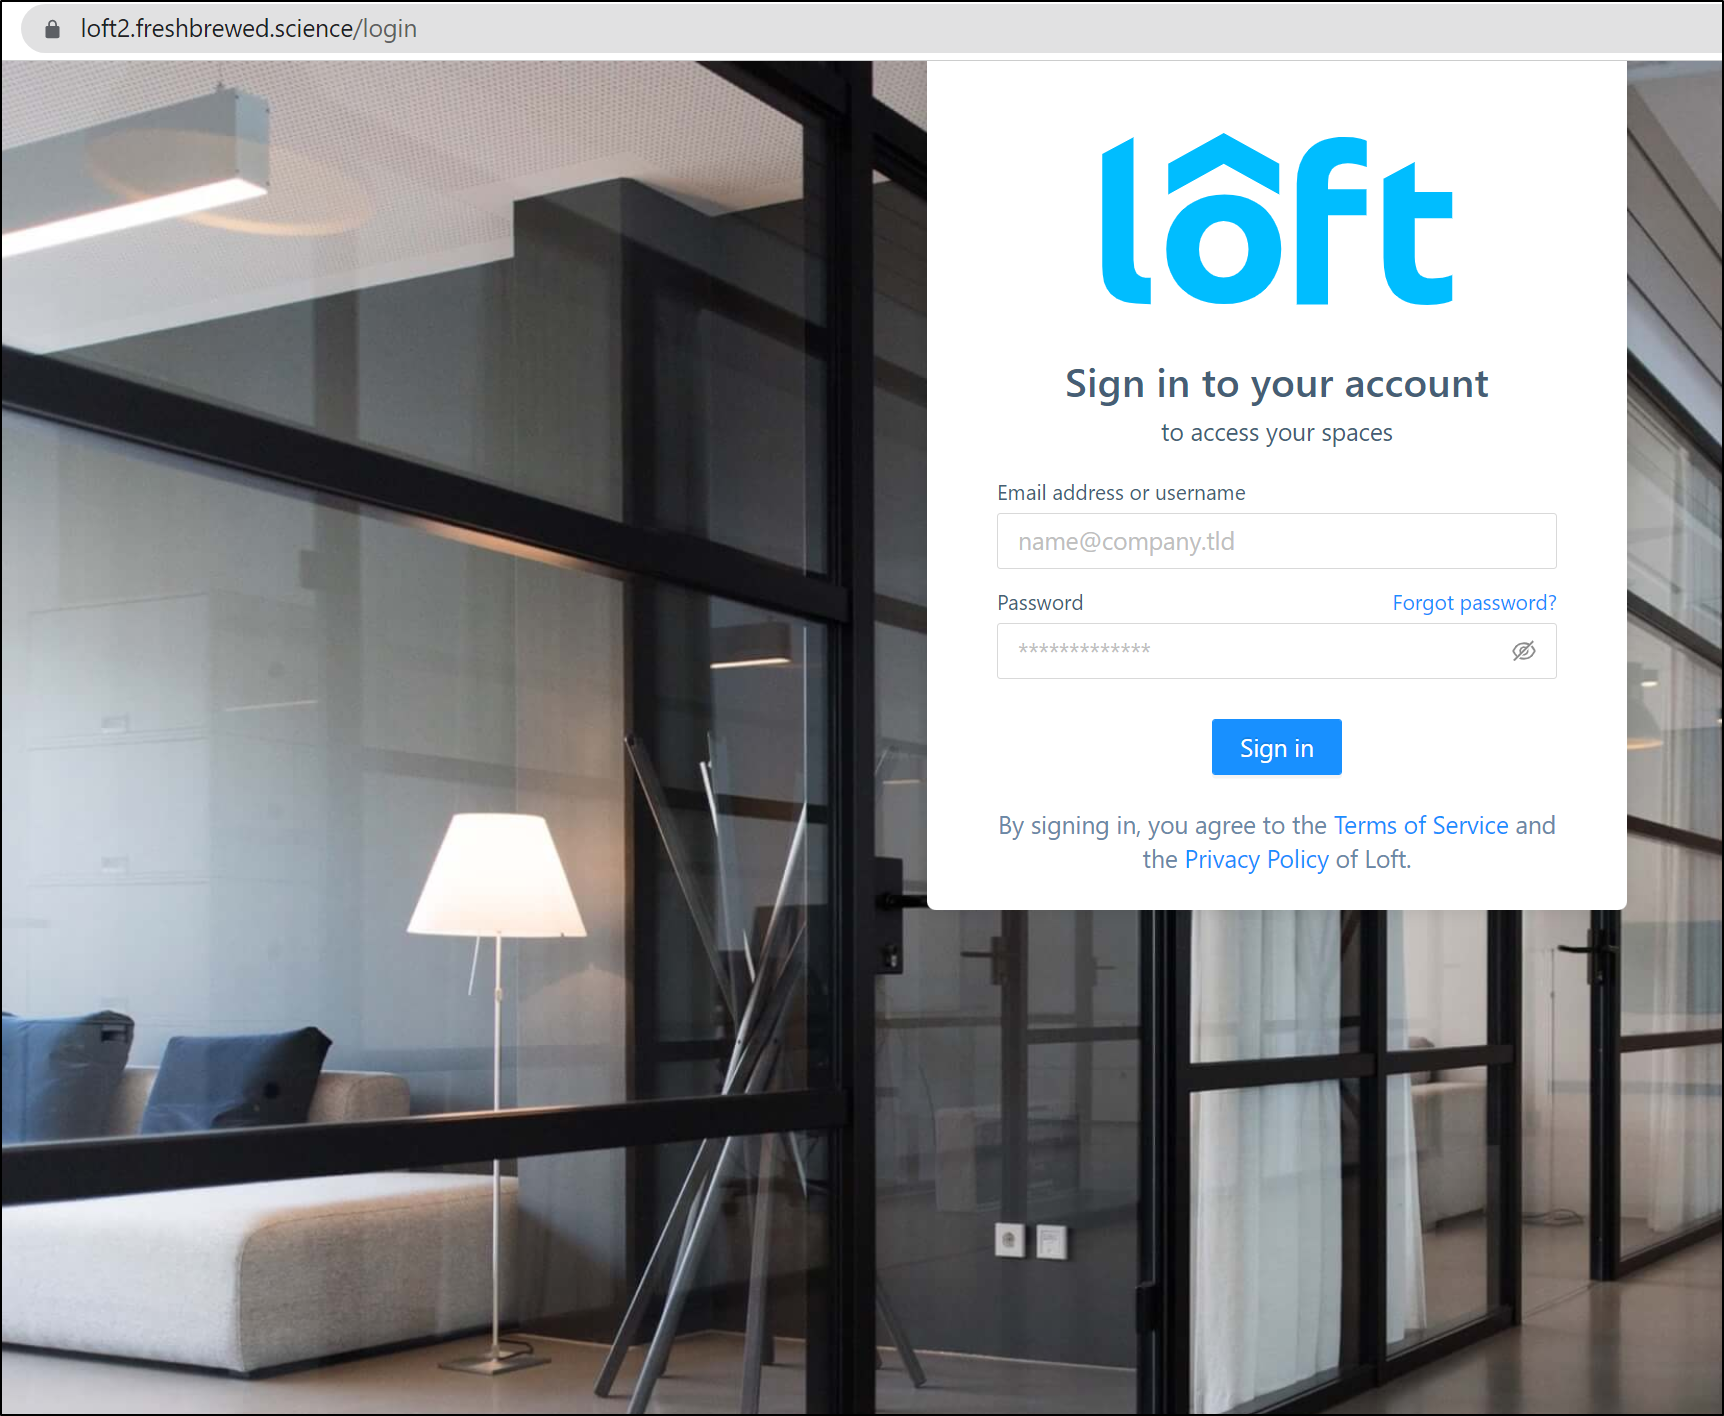
and Loft is now running on the new DNS name
https://loft2.freshbrewed.science/login
Virtual Clusters
Let’s use Loft to create a virtual cluster

Click create to create the cluster
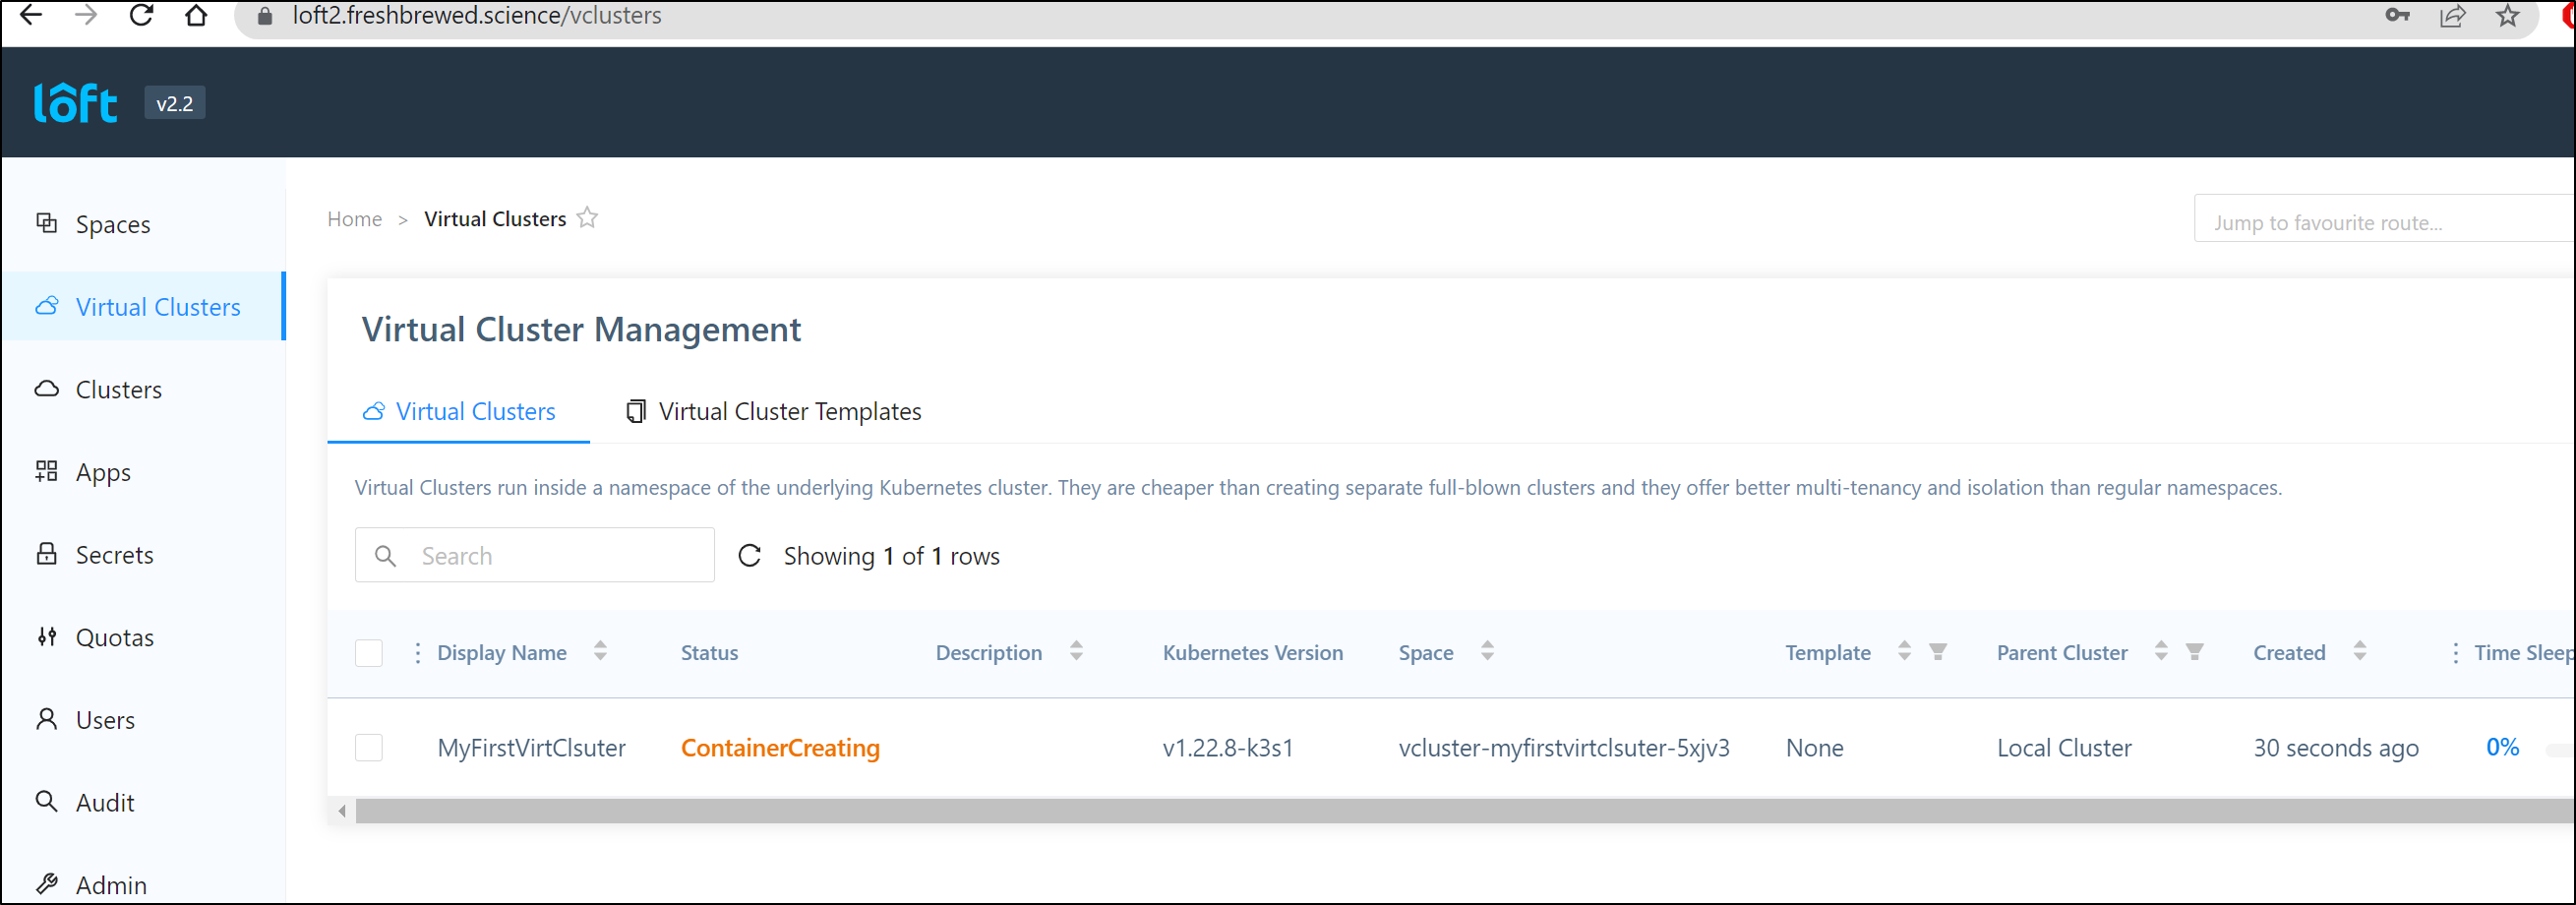
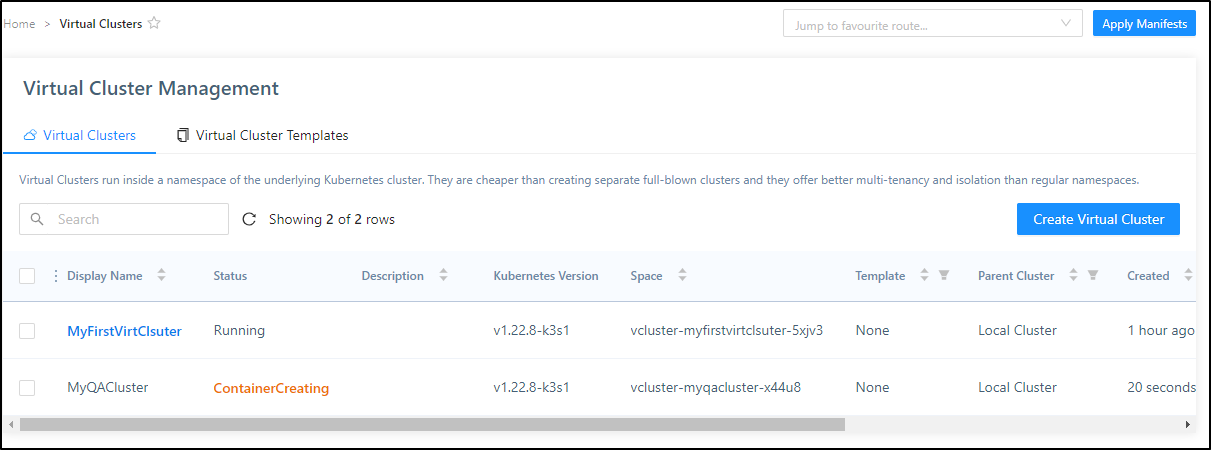
Once created, we can see it’s an independent (k3s) cluster

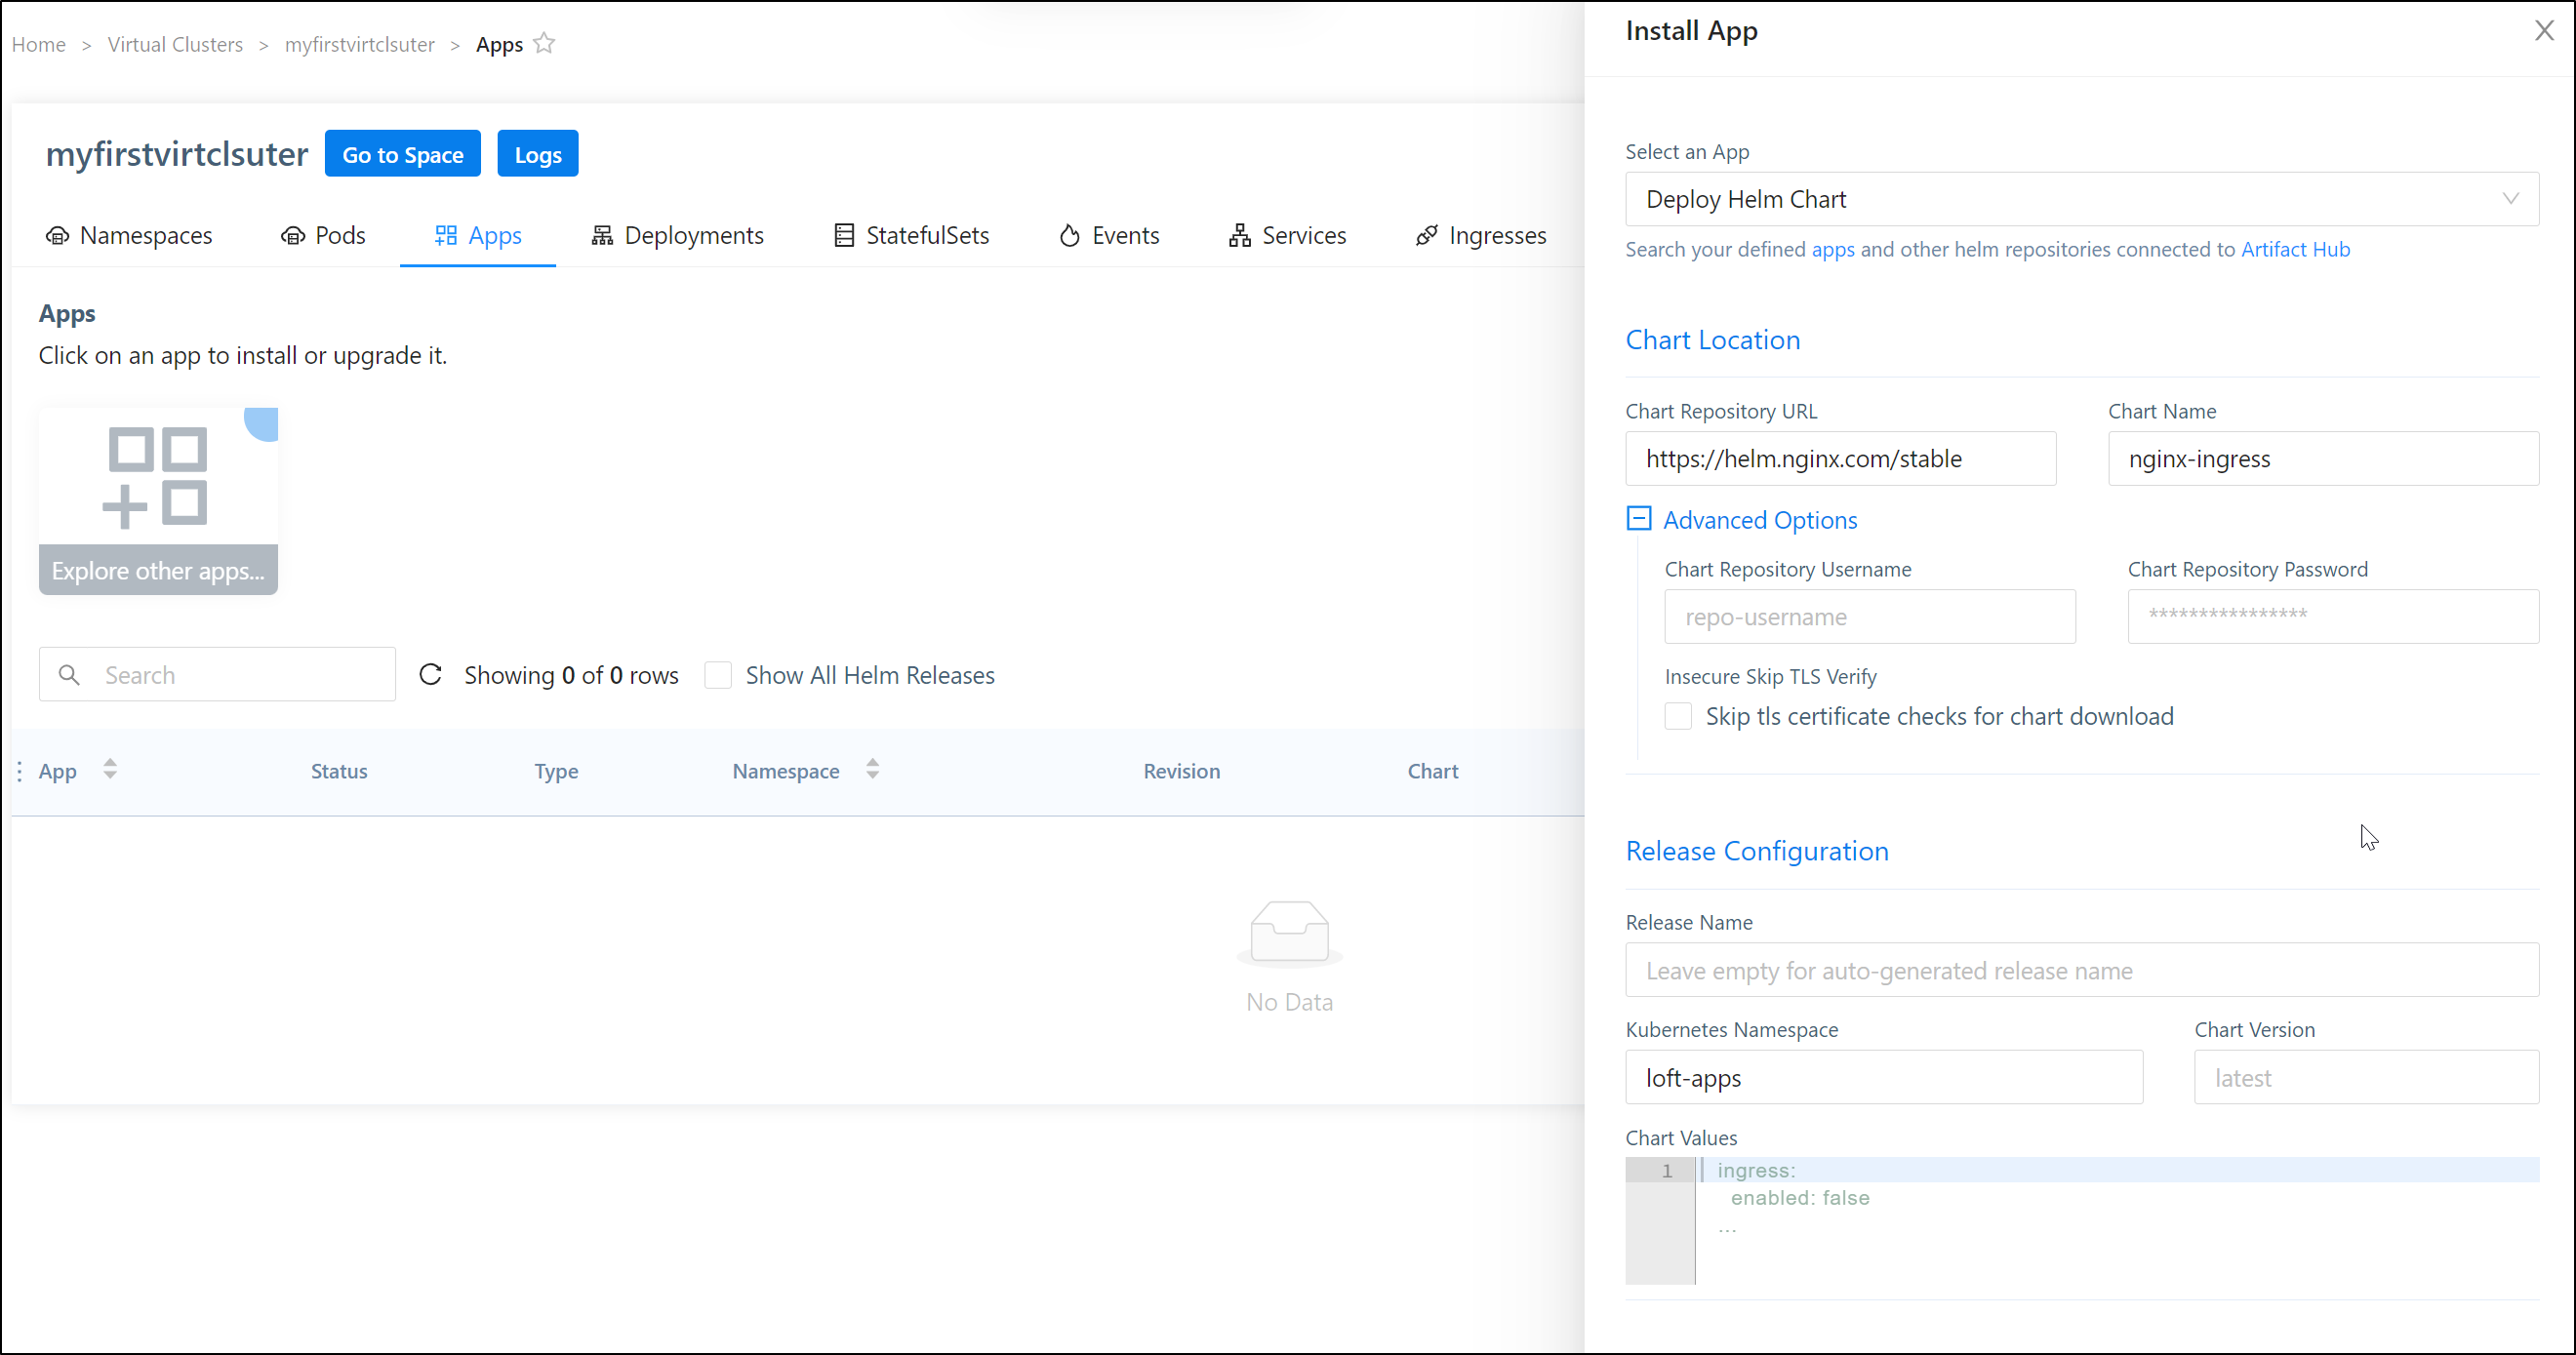
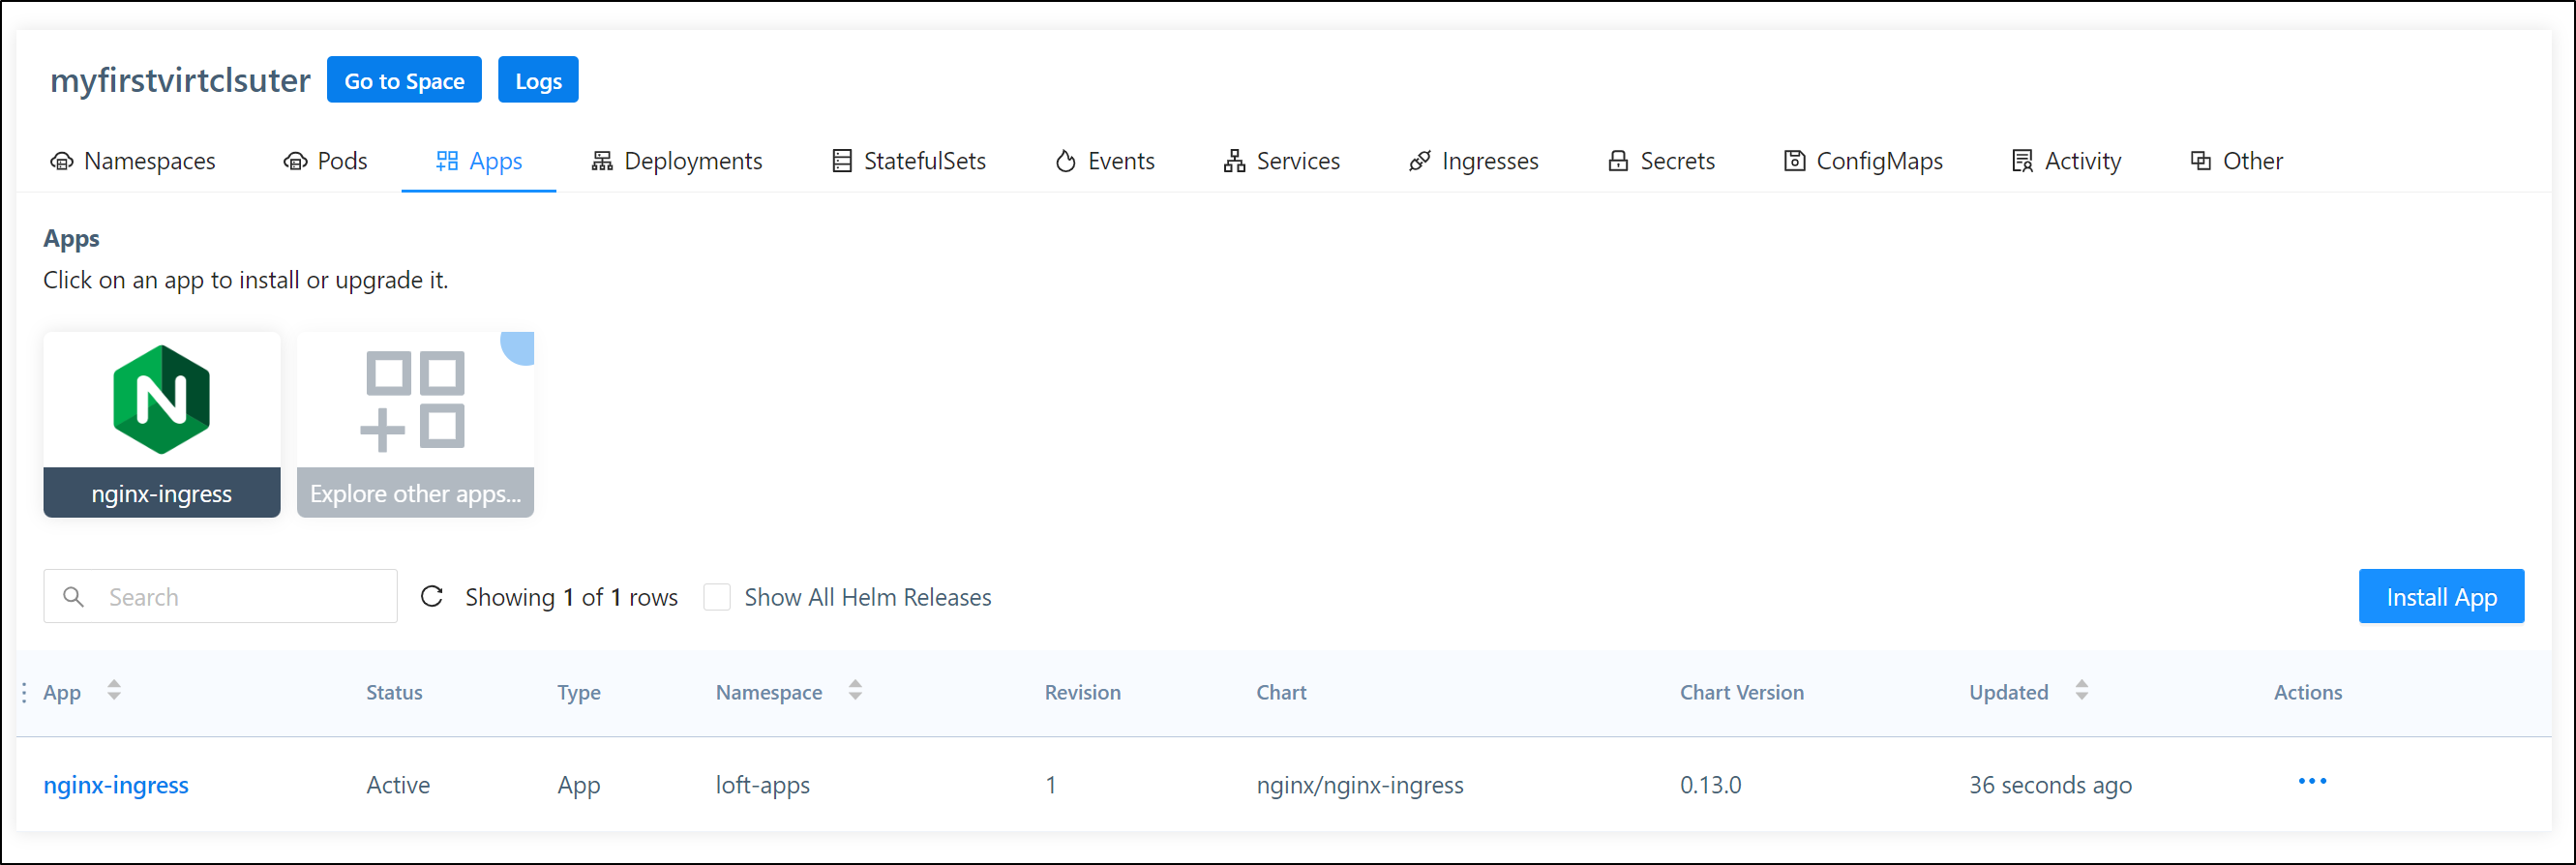
we can, for instance, directly install an App into the cluster
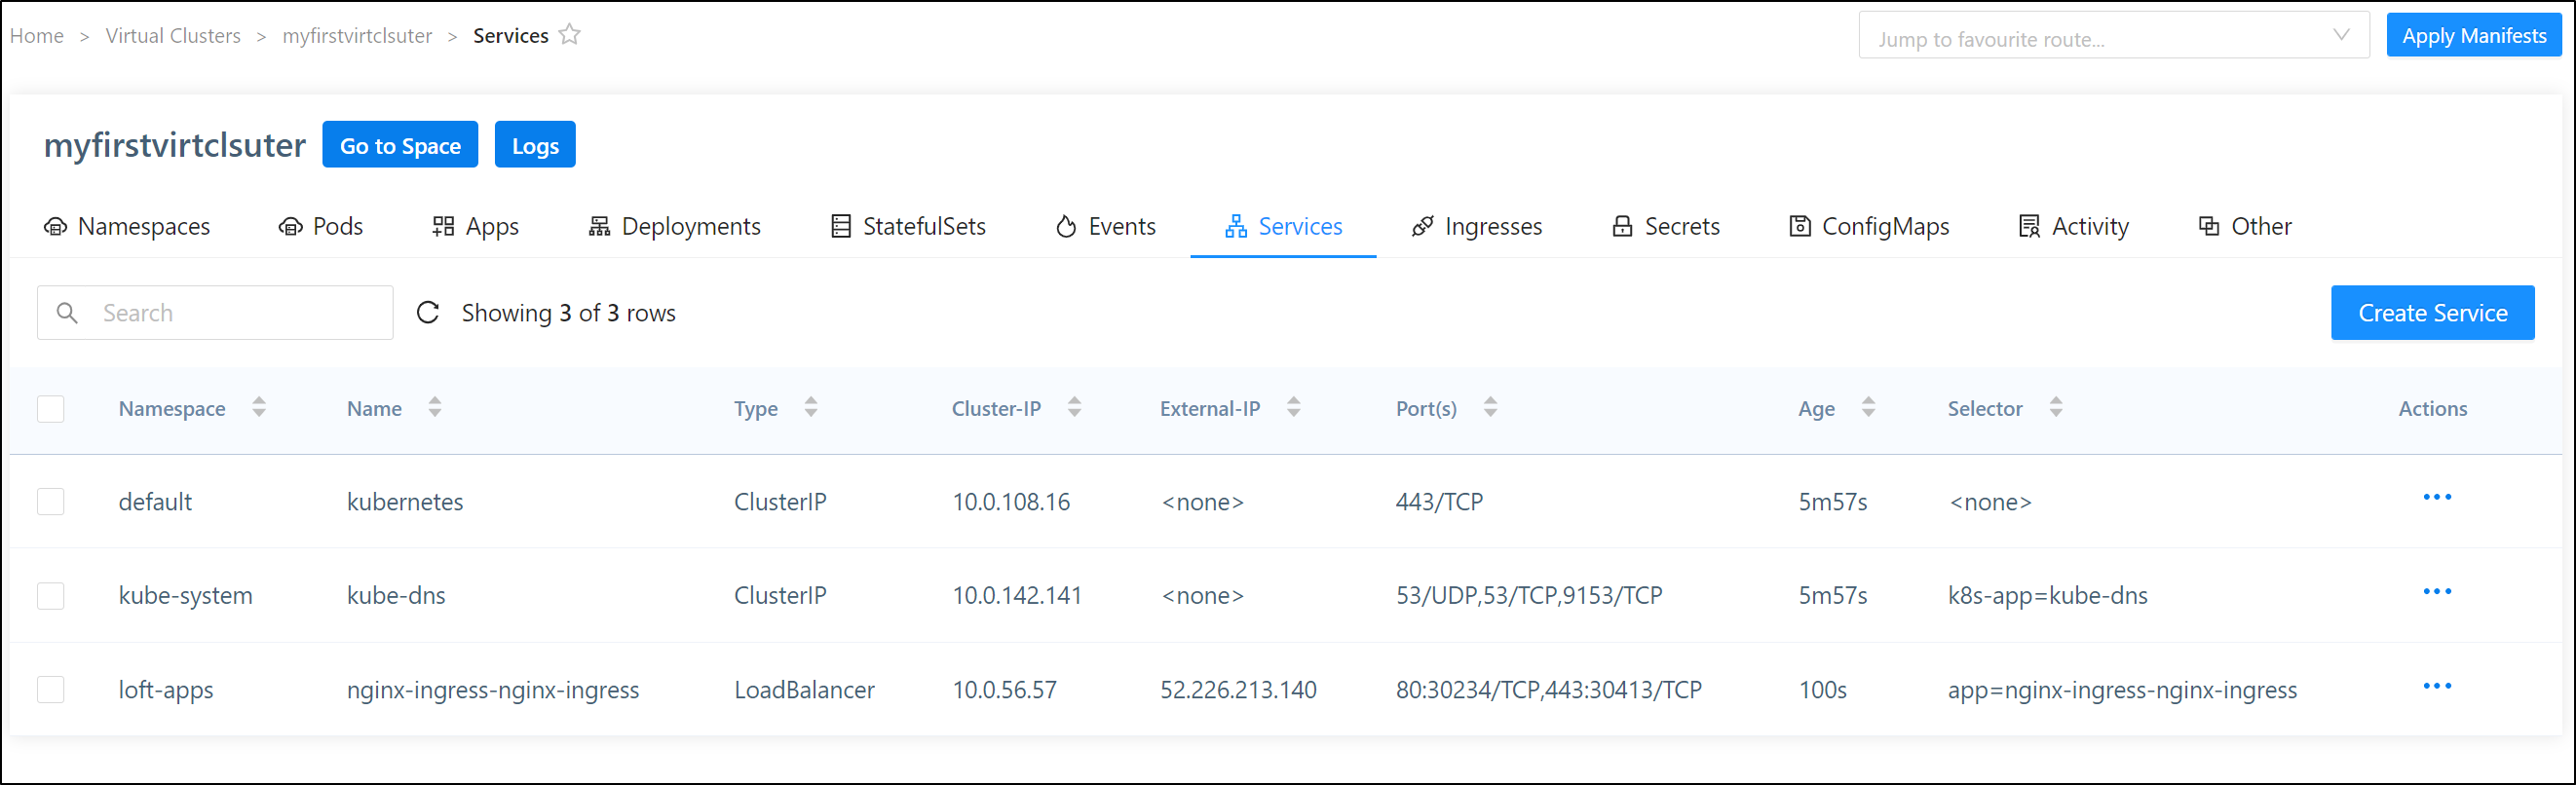
Now when I go to services, I can see the ingress external IP listed
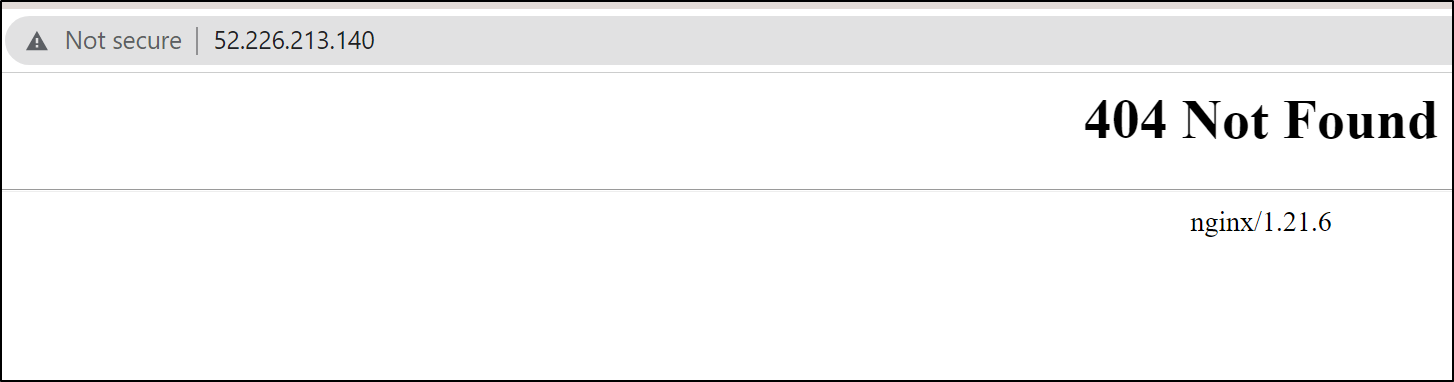
which i can verify is serving traffic
We can see this is not totally self-contained. The “virtual cluster” effectively just lives in a namespace
$ kubectl get svc -n vcluster-myfirstvirtclsuter-5xjv3
NAME                                                           TYPE           CLUSTER-IP     EXTERNAL-IP      PORT(S)                      AGE
kube-dns-x-kube-system-x-myfirstvirtclsuter                    ClusterIP      10.0.142.141   <none>           53/UDP,53/TCP,9153/TCP       69m
myfirstvirtclsuter                                             ClusterIP      10.0.108.16    <none>           443/TCP                      69m
myfirstvirtclsuter-headless                                    ClusterIP      None           <none>           443/TCP                      69m
myfirstvirtclsuter-node-aks-nodepool1-67027664-vmss000000      ClusterIP      10.0.131.64    <none>           10250/TCP                    69m
myfirstvirtclsuter-node-aks-nodepool1-67027664-vmss000002      ClusterIP      10.0.154.195   <none>           10250/TCP                    64m
nginx-ingress-nginx-ingress-x-loft-apps-x-myfirstvirtclsuter   LoadBalancer   10.0.56.57     52.226.213.140   80:30234/TCP,443:30413/TCP   64m
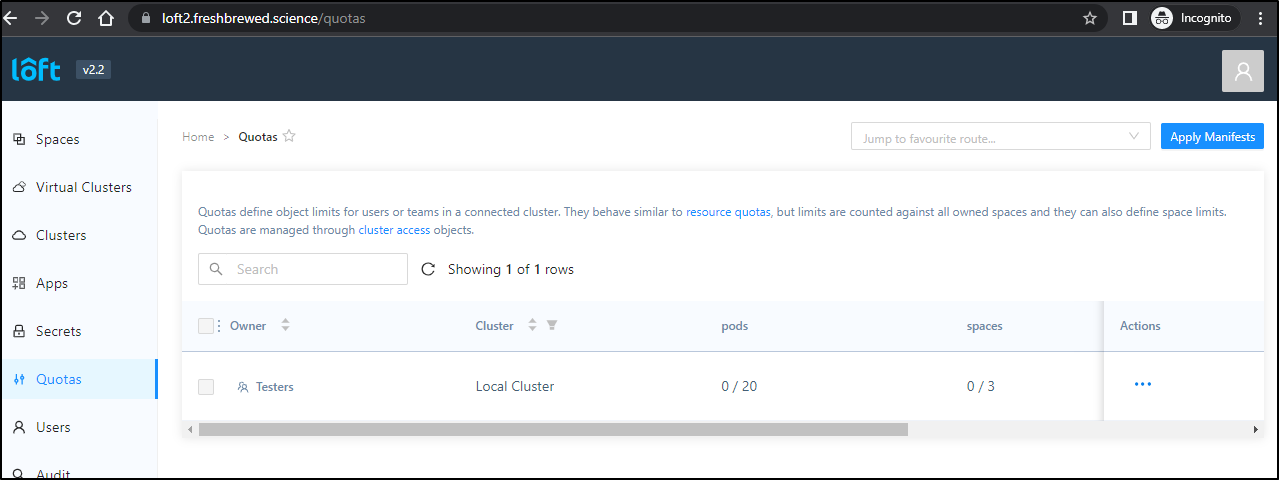
Quotas
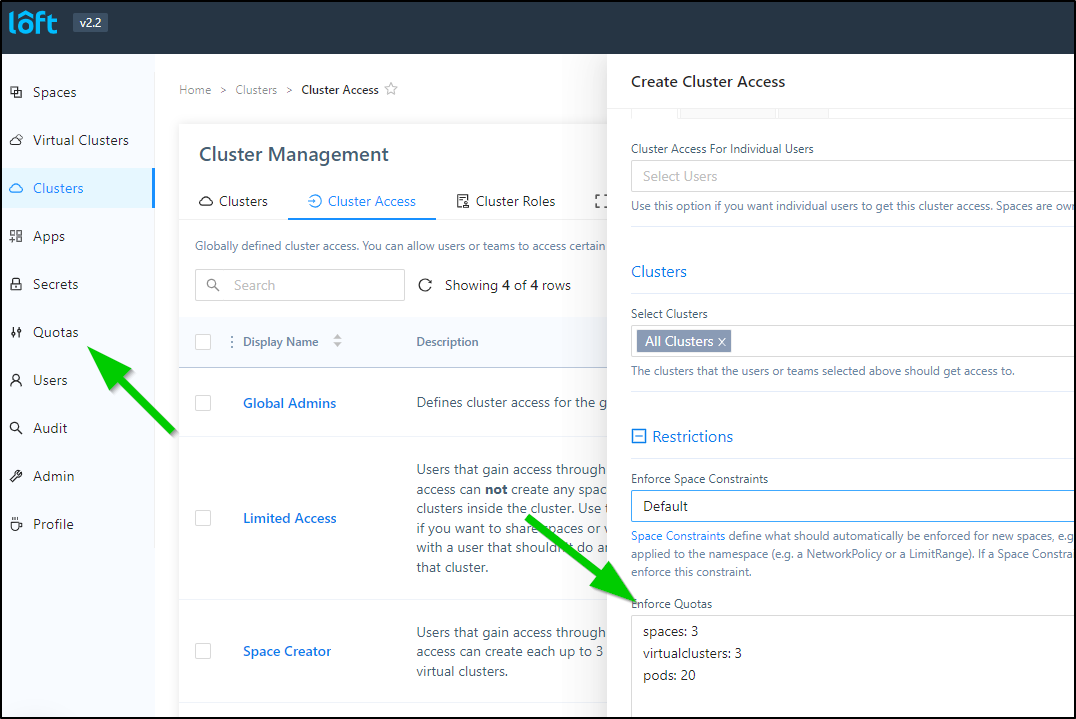
One of the things we can do is set limits on our users. Perhaps you want to allow a performance team limited access to a cluster but would like to limit how many resources they consume. You could do that in the Cluster Management section
Teams Users Groups
First, let’s create a Team for Testers

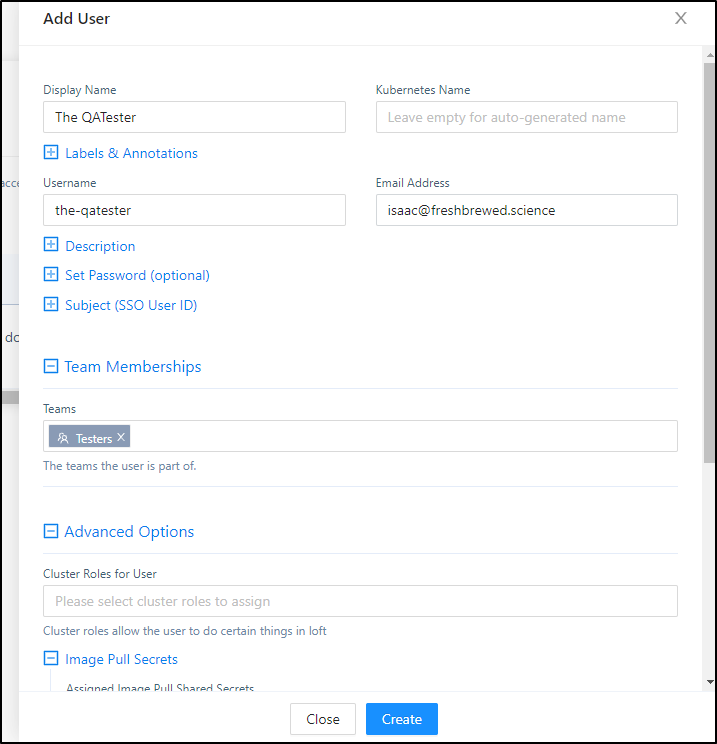
Then we can create a QA Tester user
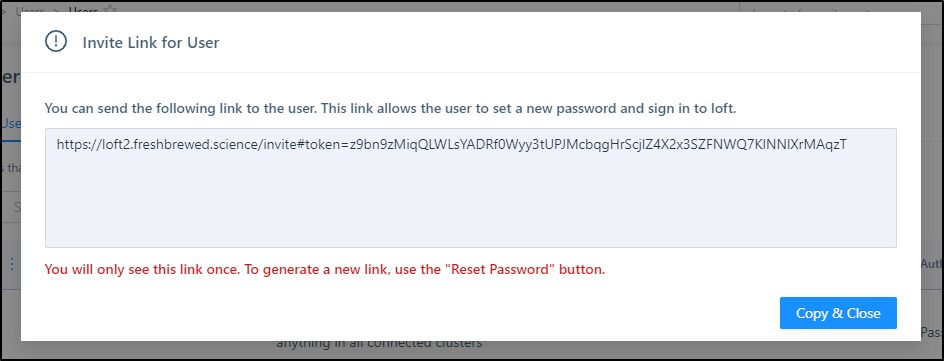
Since we have no SMTP host to send emails, we are prompted to let the user know they can login with the URL
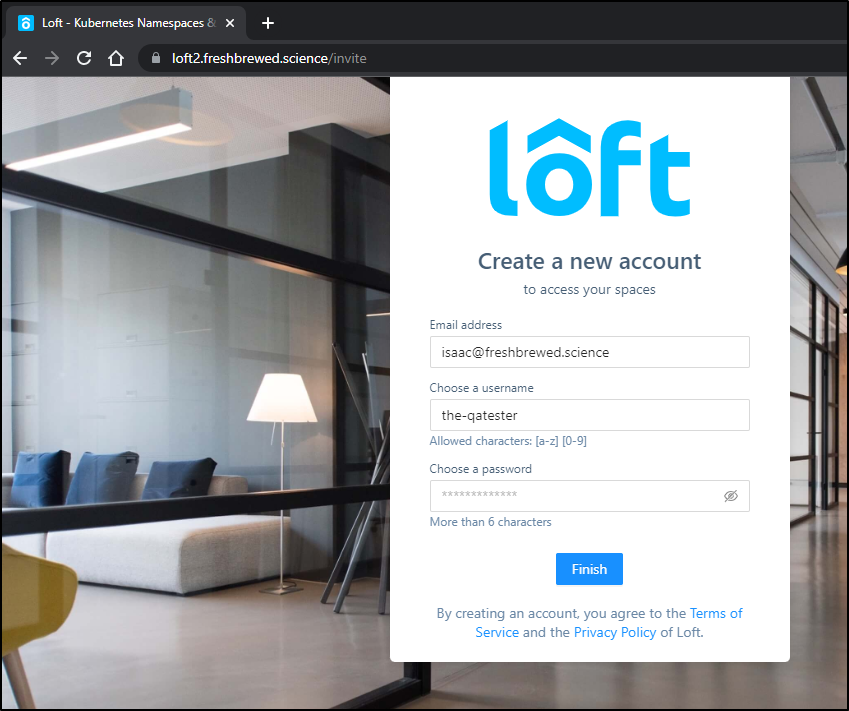
which when loaded let’s them login and set their password
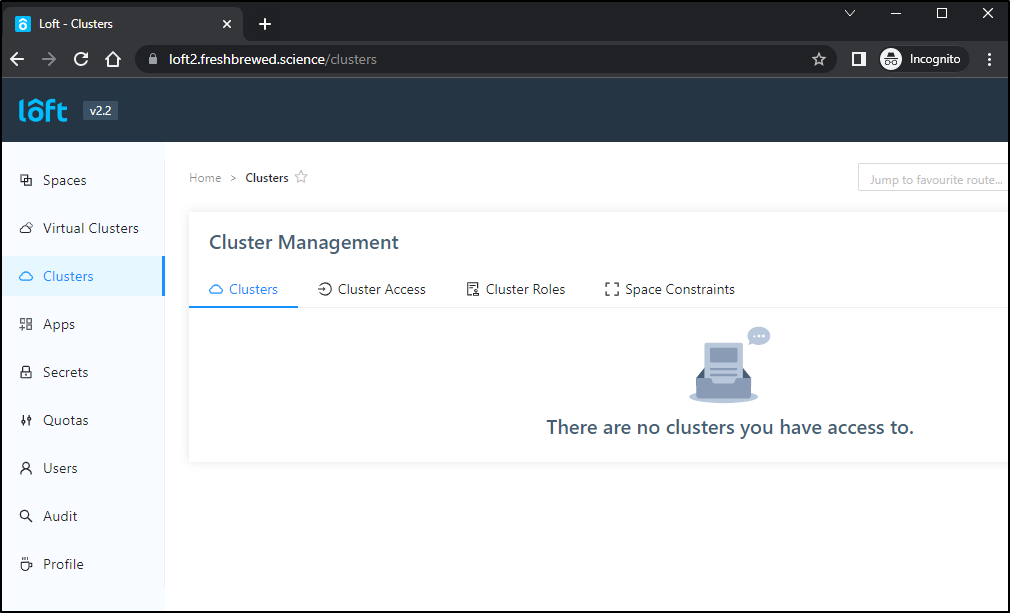
We can see that by default, the new user cannot see clusters
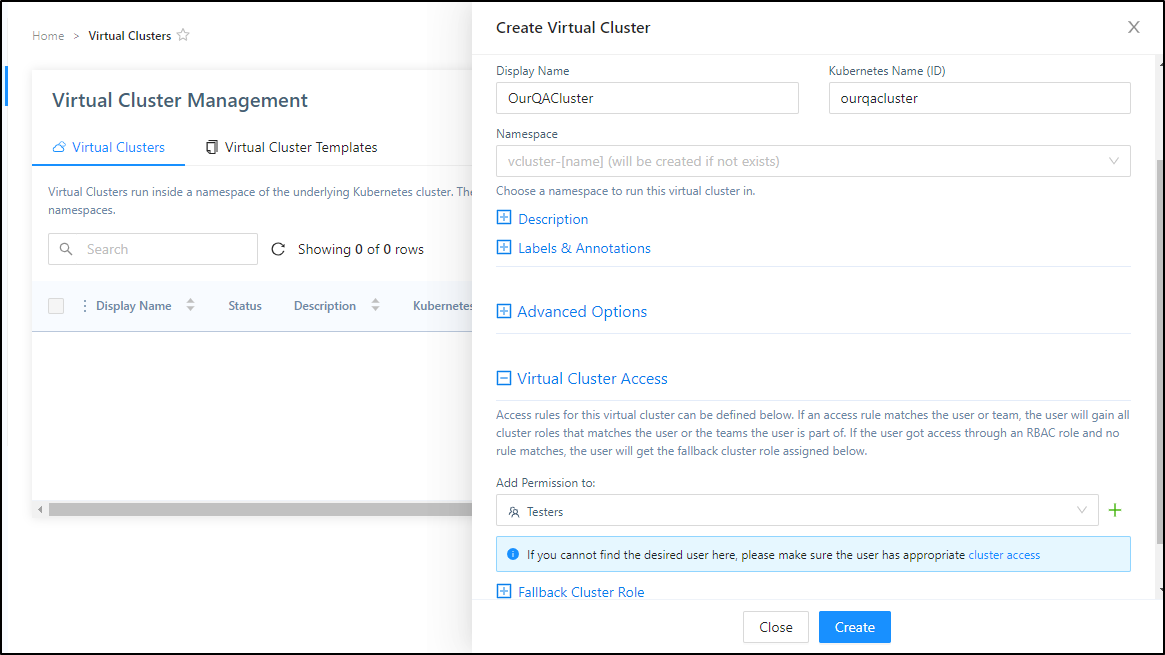
I’ll now create a virtual cluster and provide access to the “Testers” group
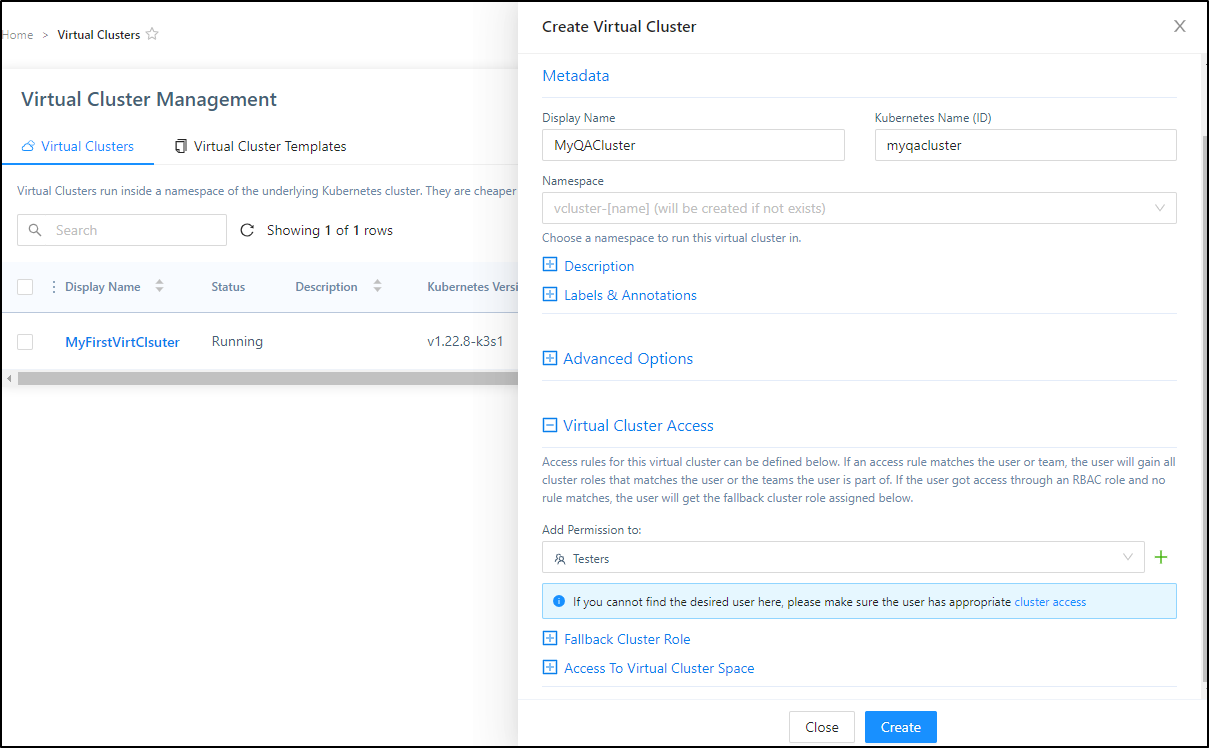
which creates the new cluster
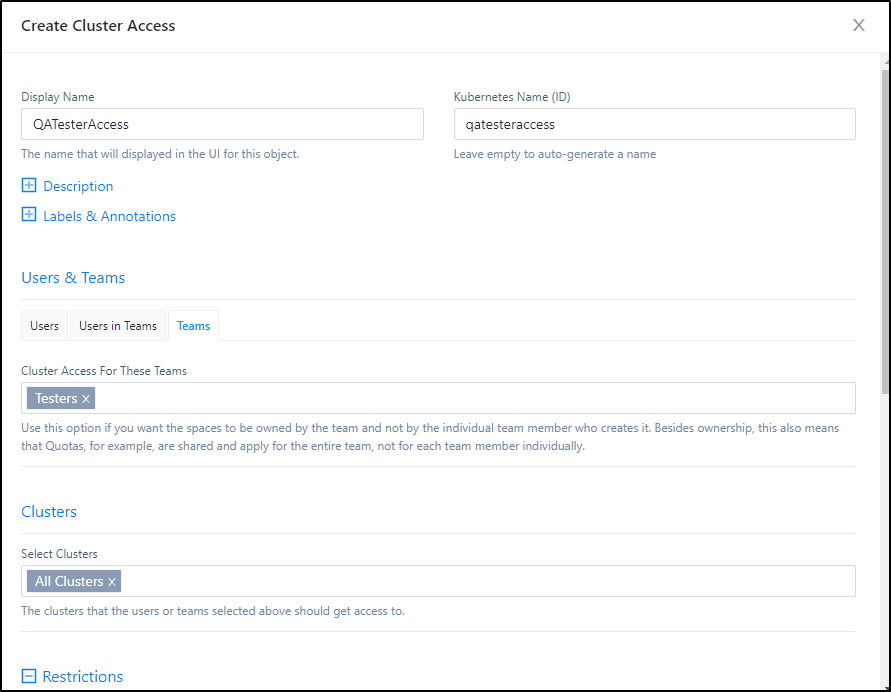
next we need to create a Cluster Access Role
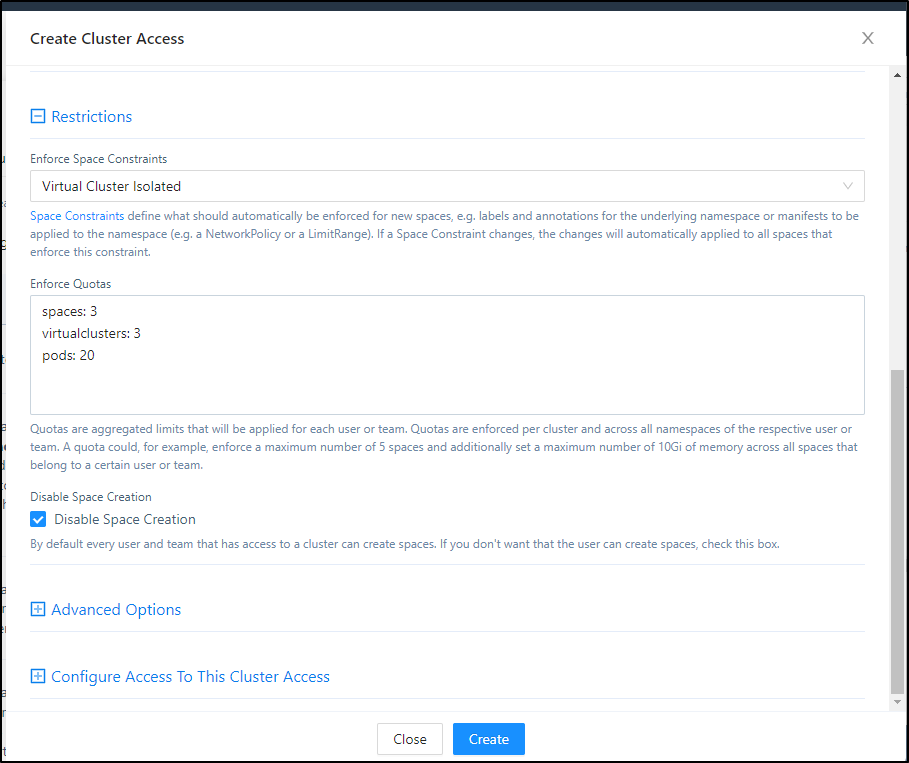
While I can configure specific real clusters, I can’t expand access to existing virtual ones.
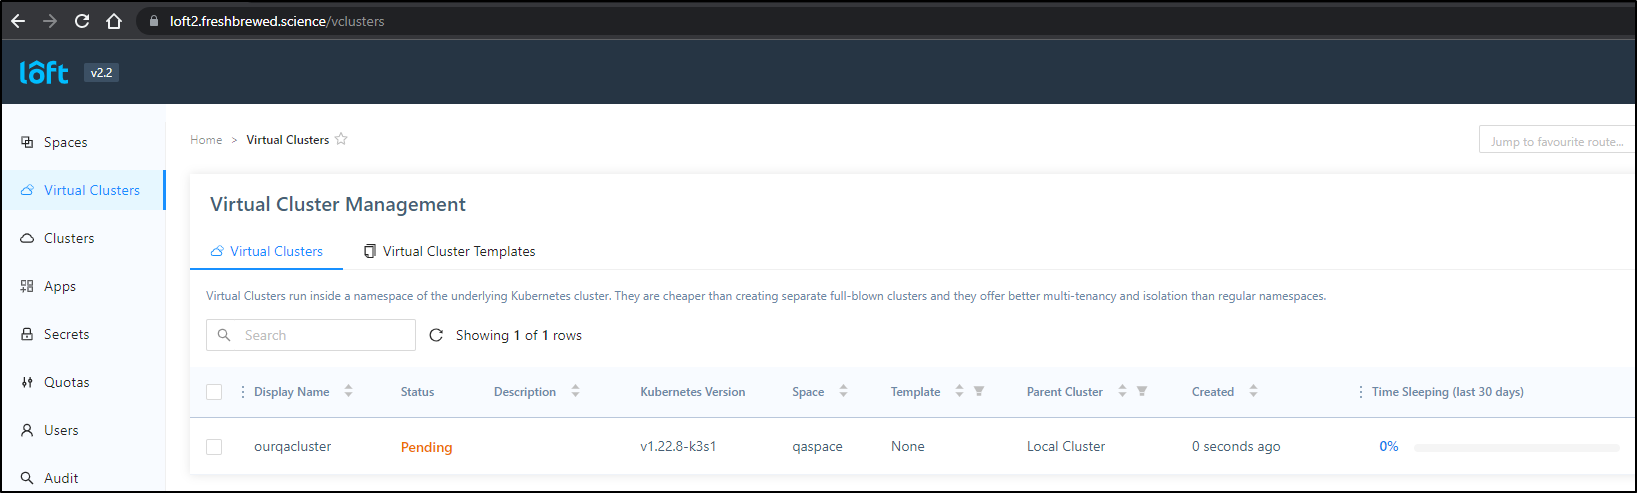
That said, the qa-tester can create a new qa cluster
We need to create a space
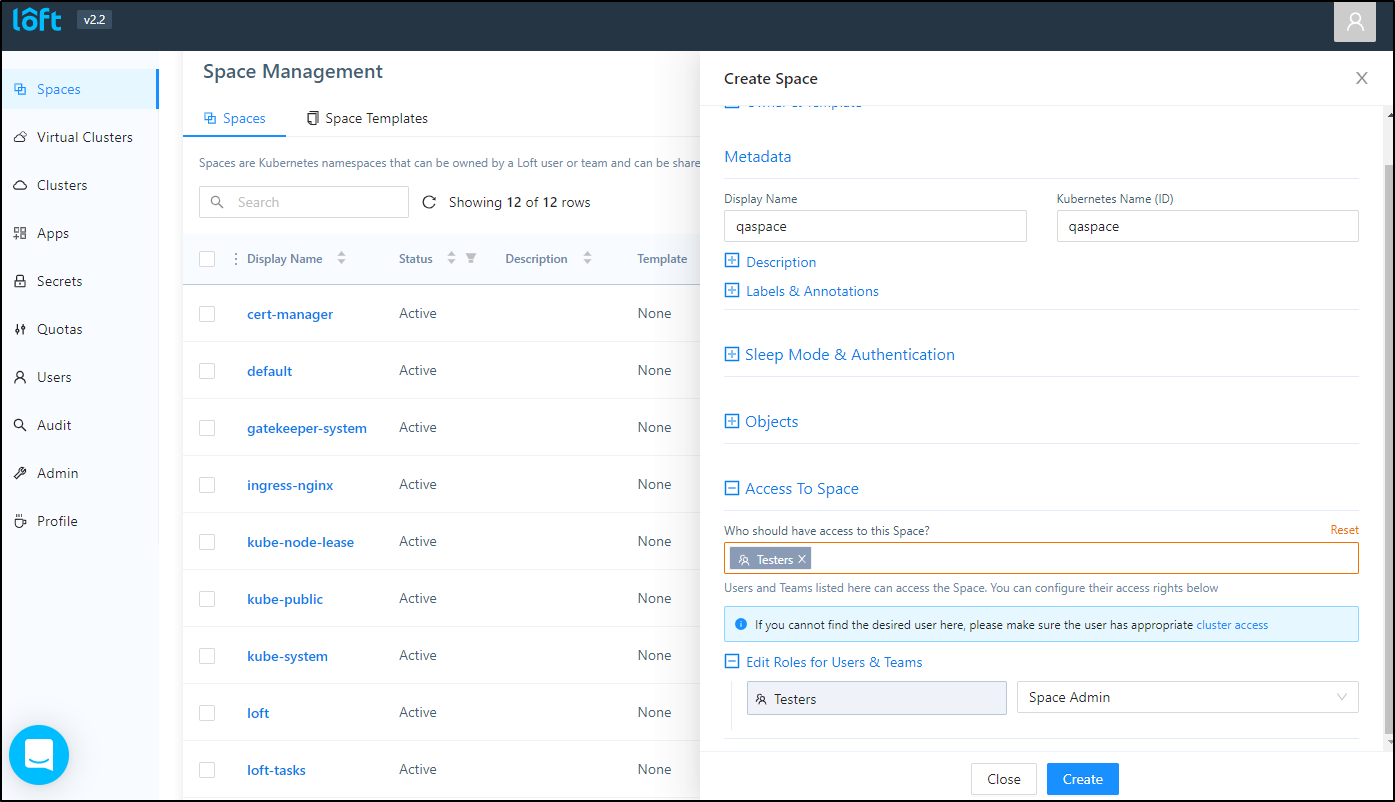
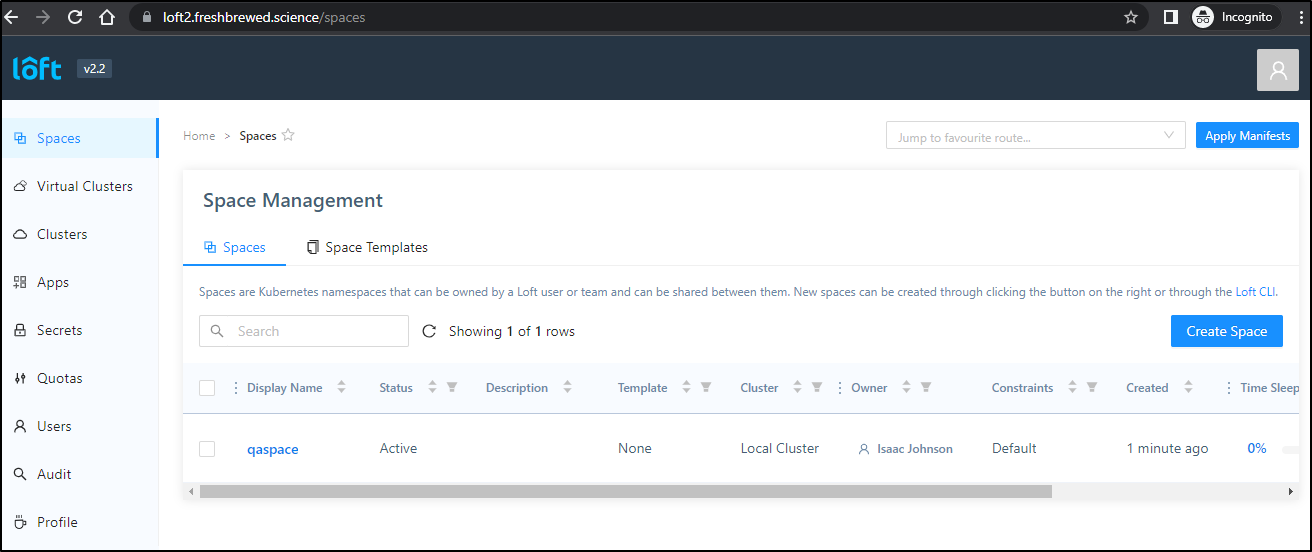
Once created, we can see our QA user can see the space
now we can try to create the cluster
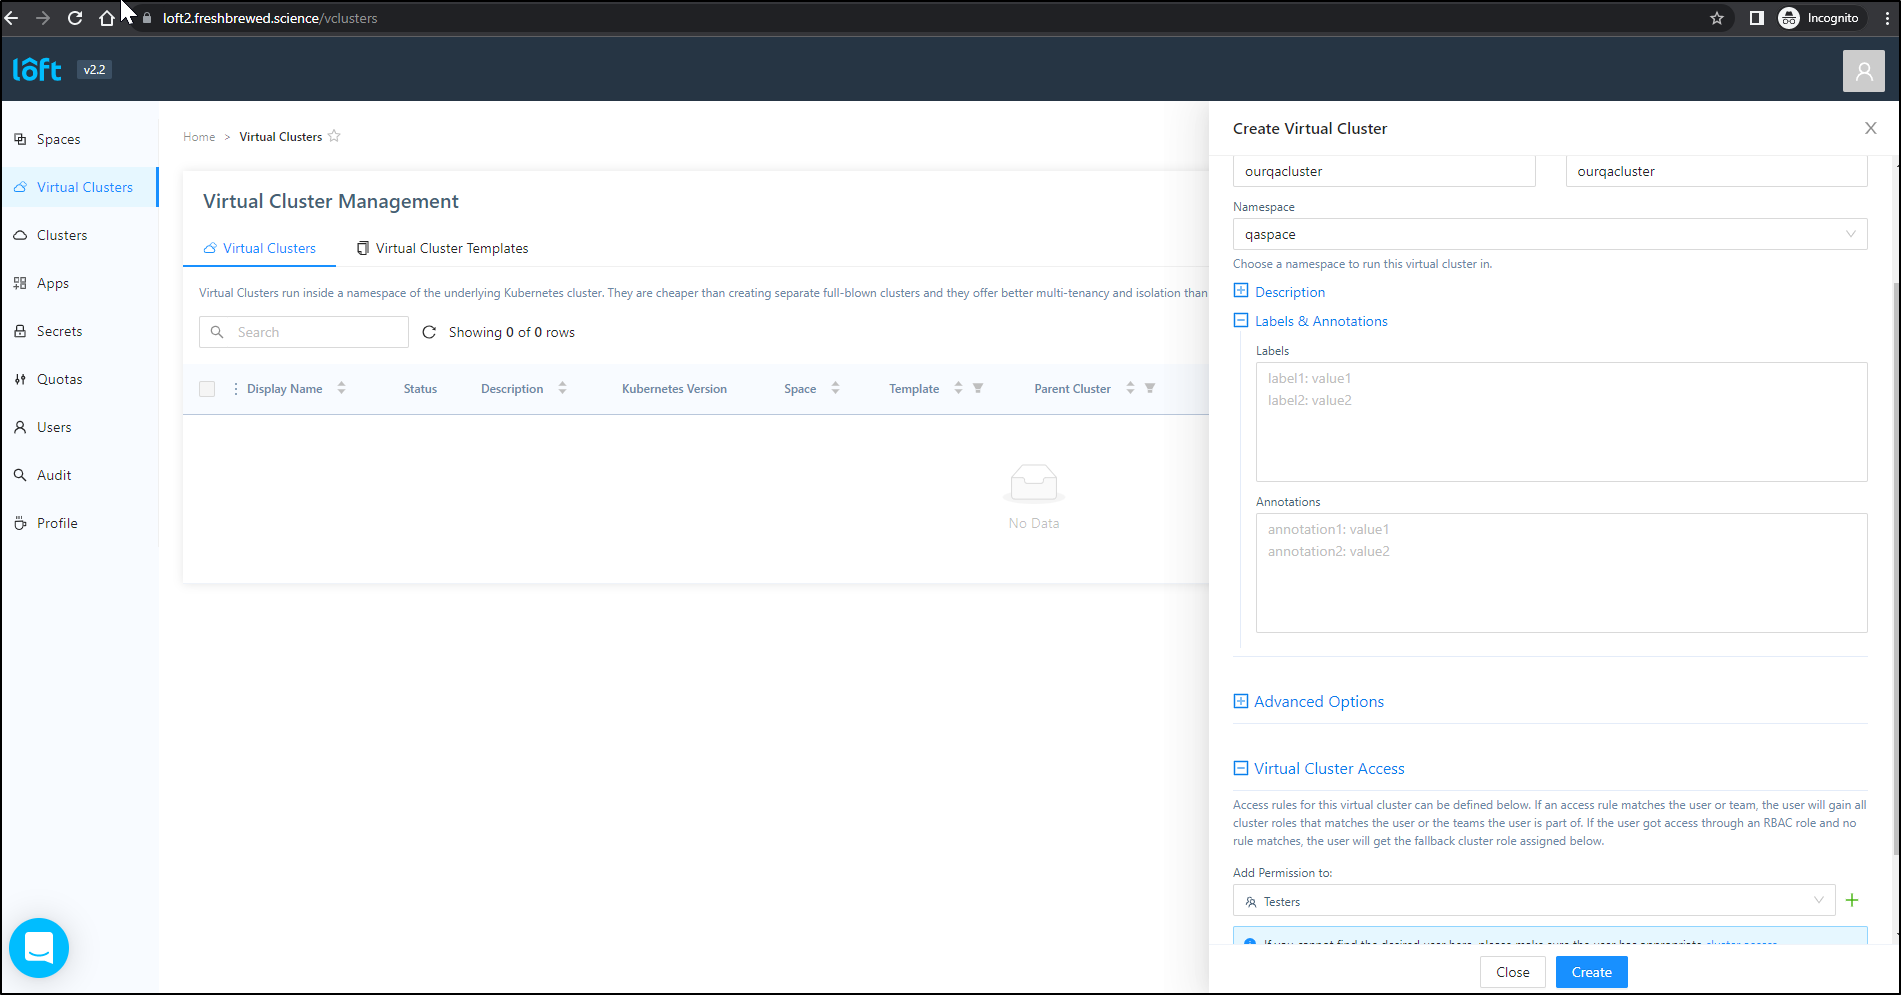
and it works
Our QA user can also view, but not edit, their quotas
Accessing
Besides the Loft UI, we can get a port-forward and a local kubeconfig to use
$ loft connect vcluster ourqacluster -n qaspace
[done] √ Virtual cluster kube config written to: ./kubeconfig.yaml. You can access the cluster via `kubectl --kubeconfig ./kubeconfig.yaml get namespaces`
[info]   Starting port forwarding on port 8443:8443
Forwarding from 127.0.0.1:8443 -> 8443
Forwarding from [::1]:8443 -> 8443
Handling connection for 8443
and now I can use the generated kubeconfig to get at the virtual cluster directly
$ kubectl --kubeconfig ./kubeconfig.yaml get namespaces
NAME              STATUS   AGE
default           Active   20m
kube-system       Active   20m
kube-public       Active   20m
kube-node-lease   Active   20m
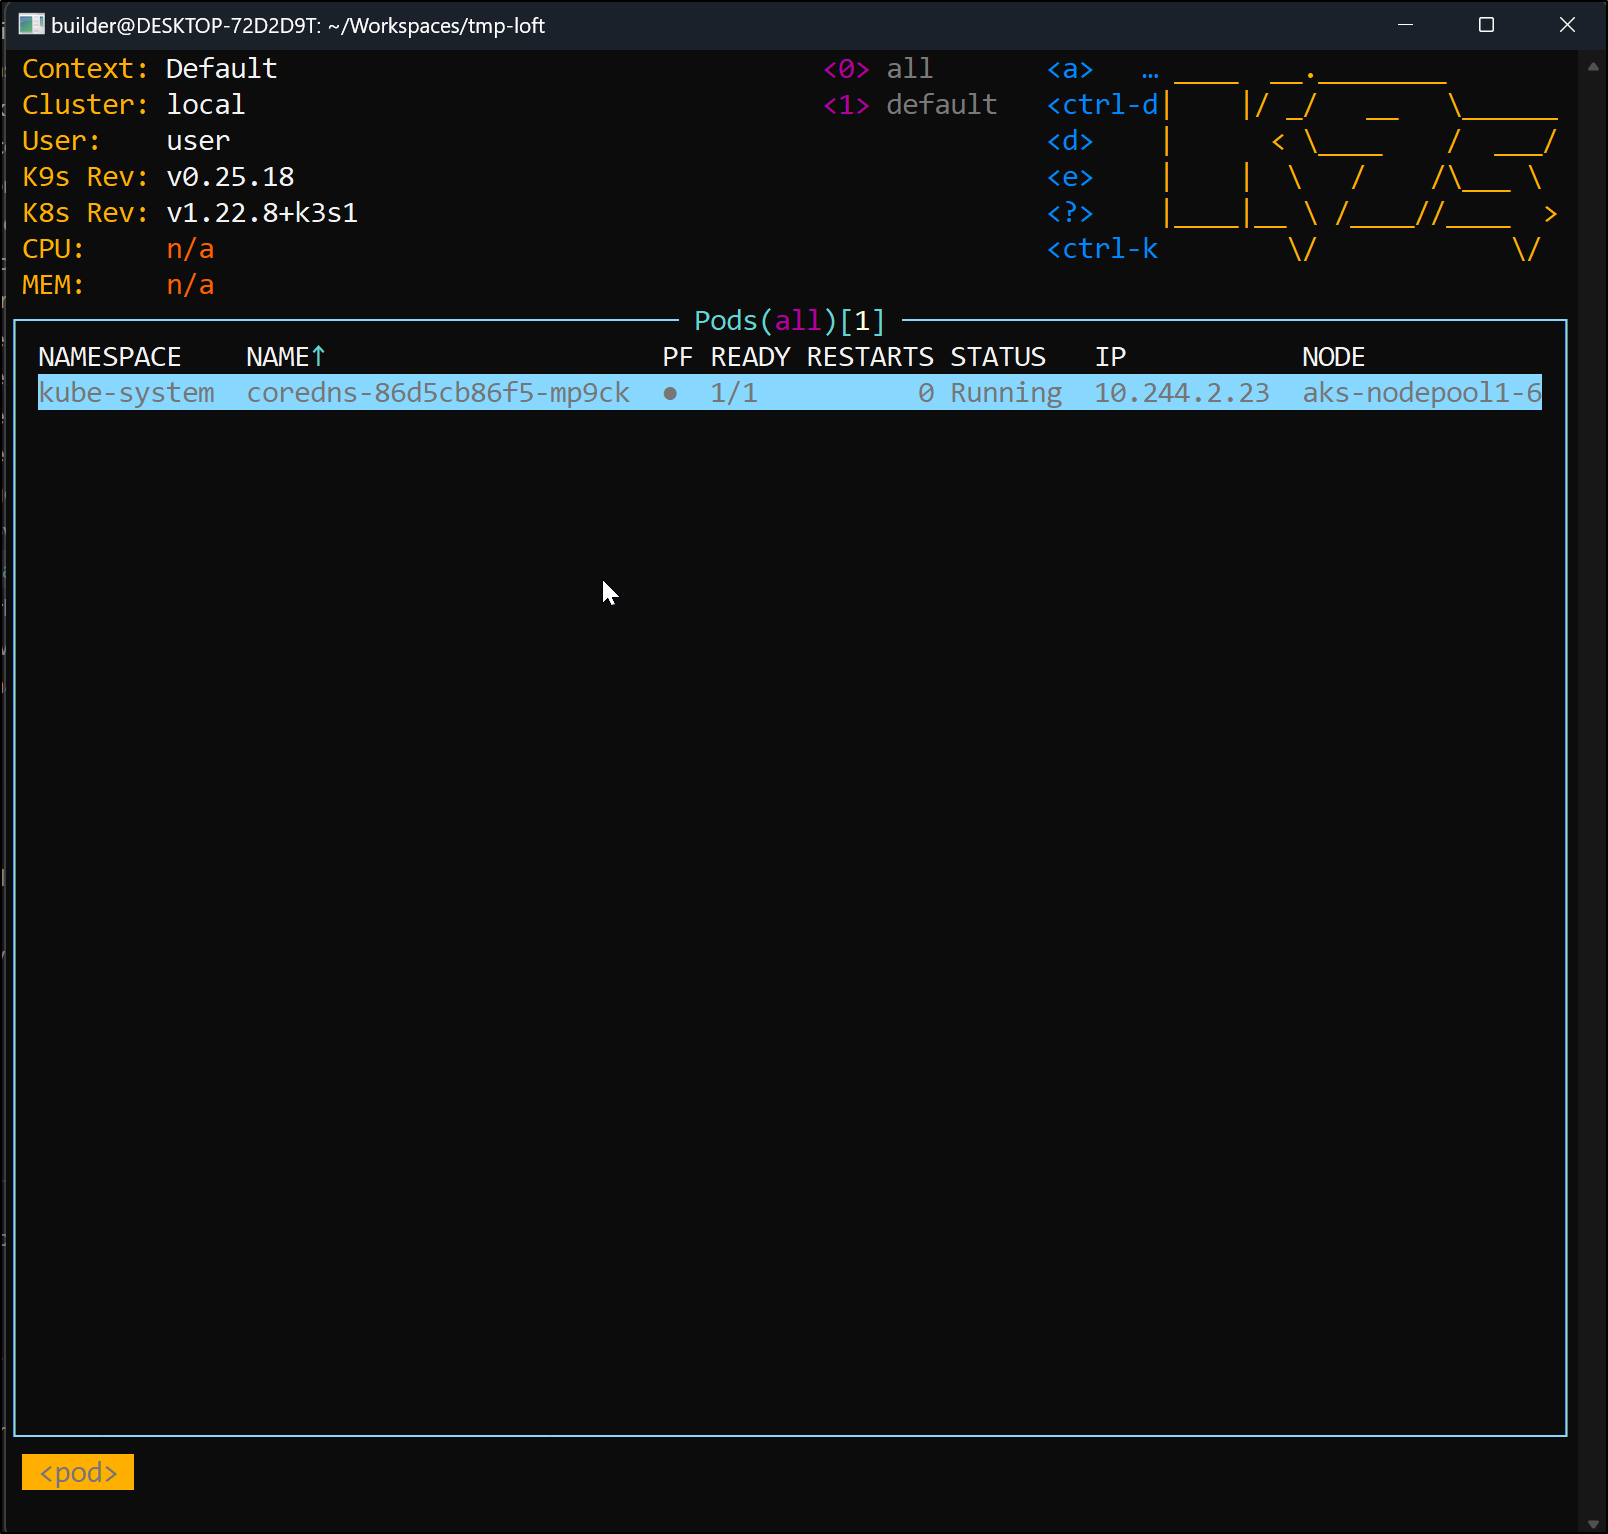
And we can use the Kubeconfig for things like k9s
$ k9s --kubeconfig ./kubeconfig.yaml
Summary
We just scratched the surface with Loft.sh. I liked how the there was a fast path to installing but knowing that it installed with Helm made it easy to switch from the CLI deploy/start to chart.
Adding TLS was fine, after I realized my mistake (missing NGinx). We showed Virtual Clusters and then having teams with Quotas creating virtual clusters.
We also showed how to access virtual clusters via the web UI and command line.
Loft.sh certainly makes it easy to create and manage clusters and users. Next, I’ll want to dig into SSO and how we use shared secrets and Apps.