Let’s get started making the pipeline. Microsoft will likely suggest the best way is to use the YAML editor, but generally I find it cumbersome and unintuitive. So we’ll use the much easier graphical interface.
From Builds, choose “New Build Pipeline”
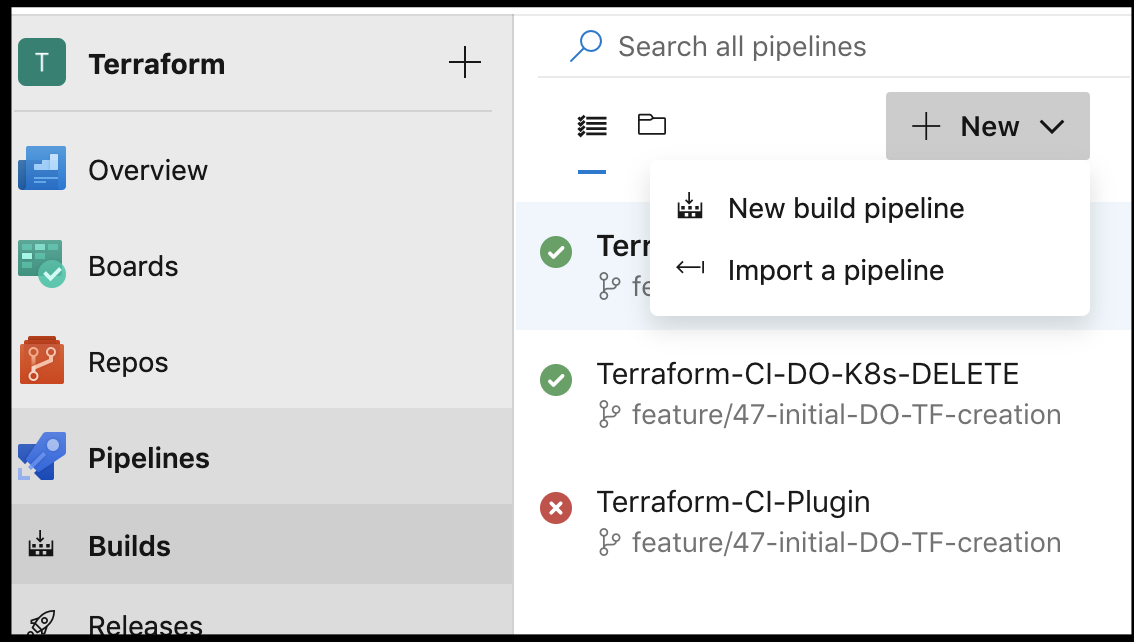
In the next screen choose the classic editor:

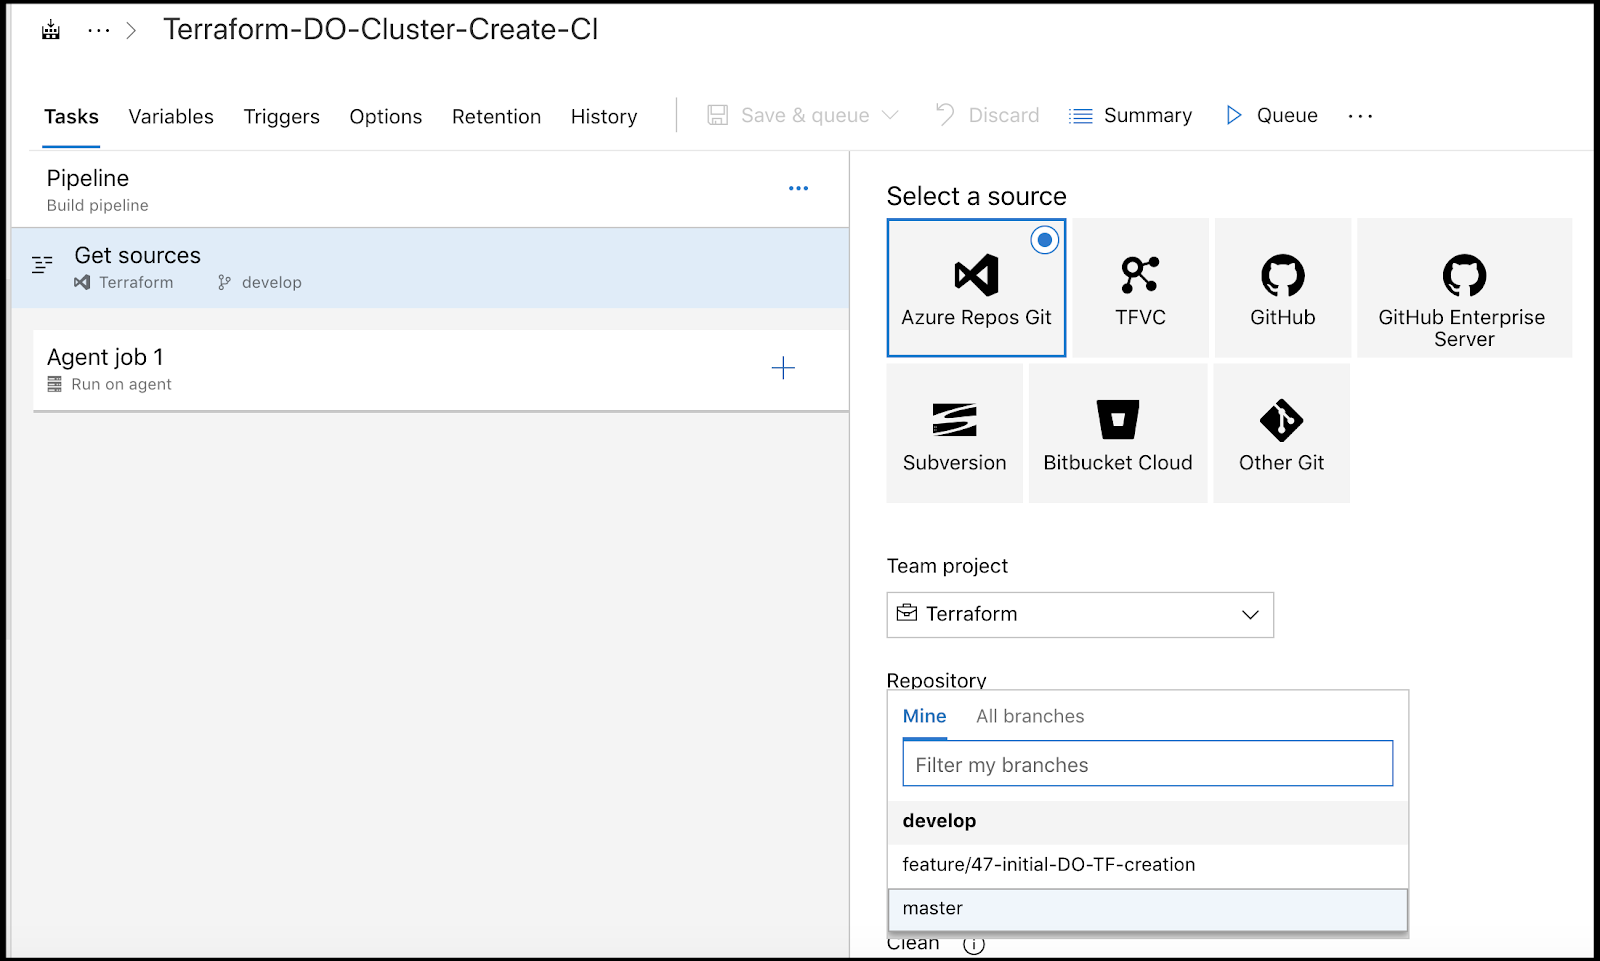
In the next section, we’ll go with the Default Azure Repos and our Terraform repo with develop branch. Of course, you can use Github if you prefer.

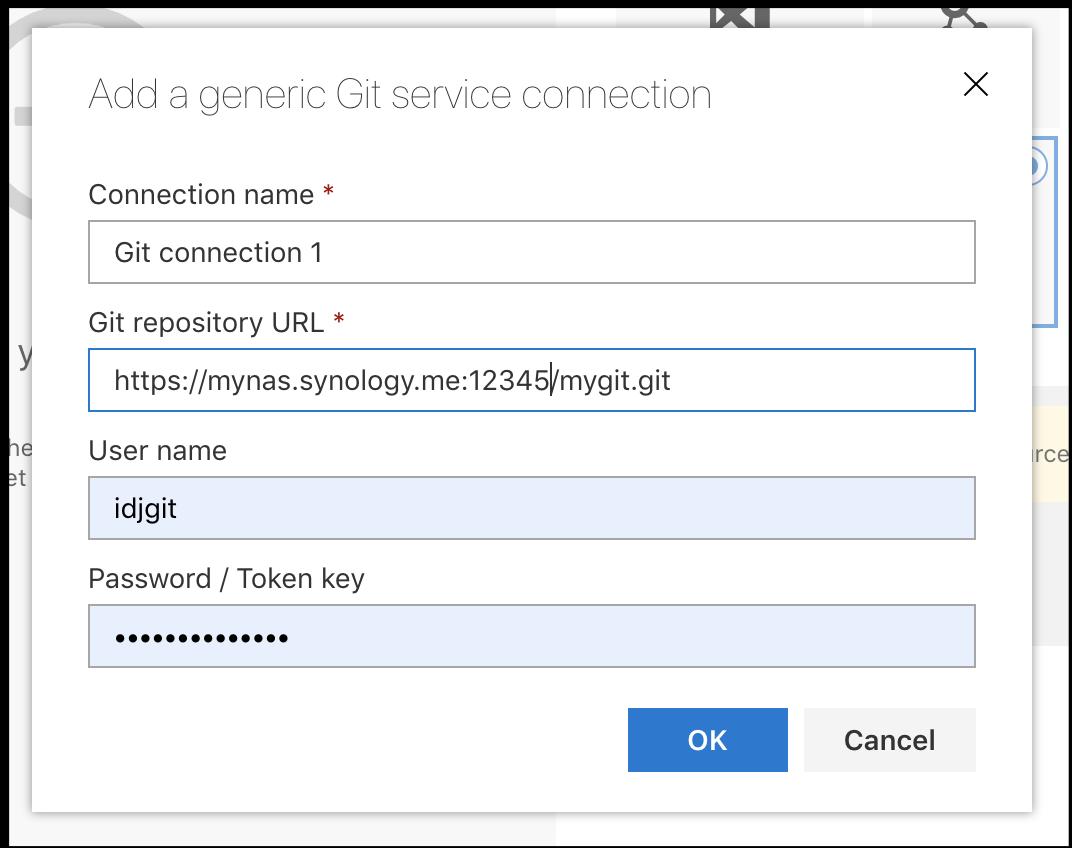
And you can, of course, use Other Git for pretty much any other provider (you could even use a home NAS):
And in the next screen you’ll be asked to choose a template and, once again, they want to get you to use YAML… but we’ll pick just an “Empty job”:

I put this on LinkedIn a while back, but i’ll repeat it here:

So now we have a basic pipeline that does nothing.
The first thing i like to do is rename it to something that more clearly defines what this pipeline does. You can use the edit link when you hover near the name or the Name field on the right:

The next thing i’ll want to do is set the Agent Pool to Ubuntu:

In the “Get Sources” section, we can change to our feature branch if we want to test building on that before moving to “develop”
Next I like to rename the “Agent job 1” to something that makes more sense. By habit i name them after the agent type so I don't forget. This is also a good time to save your pipeline. Make sure to use “save” not “Save & Queue” lest you fire a build prematurely.

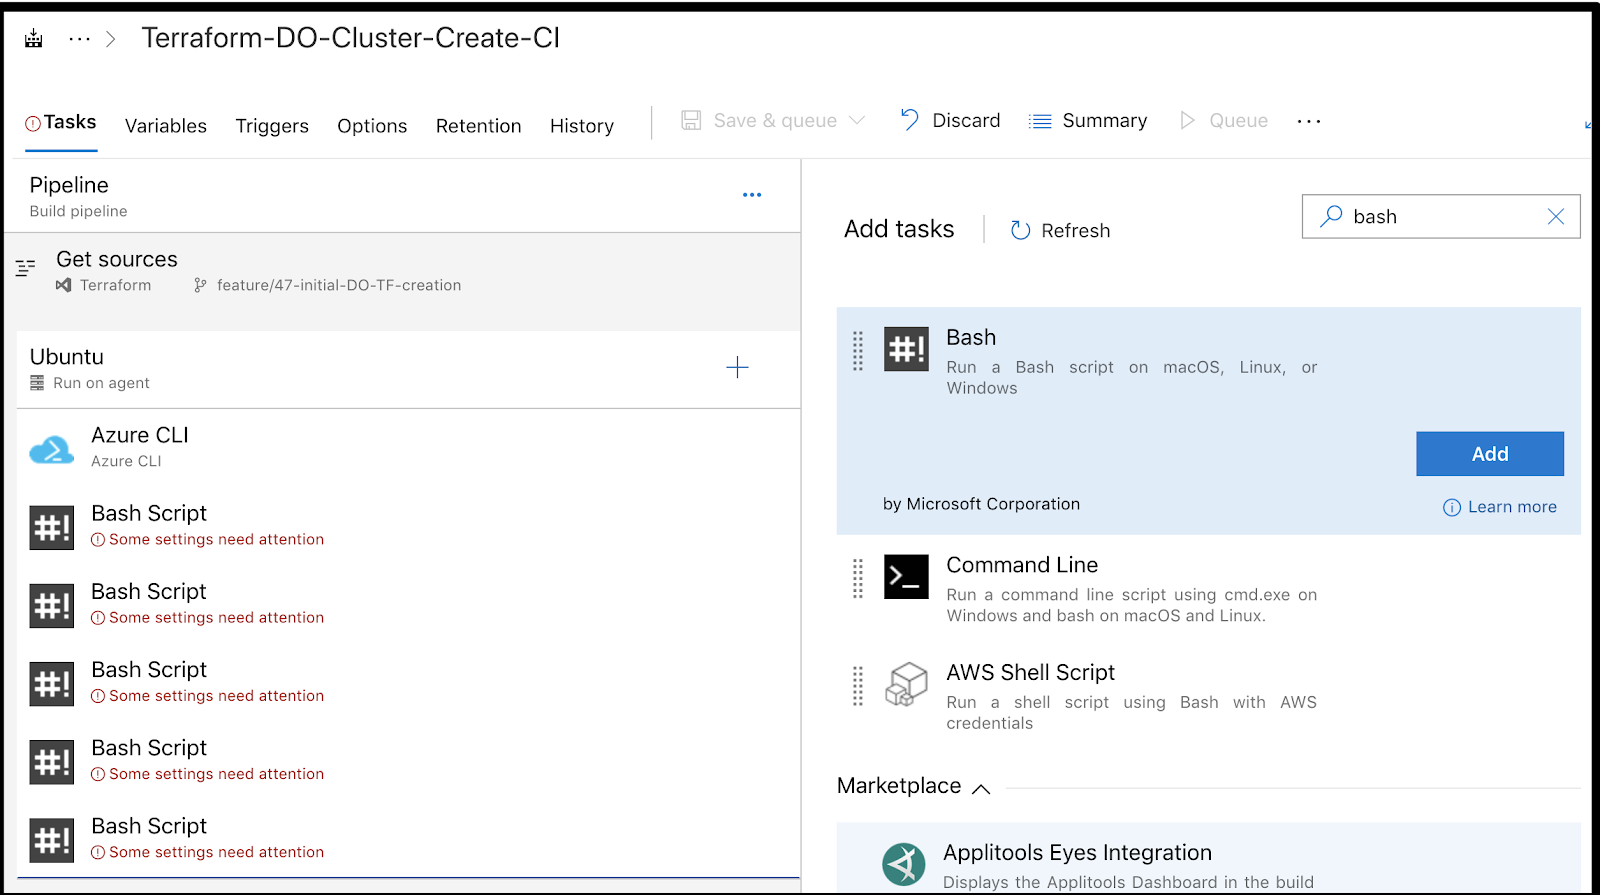
Next we will add our first task. Choose the “+” then search for Azure CLI and click Add. This pattern we’ll be doing a lot:

Here we see clearly marked all the required fields. These visual hints are quite useful as we start to create pipelines:

We will pick our Azure Sub (we created as a service connection in Part 1). We’ll switch from “Script path” to “Inline Script” and use the following
az storage account keys list --account-name $(accountName) --resource-group $(accountRG) -o json > keys.json

Let’s go take care of those pipeline variables next.
The easy way is to just create some build variables:

However, there is a better way.
Managed Variable Groups
Go to Library (you’ll need to save your pipeline at this point), and choose to create a new variable group with “+ Variable Group”

Here we can create two state storage vars to re-use in both our initial pipelines:

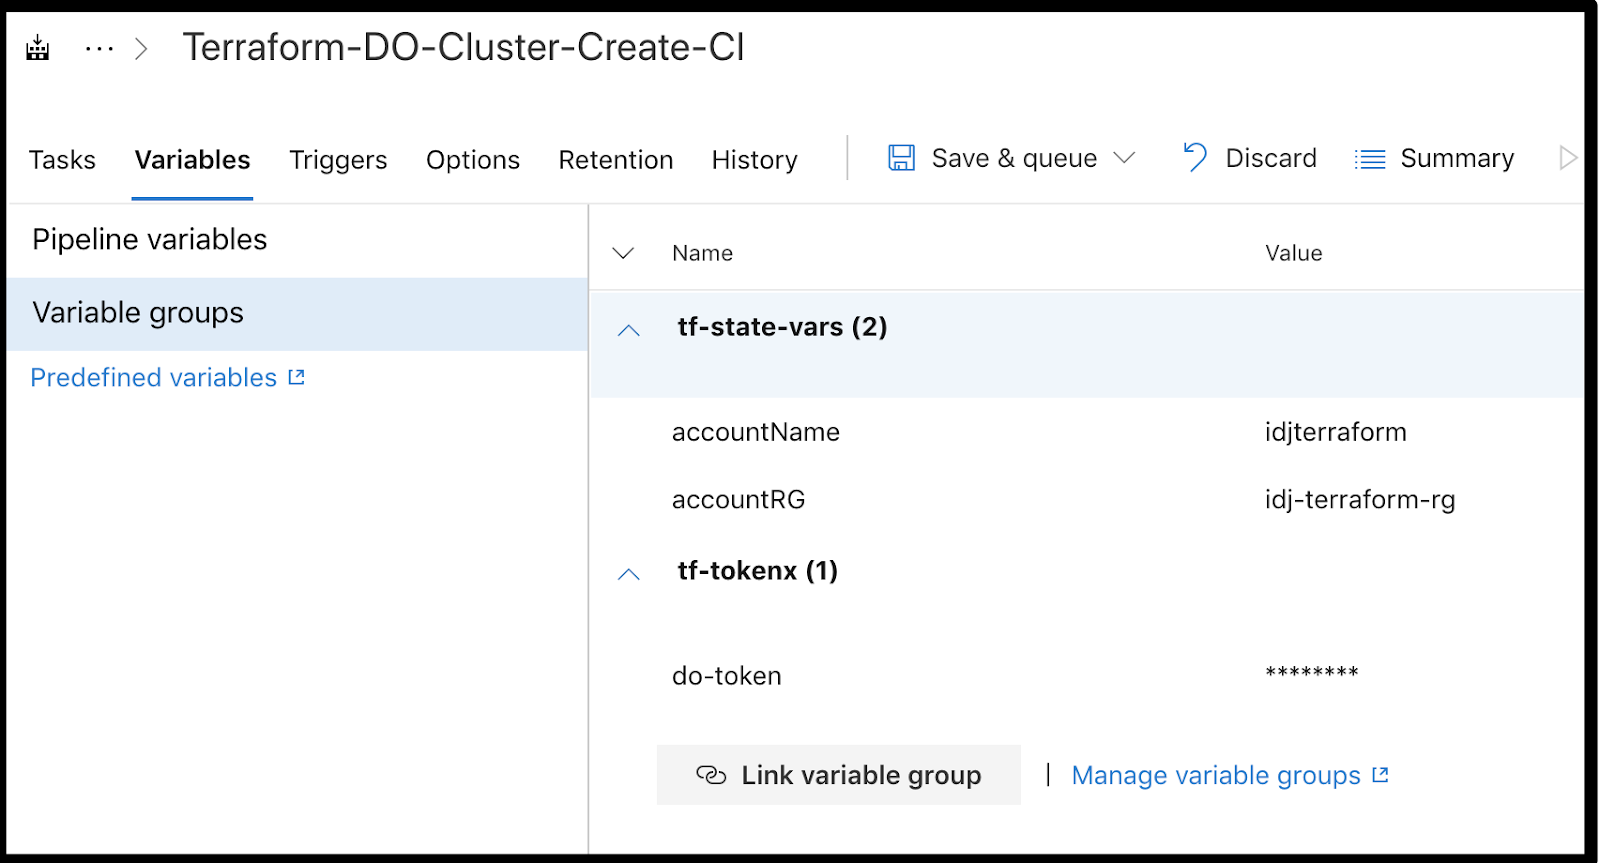
Now when we go back to our pipeline, we can link the managed variable group:

As a sanity check, we can expand it and see the variables created are there:

In part 1 we created a Key Vault entry for our token. Now we will want to access AKV as well.
In the same way we created our managed variables for the name and RG, we create a variable group for the token, only this time we choose to “Link secrets from an Azure key vault as variables”. Usually the first time you do this, you need to authorize the DevOps service principal to access the Vault:

Note: i have had troubles in the past with this so if you can’t get the Authorize to work via the Azure DevOps UI, go to the Azure Portal, lookup your AKV and add a policy for your AzDO instance manually:

At the bottom of the tf-tokenx managed variable entry, click “+ Add” and choose the do-token we created in part 1:

Which should result in your Managed Variable Group looking like this:

Save it and add it to the build job:
Now let’s go back and add a few bash scripts. I like do a bunch at once to save time:
Bash #1: set the storage key:
#!/bin/bash

set +x

export tval=`cat keys.json | grep '"value": "' | sed 's/.*"\([^"]*\)"/\1/' | tail -n1`
echo "##vso[task.setvariable variable=AZSK]$tval" > t.o

set -x

cat ./t.o

I want to explain what is happening here.

As we see in keys.json - the file created from the keys list, we dump the access keys for the storage account. Then in the next step (export tval=...) we cat them and look for value lines, strip out the double quotes and just save one (you could use head -n1 or tail -n1).. The last step of echo “##vso[task.setvariable …” is how we can ‘bubble up’ a value from bash back into the AzDO pipeline.
From my own experience, i have found the way bash works on the Ubuntu and Windows Server hosted agents is a different so the set +x (mute output) then a set -x (verbose out) with the cat of the setvar is the one way that works on all the MS Hosted Agents.
Do each of the following as bash steps like above:
[1] Create tf vars
This is to set a minimum set of terraform vars so TF knows were to stash the state file
#!/bin/bash
set -x
umask 0002

cat > $(Build.SourcesDirectory)/backend.tfvars <<'EOL'
storage_account_name = "$(accountName)"
container_name = "terraform-state"
key = "do-k8s.terraform.tfstate"
access_key = "$(AZSK)"
EOL
[2] cd and tf init
Cat the vars just for sanity output, then perform our terraform init
#!/bin/bash

set -x

export

cat $(Build.SourcesDirectory)/backend.tfvars

cd terraform/do_k8s

terraform init -backend-config=$(Build.SourcesDirectory)/backend.tfvars
[3] cd and tf plan
Run terraform plan to check the state against the plan and propose actions (creating a plan file in tfplan). FYI - don’t get fancy on your terraform plan name. I had some issues when i a used a .tf extension as terraform thought that was a recipe, not a calculated plan. Best to use a flat name for plan files
#!/bin/bash

set -x

cd terraform/do_k8s

terraform plan -var="do_token=$(do-token)"  -no-color -input=false -out tfplan
[4] cd and tf apply
We will now run the apply in a non-interactive way. Make sure to use input=false and auto-approve or your pipeline will hang waiting on user input
#!/bin/bash

set -x

cd terraform/do_k8s

terraform apply  -no-color -input=false -auto-approve ./tfplan
At this point we have launched our cluster. Now we need to get the kubeconfig so we can actually use it.
[5] Get CONFIG file
CLUSTER_ID=$(terraform output cluster-id)
OUTFILE="config"
echo "getting cluster config for $CLUSTER_ID"
curl -X GET -H "Content-Type: application/json" -H "Authorization: Bearer ${TF_VAR_do_token}" "https://api.digitalocean.com/v2/kubernetes/clusters/$CLUSTER_ID/kubeconfig" > $OUTFILE
Our last step is just to publish pipeline artifacts. There are a couple ways you can accomplish this.
Note: if you need to rearrange steps, you can easily drag them with a click/hold/drag:

When done, you should have a completed build pipeline that looks like this:

We could stop here. This would create a k8s cluster and provide a kubeconfig file:

However, it’s more interesting to have a fully functional system first.
Cluster-Delete Build job.
Let’s go ahead and clone our build job

You’ll want to rename from “Create-CI” to “Delete”. You’ll also want to remove the last step (we aren’t publishing anything):

The resulting build job should look like this:

Now, this is fine, but wouldn’t it be nice if we could re-use some of these steps - specifically in a release pipeline? You were probably curious what the little blue check boxes on tasks could be used for. Now we can find out.
Task Groups
Click through all the steps and right click anywhere on them to “Create a task group”:

From there you can set default values

The resulting page will show the fields that need values set (those without default values)

We know the token, but for the AZSK we can put in junk just so we can save our pipeline:

Now we can do a couple changes to get rid of the AZSK as well as variablize the sub dir:
Change the create tfvars step to get the key and insert it in one bash command:
#!/bin/bash
set -x
umask 0002

export tval=`cat keys.json | grep '"value": "' | sed 's/.*"\([^"]*\)"/\1/' | tail -n1`

cat > $(main_path)/backend.tfvars <<EOL
storage_account_name = "$(accountName)"
container_name = "terraform-state"
key = "do-k8s.terraform.tfstate"
access_key = "$tval"
EOL

You’ll see the other change above, change all the Build.SourcesDirectory references to “main_path”
E.g. cat $(main_path)/backend.tfvars
We can also parameterize the path to our terraform.
E.g.
cd $(dir-of-tf)
instead of
cd terraform/do_k8s
If you did it right, you should now have these variables:

We can set the defaults as you see above:
Dir-of-tf:   terraform/do_k8s
Main_path:   $(Build.SourcesDirectory)
I know right now this may seem like a lot of extra work, but trust me there is a payoff.
Let’s save and head back to our Delete pipeline:
You’ll see the unnecessary variable is now removed and all the fields are filled out:

As you can see, our build pipeline is now much simpler.
Release Pipelines:
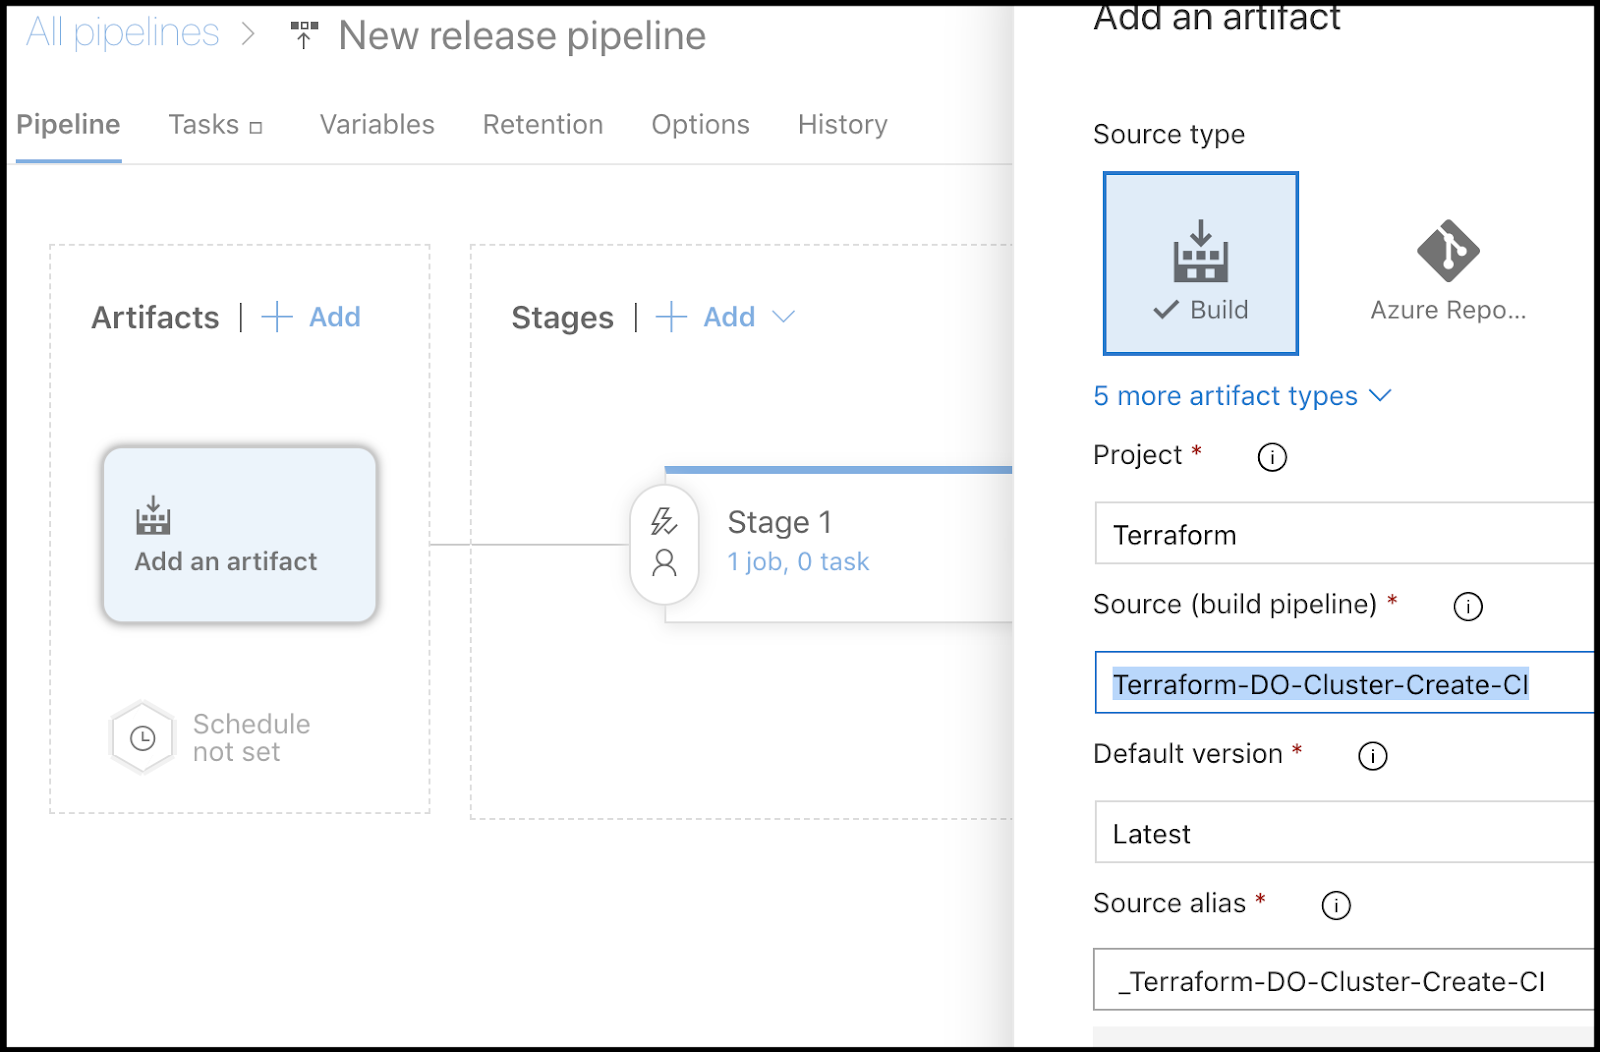
Go to Pipelines/Release and choose “+ New release pipeline”

In our new pipeline, let’s give it a name and change the first stage to be “Launch a chart”

We click on the blue text under “Launch a chart” to update the steps. Our first task will be to change the agent to Ubuntu (under “Agent Pool”)

You can create the Debug bash step if you want. I used it when creating this to get a lay of the land and see where my files were extracted, but it’s completely unnecessary.
find . -type f -exec ls -l {} \; -print

# ./_Terraform-CI-DO-K8s/drop/config
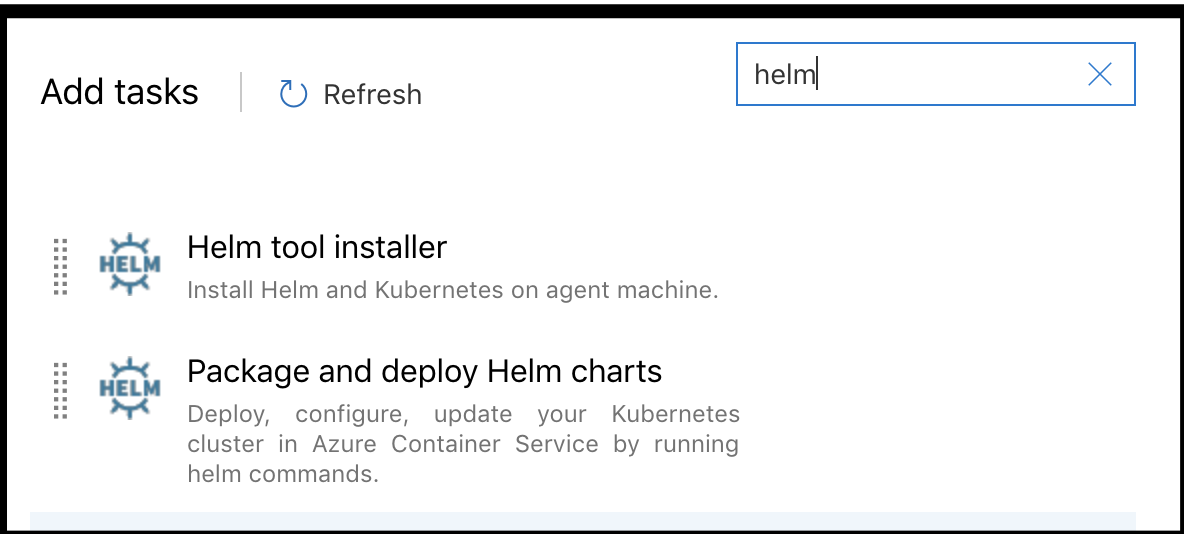
Add steps for Helm:
You can click “+” and search for Helm. We’ll need to do both the first (Helm tool installer) and second (Package and deploy Helm charts):
Next we’ll add a Helm step to install the Helm client as well as install kubectl:

Helm init will setup (and upgrade if able) tiller:

Next we need to add a “Deploy to Kubernetes” step:

Here we’ll get the current running pods as a sanity check on the kubeconfig:
This essentially automates running:
kubectl get pods --all-namespaces --kubeconfig=./_Terraform-CI-DO-K8s/drop/config
Note - the first part of the path will match the name of your triggering CI pipeline
Next add a Bash step to complete RBAC:

kubectl create serviceaccount tiller --kubeconfig=./_Terraform-CI-DO-K8s/drop/config --namespace kube-system

kubectl create clusterrolebinding tiller-cluster-rule --clusterrole=cluster-admin --serviceaccount=kube-system:tiller  --kubeconfig=./_Terraform-CI-DO-K8s/drop/config

kubectl --kubeconfig=./_Terraform-CI-DO-K8s/drop/config patch deploy --namespace kube-system tiller-deploy -p '{"spec":{"template":{"spec":{"serviceAccount":"tiller"}}}}'
Next add a helm install step to install sonarqube:

Lastly you can do helm ls to show your chart details:

After saving go back to the stage to add another stage:

Call it Delete Cluster and add a step. Here is where our Task Group creation steps will pay off:

Now fill in the details:

Note the key differences:
The dir-of-tf matches the “drop” file directory:
_Terraform-CI-DO-K8s/drop
And the main_path isnt a “build” path but the system default working dir:
$(System.DefaultWorkingDirectory)
Let’s save and take care of a couple variables we skipped over:
First, we need to let kubectl (for all these steps) know where to find the config (lest we have to pass it in each step):

KUBECONFIG: ./_Terraform-CI-DO-K8s/drop/config
We also need to associate the token as we did in the build pipelines:

Another bit of housekeeping - we need to associate the build trigger or we’ll never automatically fire this Release pipeline. Click “+ Add”

Add a reference to the CI pipeline:
Next click the circle in the upper right of the artifact box to set CI enabled:

One final detail and we are done. Click the pre-deployment conditions oval. We want to set a pause before we delete the cluster. A 10 minute delay should do it.

Running it all…
Okay - we’ve created quite a lot. Let’s start testing some of it.
Let’s Queue a build:


We can hop over digitalocean to check the status of the cluster:

We can also click on the details of the queued build job to see it applying:

When the release pipeline triggers we can hop into there and see specifics as well:

We can see the cluster is up:

When we run delete, we can see the cluster is removed as well:

Lastly, here is an example of a sample run of the release pipeline:

Summary
We covered a lot in this tutorial. We dug into both build and release pipelines. We explored managed variable groups including those backed by key vault. We handled access to vaults, pre-deployment gates and CI triggers. Lastly, we explored Task Groups with variables for code reuse, how we setup RBAC and used helm to install sonarqube chart.
In the end we had a full end to end CI/CD solution that:
- Created a kubernetes cluster is a different cloud provider on demand
- Used it to launch a known helm chart
- Paused, and then removed the entire cluster
As you can imagine, we could expand this to test anything, be it a container image, helm chart or anything one needs to launch into a pristine cluster.