

Published: Dec 7, 2023 by Isaac Johnson
Today we’ll look at a few useful containerized tools I find rather useful. Pashword for password hashing, {php}IPAM which has been around a long time, and lastly Filebrowser, a slick list OS tool that has been around at least 7 years. I only recently discovered this one and thoroughly enjoy it.
Pashword
Pashword is a nifty fully open-sourced password hash generator. It’s easy to run as a container.
First, let’s try just running the container on my dockerhost
builder@builder-T100:~$ docker run -p 3200:3000 --name pashwordtest peppershade/pashword:dev
Unable to find image 'peppershade/pashword:dev' locally
dev: Pulling from peppershade/pashword
213ec9aee27d: Already exists
4235e034d74f: Pull complete
33d6c3ba58fd: Pull complete
deebb336959c: Pull complete
1ff71f500ef1: Pull complete
e6a707c92640: Pull complete
Digest: sha256:958b99ec36b39cee96d5541e34c4a4f85ffaf6f3009fe58ef7a3b205840e311e
Status: Downloaded newer image for peppershade/pashword:dev

> start
> next start

ready - started server on 0.0.0.0:3000, url: http://localhost:3000
I can now test it locally
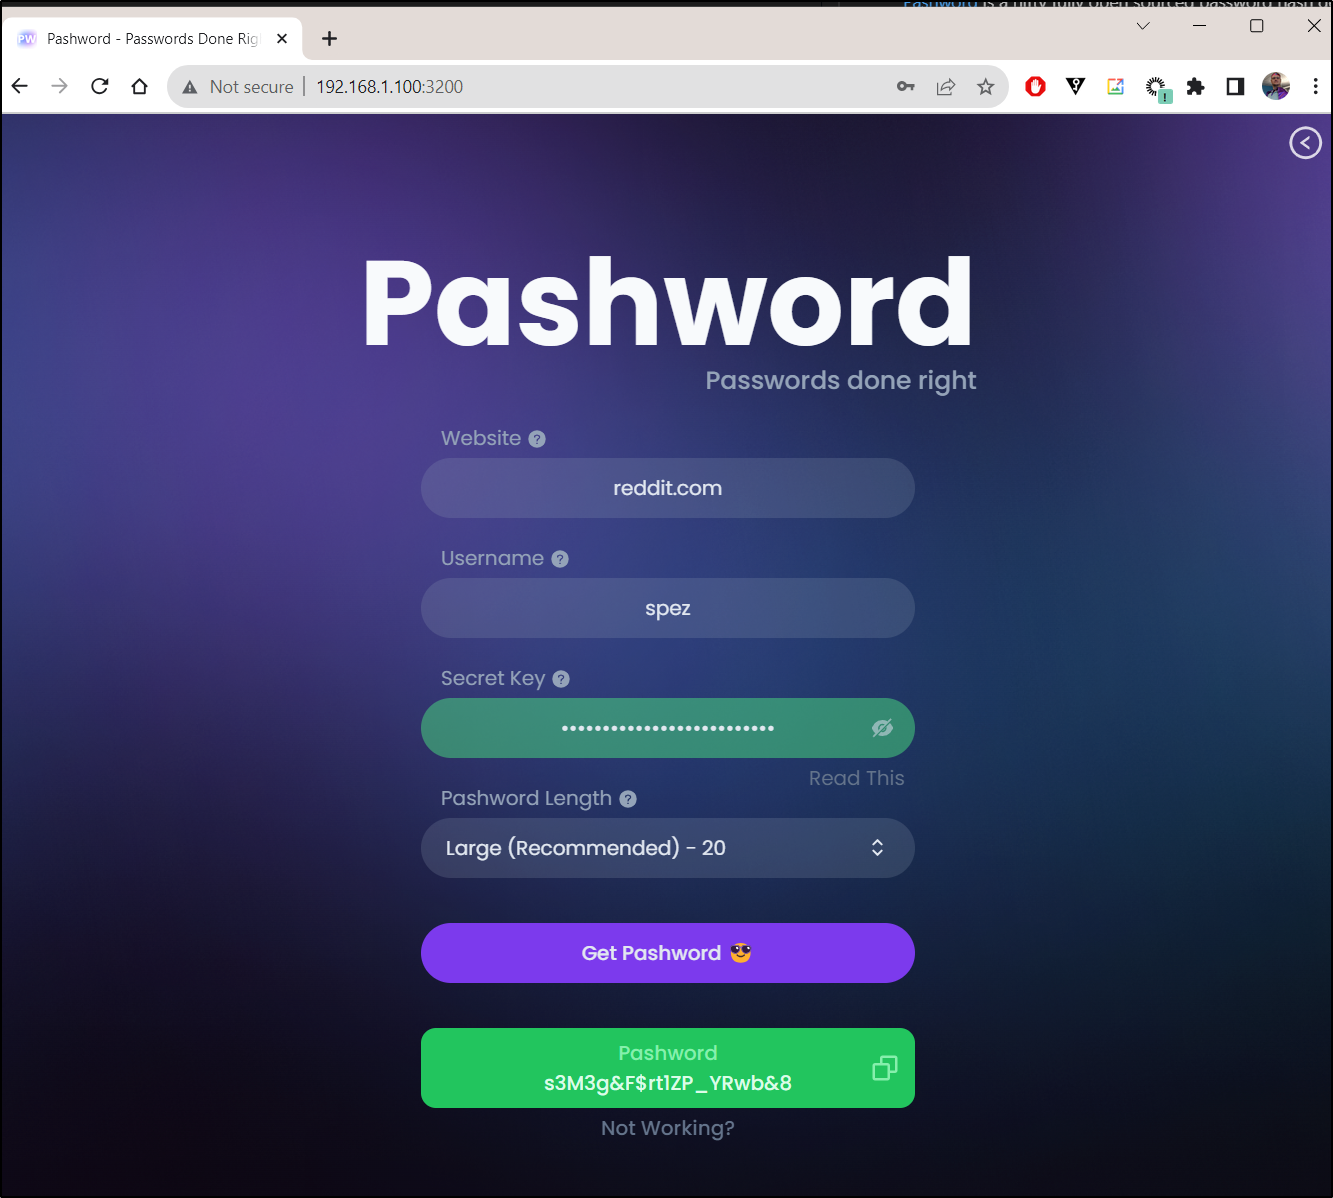
The idea of a Password Hash generator like this is that if you take a known destination, with a username, and then a seed key (secret key) you can remember, you can generate a secure password. Then when you need to use it again, you’ll remember the pieces to generate again.
Like you might expect, my big issue here is that it’s internal only and lacks TLS.
We can solve that quickly by adding an A record for ‘pashword’.
$ cat r53-pashword.json
{
    "Comment": "CREATE pashword fb.s A record ",
    "Changes": [
      {
        "Action": "CREATE",
        "ResourceRecordSet": {
          "Name": "pashword.freshbrewed.science",
          "Type": "A",
          "TTL": 300,
          "ResourceRecords": [
            {
              "Value": "75.73.224.240"
            }
          ]
        }
      }
    ]
  }

$ aws route53 change-resource-record-sets --hosted-zone-id Z39E8QFU0F9PZP --change-batch file://r53-pashword.json
{
    "ChangeInfo": {
        "Id": "/change/C00944845714AI9ADLSG",
        "Status": "PENDING",
        "SubmittedAt": "2023-11-21T00:16:33.741Z",
        "Comment": "CREATE pashword fb.s A record "
    }
}
My next step is to create a Deployment, Service and Ingress object in Kubernetes YAML that will launch this:
$ cat pashword.yaml
---
apiVersion: apps/v1
kind: Deployment
metadata:
  name: pashword-deployment
spec:
  progressDeadlineSeconds: 600
  replicas: 2
  selector:
    matchLabels:
      app: pashword
  strategy:
    rollingUpdate:
      maxSurge: 25%
      maxUnavailable: 25%
    type: RollingUpdate
  template:
    metadata:
      labels:
        app: pashword
    spec:
      containers:
      - image: peppershade/pashword:dev
        imagePullPolicy: IfNotPresent
        name: pashword-container
        ports:
        - containerPort: 3000
          protocol: TCP
      restartPolicy: Always
      terminationGracePeriodSeconds: 30
---
apiVersion: v1
kind: Service
metadata:
  name: pashwordserver-service
spec:
  internalTrafficPolicy: Cluster
  ports:
  - name: http
    port: 80
    protocol: TCP
    targetPort: 3000
  selector:
    app: pashword
---
apiVersion: networking.k8s.io/v1
kind: Ingress
metadata:
  annotations:
    cert-manager.io/cluster-issuer: letsencrypt-prod
    ingress.kubernetes.io/proxy-body-size: "0"
    ingress.kubernetes.io/ssl-redirect: "true"
    kubernetes.io/ingress.class: nginx
    nginx.ingress.kubernetes.io/proxy-body-size: "0"
    nginx.ingress.kubernetes.io/proxy-read-timeout: "3600"
    nginx.ingress.kubernetes.io/proxy-send-timeout: "3600"
    nginx.ingress.kubernetes.io/ssl-redirect: "true"
    nginx.org/client-max-body-size: "0"
    nginx.org/proxy-connect-timeout: "3600"
    nginx.org/proxy-read-timeout: "3600"
    nginx.org/websocket-services: pashwordserver-service
  labels:
    app.kubernetes.io/name: pashword
  name: pashwordingress
spec:
  rules:
  - host: pashword.freshbrewed.science
    http:
      paths:
      - backend:
          service:
            name: pashwordserver-service
            port:
              number: 80
        path: /
        pathType: ImplementationSpecific
  tls:
  - hosts:
    - pashword.freshbrewed.science
    secretName: pashword-tls
I can now create the namespace and then launch it
$ kubectl create ns pashword
namespace/pashword created

$ kubectl apply -f pashword.yaml -n pashword
deployment.apps/pashword-deployment created
service/pashwordserver-service created
ingress.networking.k8s.io/pashwordingress created
I can see it launched
$ kubectl get deployment -n pashword
NAME                  READY   UP-TO-DATE   AVAILABLE   AGE
pashword-deployment   2/2     2            2           93s

$ kubectl get svc -n pashword
NAME                     TYPE        CLUSTER-IP      EXTERNAL-IP   PORT(S)   AGE
pashwordserver-service   ClusterIP   10.43.194.222   <none>        80/TCP    2m20s

$ kubectl get ingress -n pashword
NAME              CLASS    HOSTS                          ADDRESS                                                PORTS     AGE
pashwordingress   <none>   pashword.freshbrewed.science   192.168.1.215,192.168.1.36,192.168.1.57,192.168.1.78   80, 443   2m25s
which came up without issue
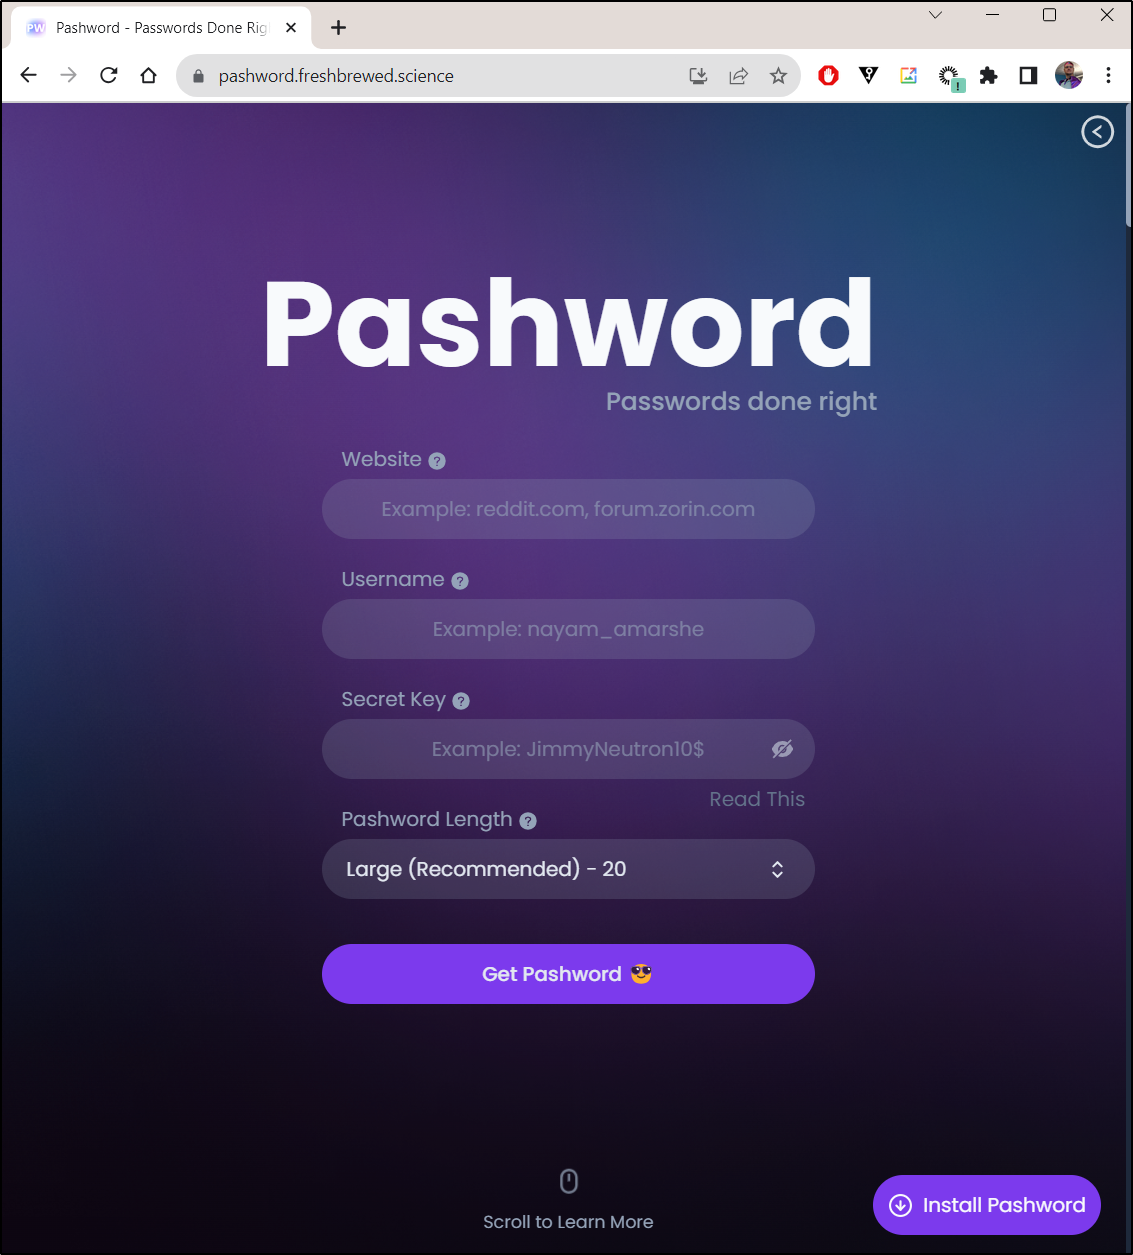
I tested a password I had created earlier and it came up with the same password. However, this time I have it secured with TLS.
I wouldn’t expect others to use it. In fact, any random website that “generates passwords” should always be treated as suspect. But I trust myself and so it’s a nice secured self-hosted password creator I can reach from on-prem, remote or on secured shared machines.
PHPIPAM
Phpipam was created in 2014 by Miha Petkovsek. It’s clearly a passion project as he has phpipam as his Github username.
I’ve used it at my current job for one of our BUs for some time, but had not realized how easy it was to install.
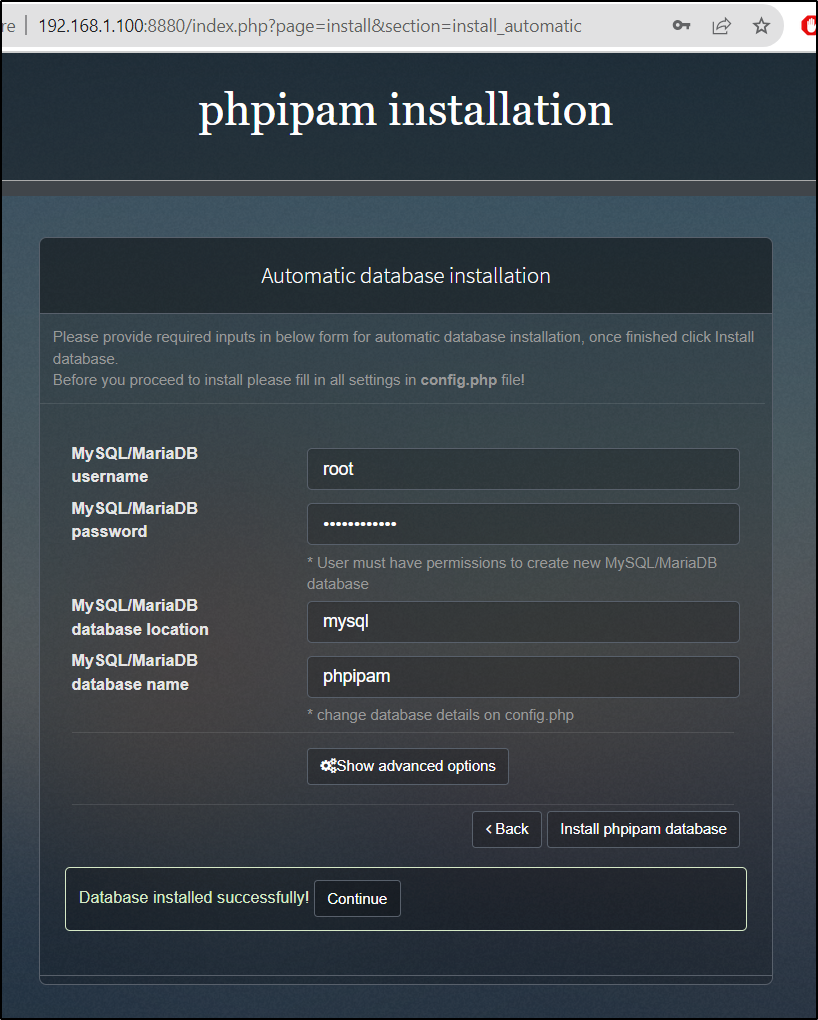
To start, we need to create a database and app container in our Dockerhub
$ docker run --name phpipam-mysql -e MYSQL_ROOT_PASSWORD=my-secret-pw -v /home/builder/phpiam/mysqlroot:/var/lib/mysql -d mysql:5.6
Unable to find image 'mysql:5.6' locally
5.6: Pulling from library/mysql
35b2232c987e: Pull complete
fc55c00e48f2: Pull complete
0030405130e3: Pull complete
e1fef7f6a8d1: Pull complete
1c76272398bb: Pull complete
f57e698171b6: Pull complete
f5b825b269c0: Pull complete
dcb0af686073: Pull complete
27bbfeb886d1: Pull complete
6f70cc868145: Pull complete
1f6637f4600d: Pull complete
Digest: sha256:20575ecebe6216036d25dab5903808211f1e9ba63dc7825ac20cb975e34cfcae
Status: Downloaded newer image for mysql:5.6
acd69511ada9c75cafec80425c418b6cdb0657cdeb0ad3132df1c596e05bff66
We can now launch the App container and link it to the MySQL
$ docker run -ti -d -p 8880:80 -e MYSQL_ENV_MYSQL_ROOT_PASS=my
-secret-pw --name ipam --link phpipam-mysql:mysql pierrecdn/phpipam
52c0289c7c735a1e269ad622af3bd67596f5dbdeb286168299933a50c00db627
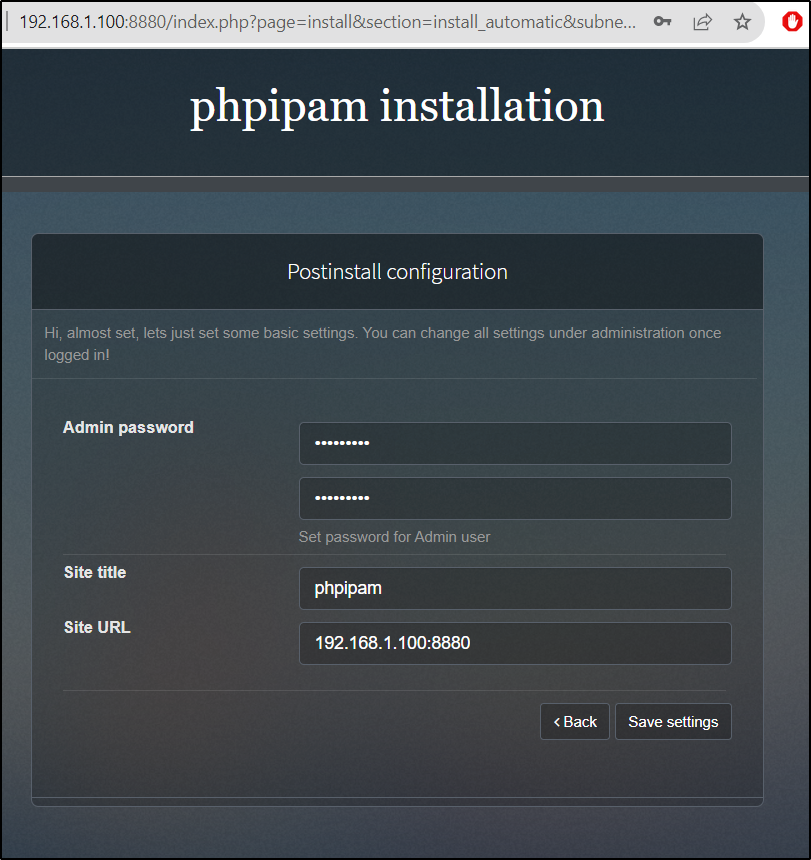
I can now go to the App at http://192.168.1.100:8880
I then created an admin user password
One of the first things I wanted to do was add my Ethernet network.
By default, phpipam will pick up the subnet of itself, but as I’m running in docker, that doesn’t help too much. Once added, I can click the scan button:
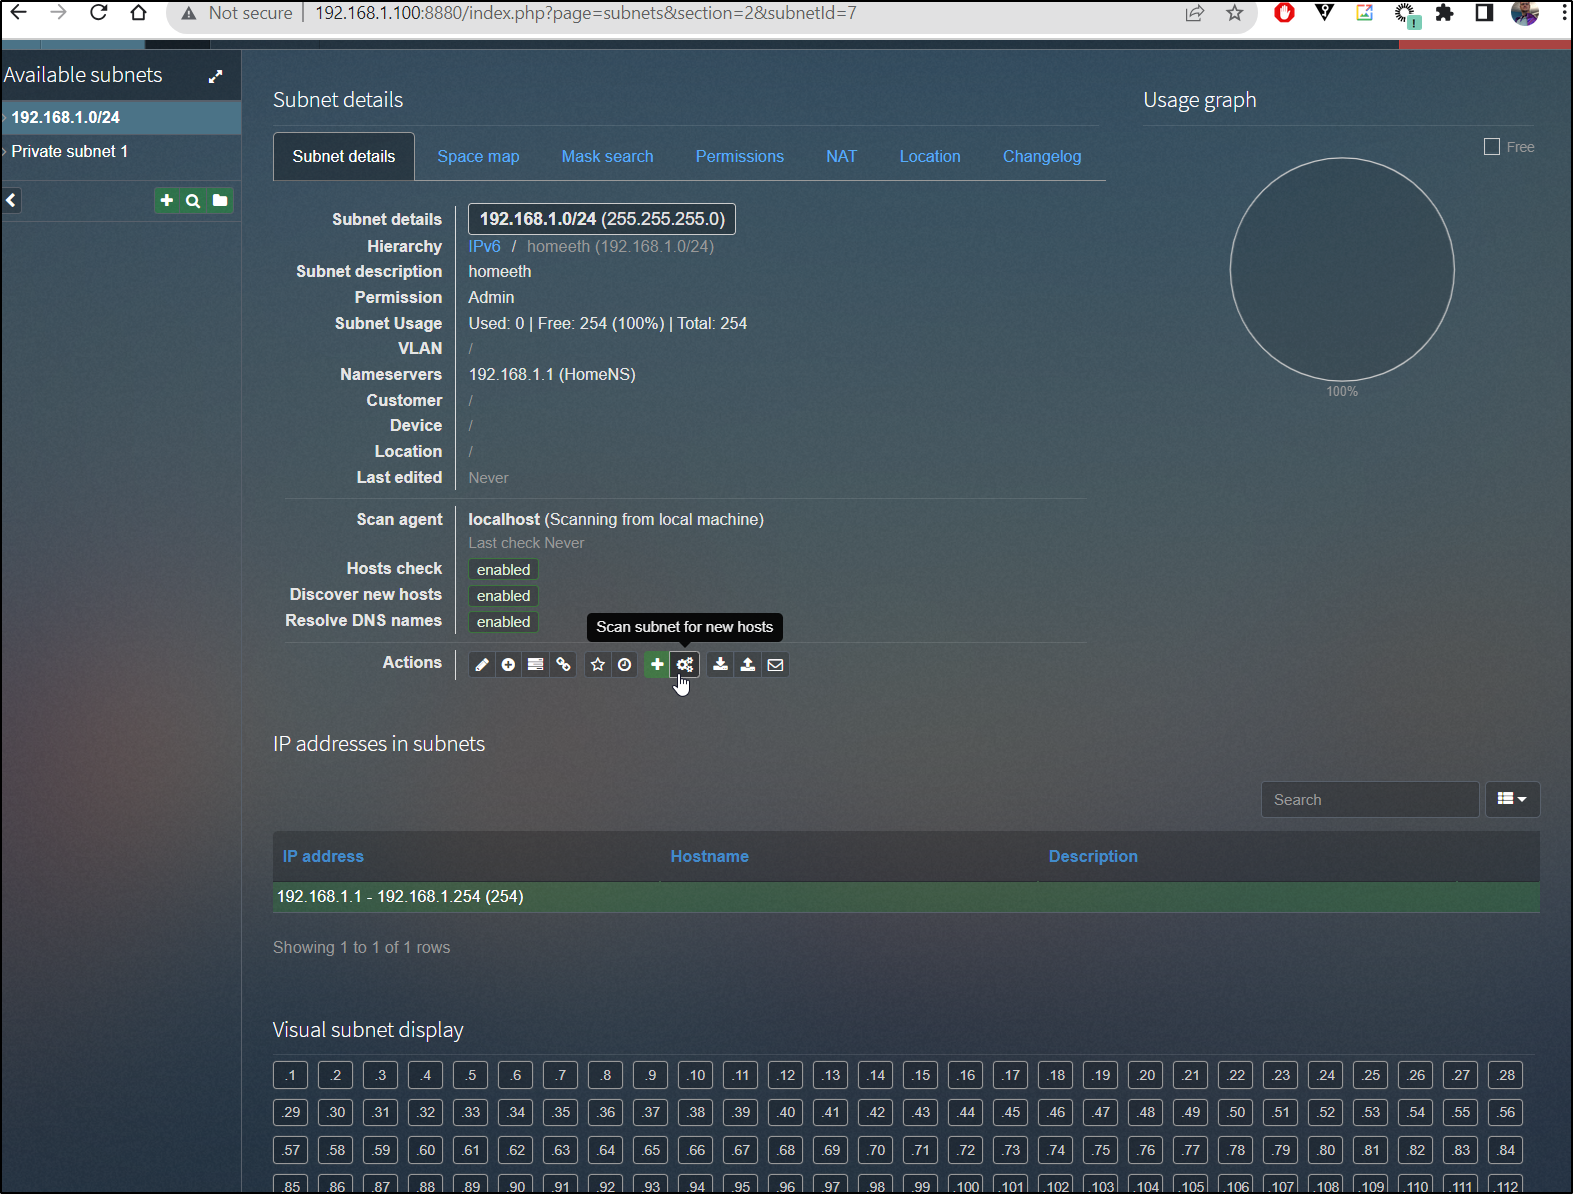
and tell it the type of scan (ping)
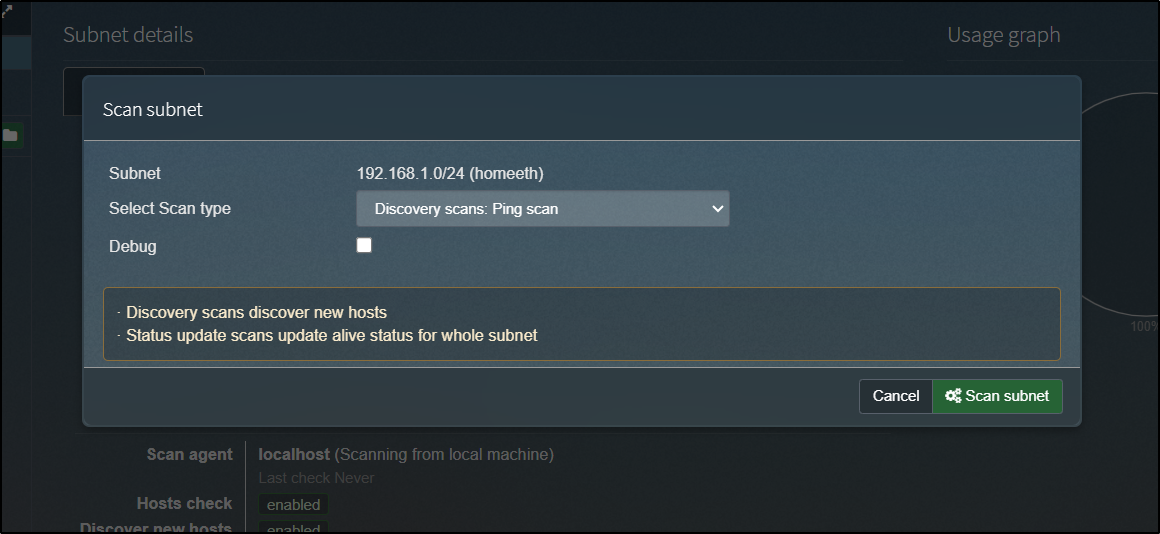
When done, we can see results of our network
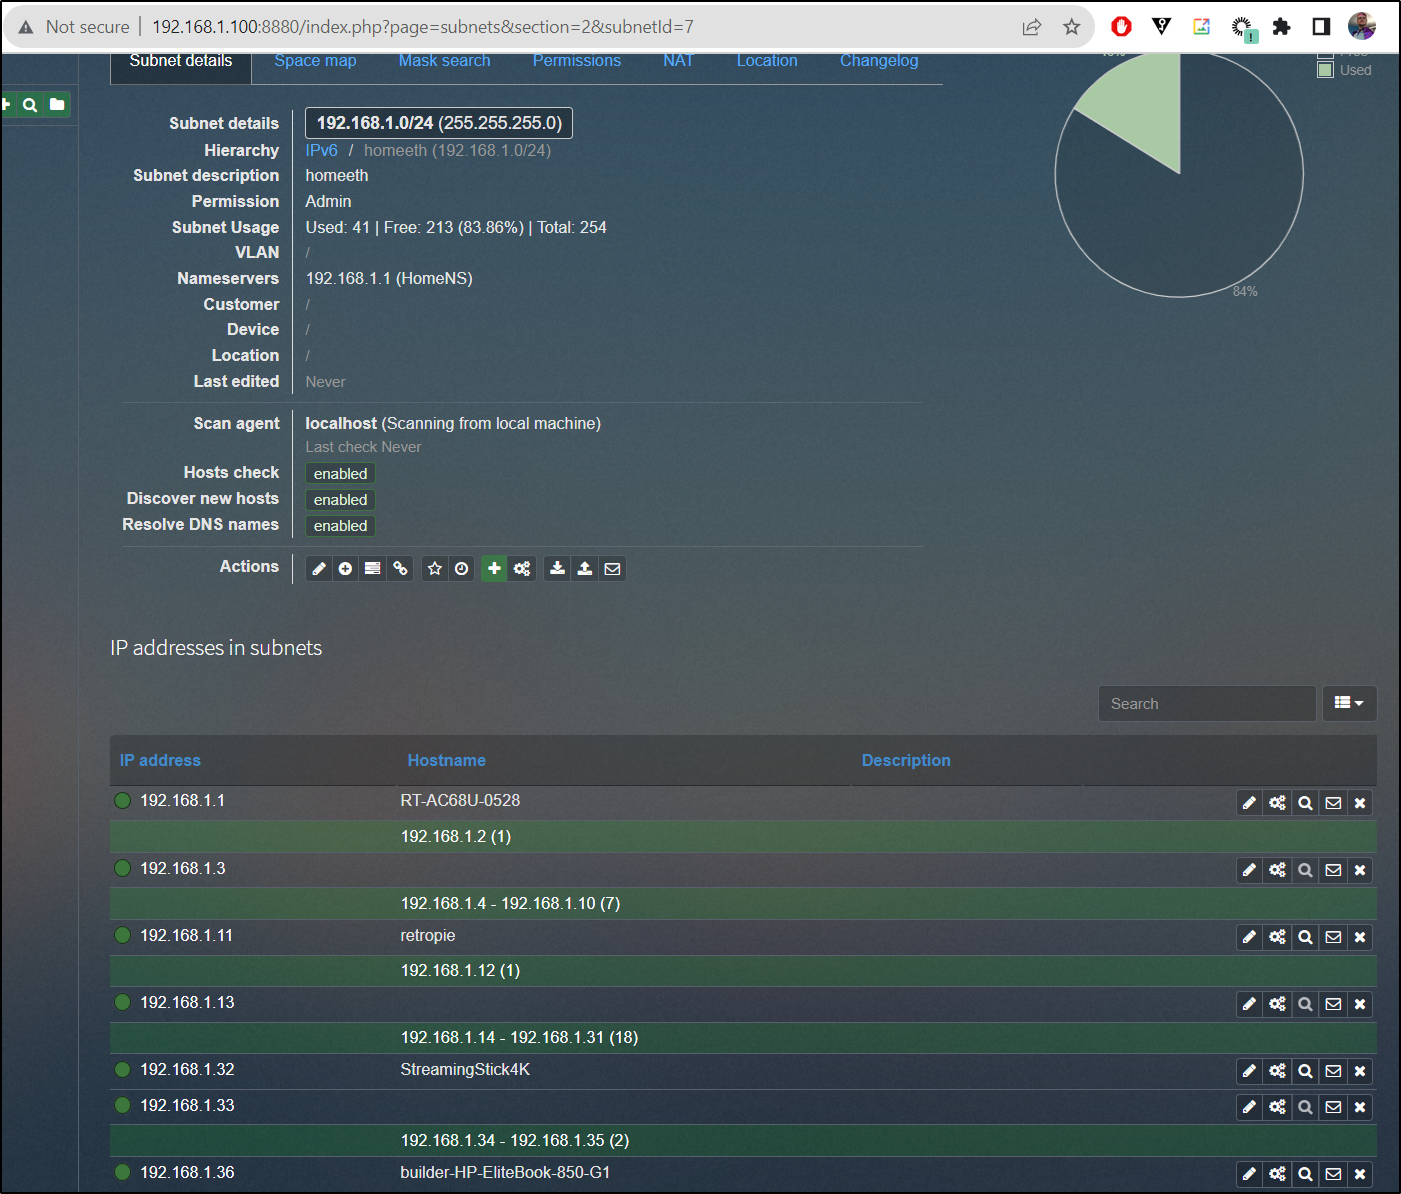
The whole reason I wanted to do this was to catch any network reassignments.
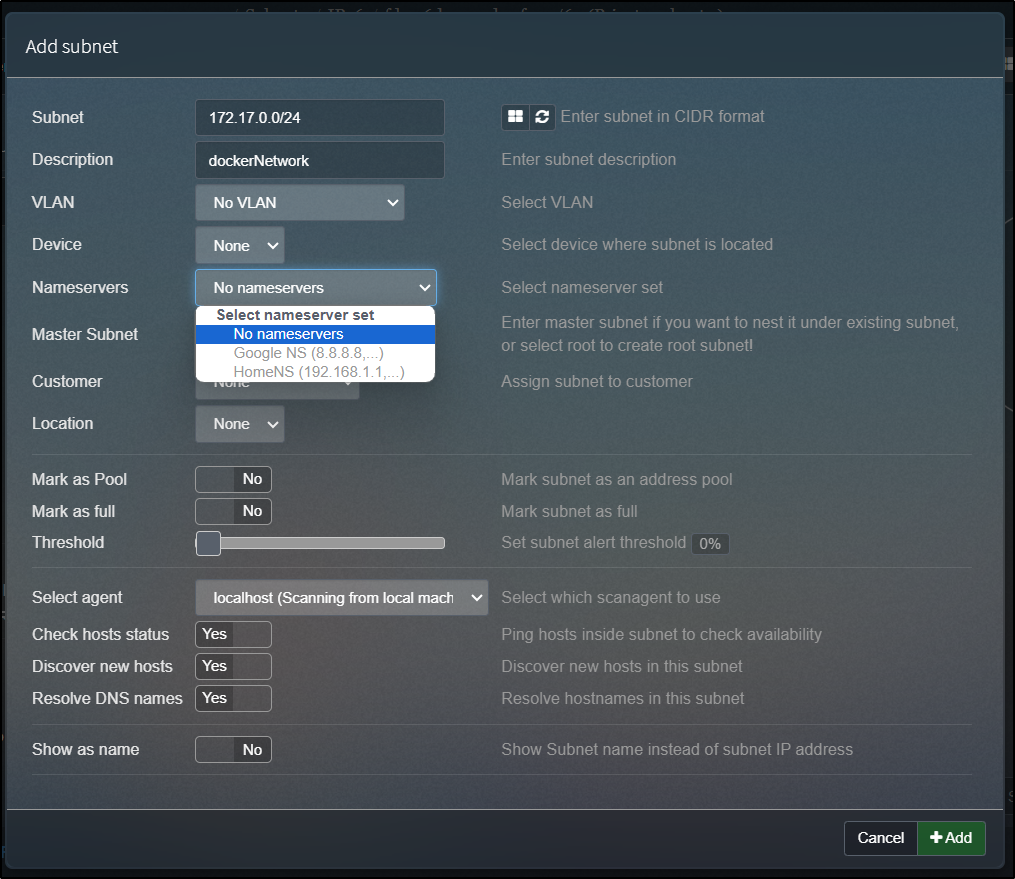
Make sure when adding a subnet to flip the toggle on “Check hosts status”, “Discover New Hosts” and “Resolve DNS names”. For the first subnet, i also added the gateway (router) which serves as my local nameserver
There are a couple utilities built in to PHPIPAM.
The first is the CIDR calculator:
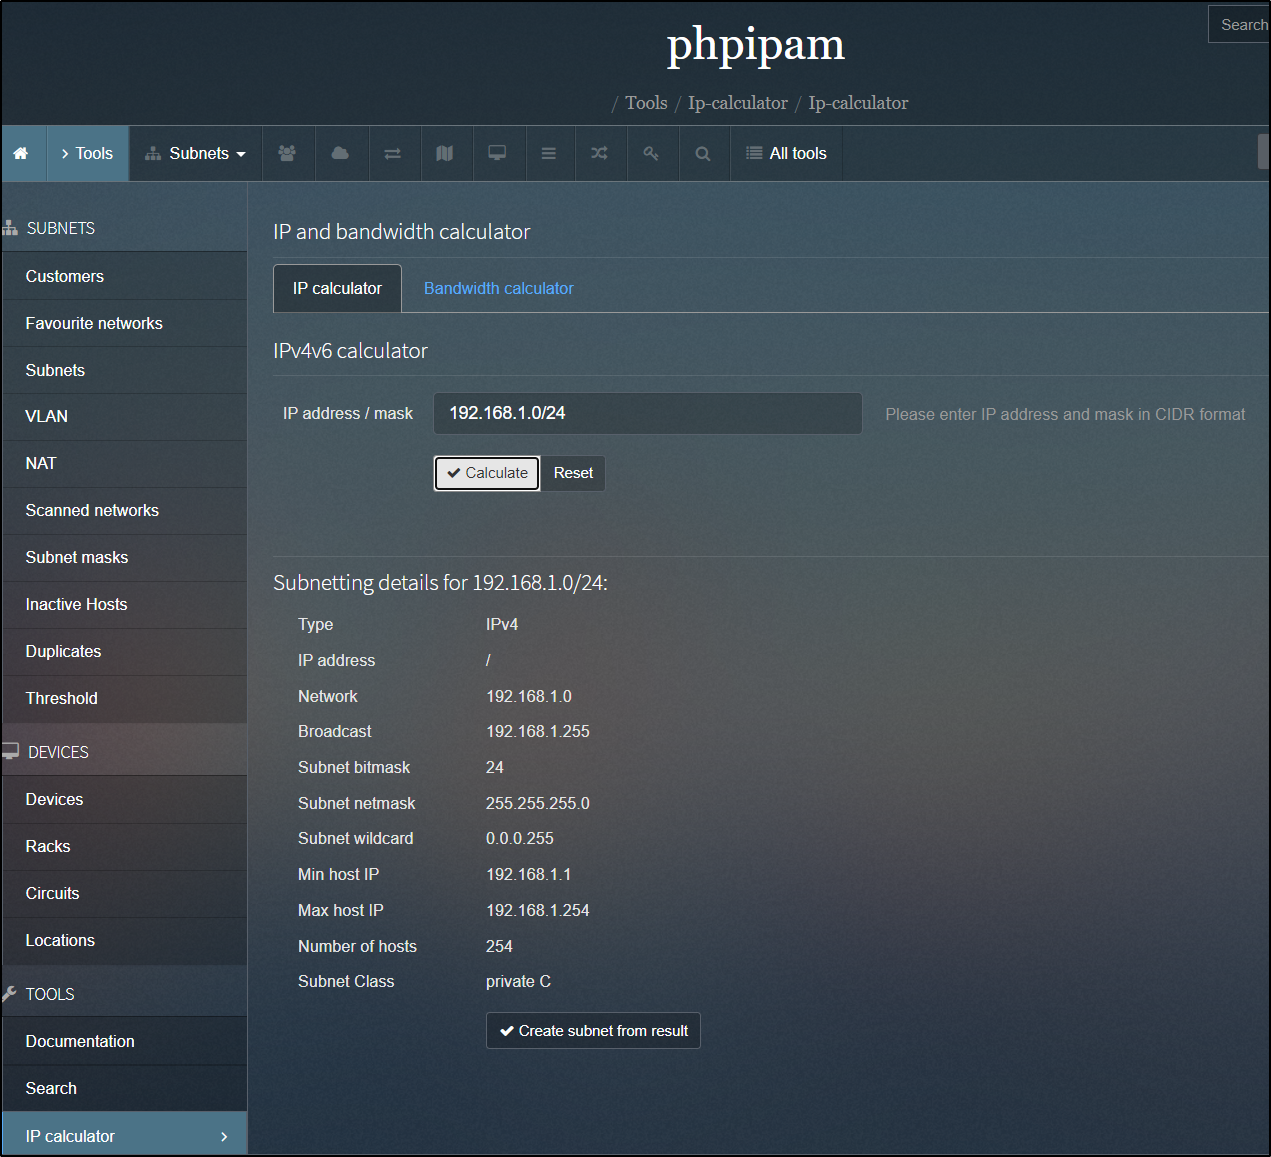
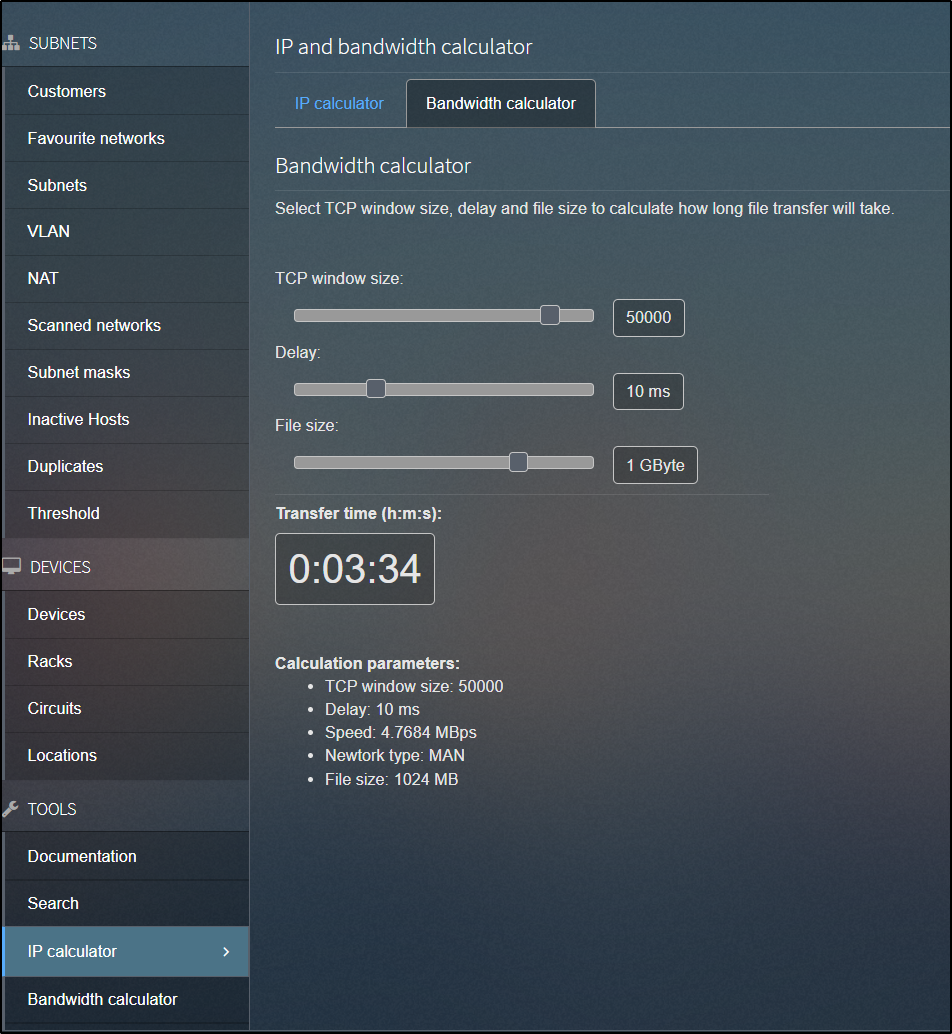
The other is a bandwidth calculator:
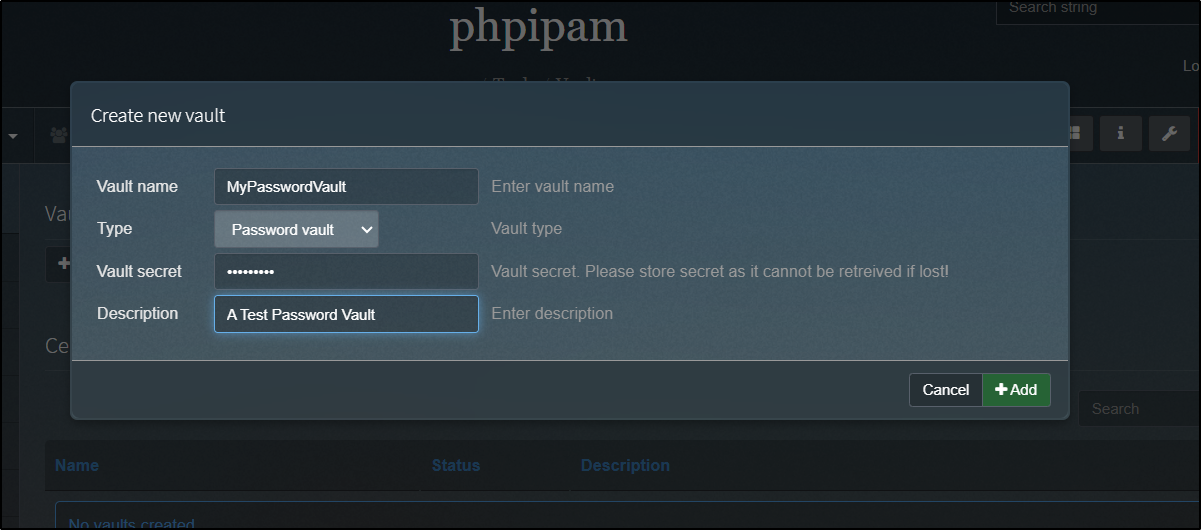
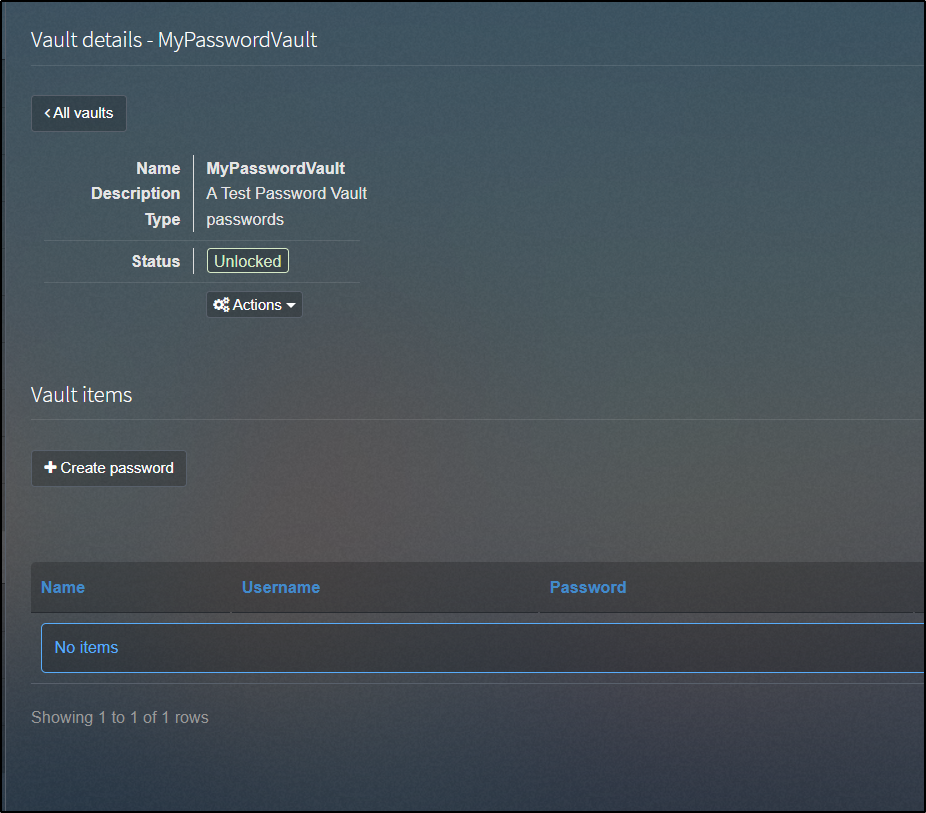
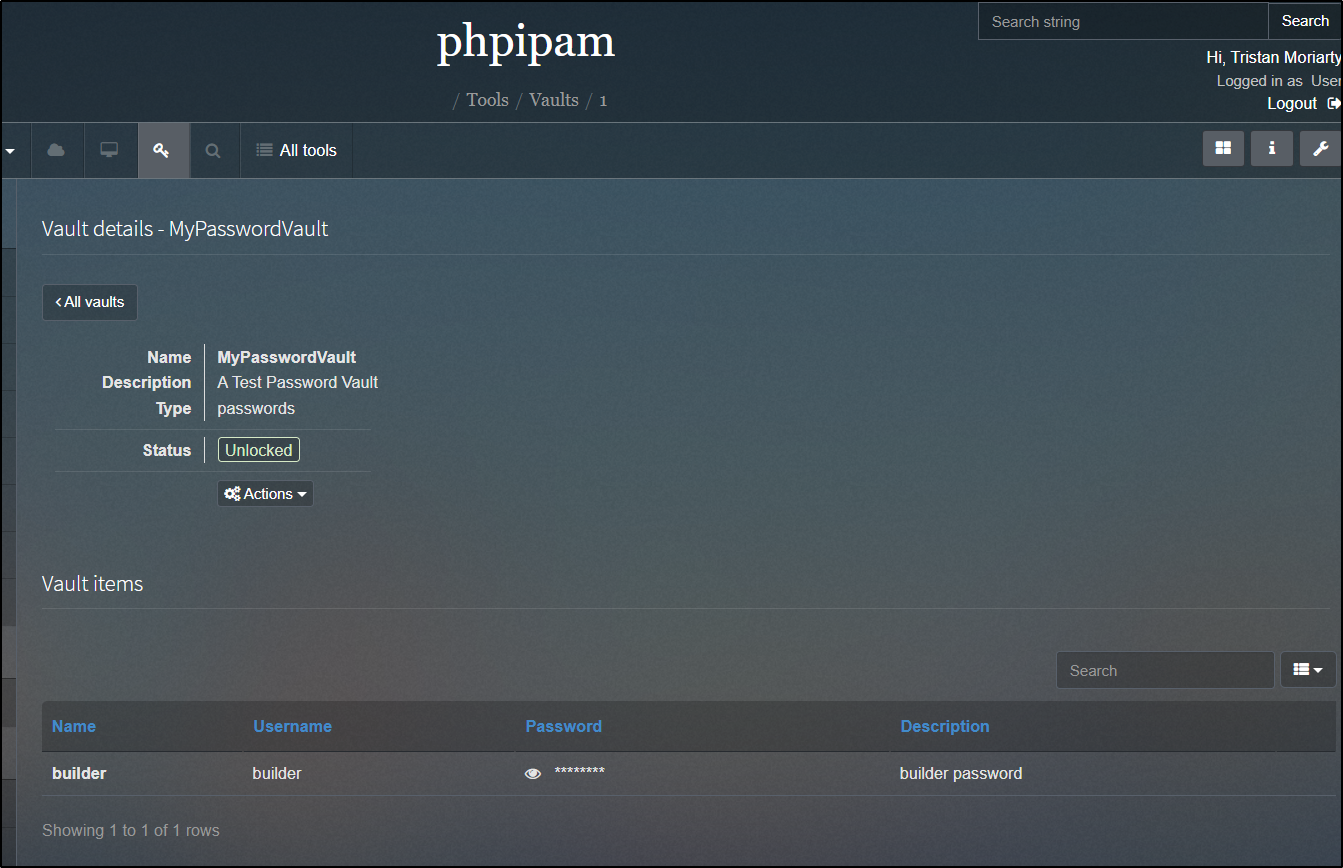
The other tool built-in to PHPIPAM is a Vault for certs and passwords.
We can create a new password vault
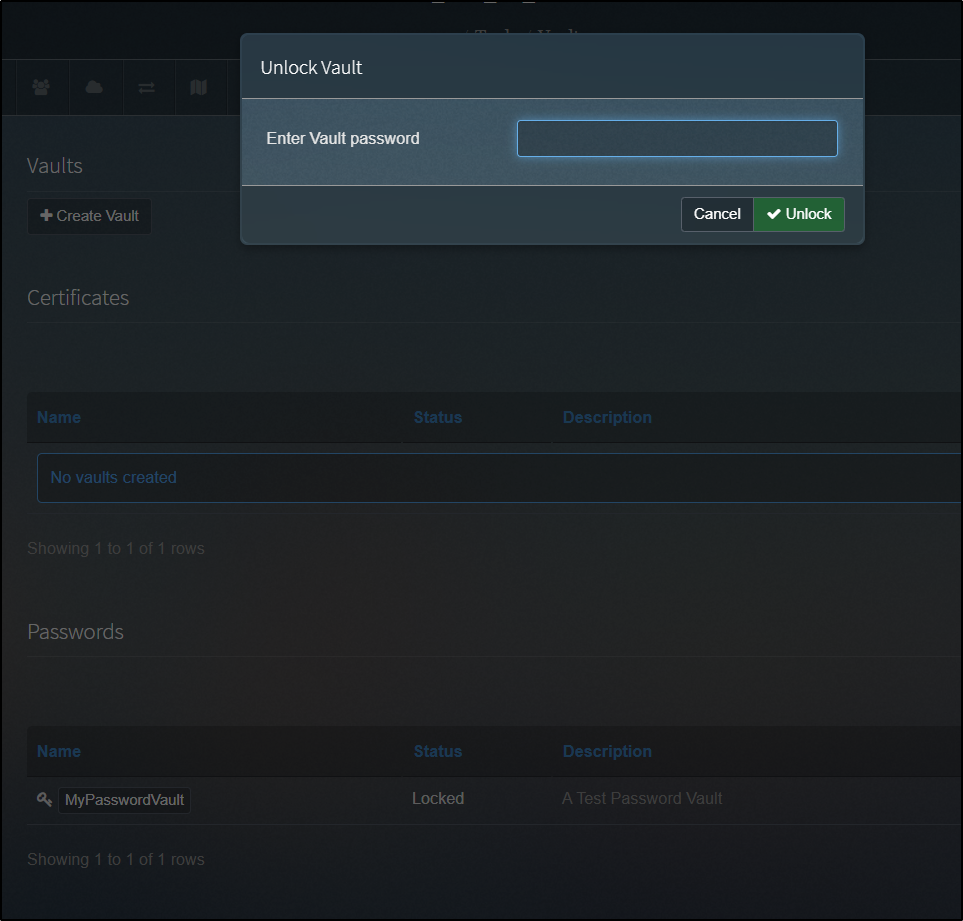
To open, we enter the password we used when we created it
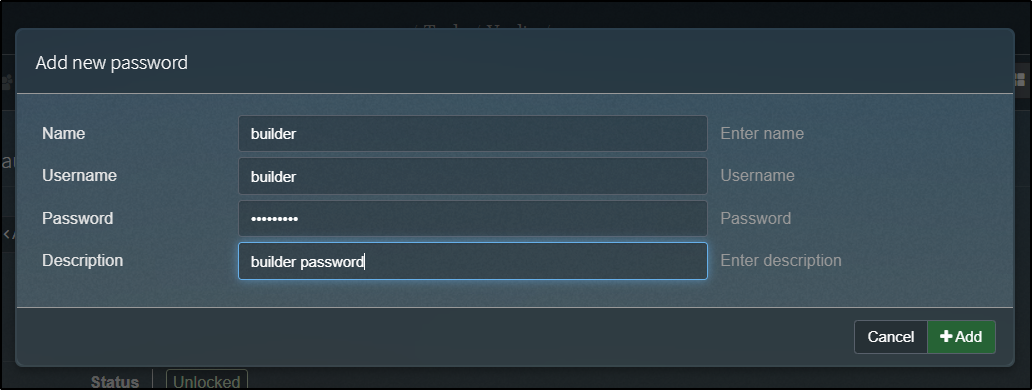
Once unlocked, I can create a password
We add the name, value and an optional description
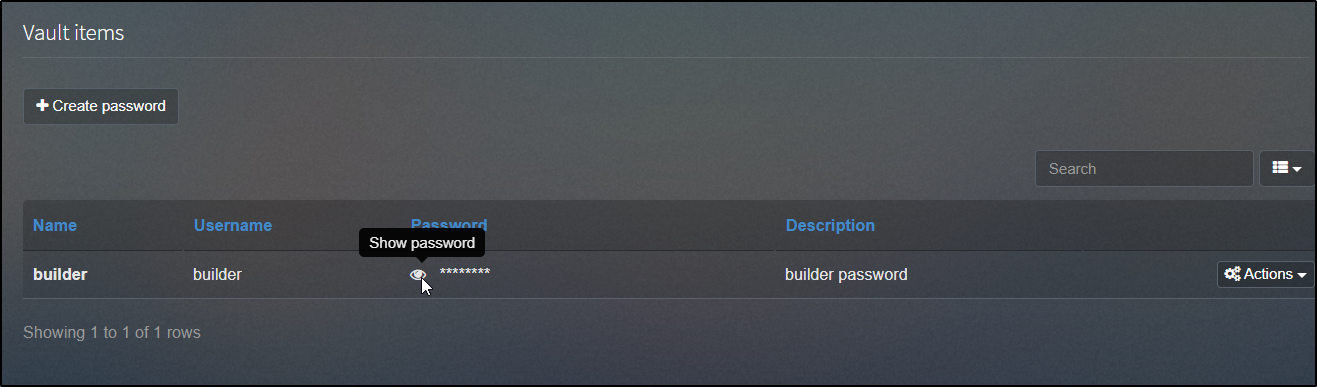
We then can click the eyeball icon to view the password
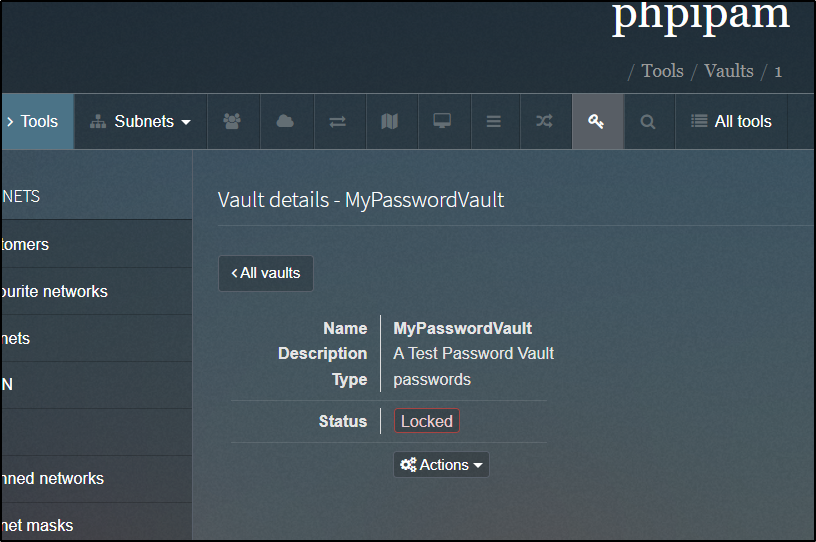
When done with the password vault, we will want to lock it
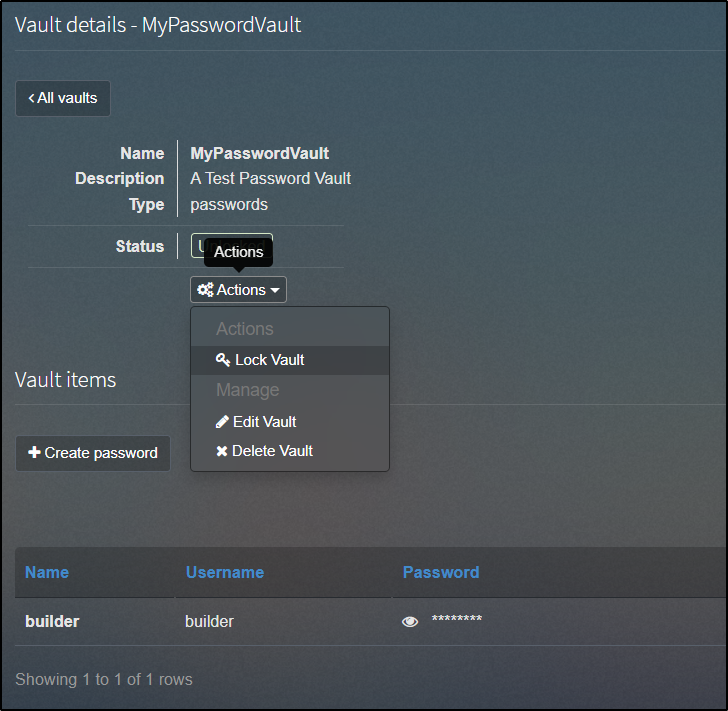
Which will restore it to a locked state
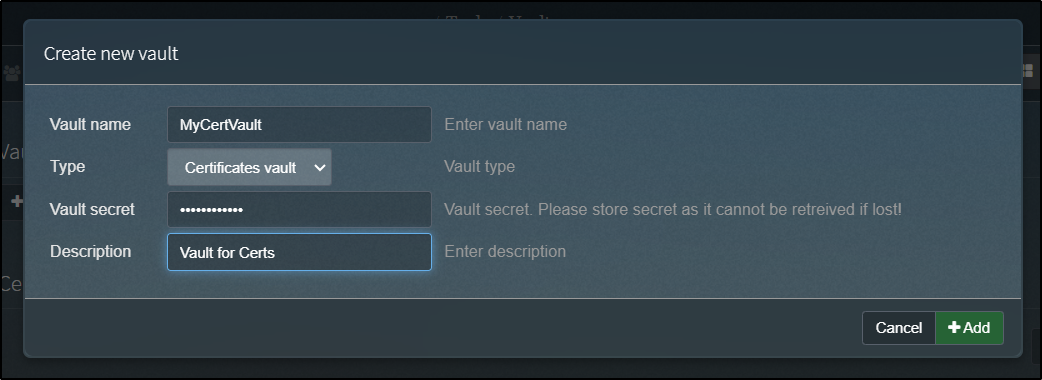
Certificate vaults are quite similar.
We create them in much the same way
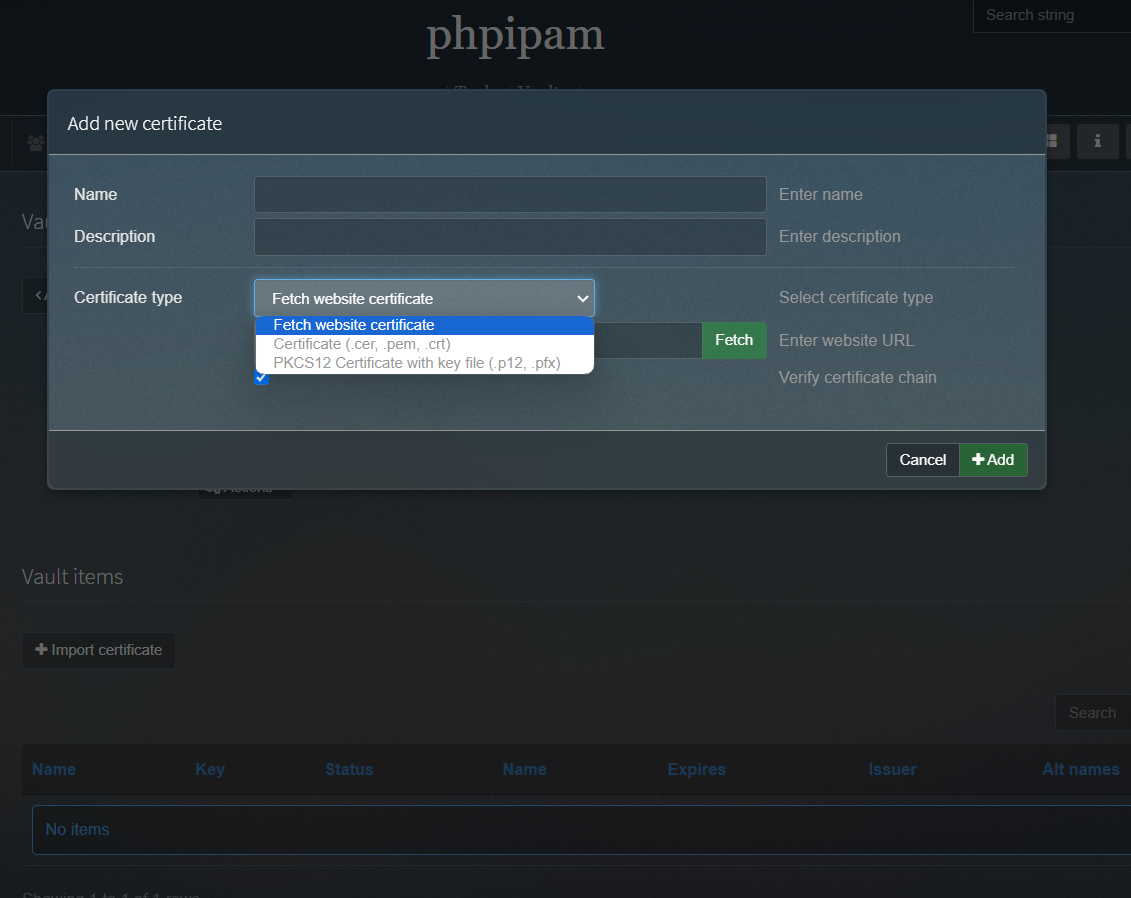
From there we can import certs
Users
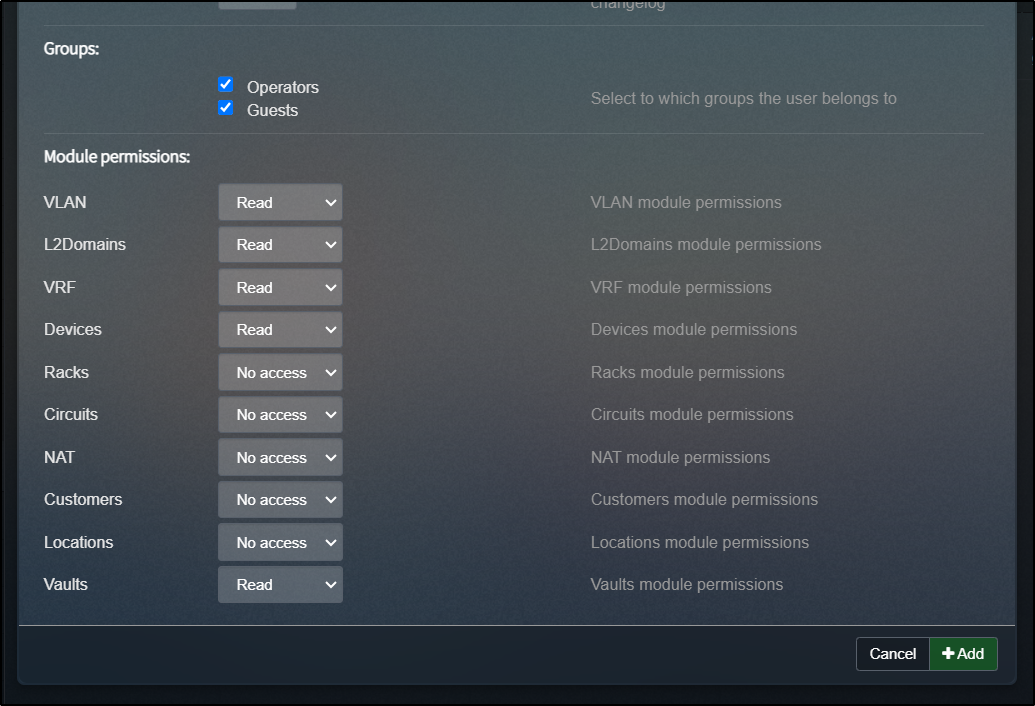
I’ll add an Operations user
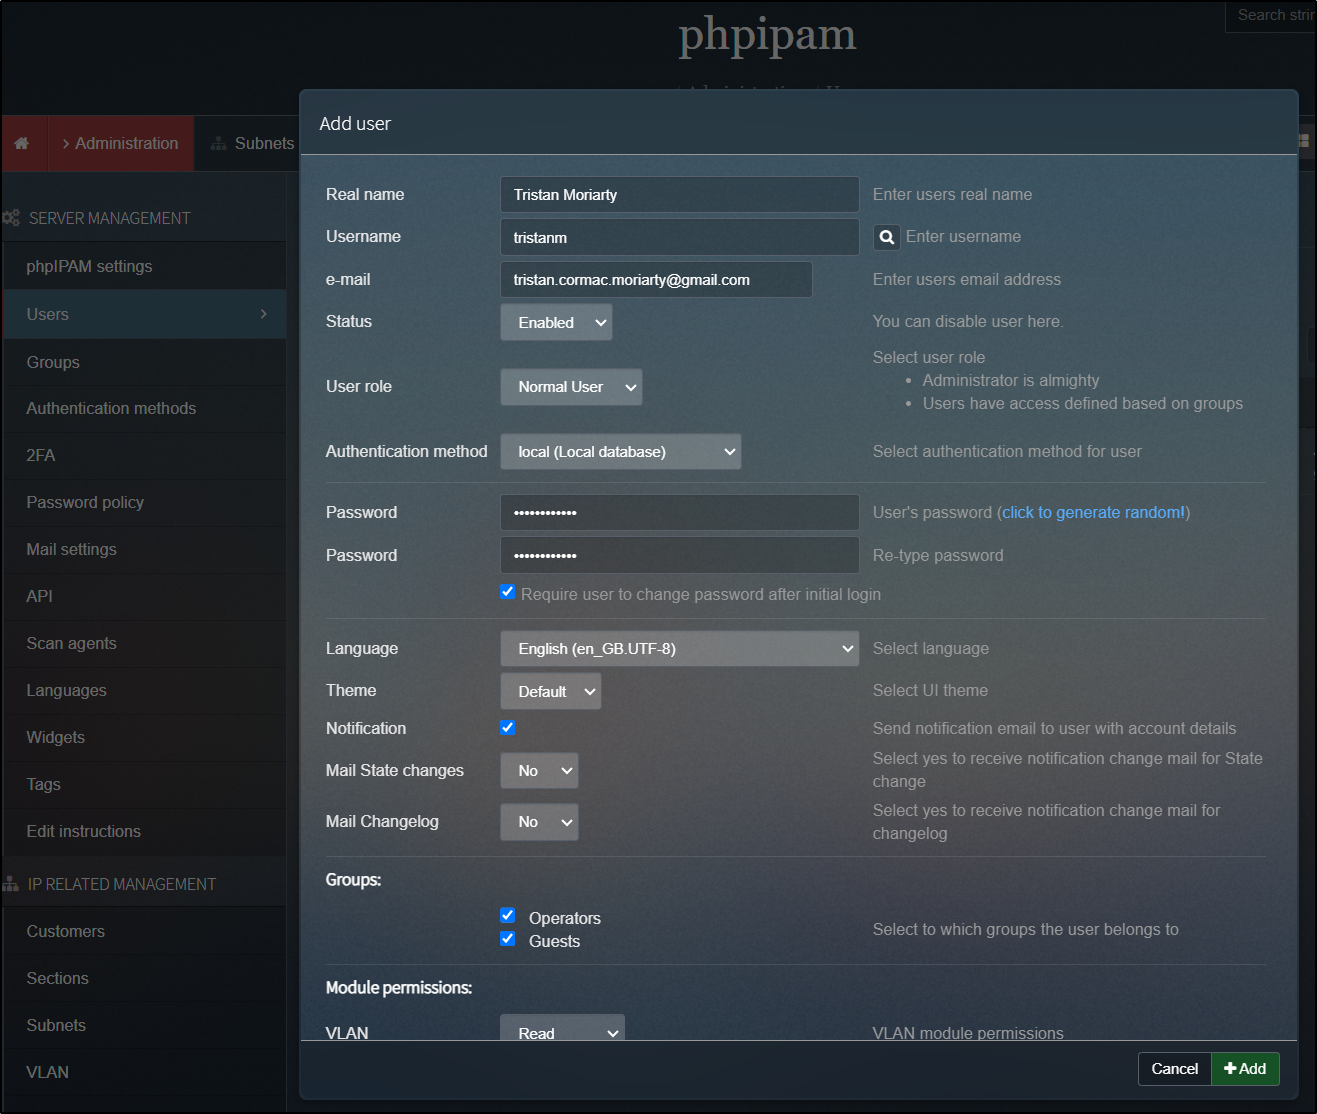
I’ll add them to specific groups with just read access
Once, created, I can see the user details in the list
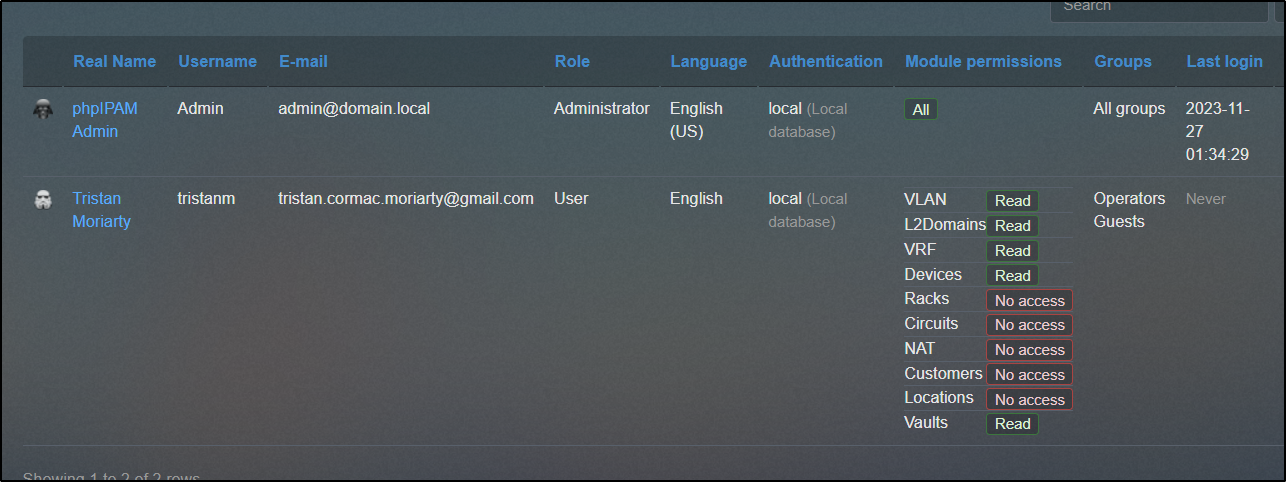
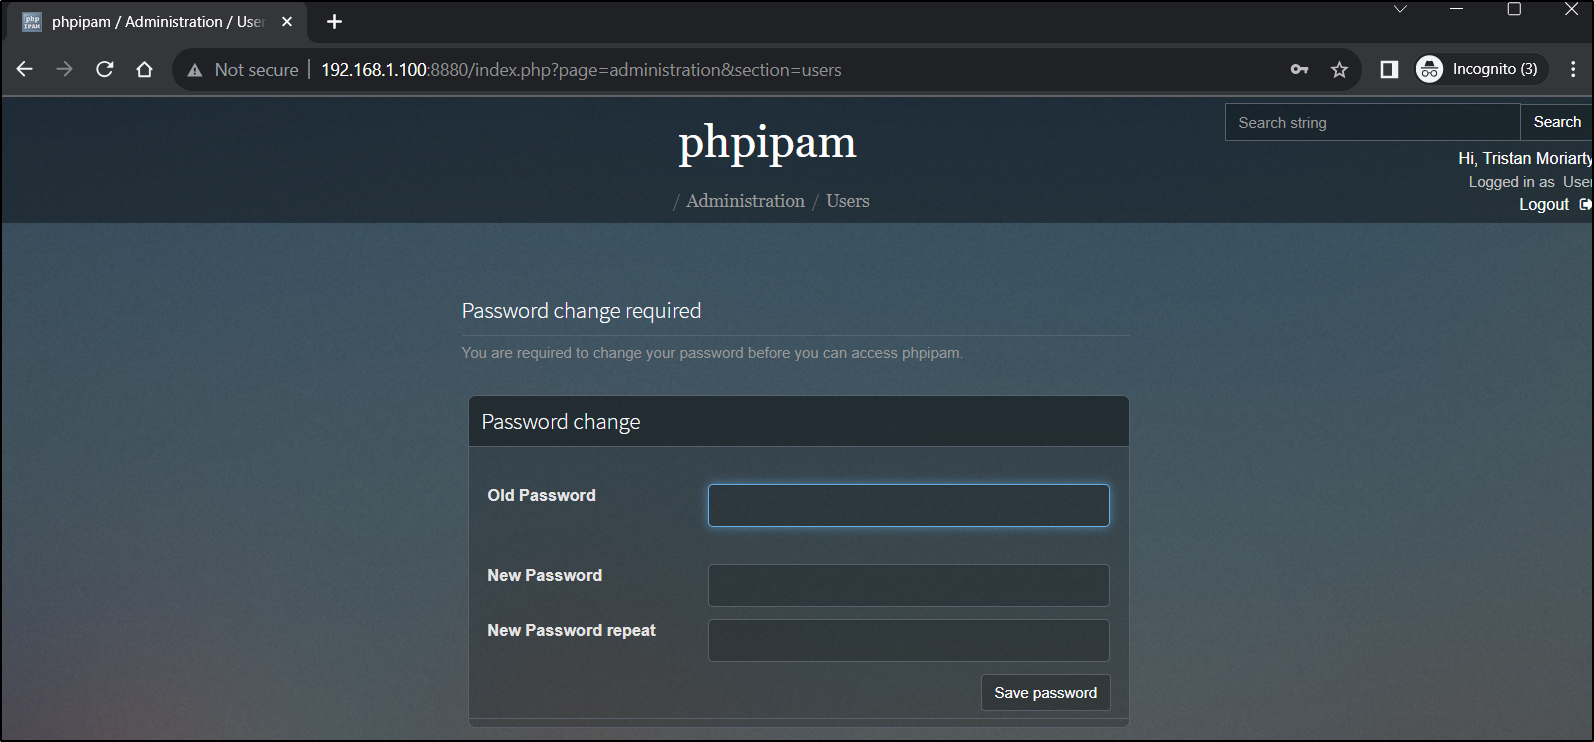
Be aware that the password is just an initial password the user will need to change once they login
Our user can search for names

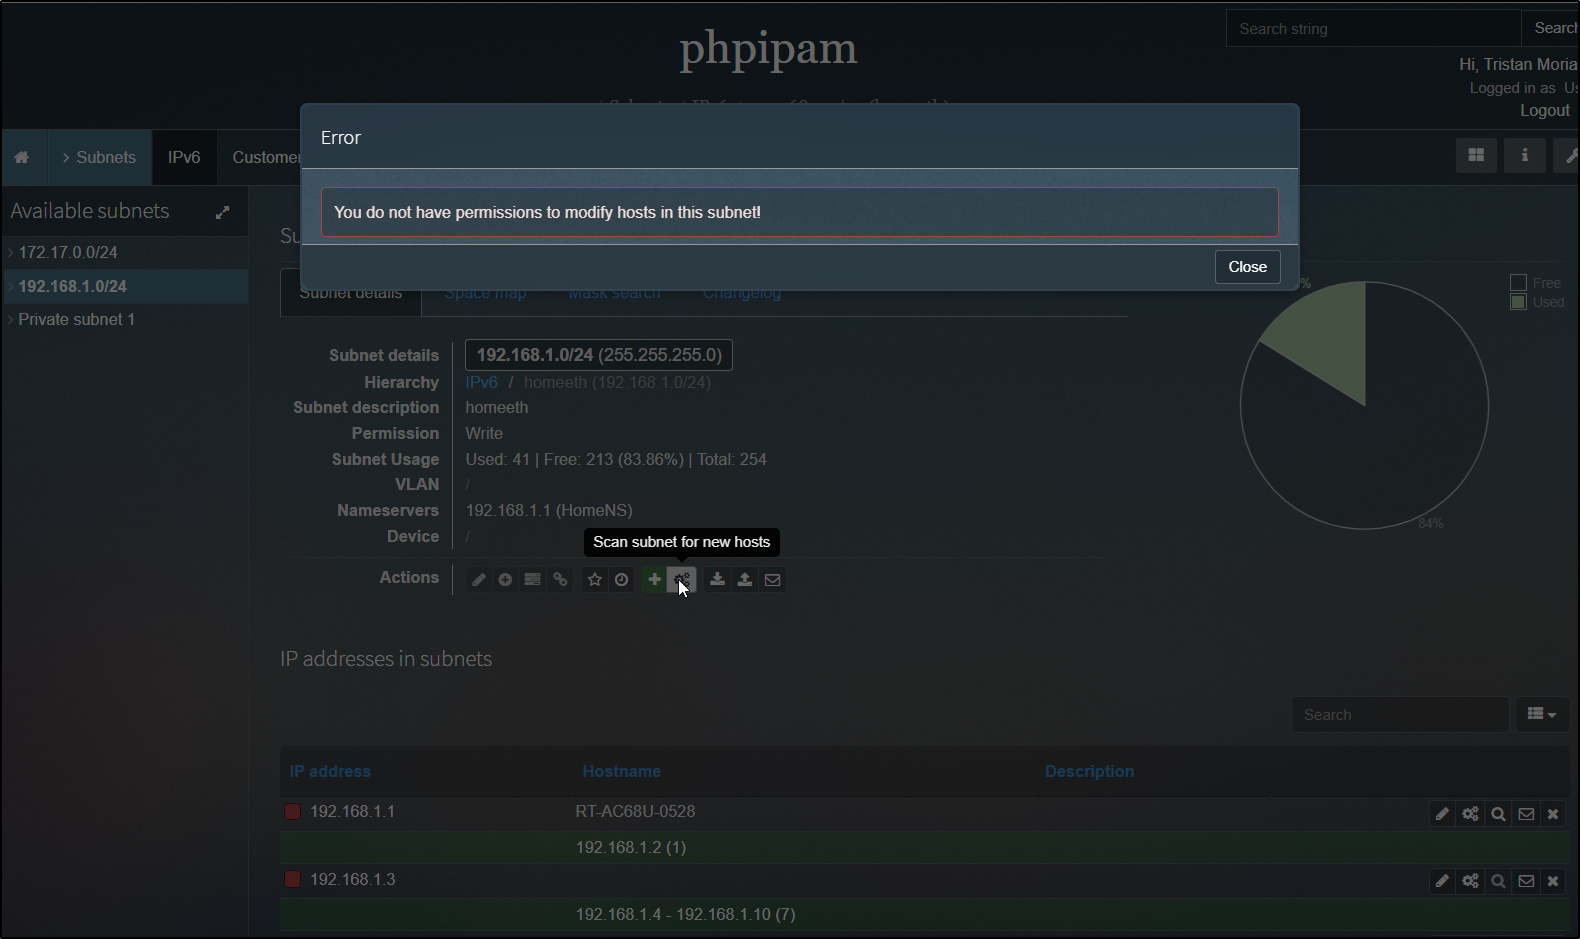
We can see that our user is rejected from running any actions such as a fresh scan
We can also see that provided our user has the Vault unlock password, our user can view password, but not edit or add them
FileBrowser
Another tool that has been on my list to checkout is “filebrowser”.
In Github, I can see releases going back to at least 2017 (1.0.0).
There are actually a fair number of blog articles already about it. I particularly liked the one on noted.lol which showed a lot of usage. I got a kickstart on this writeup from an easycode.page article.
First things first, we need a .filebrowser.json file that will have some settings. Note: we told it the DB file will be “/database.db”. I forgot that myself and spent way too long figuring out i was mounting “filebrowser.db” not “database.db”.
builder@builder-T100:~/projects$ ls -l /home/builder/.filebrowser.json
-rw-rw-r-- 1 builder builder 118 Nov 27 16:46 /home/builder/.filebrowser.json
builder@builder-T100:~/projects$ cat /home/builder/.filebrowser.json
{
  "port": 80,
  "baseURL": "",
  "address": "",
  "log": "stdout",
  "database": "/database.db",
  "root": "/srv"
}
Next, I created a folder that will house things and made a db file there.
builder@builder-T100:~/projects$ tree .
.
└── filebrowser
    └── filebrowser.db

1 directory, 1 file
builder@builder-T100:~/projects$ pwd
/home/builder/projects
I could now launch a docker version of the tool:
$ docker run -d -v /home/builder/projects/filebrowser:/srv -v /home/builder/projects/filebrowser/filebrowser.db:/database.db -v /home/builder/projects/filebrowser/.filebrowser.json:/.filebrowser.json --user $(id -u):$(id -g) -p 8899:80 filebrowser/filebrowser
fa20b4181ba6bb9ea9fb321dea6bbbdfcb00001d4d5dc0bcbc362f62a939bb14


$ docker ps
CONTAINER ID   IMAGE                                                            COMMAND                  CREATED         STATUS                            PORTS
                                             NAMES
fa20b4181ba6   filebrowser/filebrowser                                          "/filebrowser"           3 seconds ago   Up 2 seconds (health: starting)   0.0.0.0:8899->80/tcp, :::8899->80/tcp                                            silly_ptolemy
Since I’m exposing 8899, I logged in with the default “admin/admin” creds and immediately changed the password.
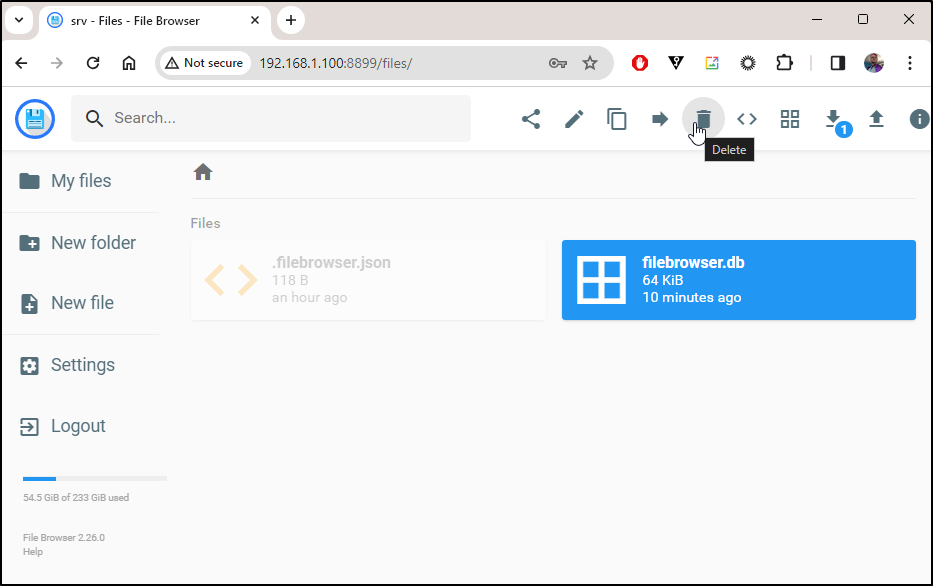
Now that I was in, I could easily see files, including the app’s db. That might not be a brilliant idea because i could easily trash the tool:
I killed that instance
builder@builder-T100:~/projects$ docker stop silly_ptolemy
silly_ptolemy
builder@builder-T100:~/projects$ docker rm silly_ptolemy
silly_ptolemy
It might actually be useful to use my Dockerhost to front my NAS.
Presently I am mounting my old NAS for DB backups
$ cat /etc/fstab  | tail -n1
192.168.1.129:/volume1/postgres-prod-dbbackups  /mnt/psqlbackups nfs    auto,nofail,noatime,nolock,intr,tcp,actimeo=1800        0       0
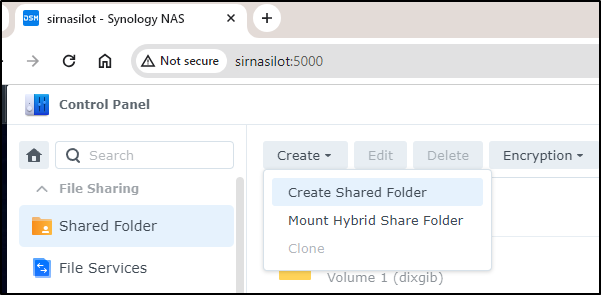
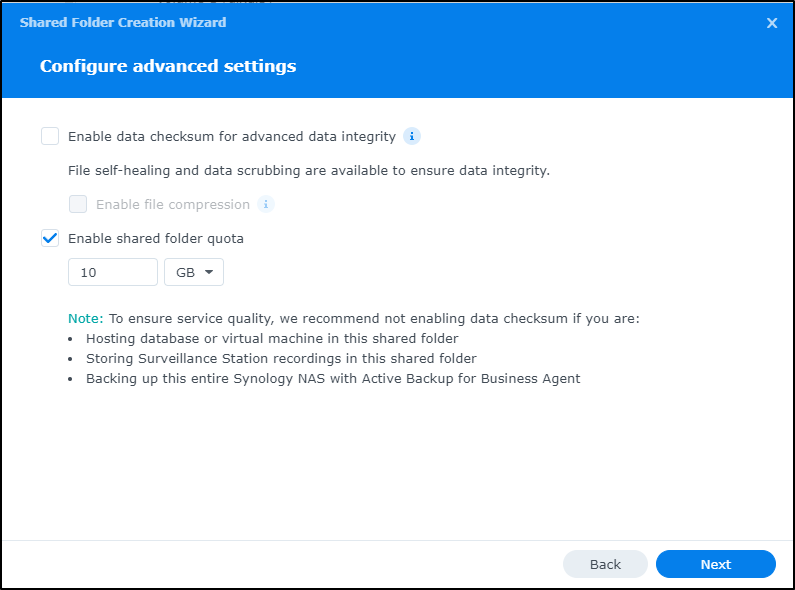
Instead, I’ll go to the new one and create a new shared folder
I’ll give it a name and uncheck the ‘restrict access to administrators only’ box
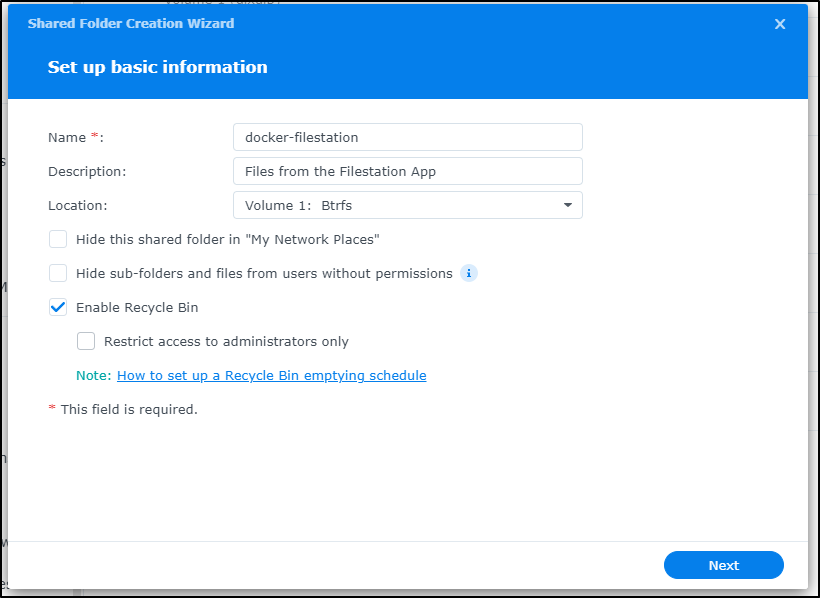
If I was sharing this to the world, I would very likely enable a shared quota lest I become a new anglefire (guessing not many remember that service, nor geocities which is why I had needed it).
Next, to use this for NFS, I’ll need to create some NFS permissions so we can mount it
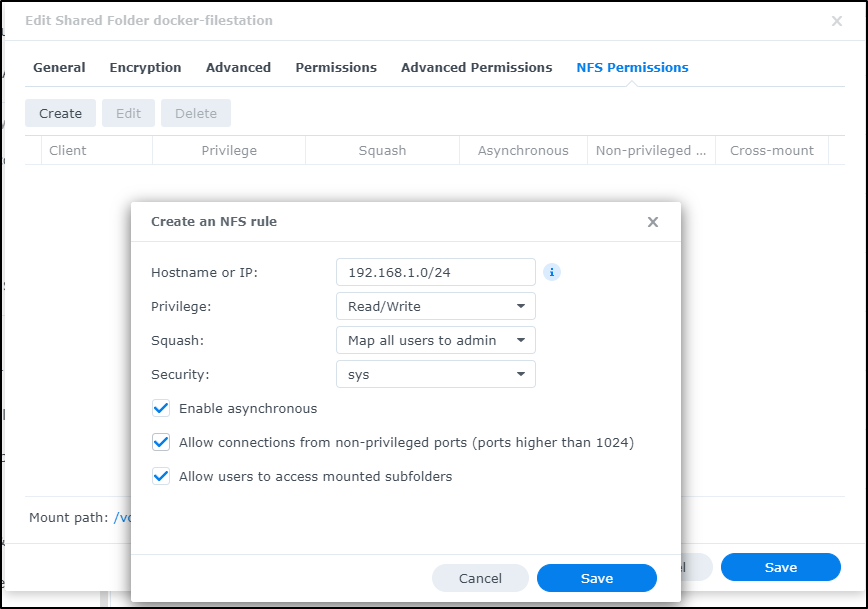
I’ll make the directory, add an entry in /etc/fstab, and then mount it.
builder@builder-T100:~/projects$ sudo mkdir /mnt/filestation
builder@builder-T100:~/projects$ sudo vi /etc/fstab
builder@builder-T100:~/projects$ cat /etc/fstab | tail -n1
192.168.1.116:/volume1/docker-filestation  /mnt/filestation nfs    auto,nofail,noatime,nolock,intr,tcp,actimeo=1800        0       0

builder@builder-T100:~/projects$ sudo mount -a
I’ll launch a fresh filebrowser. I’m interested to see if it persisted my updated admin password even after I purged the old image (is it in the database.db)
$ docker run -d -v /mnt/filestation:/srv -v /home/builder/projects/filebrowser/filebrowser.db:/database.db -v /home/builder/projects/filebrowser/.filebrowser.json:/.filebrowser.json --user $(id -u):$(id -g) -p 8899:80 filebrowser/filebrowser
1fb429708cc7fcac174ee64d79d49a6407078a3d9851746029682a50e33ccd54
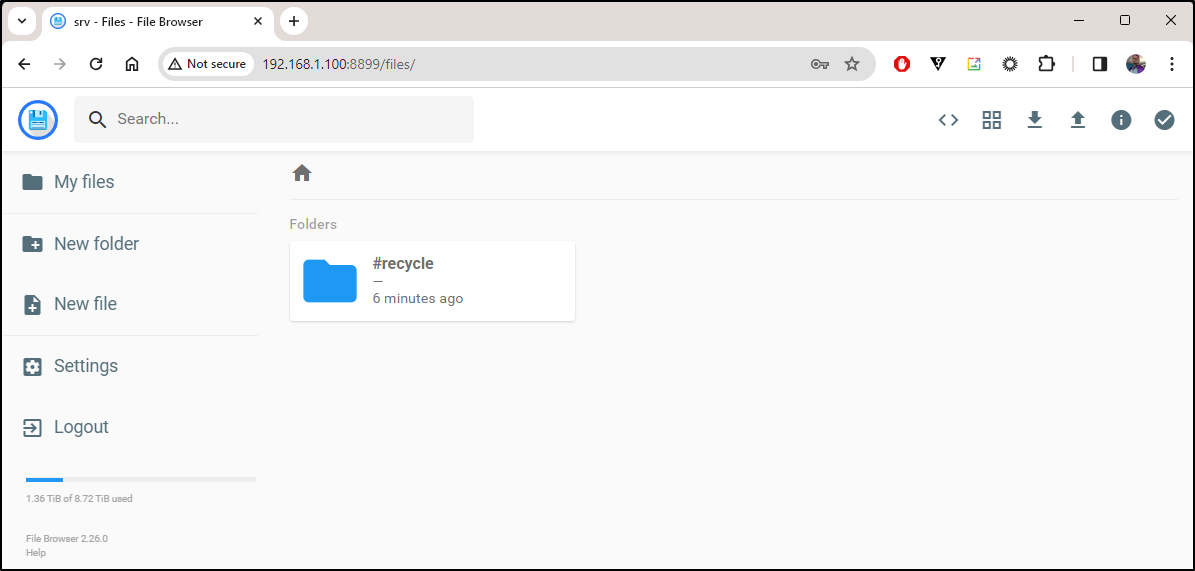
I can confirm it did save the password.
Once logged in, I can see files - and they don’t include the database.db file this time.
I chose file upload and uploaded a local image from a prior article that was still in my downloads folder
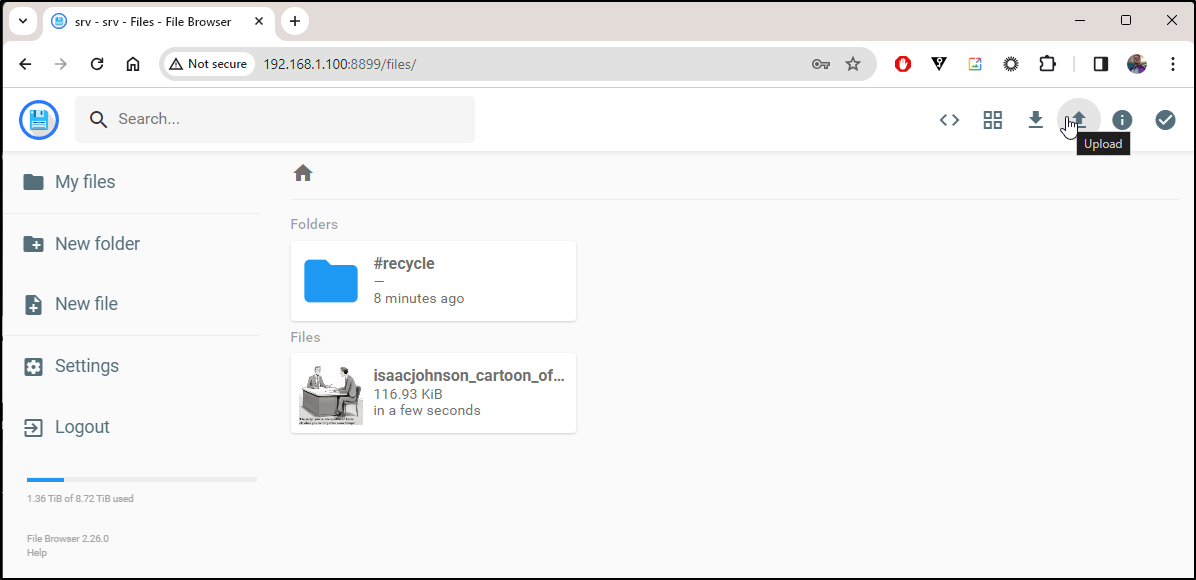
Heading back to the Synology interface, indeed I can see the file now safely tucked away on the volume

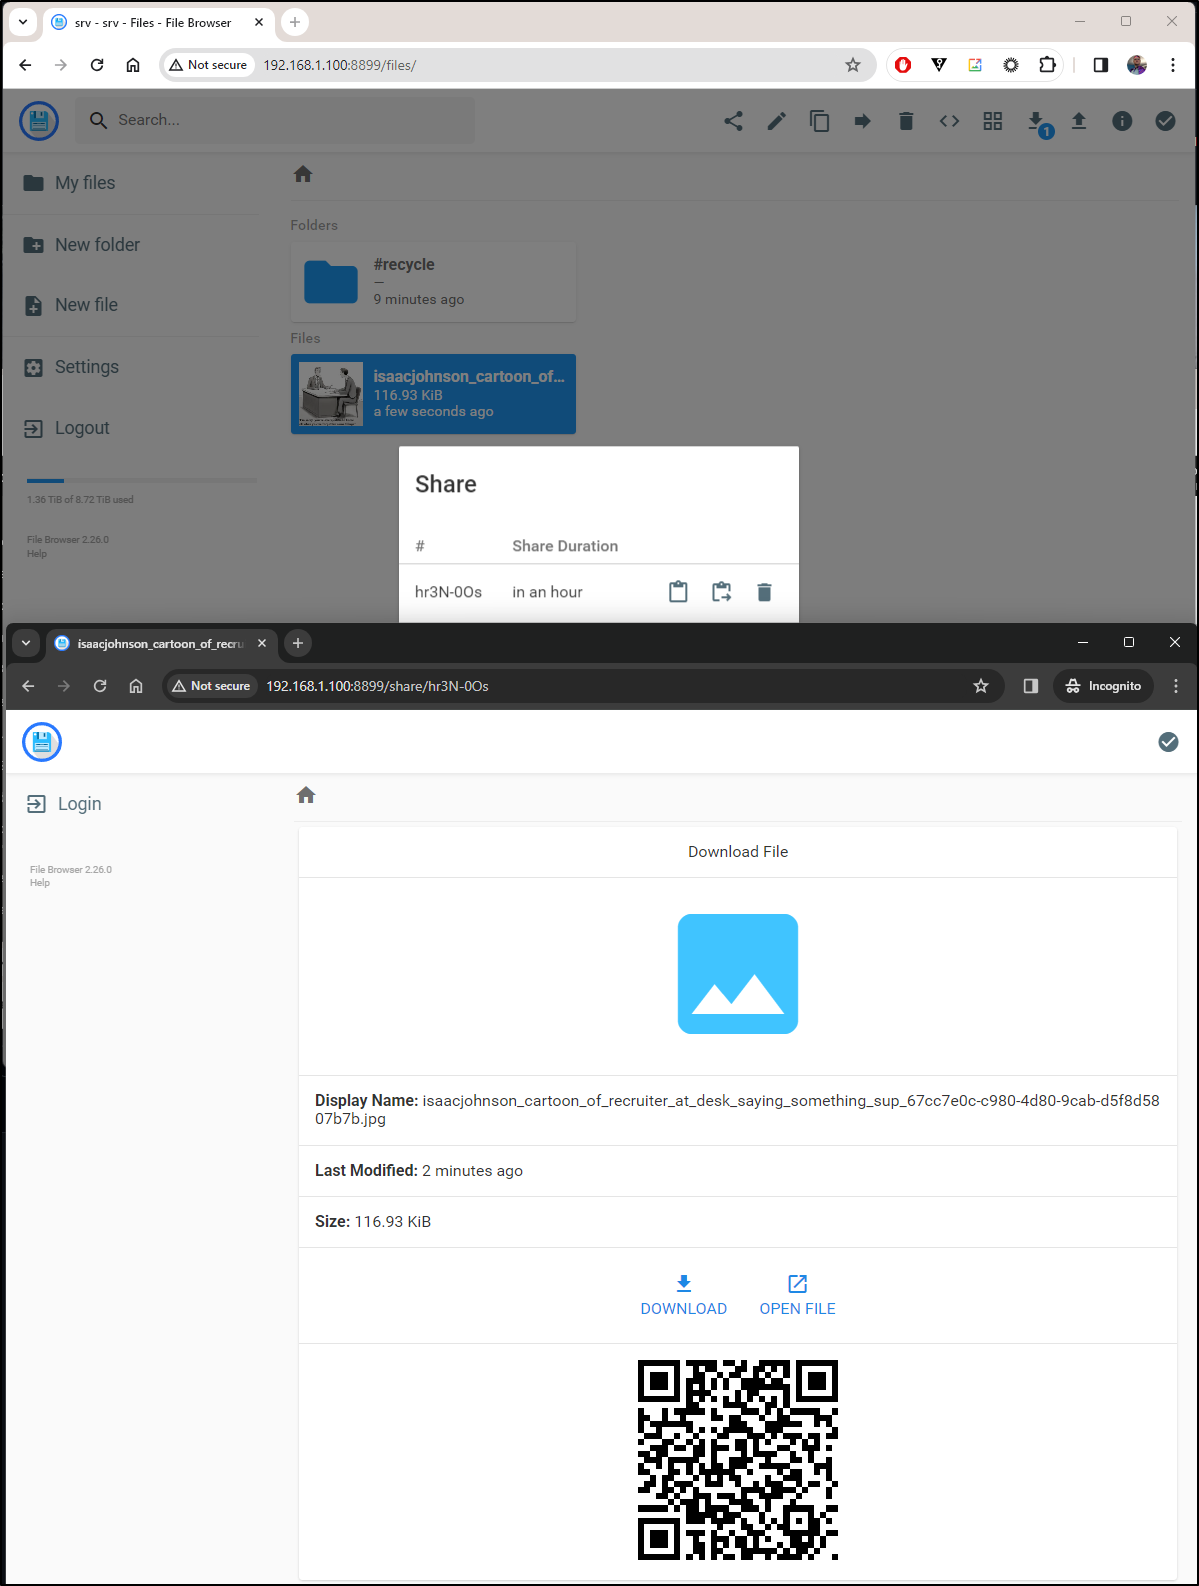
One of the handy features one can do is share a file for a duration. Here I shared it for an hour and used an incognito window to prove the URL worked
However, this isn’t too handy unless I’m in my network.
So let’s first add a quick A record in the normal way
builder@DESKTOP-QADGF36:~/Workspaces/jekyll-blog$ aws route53 change-resource-record-sets --hosted-zone-id Z39E8QFU0F9PZP --change-batch file://r53-filebrowser.json
{
    "ChangeInfo": {
        "Id": "/change/C02575932ICQO87JD766R",
        "Status": "PENDING",
        "SubmittedAt": "2023-11-28T00:17:58.535Z",
        "Comment": "CREATE filebrowser fb.s A record "
    }
}
builder@DESKTOP-QADGF36:~/Workspaces/jekyll-blog$ cat r53-filebrowser.json
{
    "Comment": "CREATE filebrowser fb.s A record ",
    "Changes": [
      {
        "Action": "CREATE",
        "ResourceRecordSet": {
          "Name": "filebrowser.freshbrewed.science",
          "Type": "A",
          "TTL": 300,
          "ResourceRecords": [
            {
              "Value": "75.73.224.240"
            }
          ]
        }
      }
    ]
  }
With the A record in place, I’ll want to create a Endpoint, a Service and lastly an Ingress to use them:
$ cat filebrowser.ingress.yaml
apiVersion: v1
kind: Service
metadata:
  name: filebrowser-external-ip
spec:
  clusterIP: None
  internalTrafficPolicy: Cluster
  ports:
  - name: filebrowserp
    port: 80
    protocol: TCP
    targetPort: 8899
  sessionAffinity: None
  type: ClusterIP
---
apiVersion: v1
kind: Endpoints
metadata:
  name: filebrowser-external-ip
subsets:
- addresses:
  - ip: 192.168.1.100
  ports:
  - name: filebrowserp
    port: 8899
    protocol: TCP
---
apiVersion: networking.k8s.io/v1
kind: Ingress
metadata:
  annotations:
    cert-manager.io/cluster-issuer: letsencrypt-prod
    kubernetes.io/ingress.class: nginx
    kubernetes.io/tls-acme: "true"
    nginx.ingress.kubernetes.io/proxy-read-timeout: "3600"
    nginx.ingress.kubernetes.io/proxy-send-timeout: "3600"
    nginx.org/websocket-services: filebrowser-external-ip
  labels:
    app.kubernetes.io/instance: filebrowseringress
  name: filebrowseringress
spec:
  rules:
  - host: filebrowser.freshbrewed.science
    http:
      paths:
      - backend:
          service:
            name: filebrowser-external-ip
            port:
              number: 80
        path: /
        pathType: ImplementationSpecific
  tls:
  - hosts:
    - filebrowser.freshbrewed.science
    secretName: filebrowser-tls

$ kubectl apply -f filebrowser.ingress.yaml
service/filebrowser-external-ip created
endpoints/filebrowser-external-ip created
ingress.networking.k8s.io/filebrowseringress created
At first, I got a bad gateway error
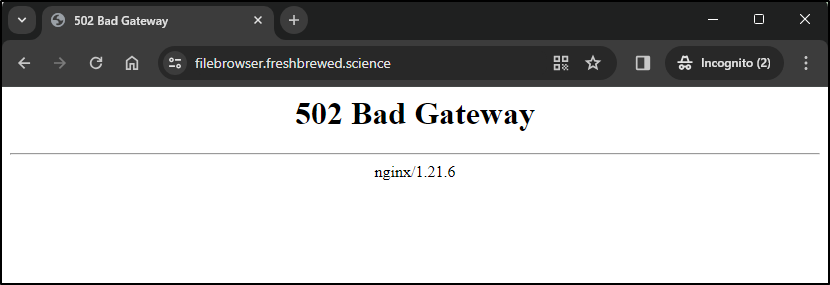
Then it dawned on me; Doh! I forgot to start back up the service.
builder@builder-T100:~/projects$ docker stop sleepy_morse
sleepy_morse
builder@builder-T100:~/projects$
builder@builder-T100:~/projects$ docker start sleepy_morse
sleepy_morse
I saw stuck loading pages, but upon careful examination of the source, it seems it’s scrubbing a slash:
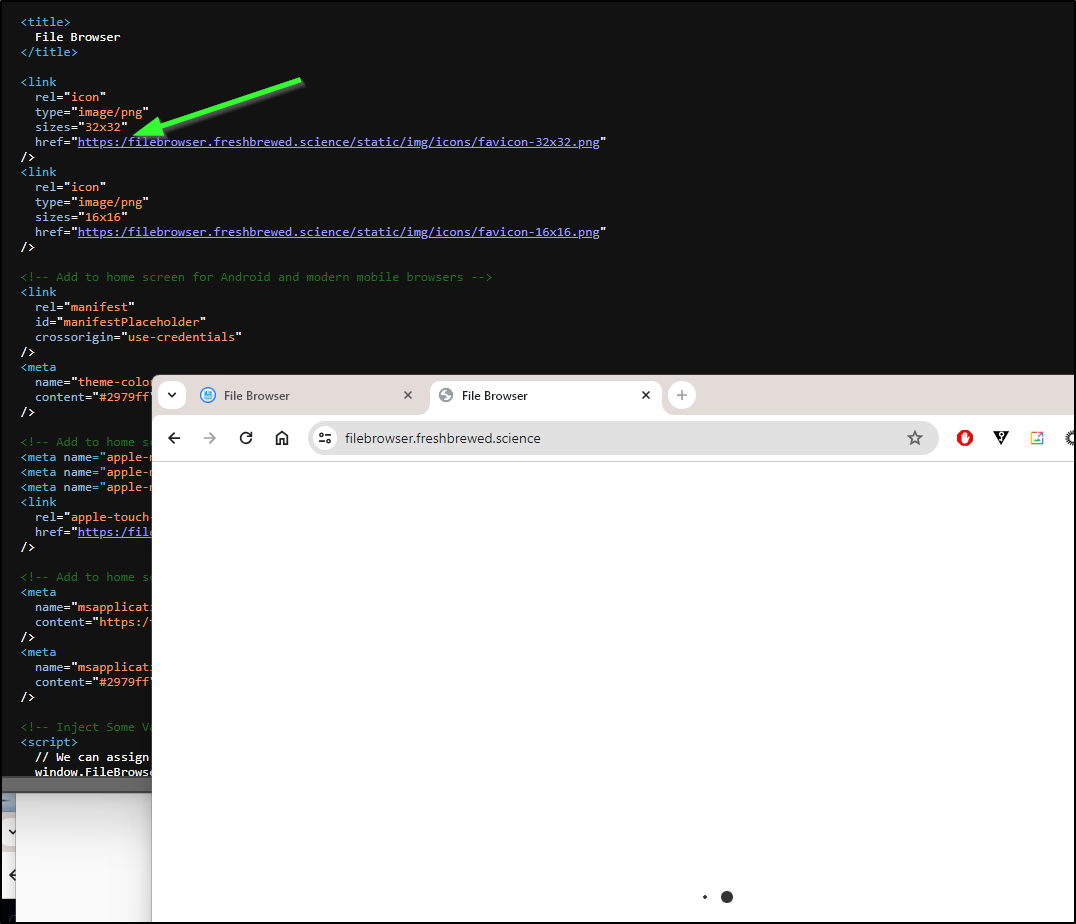
Even though I clearly have it there:
$ cat filebrowser/.filebrowser.json
{
  "port": 80,
  "baseURL": "https://filebrowser.freshbrewed.science",
  "address": "",
  "log": "stdout",
  "database": "/database.db",
  "root": "/srv"
}
I tried a variety of options. When I did finally just blank the value out, it worked fine again.
builder@builder-T100:~/projects$ cat filebrowser/.filebrowser.json
{
  "port": 80,
  "baseURL": "",
  "address": "",
  "log": "stdout",
  "database": "/database.db",
  "root": "/srv"
}
It must be for a subpath on a domain (e.g. “/filedrop”).
I updated to a strong password and tried a share
Uploading something of size was rejected
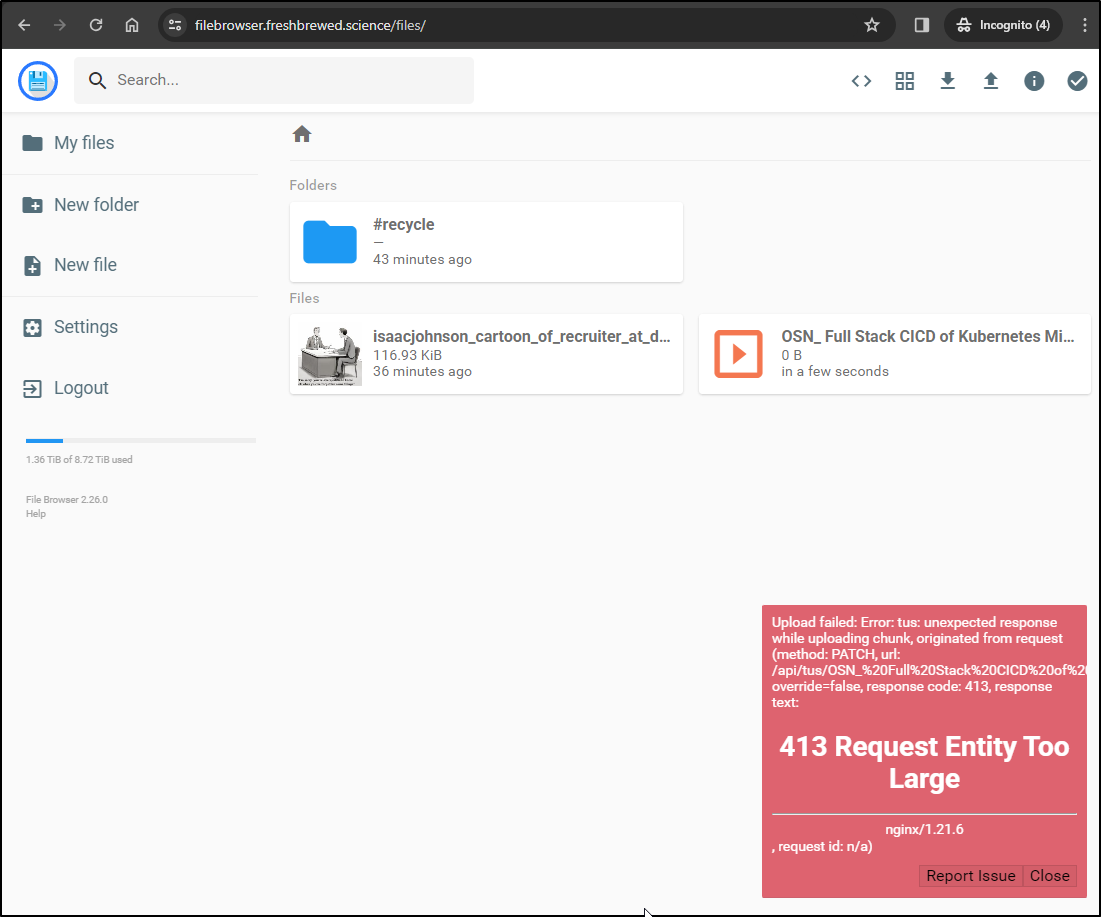
This is all too familiar. I need to set the proxy body size to 0
$ kubectl get ingress filebrowseringress -o yaml > filebrowser.ingressonly.yaml
$ cp filebrowser.ingressonly.yaml filebrowser.ingressonly.yaml.old
$ vi filebrowser.ingressonly.yaml
$ diff filebrowser.ingressonly.yaml filebrowser.ingressonly.yaml.old
5,11d4
<     ingress.kubernetes.io/proxy-body-size: "0"
<     ingress.kubernetes.io/ssl-redirect: "true"
<     nginx.ingress.kubernetes.io/proxy-body-size: "0"
<     nginx.ingress.kubernetes.io/ssl-redirect: "true"
<     nginx.org/client-max-body-size: "0"
<     nginx.org/proxy-connect-timeout: "3600"
<     nginx.org/proxy-read-timeout: "3600"

$ kubectl delete ingress filebrowseringress
ingress.networking.k8s.io "filebrowseringress" deleted
$ kubectl apply -f filebrowser.ingressonly.yaml
ingress.networking.k8s.io/filebrowseringress created
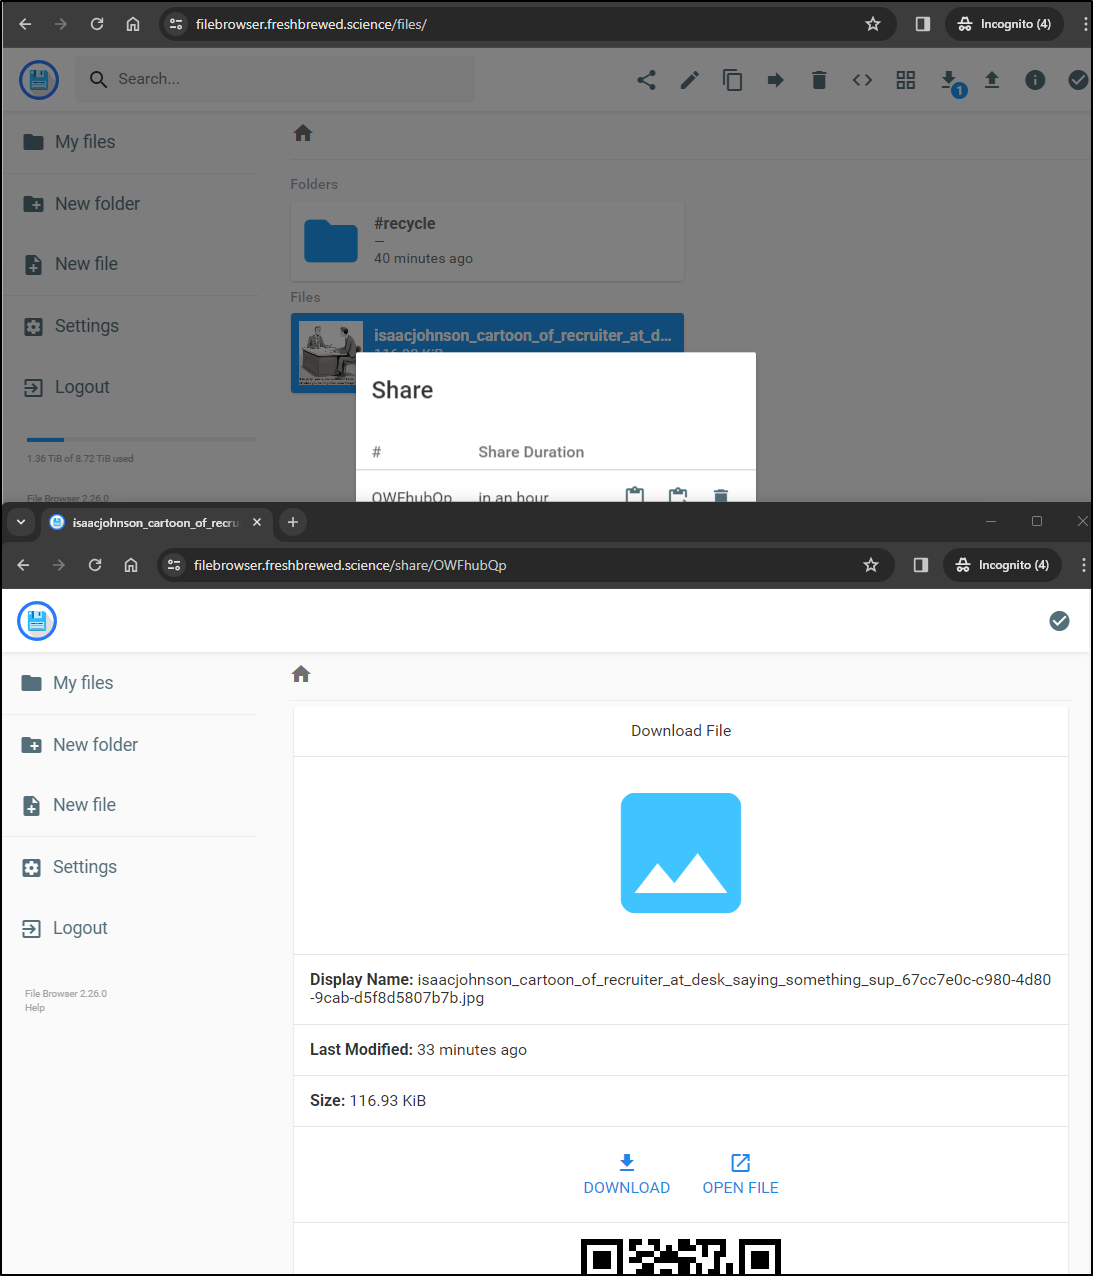
This time it worked
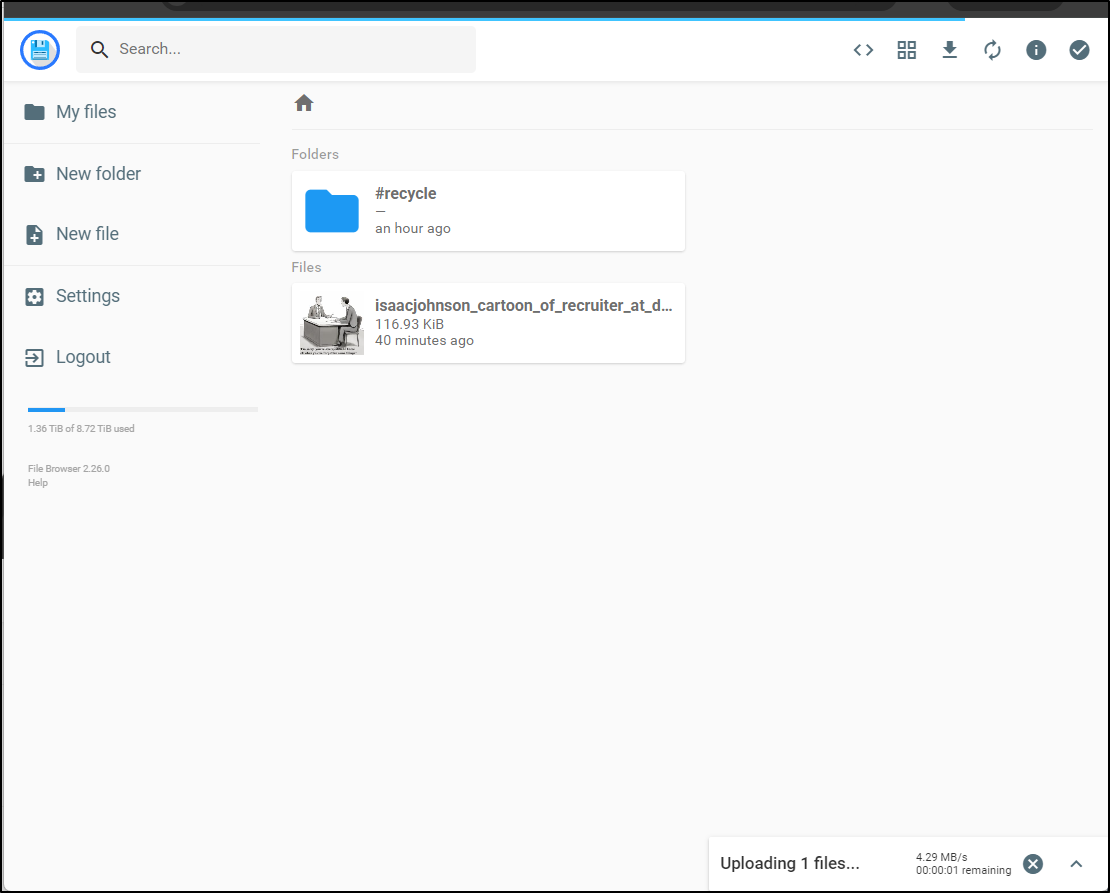
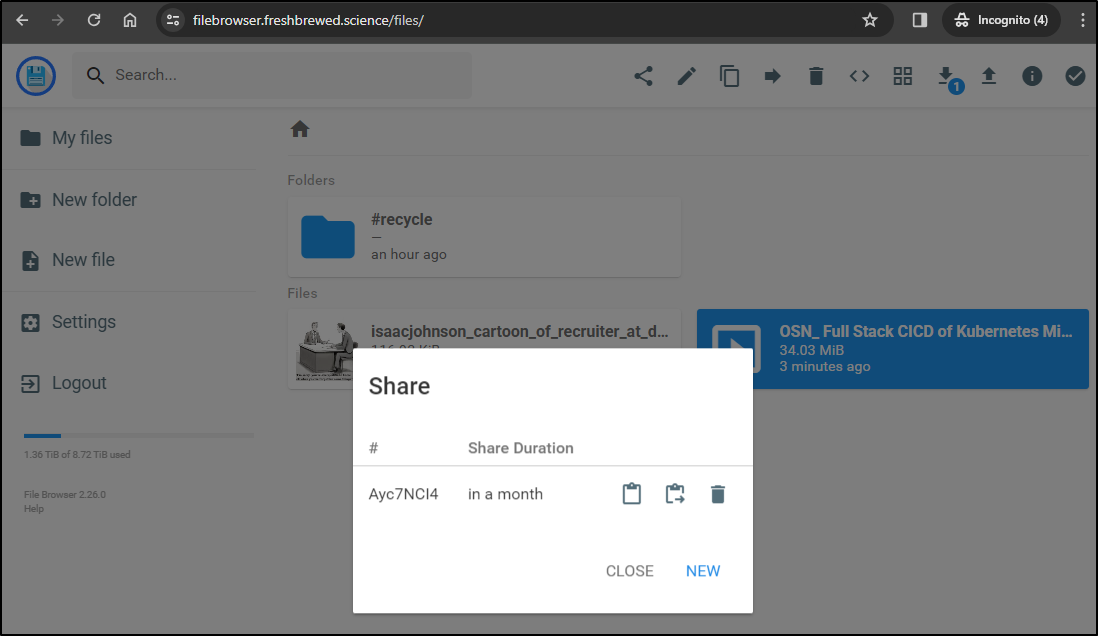
I tried a share and used my phone to test the download.
I can share for a month
even a year
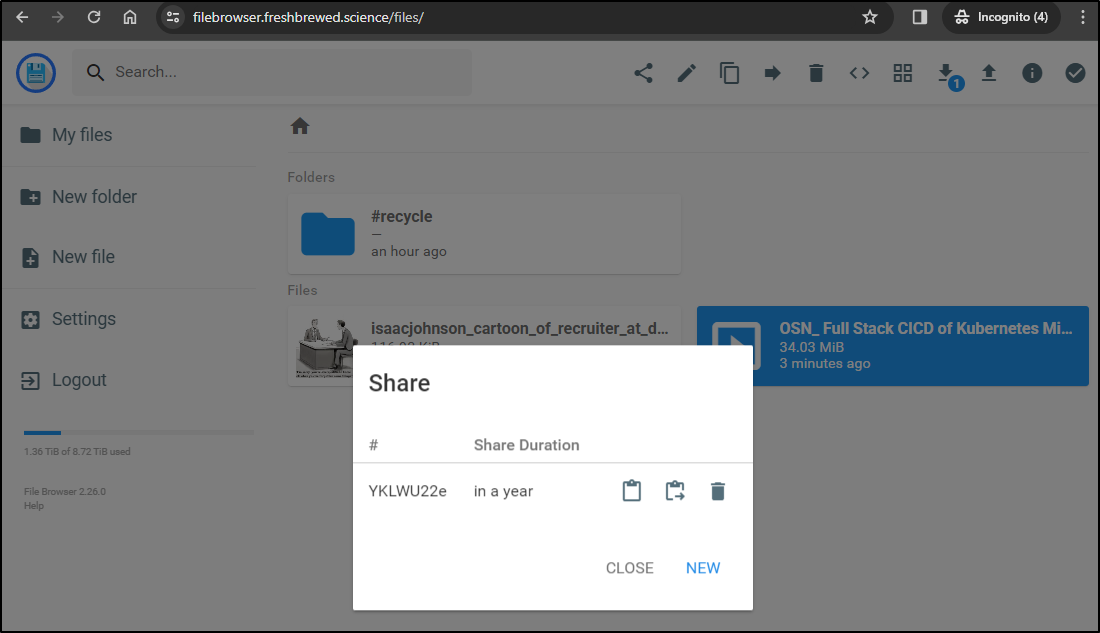
If you trust me not to RickRole you, you can try it yourself with one of my older OSN presentations.
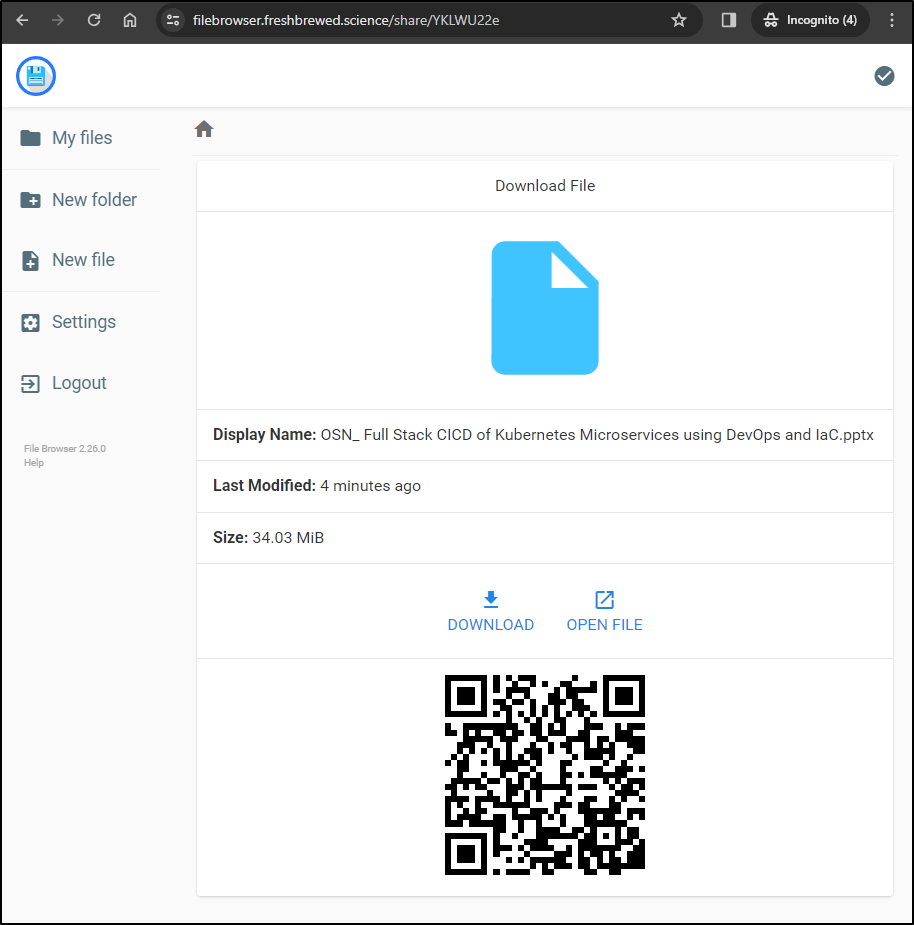
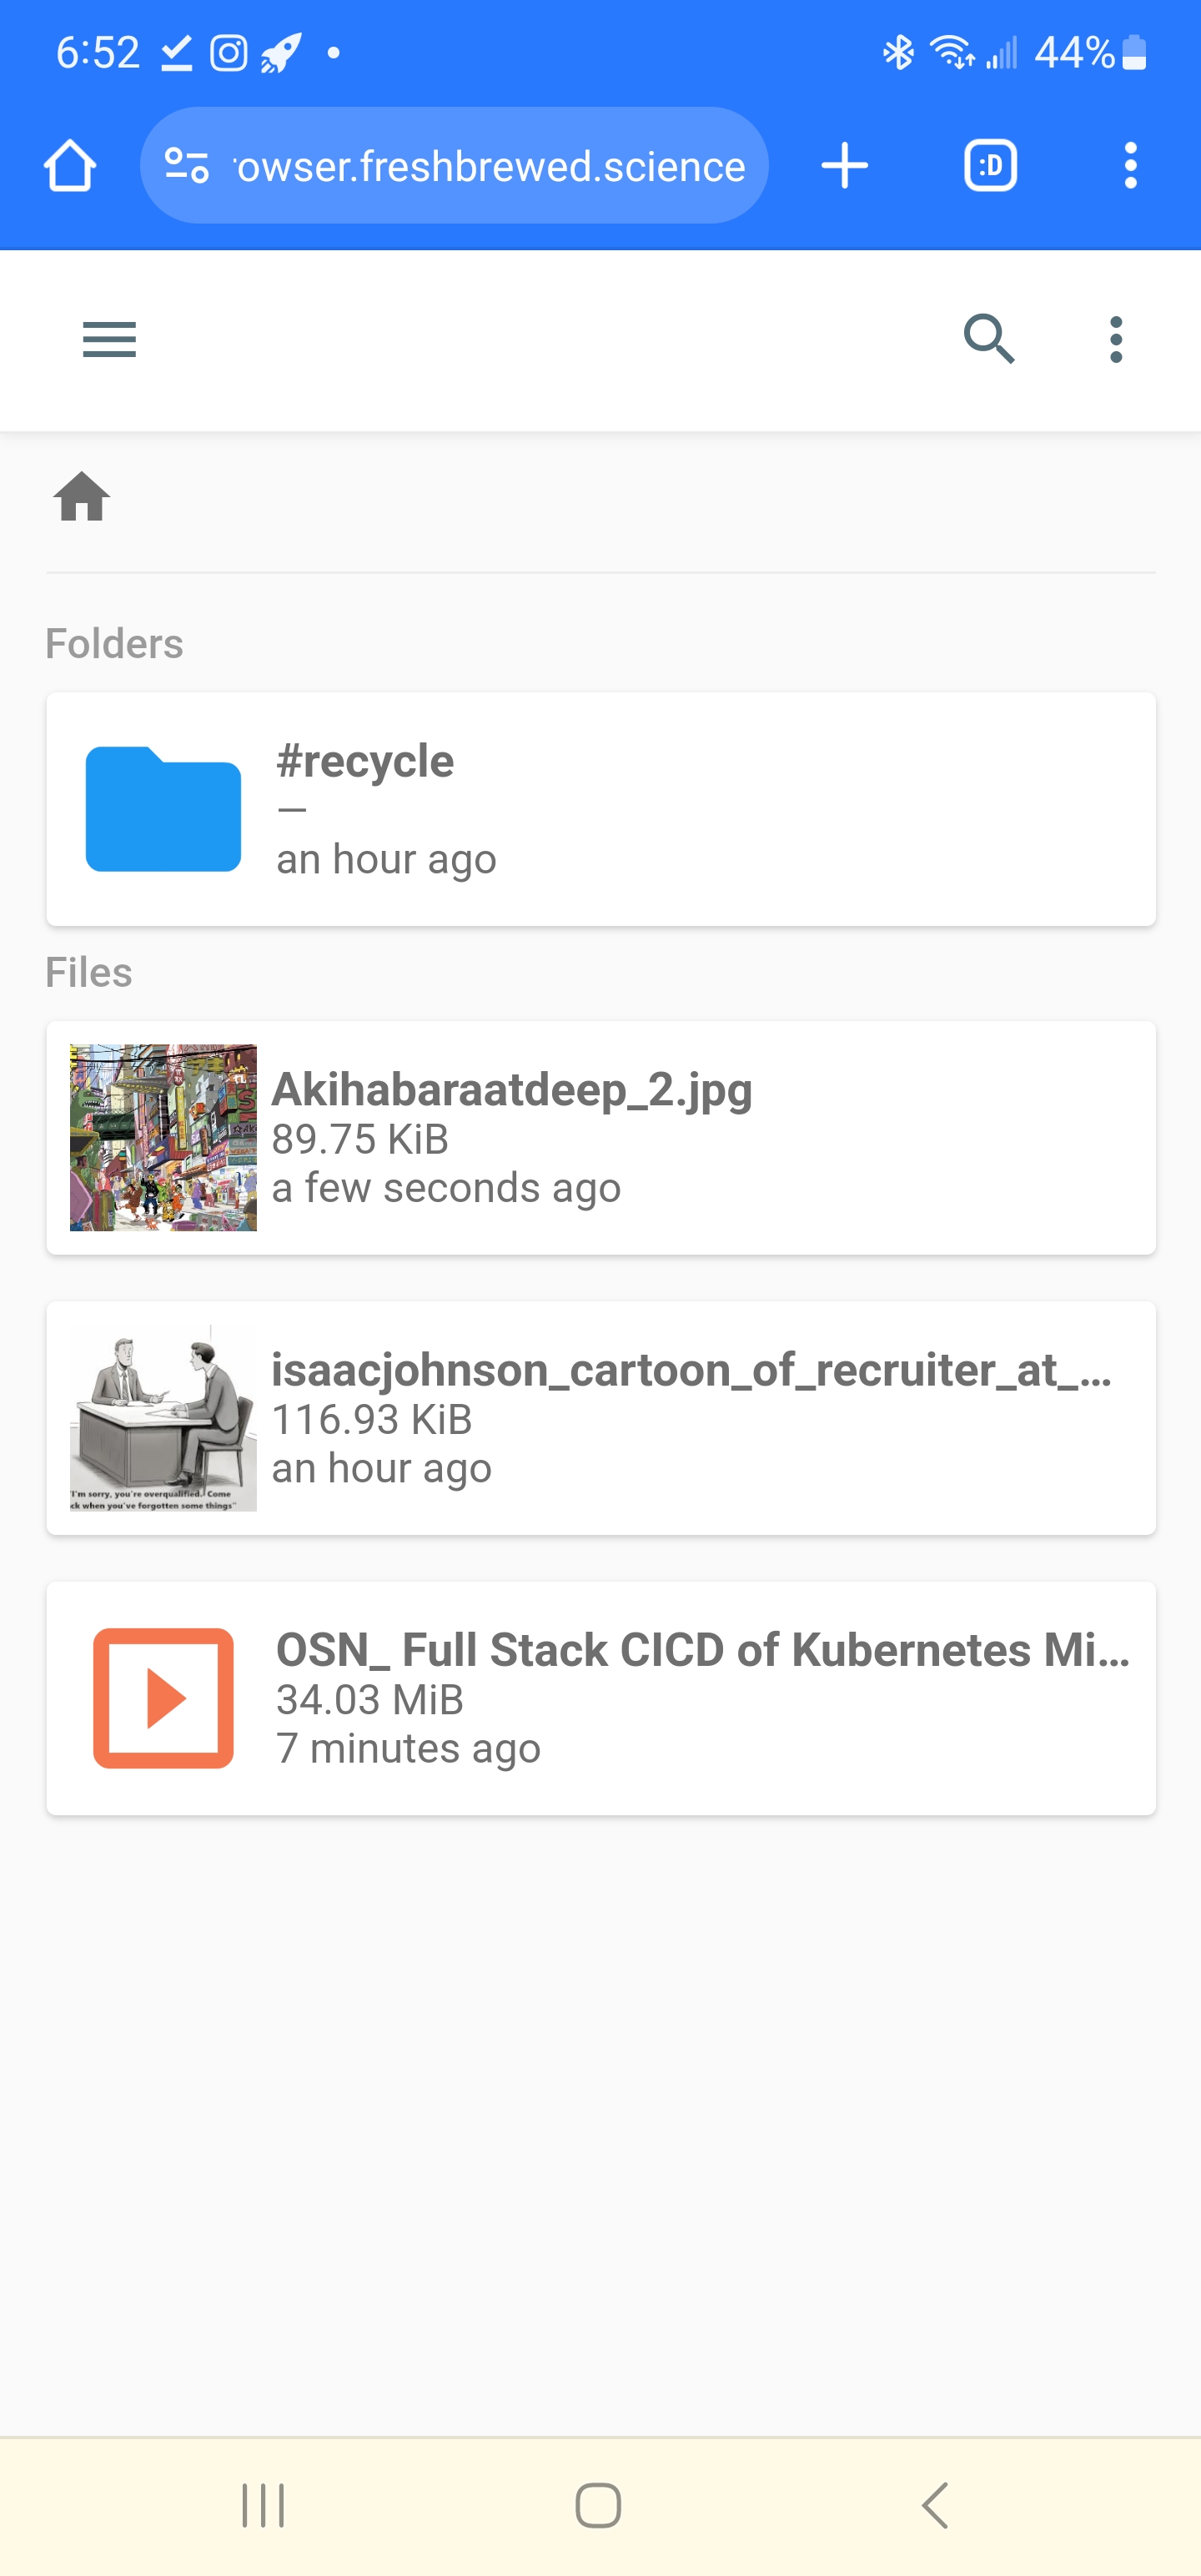
I found it worked fantastic from my mobile browser as well. In fact, I used it to upload and then download this screenshot:
Summary
We started off by exploring Pashword, a simple but useful tool for creating repeatable password hashes. We then moved on to setting up {php}IPAM. It’s a tool I find to be a pretty handy tool for tracking systems in my network. Lastly, we setup and tried out Filebrowser which, if for no other reason, is a great easy way to share files and upload from one’s mobile device.
I could have exposed {php}IPAM but fear the impact it might have without some kind of heavy security layer. I have been using Filebrowser on the regular since writing this post. It has so far proven to be exceedingly valuable for sharing files between devices easily.