Published: Jun 2, 2023 by Isaac Johnson
An issue that has come up recently on maintaining some Windows Server hosts is how to use cloud storage with Windows.
Today we will explore a few ways using Azure and GCP. We’ll use Azure Files, Azure Container (Blob) and lastly explore handling Windows Server mounts to GCP buckets via RClone and WinFSP
Azure Files
Azure Files is the easiest way to get an Azure Cloud storage account mounted.
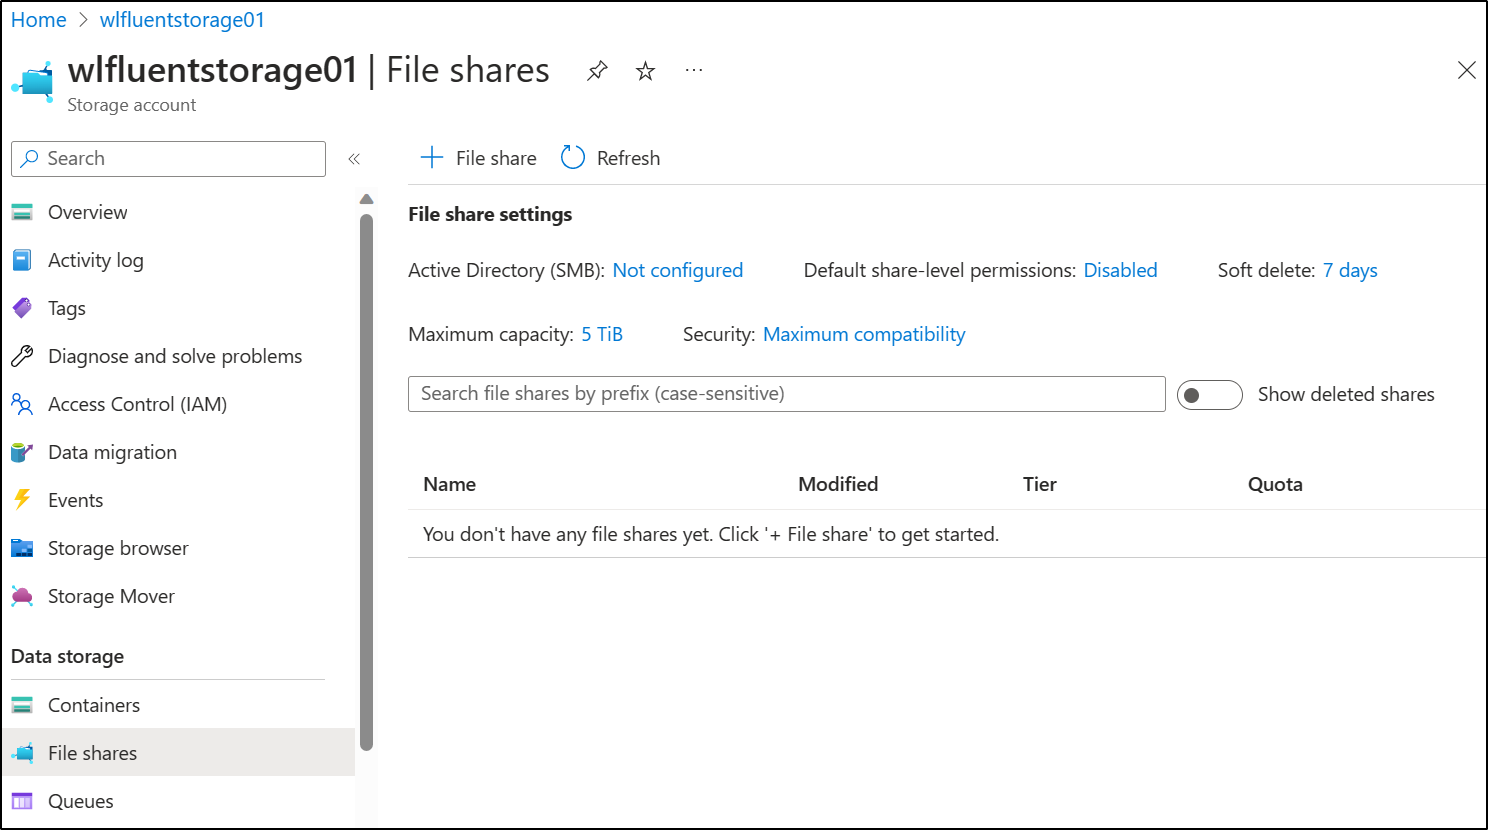
I’ll navigate to the same storage account we used last and go to File Shares
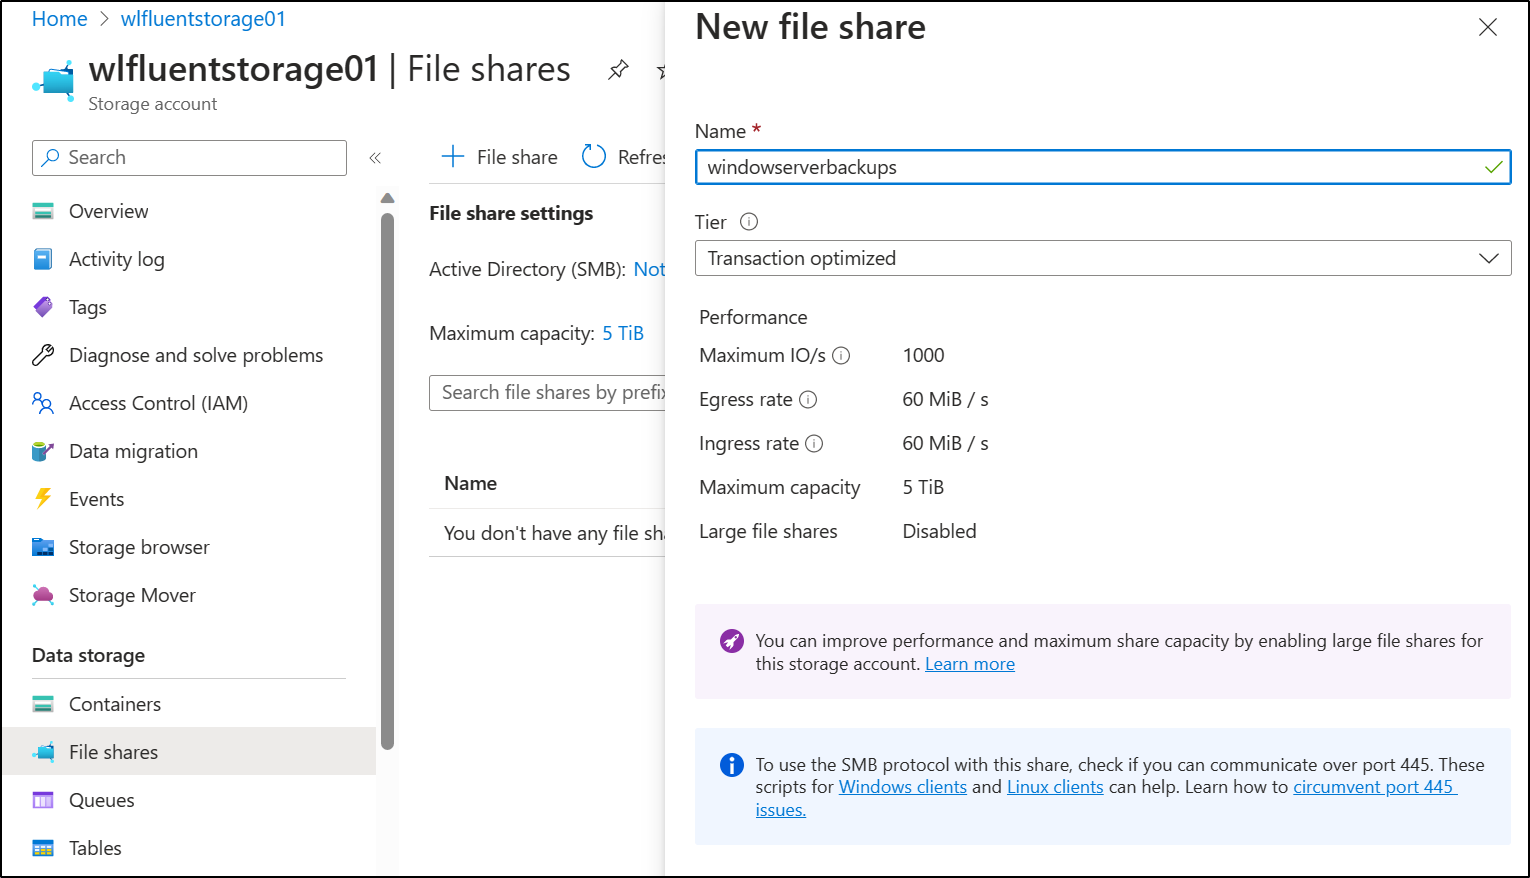
Here I’ll create new File Share and give it a name
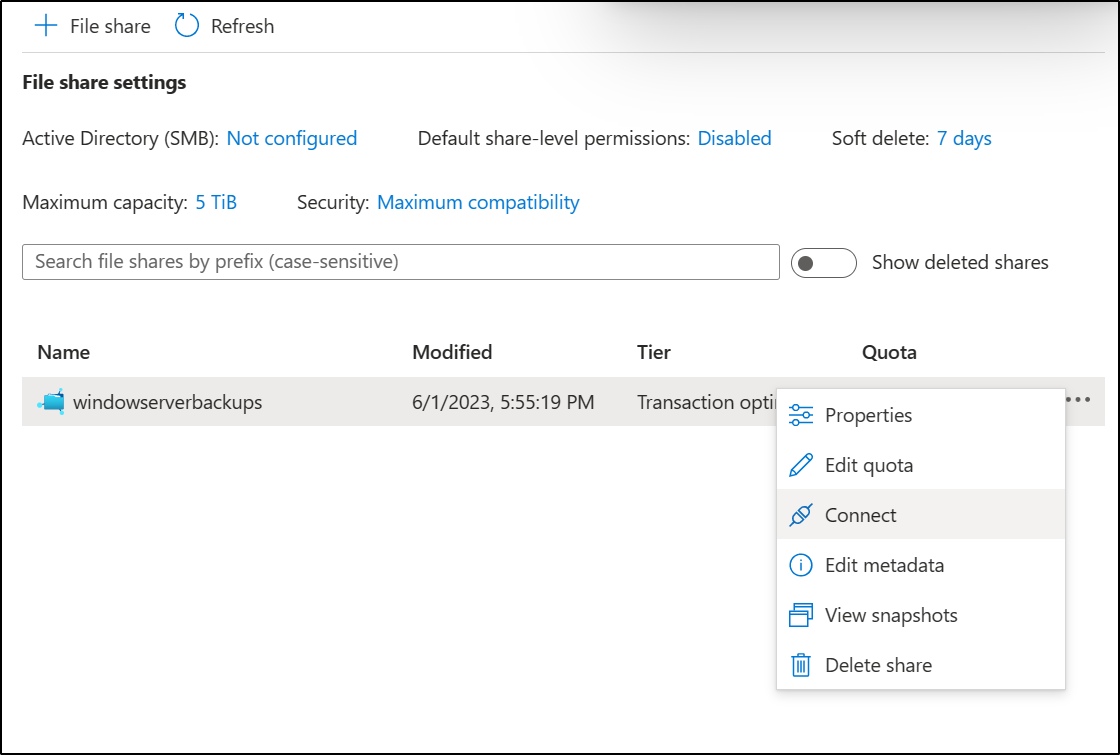
Next, we use the triple dot menu and click “Connect”
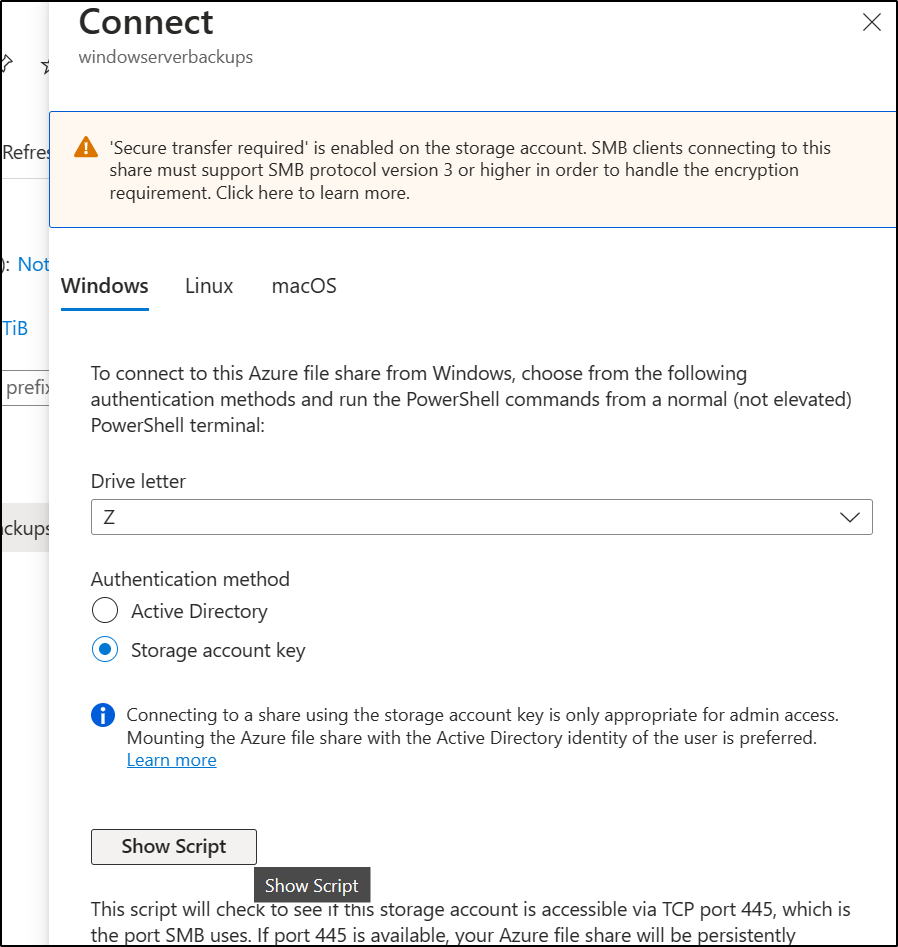
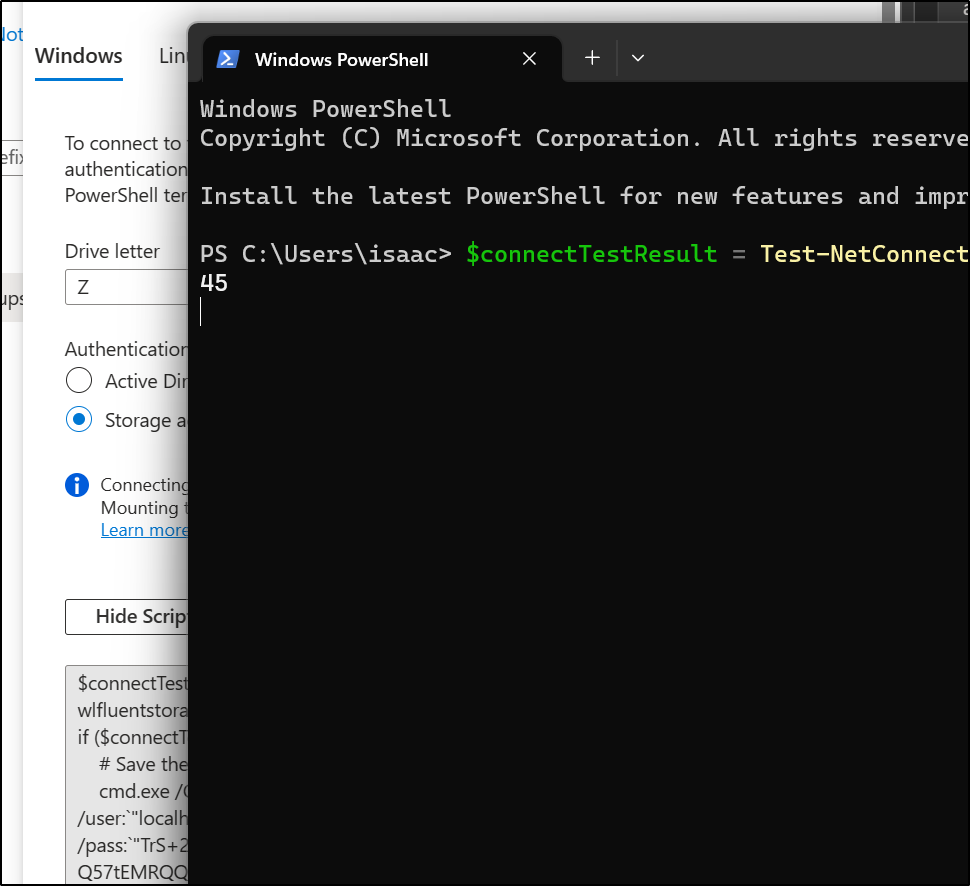
I’ll select a drive letter and click “show script”
I can then run it in Powershell
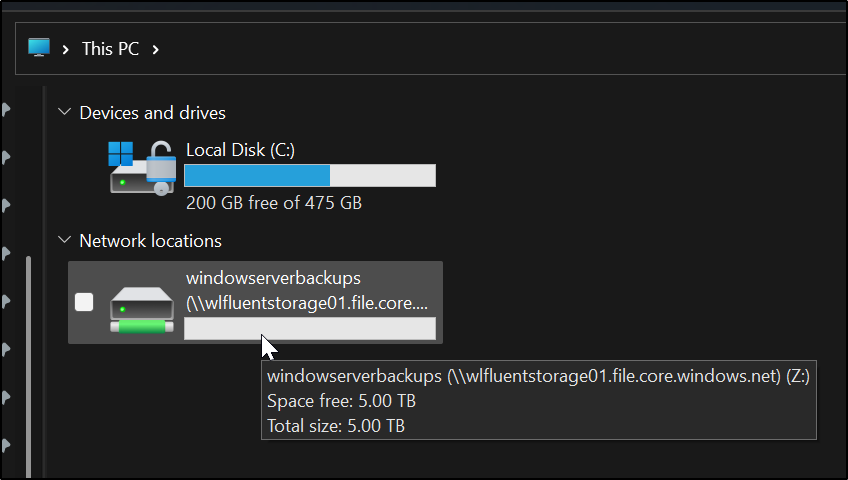
And when done, it has created the Drive letter
Which I see mounted
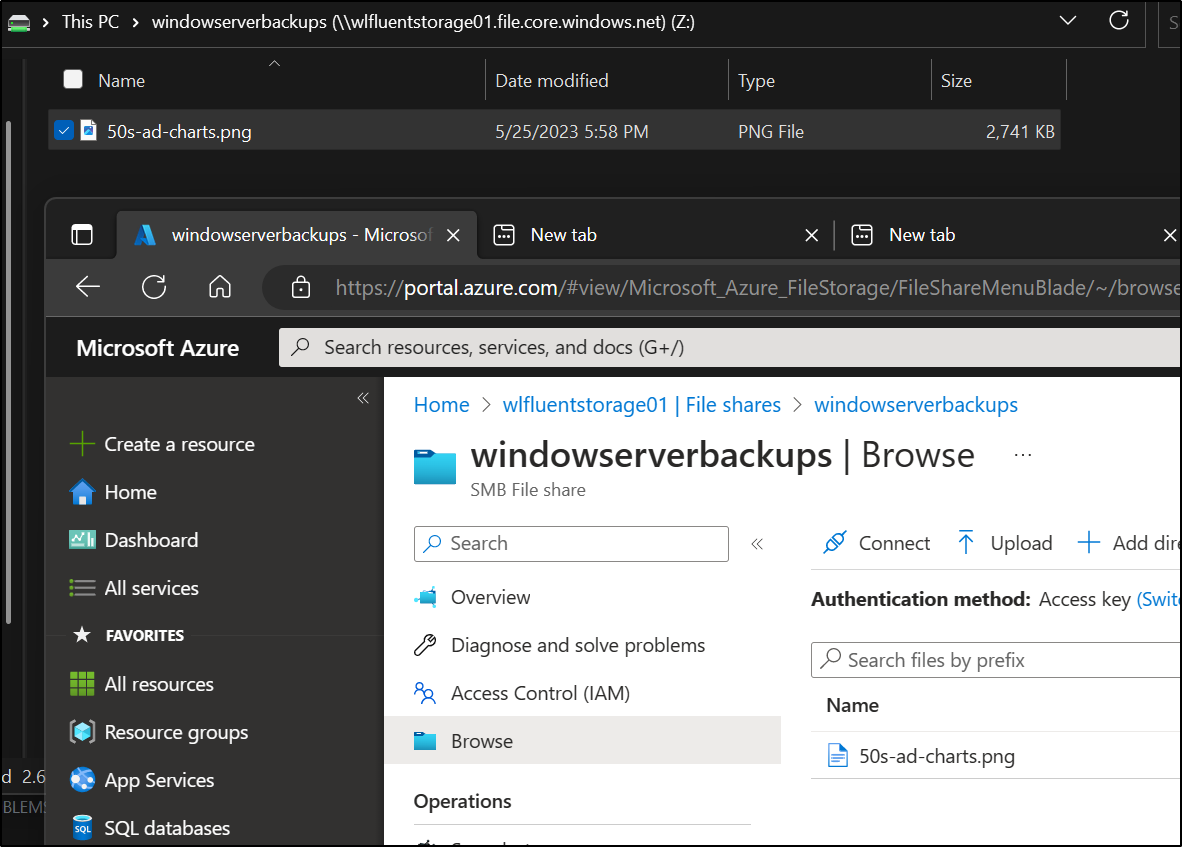
I can copy a file and see it is transferred via the portal
Fuse
The other method is using WSL to mount Blob storage through Fuse
Let’s first setup Fuse on WSL
sudo wget https://packages.microsoft.com/config/ubuntu/20.04/packages-microsoft-prod.deb
sudo dpkg -i packages-microsoft-prod.deb
sudo apt-get update
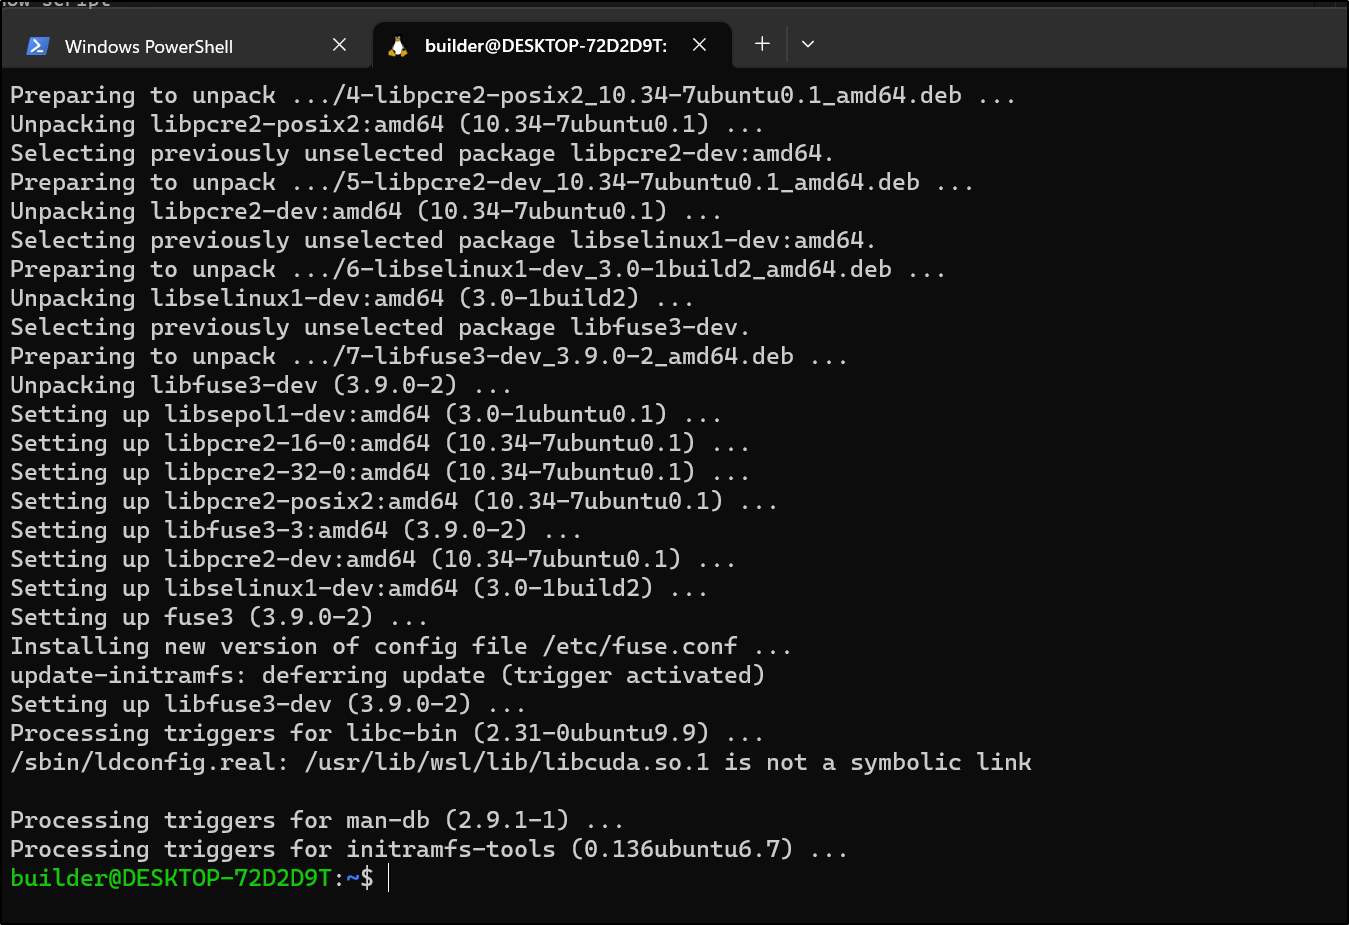
sudo apt-get install libfuse3-dev fuse3
Then we install blobfuse2
builder@DESKTOP-72D2D9T:~$ sudo apt-get install blobfuse2
Reading package lists... Done
Building dependency tree
Reading state information... Done
The following packages were automatically installed and are no longer required:
  libfwupdplugin1 libgbm1 libjs-sphinxdoc libjs-underscore libsass1 libsecret-1-0 libsecret-common libwayland-server0
  libxmlb1 python-pkginfo-doc python3-adal python3-aiohttp python3-applicationinsights python3-argcomplete
  python3-async-timeout python3-azext-devops python3-azure python3-azure-cli python3-azure-cli-core
  python3-azure-cli-telemetry python3-azure-cosmos python3-azure-cosmosdb-table python3-azure-datalake-store
  python3-azure-functions-devops-build python3-azure-multiapi-storage python3-azure-storage python3-cffi
  python3-fabric python3-humanfriendly python3-invoke python3-isodate python3-javaproperties python3-jsmin
  python3-jsondiff python3-knack python3-mock python3-msal python3-msal-extensions python3-msrest python3-msrestazure
  python3-multidict python3-pbr python3-pkginfo python3-ply python3-portalocker python3-psutil python3-pycparser
  python3-requests-oauthlib python3-scp python3-sshtunnel python3-tabulate python3-tz python3-uamqp
  python3-vsts-cd-manager python3-websocket python3-yarl
Use 'sudo apt autoremove' to remove them.
The following NEW packages will be installed:
  blobfuse2
0 upgraded, 1 newly installed, 0 to remove and 168 not upgraded.
Need to get 13.2 MB of archives.
After this operation, 28.6 MB of additional disk space will be used.
Get:1 https://packages.microsoft.com/ubuntu/20.04/prod focal/main amd64 blobfuse2 amd64 2.0.3 [13.2 MB]
Fetched 13.2 MB in 5s (2565 kB/s)
Selecting previously unselected package blobfuse2.
(Reading database ... 226061 files and directories currently installed.)
Preparing to unpack .../blobfuse2_2.0.3_amd64.deb ...
Unpacking blobfuse2 (2.0.3) ...
Setting up blobfuse2 (2.0.3) ...
Processing triggers for rsyslog (8.2001.0-1ubuntu1.3) ...
invoke-rc.d: could not determine current runlevel
builder@DESKTOP-72D2D9T:~$
note: if it doesnt find blobfuse2, one of the earlier steps to setup Microsoft packages for Ubuntu failed
I’ll now make a RAM disk for temp storage
builder@DESKTOP-72D2D9T:~$ sudo mkdir /mnt/ramdisk
builder@DESKTOP-72D2D9T:~$ sudo mount -t tmpfs -o size=16g tmpfs /mnt/ramdisk
builder@DESKTOP-72D2D9T:~$ sudo mkdir /mnt/ramdisk/blobfuse2tmp
builder@DESKTOP-72D2D9T:~$ sudo chown builder /mnt/ramdisk/blobfuse2tmp
Then a mount point for the Blob container
$ sudo mkdir /mnt/azk8sstorage
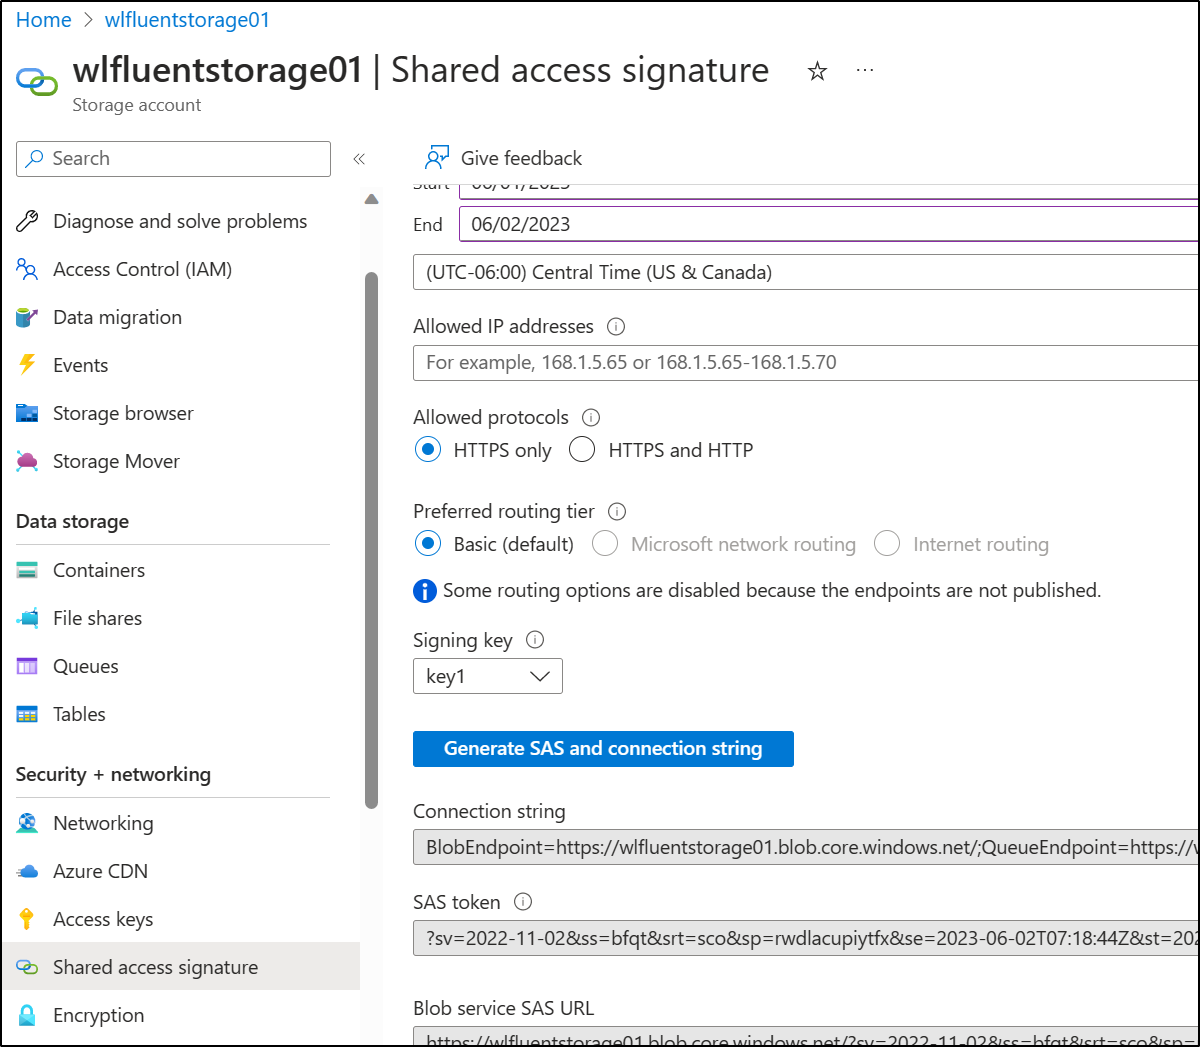
Using the Shared Access Signature (SAS) section, I’ll create an SAS string I need for the FUSE configuration
the config then looks like this
builder@DESKTOP-72D2D9T:~$ cat ~/fuse.config.yaml
allow-other: true

logging:
  type: syslog
  level: log_debug

components:
  - libfuse
  - file_cache
  - attr_cache
  - azstorage

libfuse:
  attribute-expiration-sec: 120
  entry-expiration-sec: 120
  negative-entry-expiration-sec: 240

file_cache:
   path: /mnt/ramdisk/blobfuse2tmp
#  timeout-sec: 120
   max-size-mb: 8192
   cleanup-on-start: true
   allow-non-empty-temp: true
stream:
  block-size-mb: 8
  blocks-per-file: 3
  cache-size-mb: 1024

attr_cache:
  timeout-sec: 7200

azstorage:
  type: block
  account-name: wlfluentstorage01
  account-key: TrS+207kSOr7mTBO1ipE1z9KaYIeOHctLgcDC7HhRjp0bbp8reCDhnfhK317OjiQ57tEMRQQc//z+AStrz75pQ==
  endpoint: https://wlfluentstorage01.blob.core.windows.net
  mode: sas
  container: k8sstorage
  sas: ?sv=2022-11-02&ss=bfqt&srt=sco&sp=rwdlacupiytfx&se=2023-06-02T07:18:44Z&st=2023-06-01T23:18:44Z&spr=https&sig=jVb1WPUplDH6ksZJAt1I9QGlTMR4I0YSEeej9KxWNso%3D
Now I can mount it
builder@DESKTOP-72D2D9T:~$ sudo blobfuse2 mount /mnt/azk8sstorage --config-file=/home/builder/fuse.config.yaml
I can see the contents I would expect now in WSL
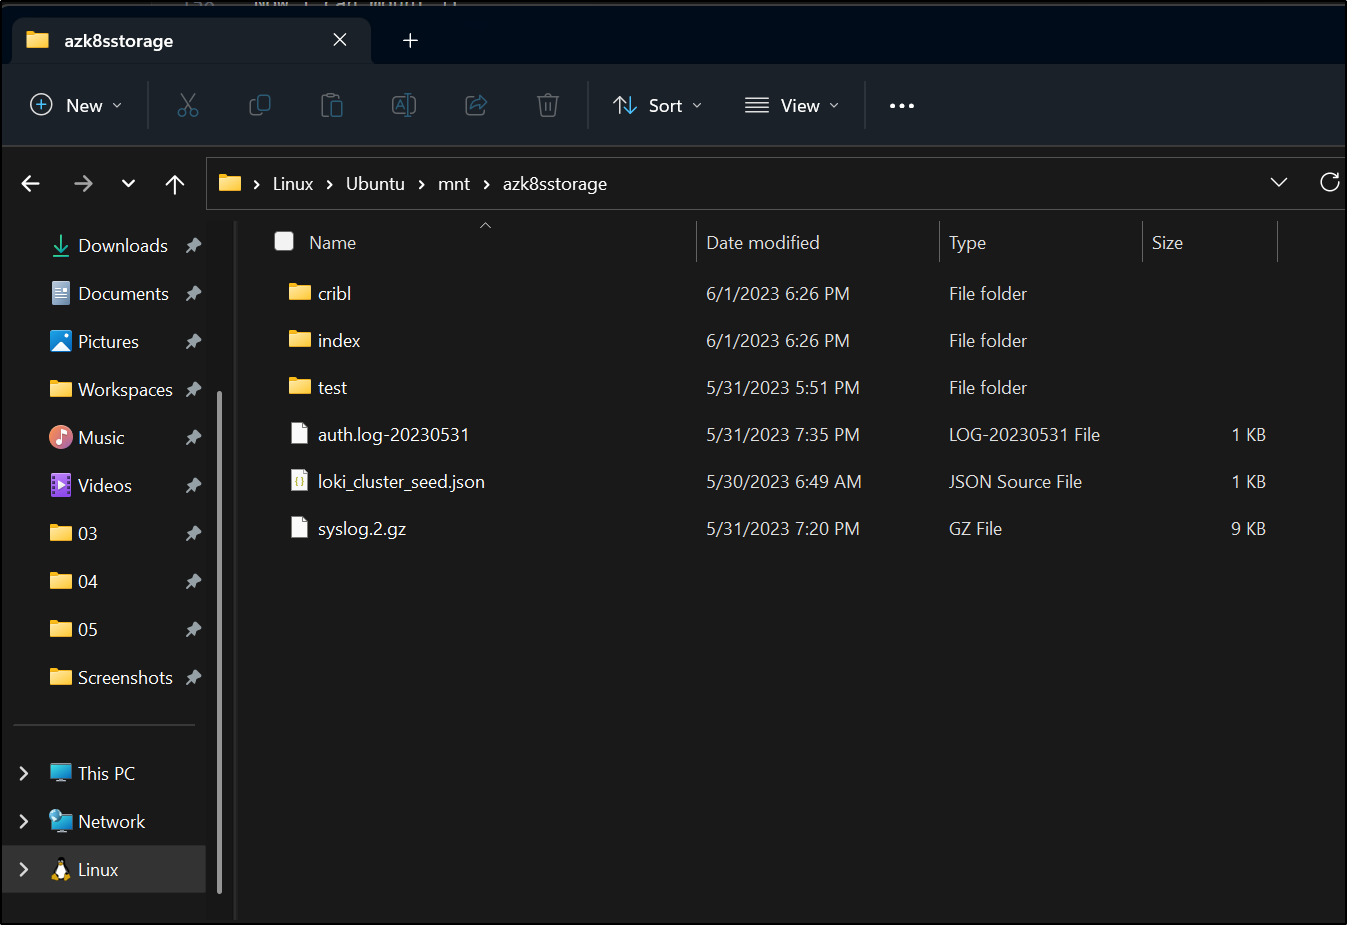
But more to the point, because Windows 11 mounts our Linux File system in Windows, I can see the Blob container in Windows File Explorer
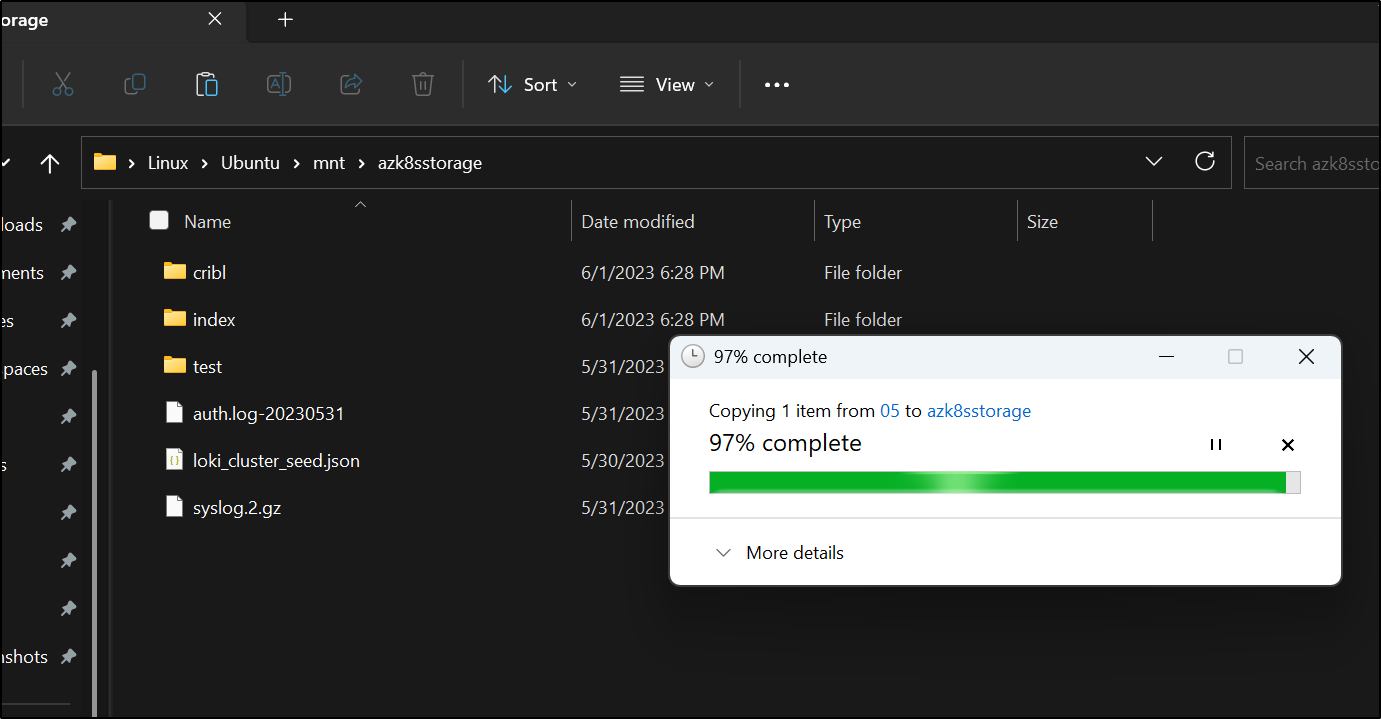
This means I can copy a file over
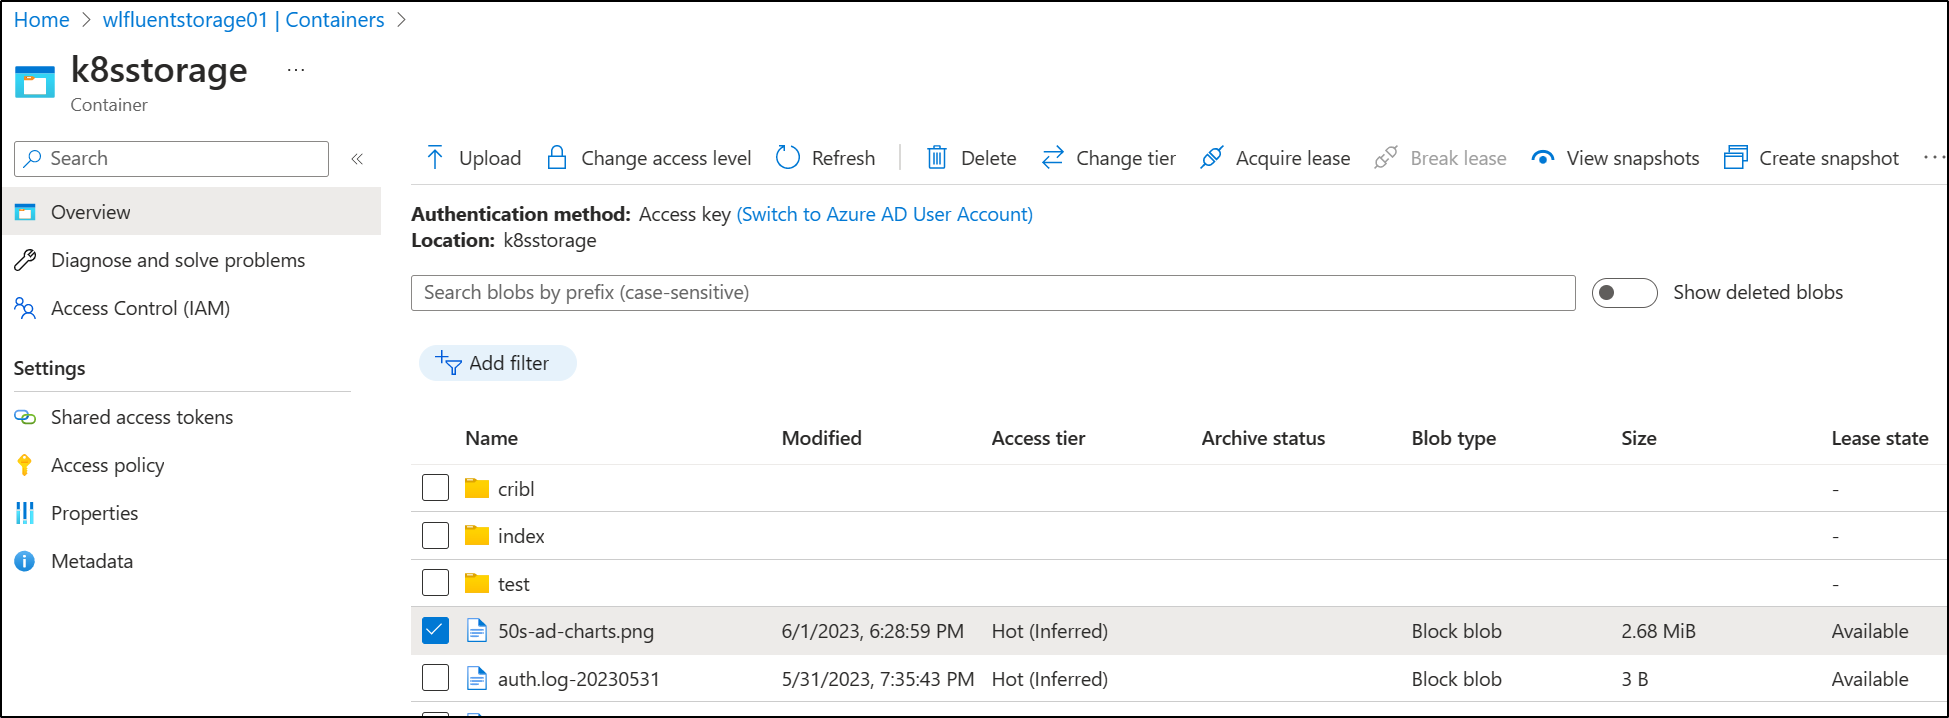
And see it in the Portal
I can double click it and see Windows via WSL via Fuse, pull it back and show the image I uploaded
GCP and Windows
I wrote this section then a machine crash nearly took down the whole post. I’m pivoting to using a Windows Server cloud VM instead of my own Windows 11 host for this
Create a VM in Azure
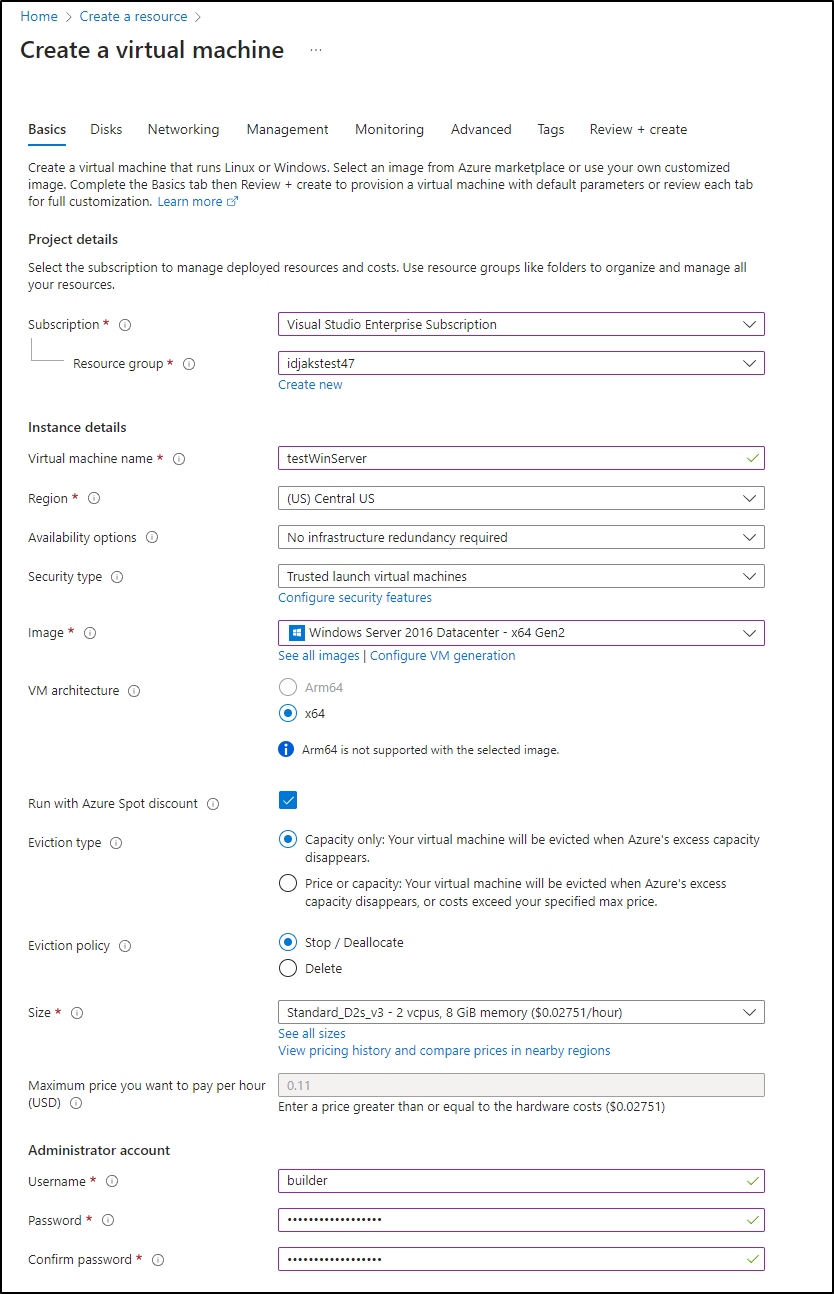
To test, I’ll create a Windows Server 2016 in Azure so as not to mess up (again) my host machine
I’ll set it up with Windows Server 2016 DC and use Spot Discount to save a few bucks.
I know I mentioned this in my OSN Talk but I love how one can save using your existing Windows Server licenses. Businesses need to keep that in mind when moving lots of Windows hosts from existing Datacenters.
Under networking, make sure to delete the Public IP when we kill this VM, by default this is disabled/not selected
To save money, I’ll leave the Auto-shutdown enabled. This is pretty handy for ‘utility boxes’. One will get an email saying “hey i plan to shut down” that let’s you opt out should you be using it near the Shutdown Time. It’s in UTC by default so i then changed to Central
Later on, I might very well add some Choco steps here to automate at boot up. I’ve done that pattern before with great success
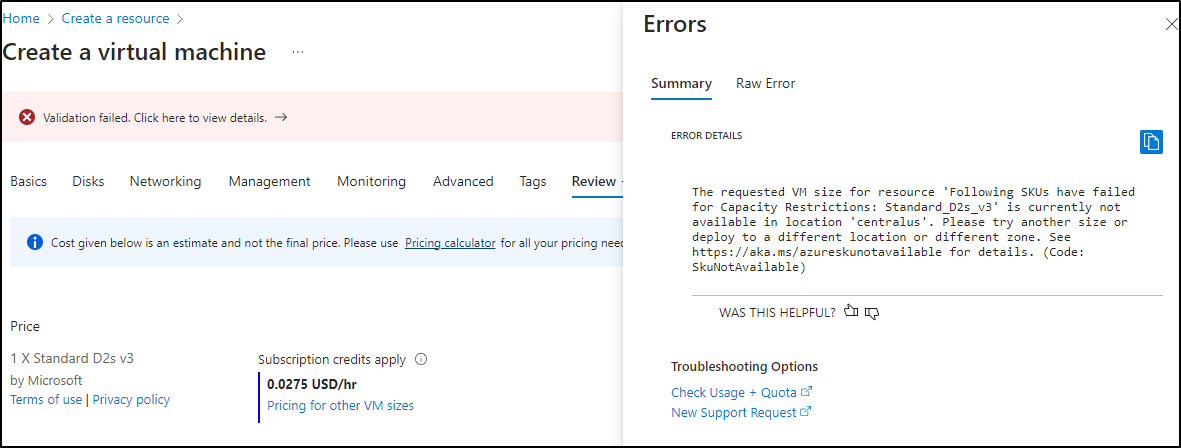
Interetstingly I got blocked on capacity
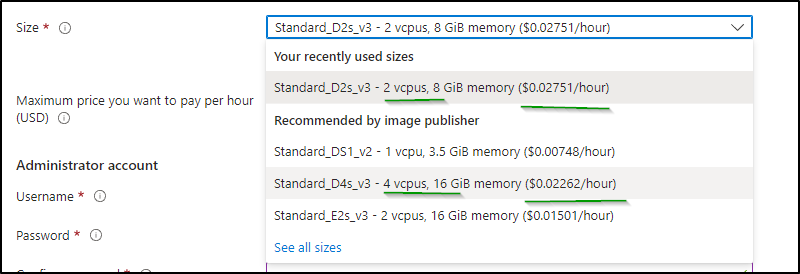
going back, I really should have looked at the Size and pricing
I, of course, switched to a D4s_v3 immediately. I went back and forth on regions and machine classes. Seems it is a bit of a game on spot instances in regions. Once I opted out of spot instance pricing, validation passed and I could create.
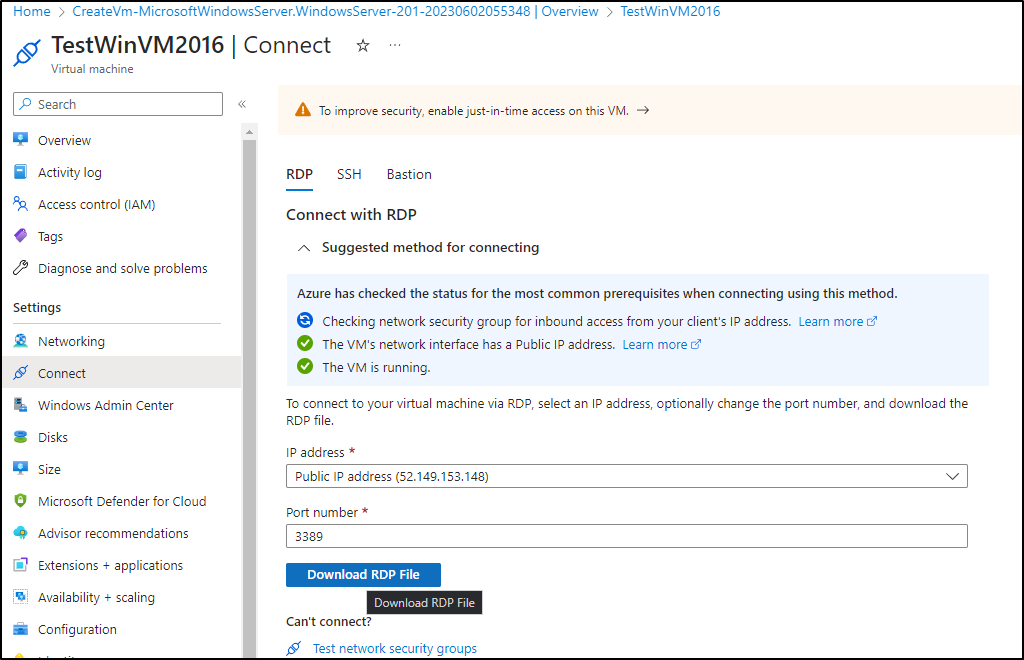
When completed, I can download the RDP to connect
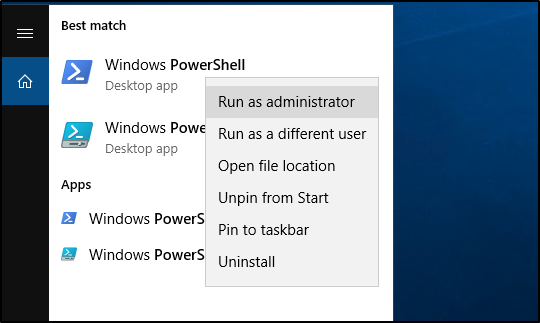
We then need chocolatey. So I’ll fire up an Admin PowerShell
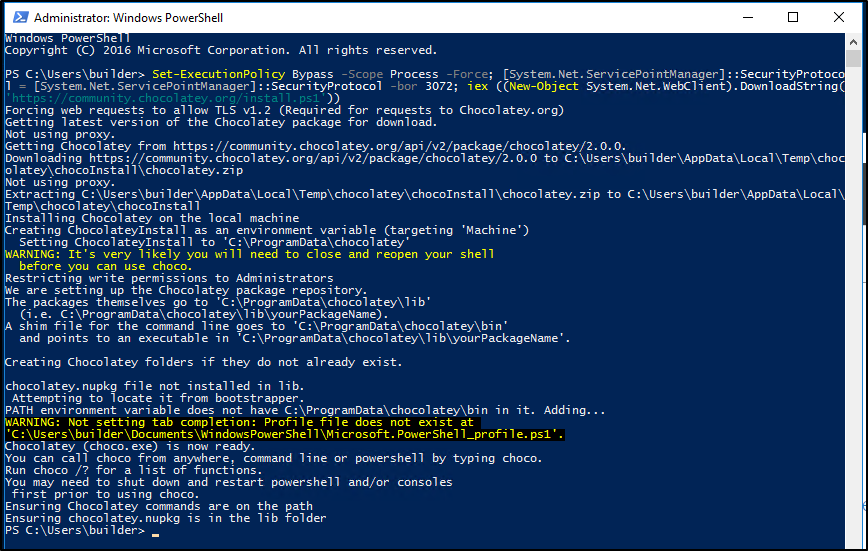
One just needs to change the execution policy and run the Choco one-liner (you can find steps here)
Note: the first time through needed a reboot
After reboot it works
I’ll choco install rclone next
PS C:\Users\builder> choco install rclone
Chocolatey v2.0.0
Installing the following packages:
rclone
By installing, you accept licenses for the packages.
Before we configure rclone, we need an SA JSON that can see our buckets.
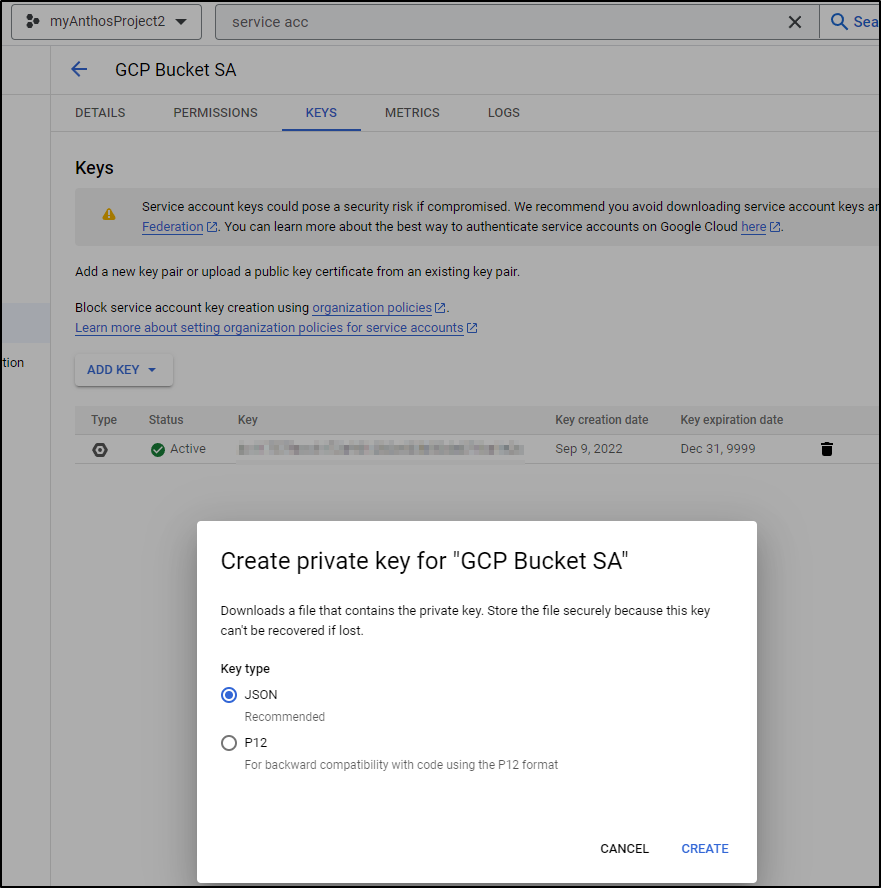
I’ll get a fresh JSON file for an existing Service from Google Cloud Console
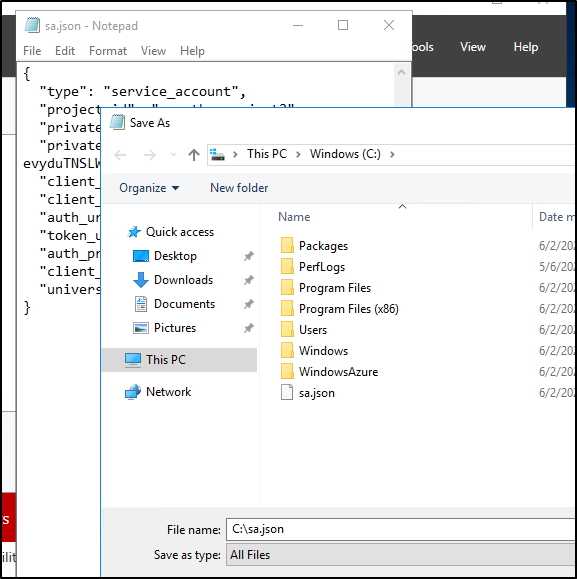
To transfer it over to the Windows Server, I just opened locally in VS Code, copied the contents, then used Notepad to save it to the C:\ drive on the destination host. It’s really just a small text file
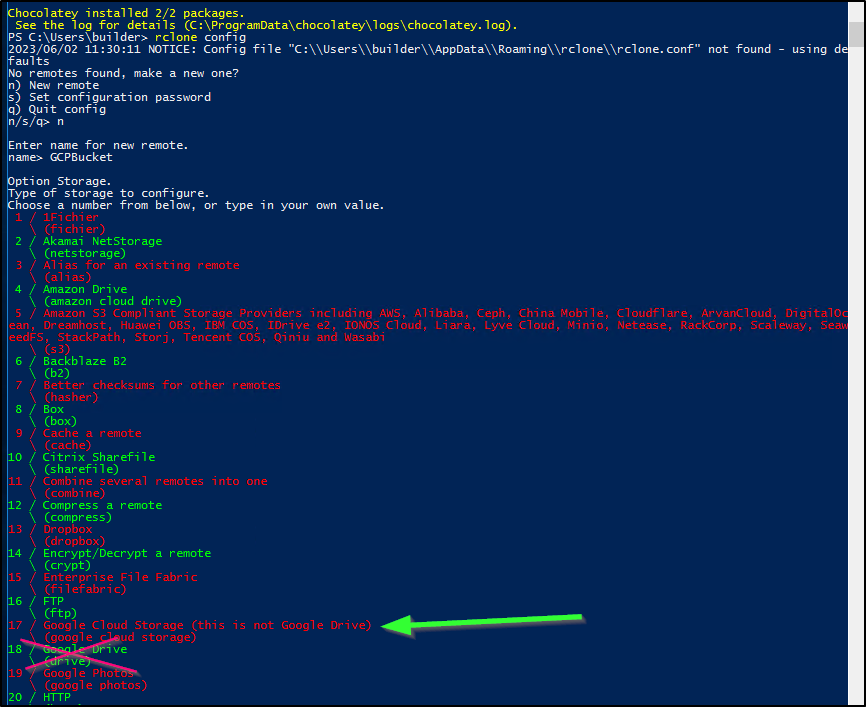
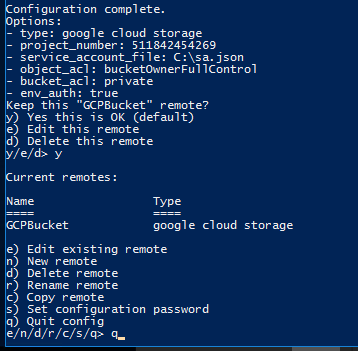
We’ll want the GCP Cloud Storage (not Drive) when setting up rclone with ‘rclone config’
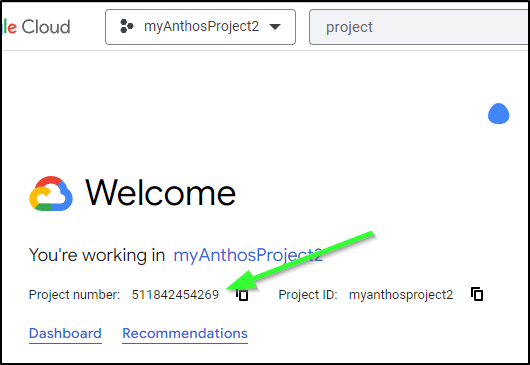
To list buckets, we need that project Number, which I always forget where it’s shown. It’s on the main Welcome page for your project
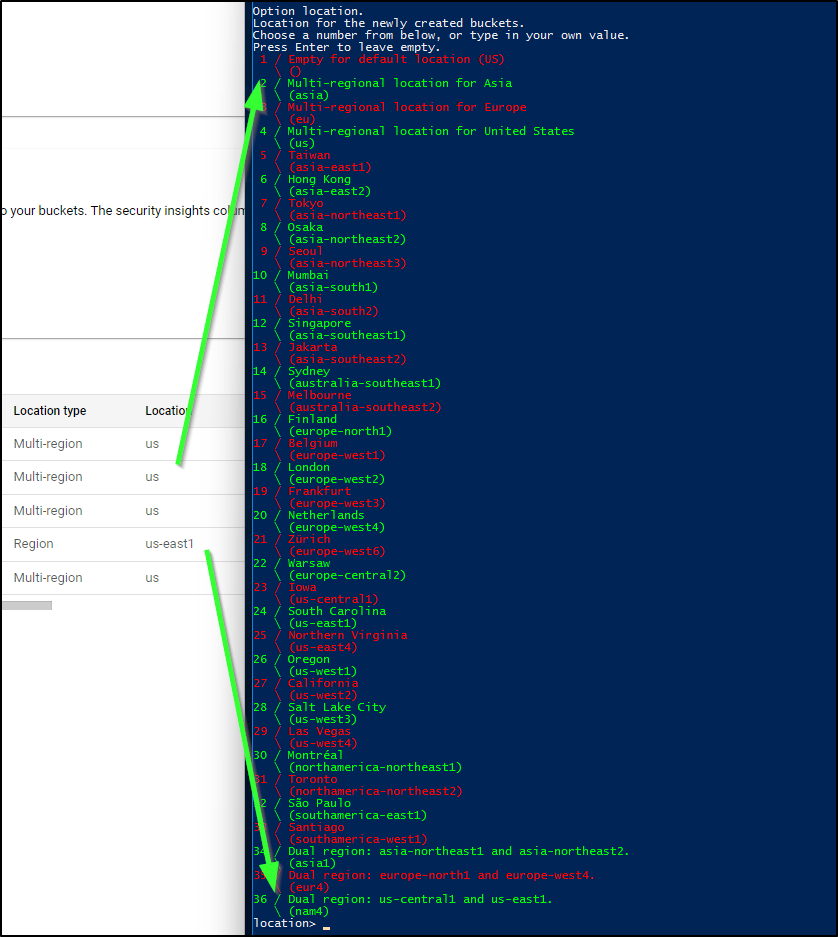
Most of my buckets are non-regional US, save for one. So provided I’m interested in those, I would stick with the default region of “US”
I’ll then quit
I can now see my buckets
PS C:\Users\builder> rclone lsd GCPBucket:
          -1 2023-06-02 11:41:09        -1 artifacts.myanthosproject2.appspot.com
          -1 2023-06-02 11:41:09        -1 backupsforlonghorn
          -1 2023-06-02 11:41:09        -1 myanthosproject2_cloudbuild
          -1 2023-06-02 11:41:09        -1 myk3sglusterfs
          -1 2023-06-02 11:41:09        -1 myk3spvcstore
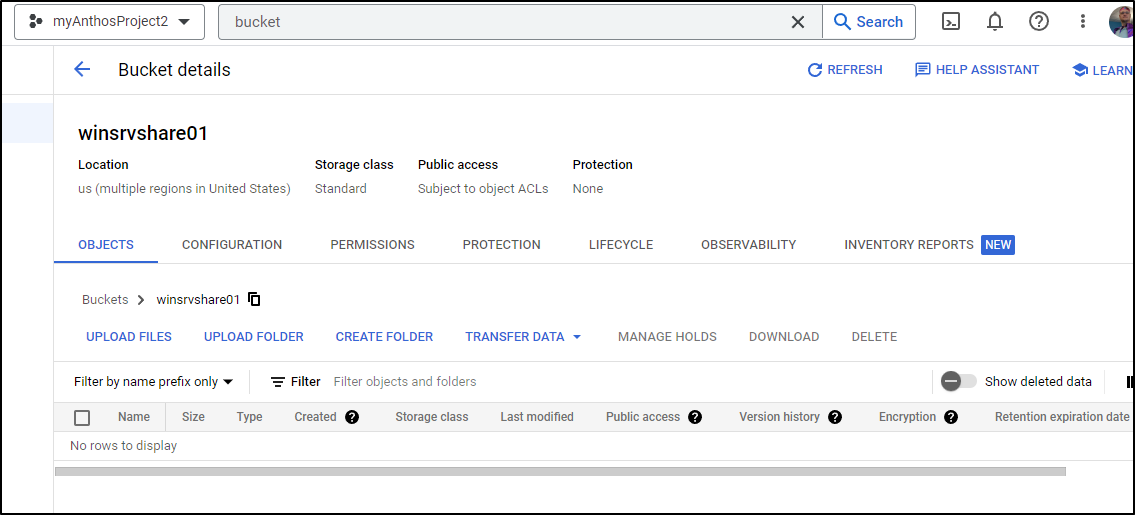
I can create a new bucket
PS C:\Users\builder> rclone mkdir GCPBucket:winsrvshare01
PS C:\Users\builder> rclone ls GCPBucket:winsrvshare01
PS C:\Users\builder>
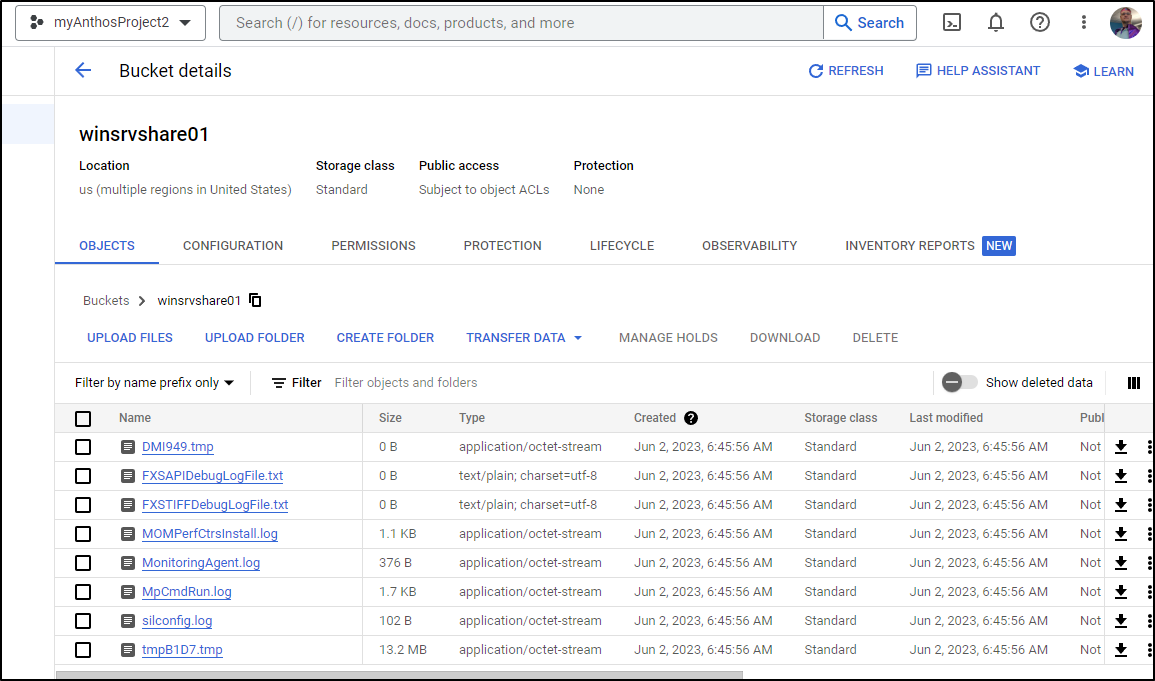
And see that reflected in GCP
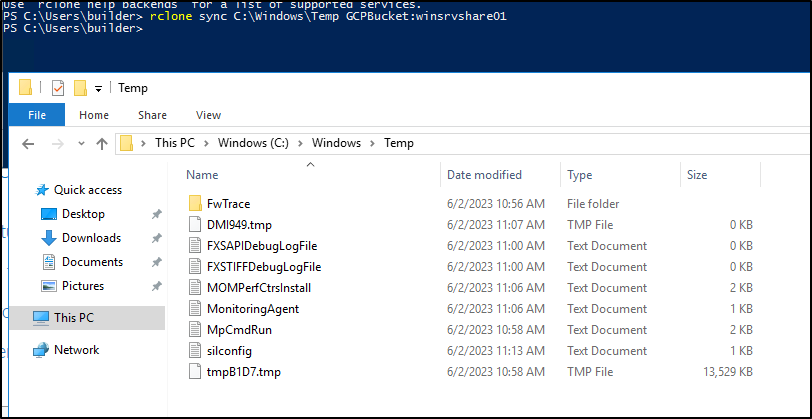
We can use “sync” to rsync, destructive, local files to destination (wiping out excess files in the bucket) with rclone sync
For example, say I did an rclone sync from C:\Windows\Temp
I could then see the files immediately show up in GCP Storage
I can also just rclone copy to just copy a specific file
To actually mount files, we need WinFSP.
WinFSP
Let’s first get Win FSP.
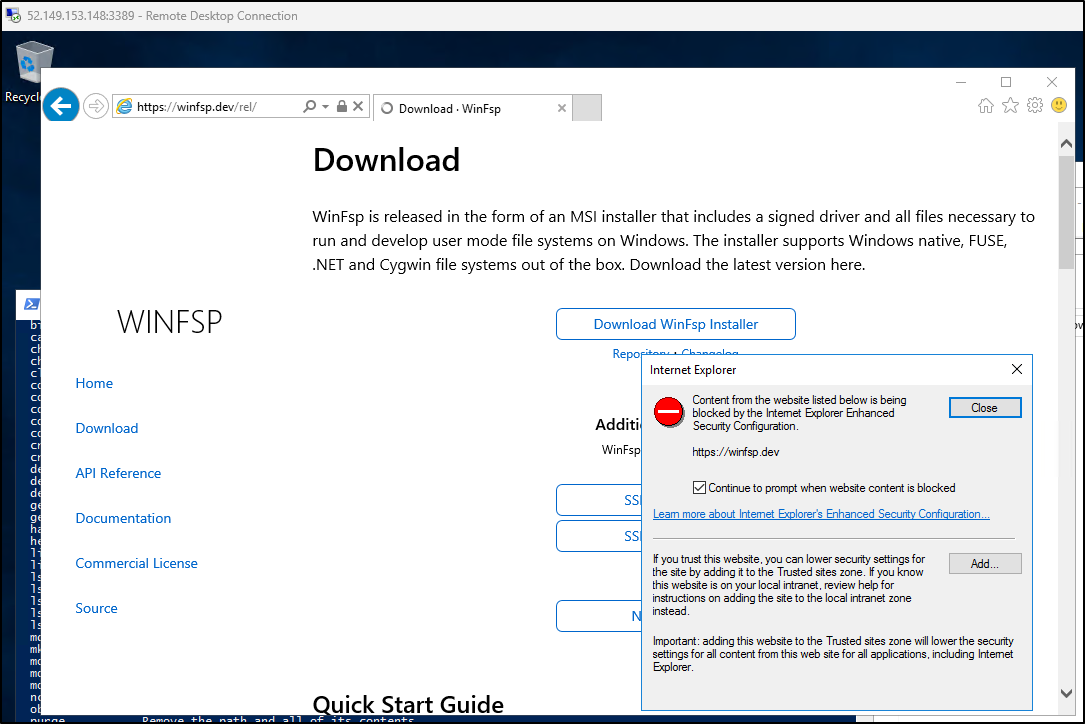
Now we could fight IE in Windows Server to get the files, which is a fun game if you have a few hours to spend making exceptions in IE enhanced security…
OR, you can just use choco on this one
PS C:\Users\builder> choco install winfsp
Chocolatey v2.0.0
Installing the following packages:
winfsp
By installing, you accept licenses for the packages.
I should now be able to mount the drive using Powershell
PS C:\Users\builder> choco install winfsp
Chocolatey v2.0.0
Installing the following packages:
winfsp
By installing, you accept licenses for the packages.
Progress: Downloading winfsp 2.0.23075... 100%

winfsp v2.0.23075 [Approved]
winfsp package files install completed. Performing other installation steps.
The package winfsp wants to run 'chocolateyInstall.ps1'.
Note: If you don't run this script, the installation will fail.
Note: To confirm automatically next time, use '-y' or consider:
choco feature enable -n allowGlobalConfirmation
Do you want to run the script?([Y]es/[A]ll - yes to all/[N]o/[P]rint): A

WARNING: No registry key found based on  'WinFsp*'
Installing winfsp...
winfsp has been installed.
  winfsp may be able to be automatically uninstalled.
 The install of winfsp was successful.
  Software installed as 'msi', install location is likely default.

Chocolatey installed 1/1 packages.
 See the log for details (C:\ProgramData\chocolatey\logs\chocolatey.log).
PS C:\Users\builder>
PS C:\Users\builder>
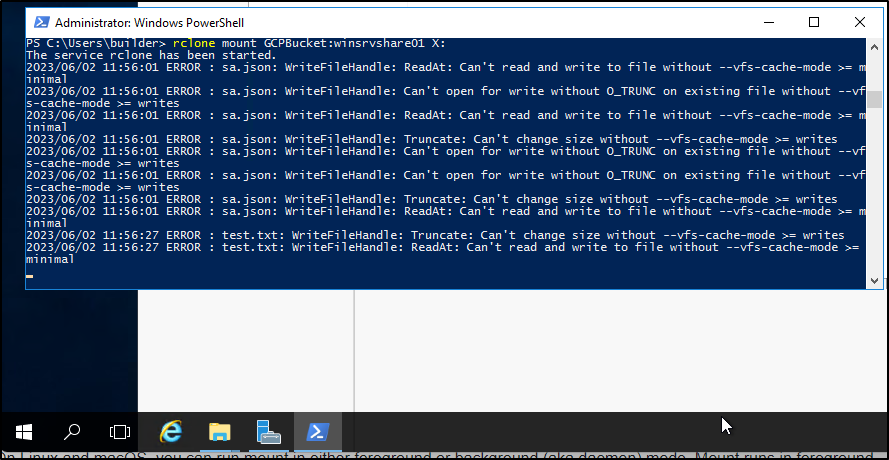
PS C:\Users\builder> rclone mount GCPBucket:winsrvshare01 X:
The service rclone has been started.
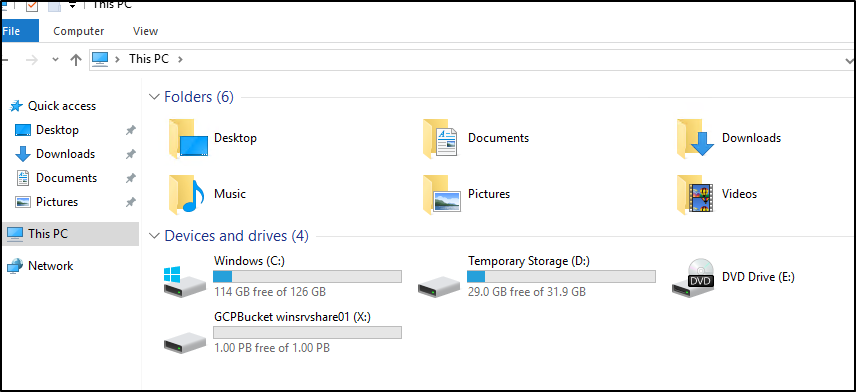
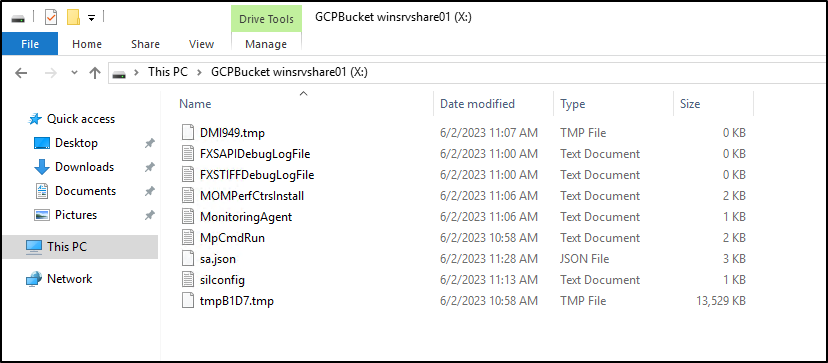
We can see our files now in the “X:” drive we mounted
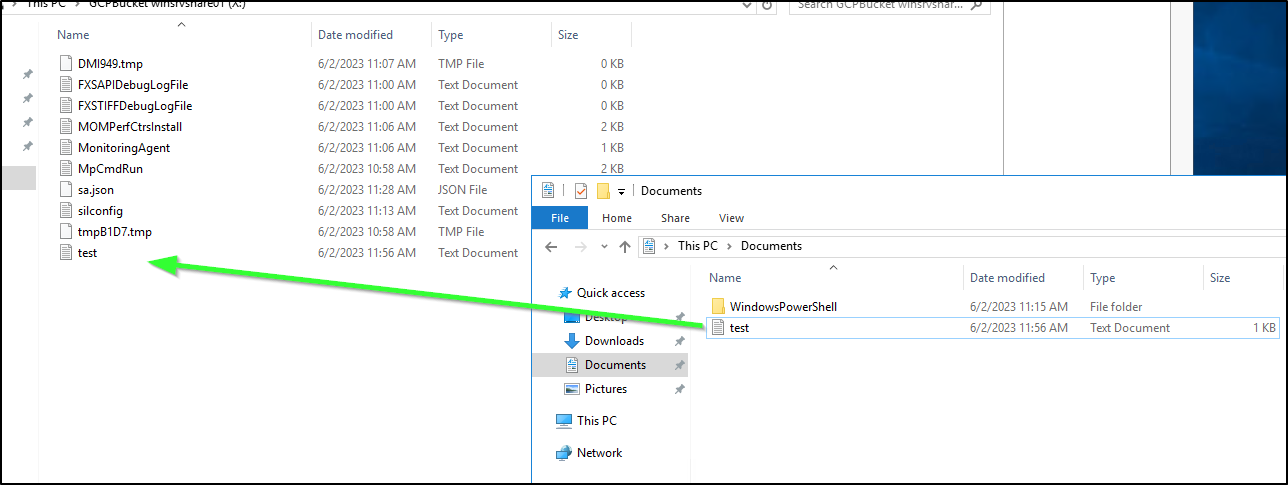
I saw some errors in the log in PowerShell so I wanted to test this mount behaviour.
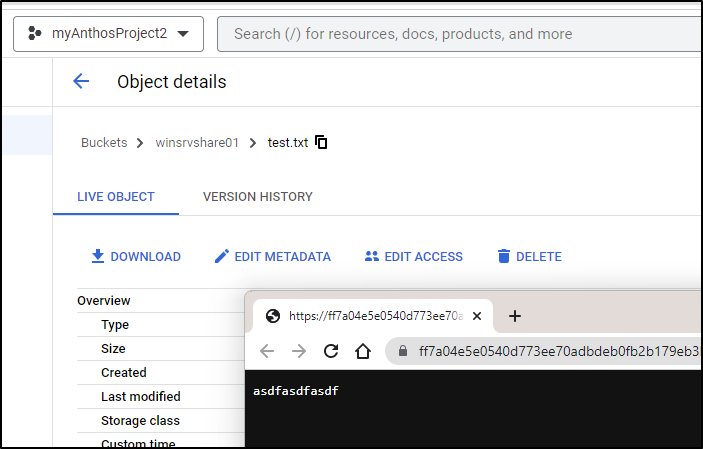
I created a file with some random text and dragged and dropped it over
I then tested it out locally and found the file was just fine
One minor annoyance is that the ‘rclone mount’ does have a ‘–daemon’ mode for Linux and Mac, but not for Windows so we have to leave it up in the foreground
I want to create a new CMD file in the startup folder. You can use Win+R and enter “shell:startup” or just go to %APPDATA%\Microsoft\Windows\Start Menu\Programs\Startup
I’m going to try using the (undocumented) no-console option. I’ll create a text file in the startup folder and add the contents for the mount
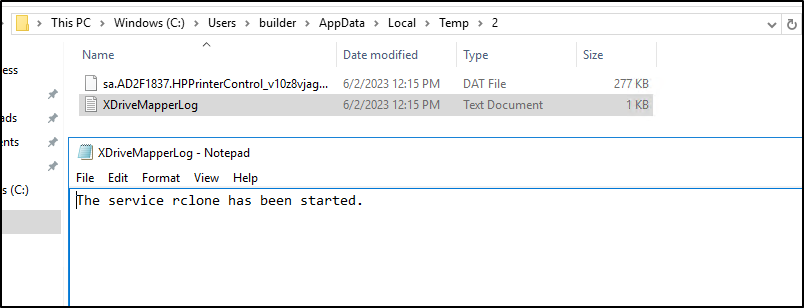
rclone.exe mount GCPBucket:winsrvshare01 X: -o volname=GCPRemote --no-console --log-file "%TMP%\XDriveMapperLog.txt"
Windows by default hides extensions, so i have to turn this txt file into a CMD
I’ll just use “move” with drag and drop in PowerShell to change the txt to cmd
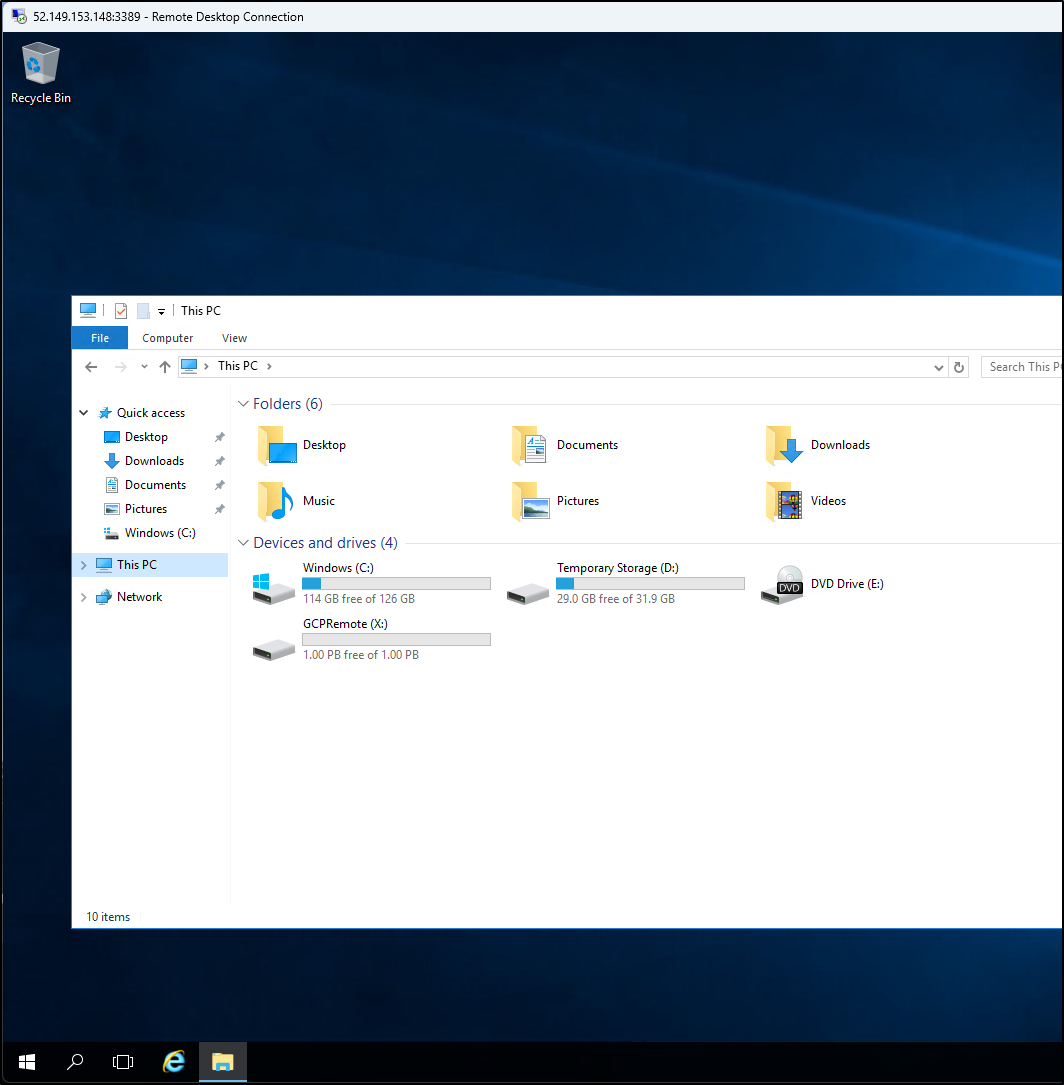
I restarted the host and upon login, I could see the drive mounted
And output that the drive was mapped
Summary
Today we had some fun digging into using an Azure Storage account two ways - first with “Azure Files” storage types to mount a drive with PowerShell and then using BlobFuse with WSL to mount it via Windows Subsystem for Linux integration in Windows 11. We then explored GCP Buckets with Windows Server by using a Windows Server 2016 host in Azure and mounting buckets in GCP using RClone.
These techniques are powerful ways to create network drives using the clouds for which you already pay. I did not cover S3, but you can use AWS pretty much the same way - either with s3fs in Linux and mounting via WSL or using rclone with AWS S3 (see docs here). I have nothing against AWS, I just tend to lean towards Azure and GCP.


