

Published: Apr 13, 2023 by Isaac Johnson
I was reviewing some Open Source monitoring solutions recently when I got turned on to Zabbix. I was surprised this hadn’t come across my path earlier. It’s been out since 2005 and is a really stable self-hosted monitoring solution. It’s essentially a fully open-source solution out of Latvia created by Alexei Vladishev.
Let’s check out, what I believe to be, a hidden gem of an OSS monitoring suite.
Kubernetes Install
Zabbix offers many ways to host. Most traditionally it runs as service on a VM with a database backend, generally MySQL or Postgres.
That said, a community has built out a pretty solid Helm Deploy for Kubernetes. Let’s take that path first.
Helm Install
First we add the new Helm repo for Zabbix and update
$ helm repo add zabbix-community https://zabbix-community.github.io/helm-zabbix
"zabbix-community" has been added to your repositories
$ helm repo update
Hang tight while we grab the latest from your chart repositories...
...Successfully got an update from the "zabbix-community" chart repository
...Successfully got an update from the "longhorn" chart repository
...Successfully got an update from the "azure-samples" chart repository
...Successfully got an update from the "novum-rgi-helm" chart repository
...Successfully got an update from the "sumologic" chart repository
...Successfully got an update from the "jfelten" chart repository
...Successfully got an update from the "dapr" chart repository
...Successfully got an update from the "kuma" chart repository
...Successfully got an update from the "confluentinc" chart repository
...Successfully got an update from the "adwerx" chart repository
...Successfully got an update from the "actions-runner-controller" chart repository
...Successfully got an update from the "uptime-kuma" chart repository
...Successfully got an update from the "hashicorp" chart repository
...Successfully got an update from the "ngrok" chart repository
...Successfully got an update from the "kubecost" chart repository
...Successfully got an update from the "sonarqube" chart repository
...Successfully got an update from the "castai-helm" chart repository
...Successfully got an update from the "epsagon" chart repository
...Successfully got an update from the "lifen-charts" chart repository
...Successfully got an update from the "elastic" chart repository
...Successfully got an update from the "nginx-stable" chart repository
...Successfully got an update from the "open-telemetry" chart repository
...Successfully got an update from the "harbor" chart repository
...Successfully got an update from the "rook-release" chart repository
...Successfully got an update from the "datadog" chart repository
...Successfully got an update from the "crossplane-stable" chart repository
...Successfully got an update from the "incubator" chart repository
...Successfully got an update from the "newrelic" chart repository
...Successfully got an update from the "rancher-latest" chart repository
...Successfully got an update from the "bitnami" chart repository
...Successfully got an update from the "freshbrewed" chart repository
...Successfully got an update from the "myharbor" chart repository
...Successfully got an update from the "rhcharts" chart repository
...Successfully got an update from the "argo-cd" chart repository
...Successfully got an update from the "gitlab" chart repository
Update Complete. ⎈Happy Helming!⎈
I’ll download and check the default values
$ helm show values zabbix-community/zabbix > ./zabbix_values.yaml
I won’t show them all, but essentially, I wanted to double check that, indeed, it would create a postgresql db.
Now we can install
$ helm upgrade --install myzabbix zabbix-community/zabbix --create-namespace -n monitoring
Release "myzabbix" does not exist. Installing it now.
NAME: myzabbix
LAST DEPLOYED: Wed Apr 12 15:18:59 2023
NAMESPACE: monitoring
STATUS: deployed
REVISION: 1
TEST SUITE: None
NOTES:
Get the application URL by running these commands:
  export POD_NAME=$(kubectl get pods --namespace monitoring -l "app=myzabbix-zabbix-web" -o jsonpath="{.items[0].metadata.name}")
  export CONTAINER_PORT=$(kubectl get pod --namespace monitoring $POD_NAME -o jsonpath="{.spec.containers[0].ports[0].containerPort}")
  echo "Visit http://127.0.0.1:8888 to use your application"
  kubectl --namespace monitoring port-forward $POD_NAME 8888:$CONTAINER_PORT
We can see it is starting up
$ kubectl get pods -n monitoring
NAME                                          READY   STATUS              RESTARTS   AGE
myzabbix-zabbix-web-7fd6d4db87-ck6sd          0/1     ContainerCreating   0          55s
myzabbix-zabbix-webservice-7d96f65f66-vnmtg   0/1     ContainerCreating   0          55s
myzabbix-zabbix-server-5978d49678-znzfn       0/2     ContainerCreating   0          55s
myzabbix-postgresql-0                         1/1     Running             0          55s

$ kubectl get pods -n monitoring
NAME                                          READY   STATUS              RESTARTS   AGE
myzabbix-zabbix-server-5978d49678-znzfn       0/2     ContainerCreating   0          92s
myzabbix-postgresql-0                         1/1     Running             0          92s
myzabbix-zabbix-webservice-7d96f65f66-vnmtg   1/1     Running             0          92s
myzabbix-zabbix-web-7fd6d4db87-ck6sd          1/1     Running             0          92s
Now I can see it running
$ kubectl get pods -n monitoring
NAME                                          READY   STATUS    RESTARTS   AGE
myzabbix-postgresql-0                         1/1     Running   0          2m56s
myzabbix-zabbix-webservice-7d96f65f66-vnmtg   1/1     Running   0          2m56s
myzabbix-zabbix-web-7fd6d4db87-ck6sd          1/1     Running   0          2m56s
myzabbix-zabbix-server-5978d49678-znzfn       2/2     Running   0          2m56s
We can see the services running
$ kubectl get services -n monitoring
NAME                         TYPE        CLUSTER-IP      EXTERNAL-IP   PORT(S)               AGE
myzabbix-zabbix-server       ClusterIP   10.43.168.79    <none>        10051/TCP,10052/TCP   4m39s
myzabbix-zabbix-agent        ClusterIP   10.43.97.37     <none>        10050/TCP             4m39s
myzabbix-zabbix-web          ClusterIP   10.43.246.54    <none>        80/TCP                4m39s
myzabbix-postgresql          ClusterIP   10.43.184.212   <none>        5432/TCP              4m39s
myzabbix-zabbix-webservice   ClusterIP   10.43.230.124   <none>        10053/TCP             4m39s
Accessing the UI
$ kubectl port-forward service/myzabbix-zabbix-web 8888:80 -n monitoring
Forwarding from 127.0.0.1:8888 -> 8080
Forwarding from [::1]:8888 -> 8080
I’ll login with the default Admin/zabbix account
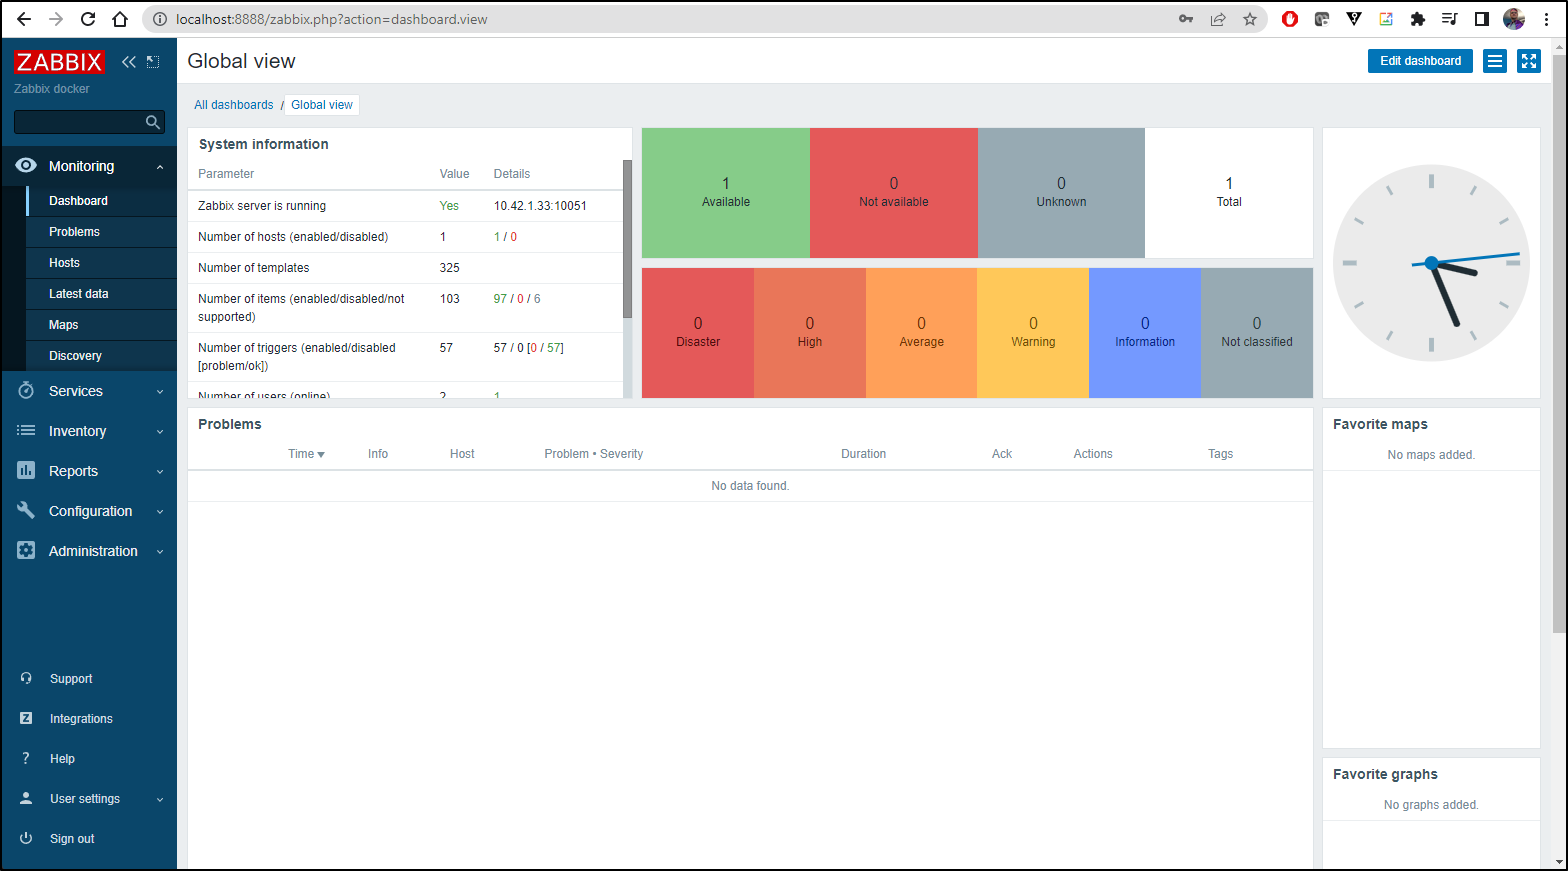
By default, Zabbix will want to send alerts out by email.
For that, we need to configure our outgoing email server.
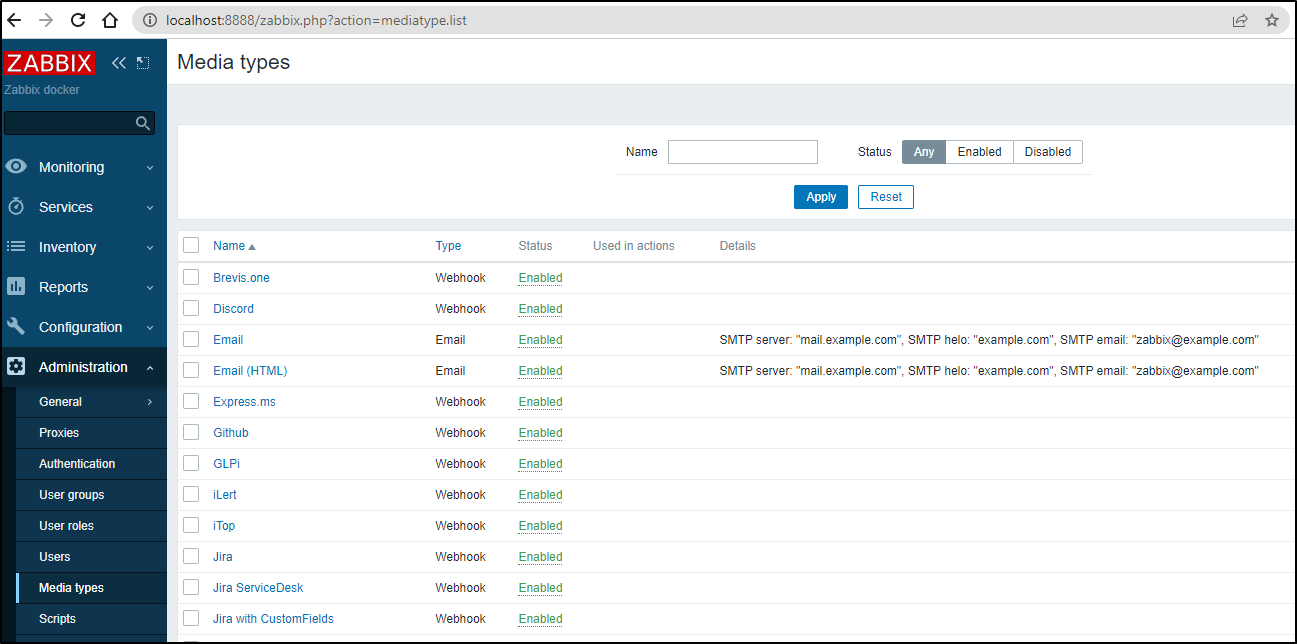
Depending on the version of Zabbix, that will be in Configuration/Notifications upon events/Media Types/Email, or Alerts/Media types or in my case, Administration/Media types/Email
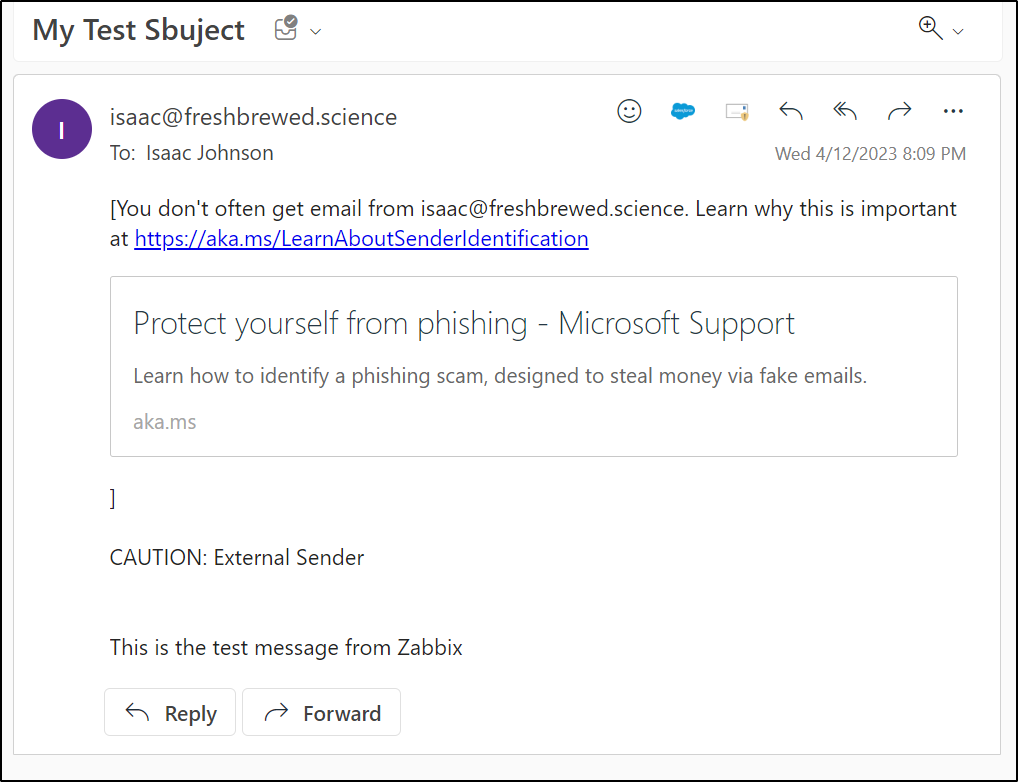
Testing the email
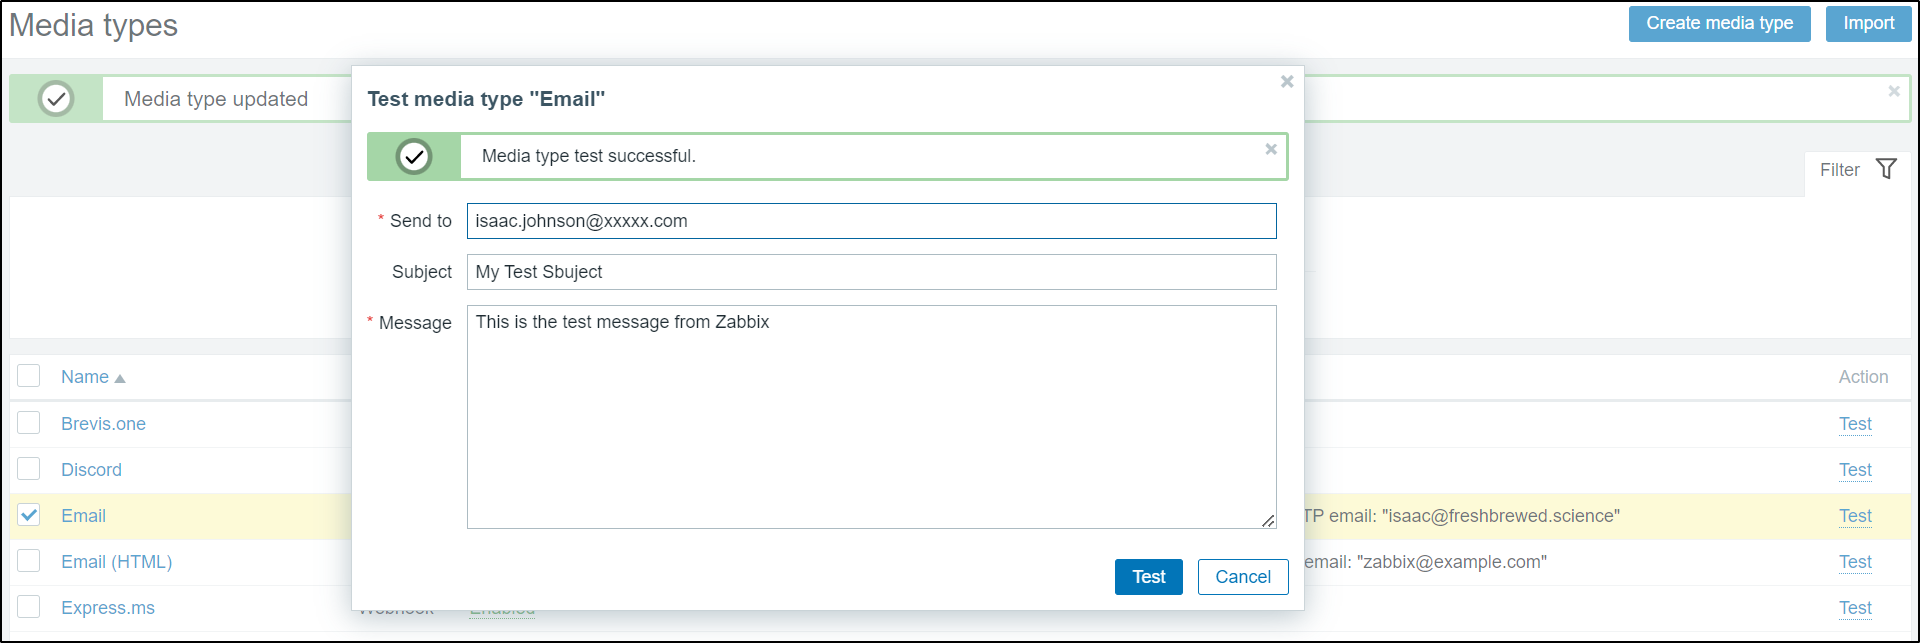
We can it worked
Adding Monitors
The purpose of Zabbix is to monitor things. Thing of it as the heart of a traditional NOC.
From their features page
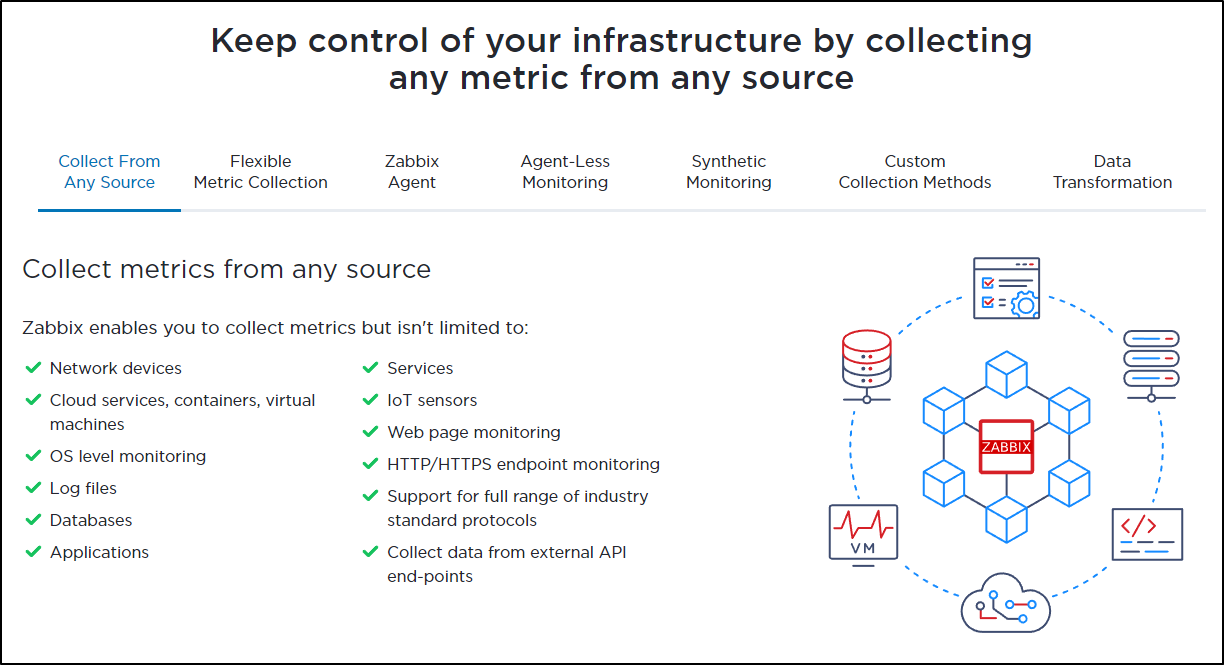
Let’s start with Hosts.
Adding a host
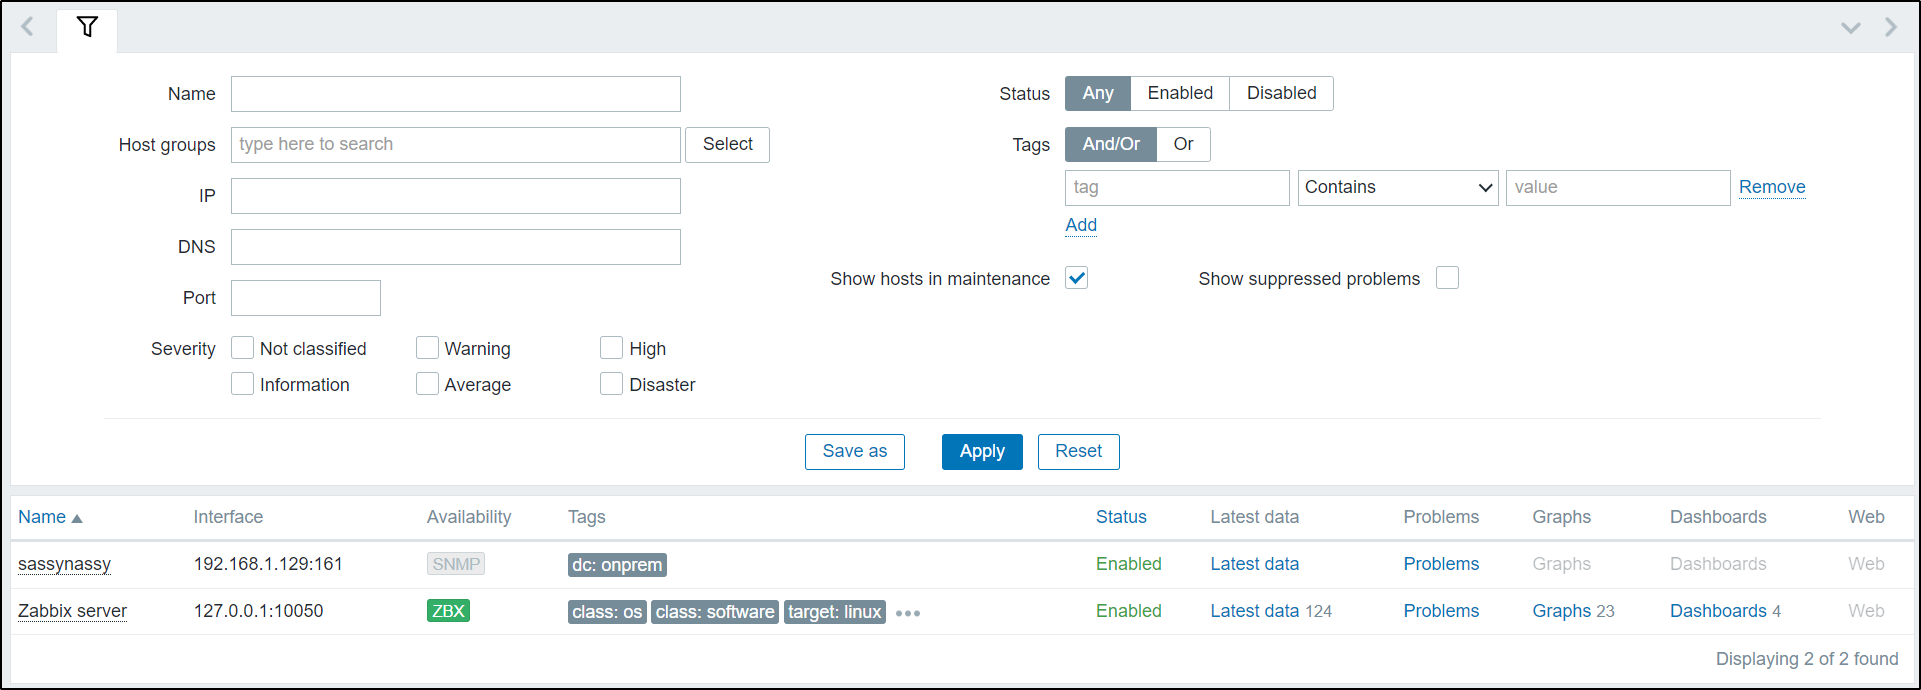
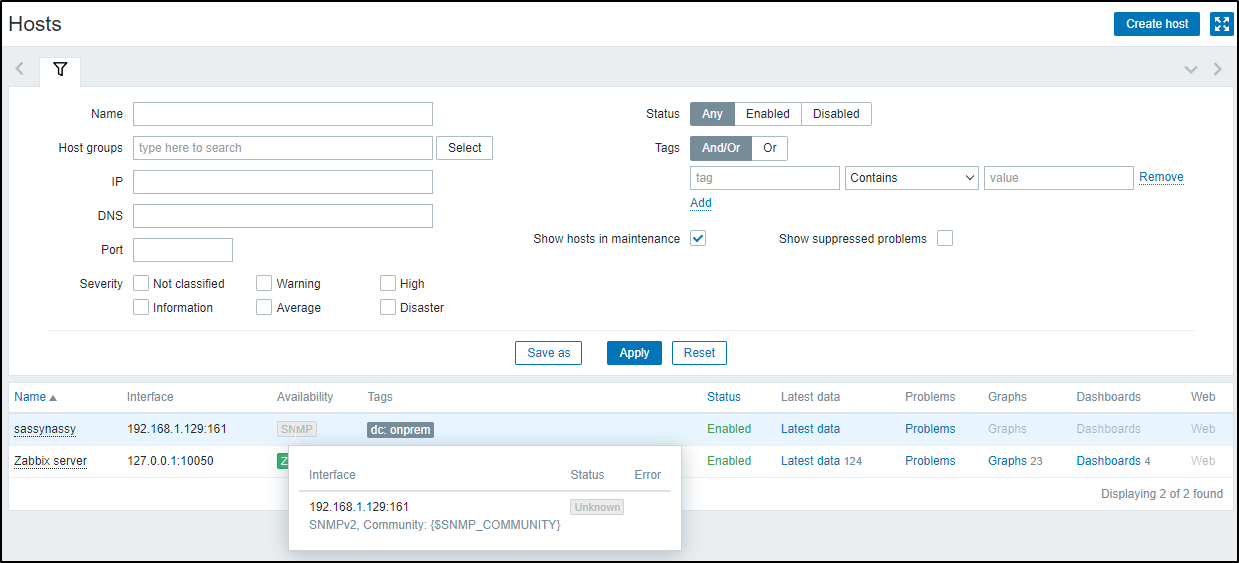
We can add a host under hosts. To start with I’ll add my NAS which fundamentally is a little Linux computer with a RAID array.
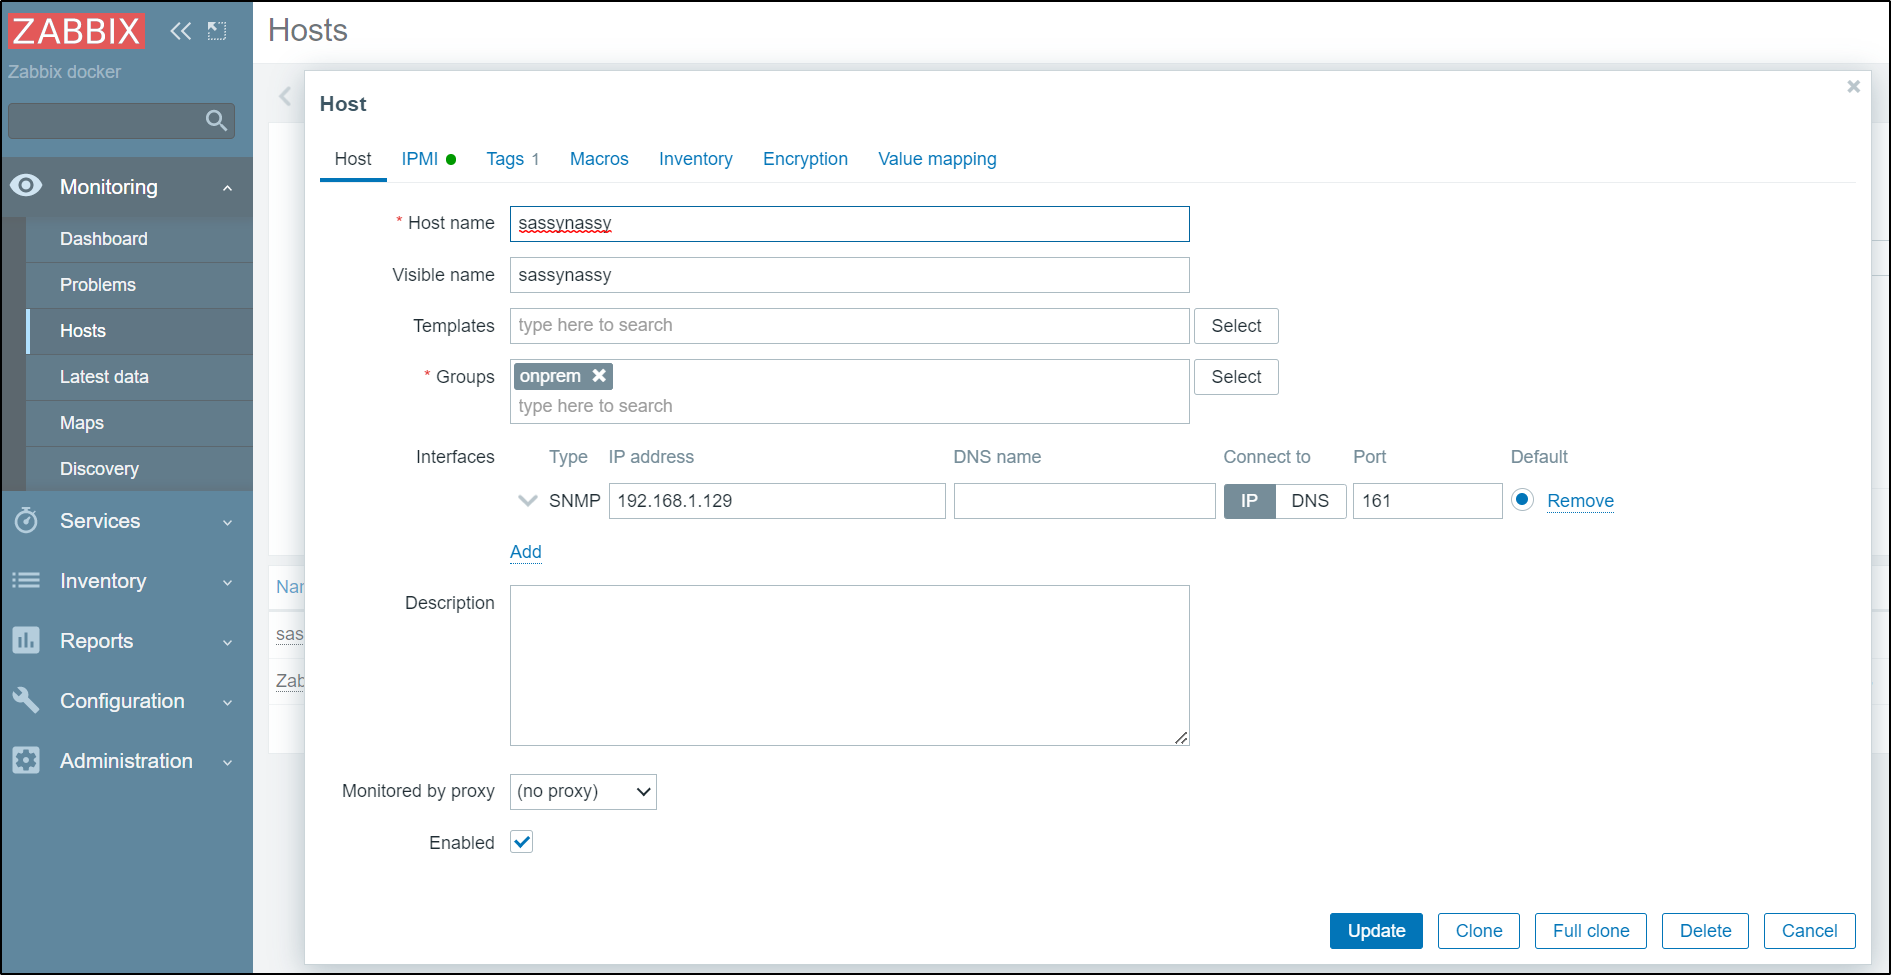
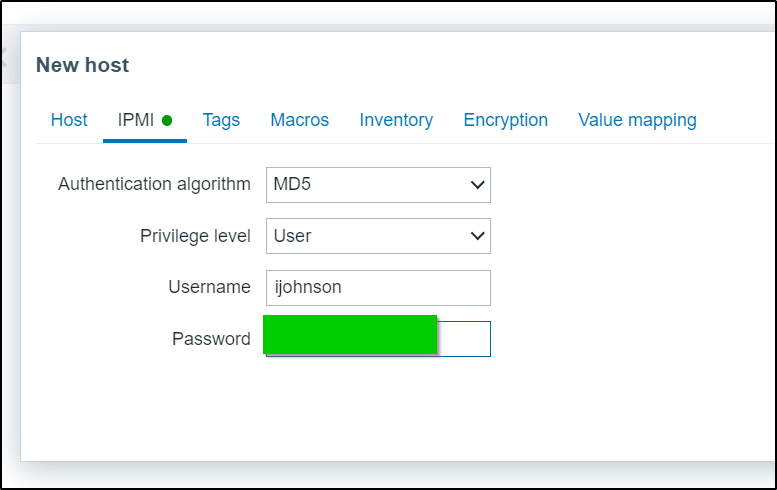
Once we add host details, we can go to IPMI to set login credentials. Here we can add a user and password.
We can now see it listed in our server list.
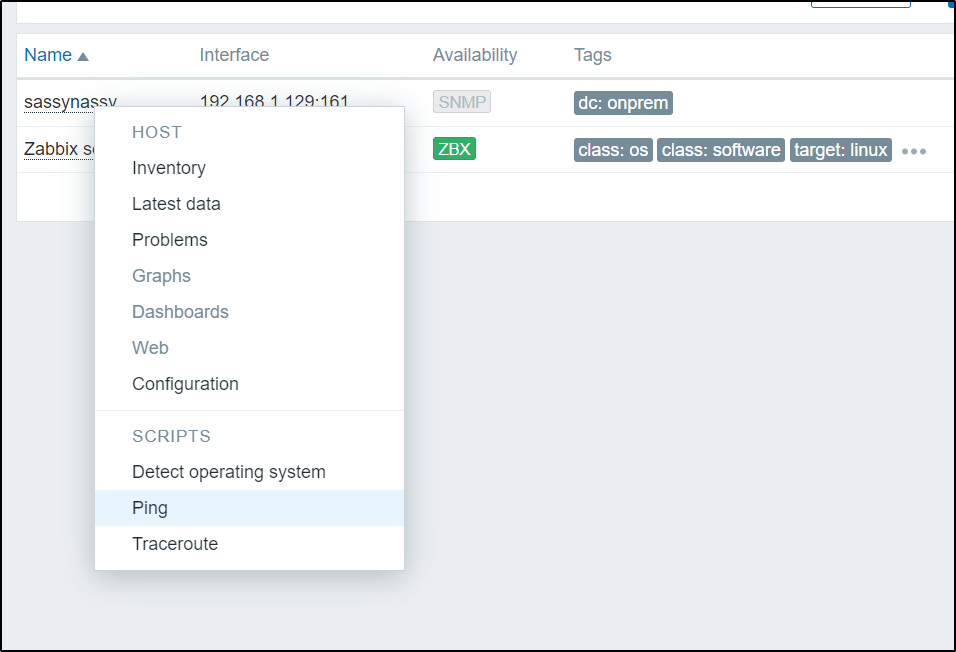
Let’s use ping to test the host
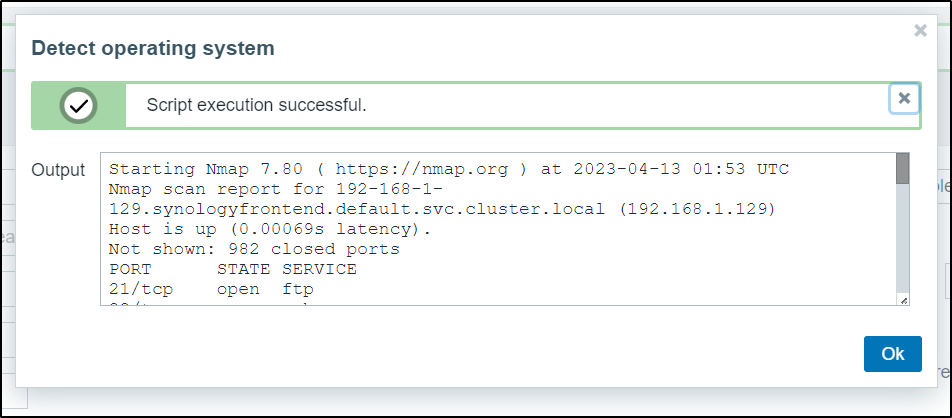
I can see details come back.
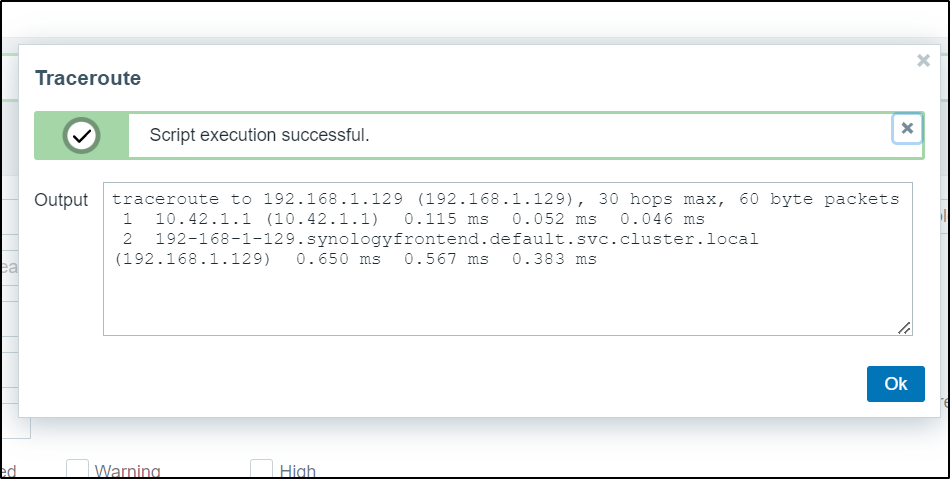
Traceroute gives me network packet details as well
Reports
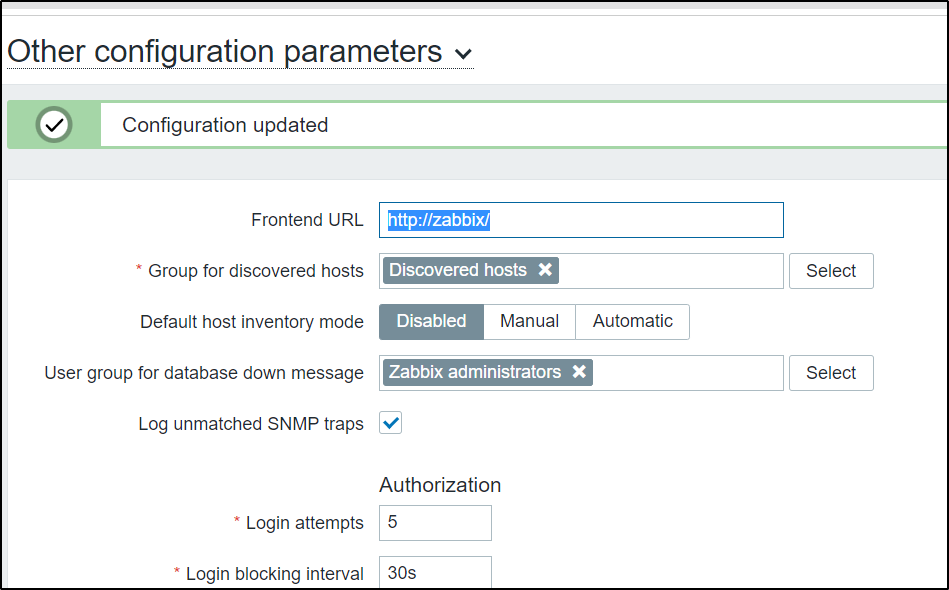
To setup reports, we need to set some kind of frontend URL (even if fake)
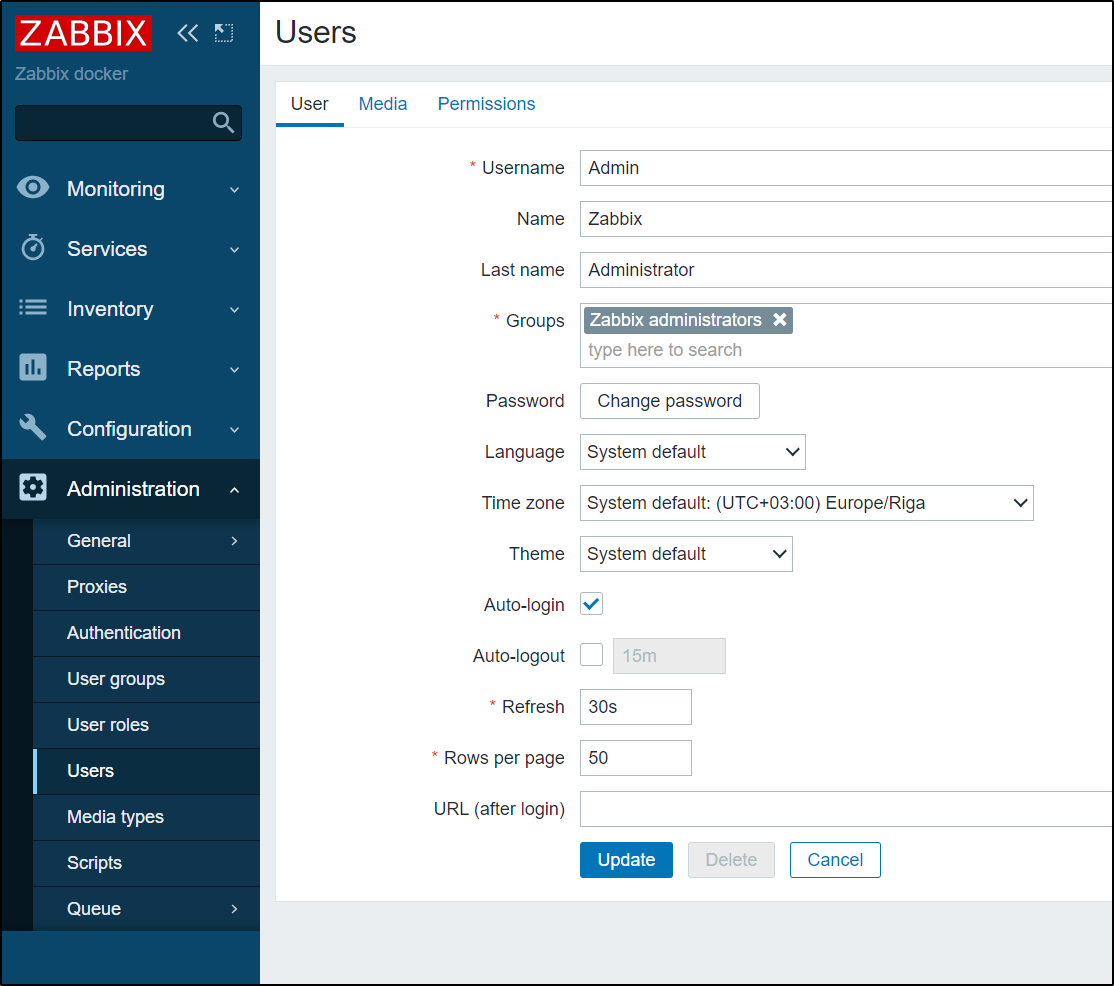
To receive a report, we need a user with an email destination. Let’s go to Users and find Admin
We have to then add Media
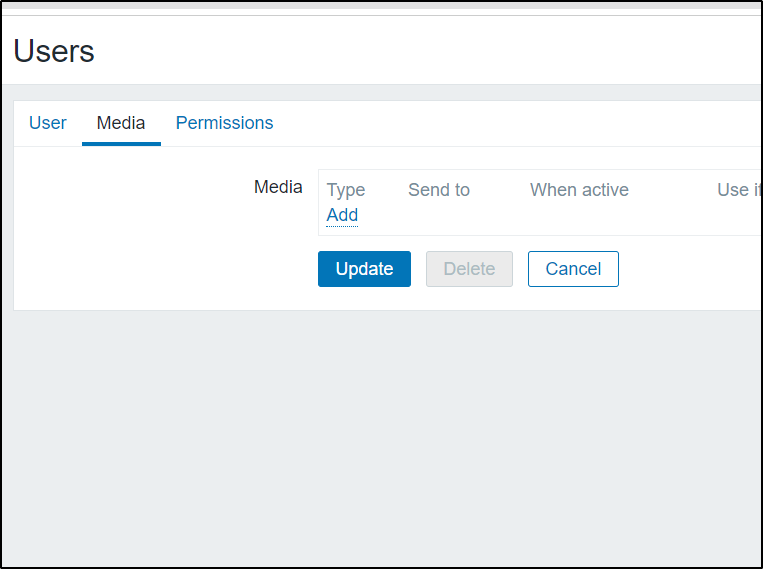
Then add my email address

We can now see both the email and severities for which it will be used
Now we can create a scheduled report
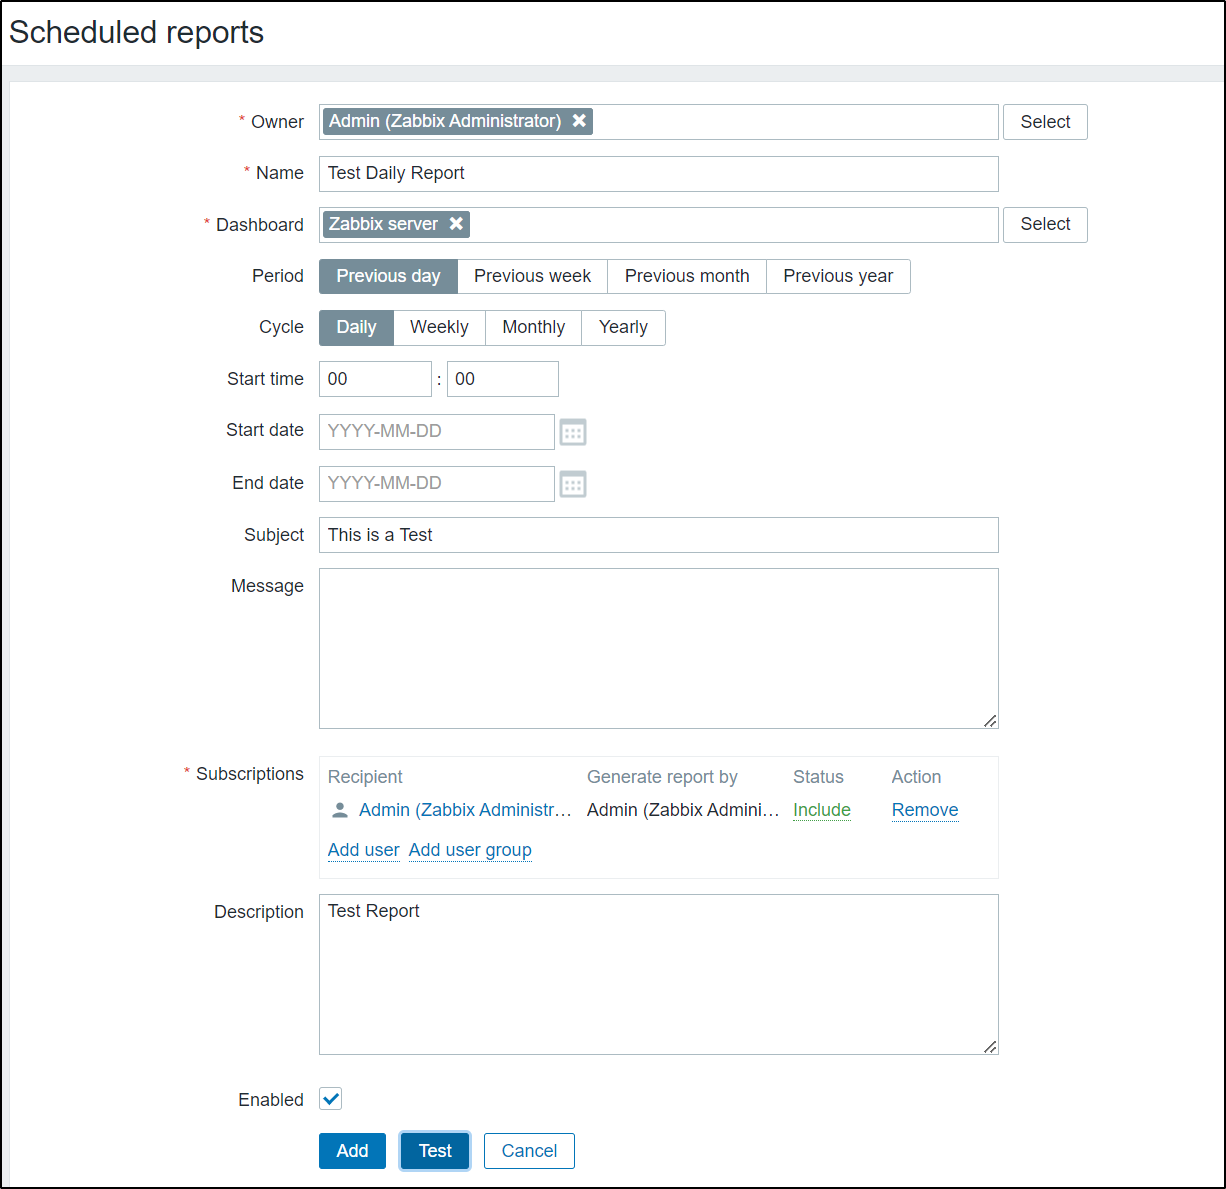
Clicking test shows it works
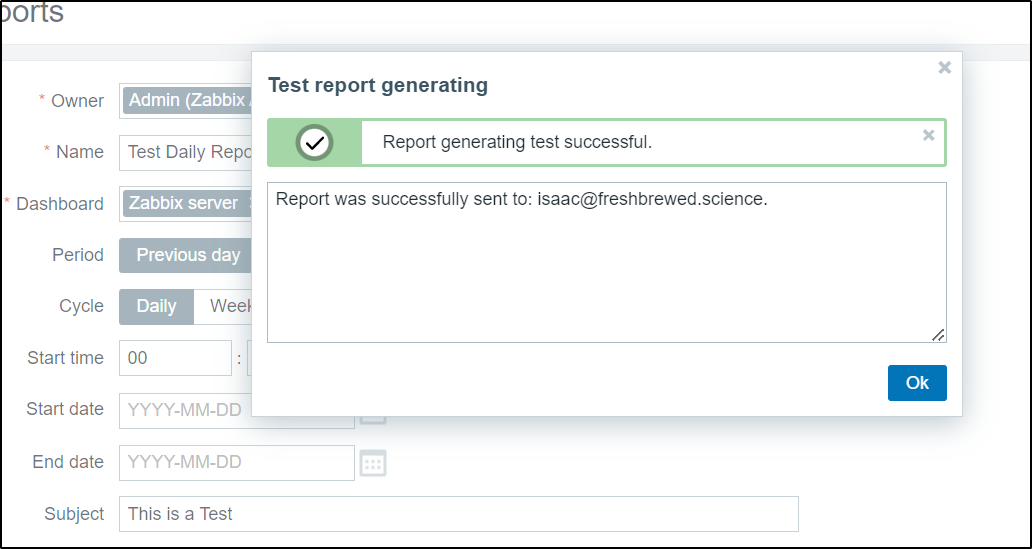
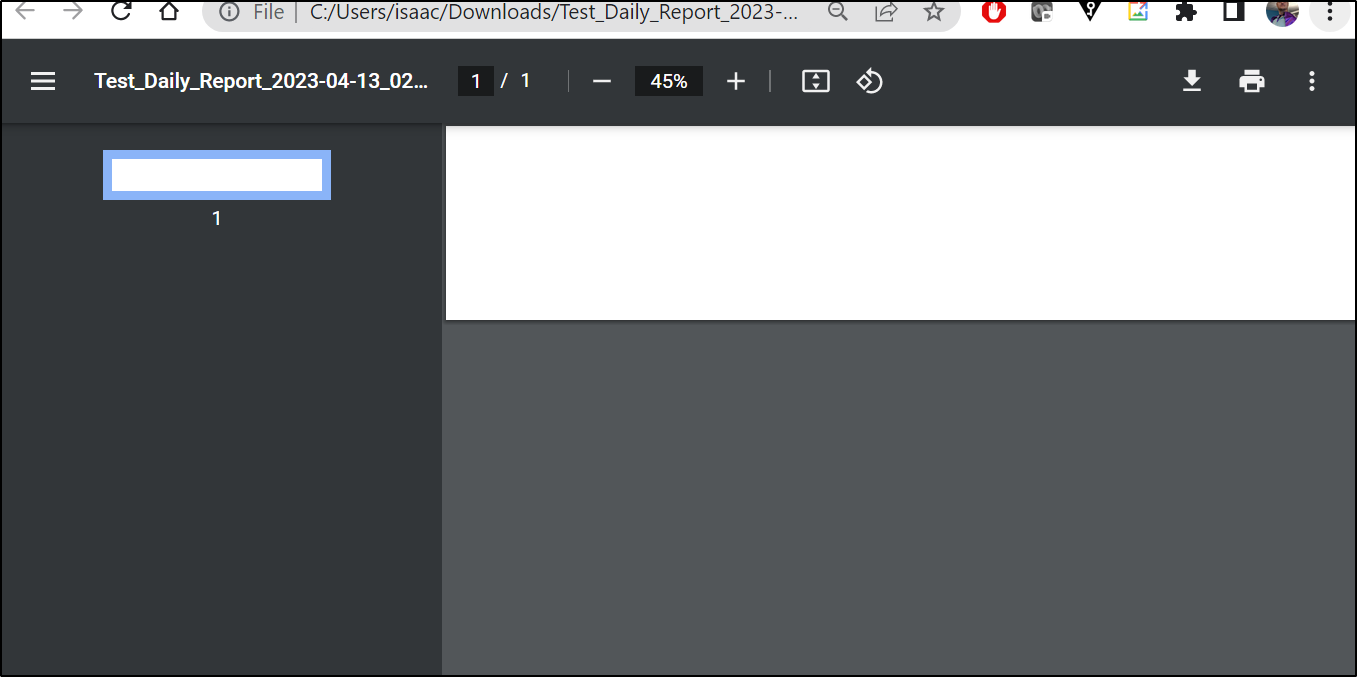
I then got an email with a report attached
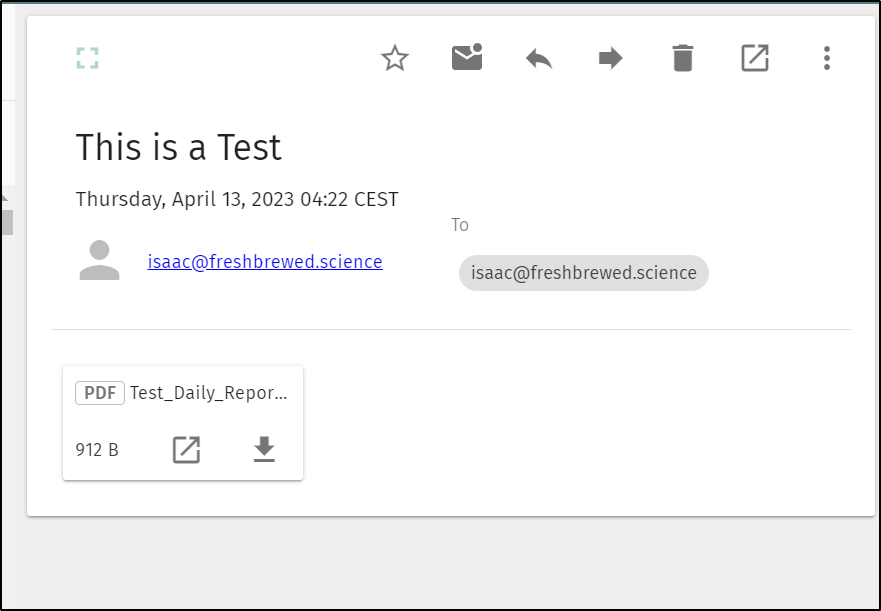
Which was blank
Seeing Data
We can go to “Latest Data” to see all the checks Zabbix has performed lately
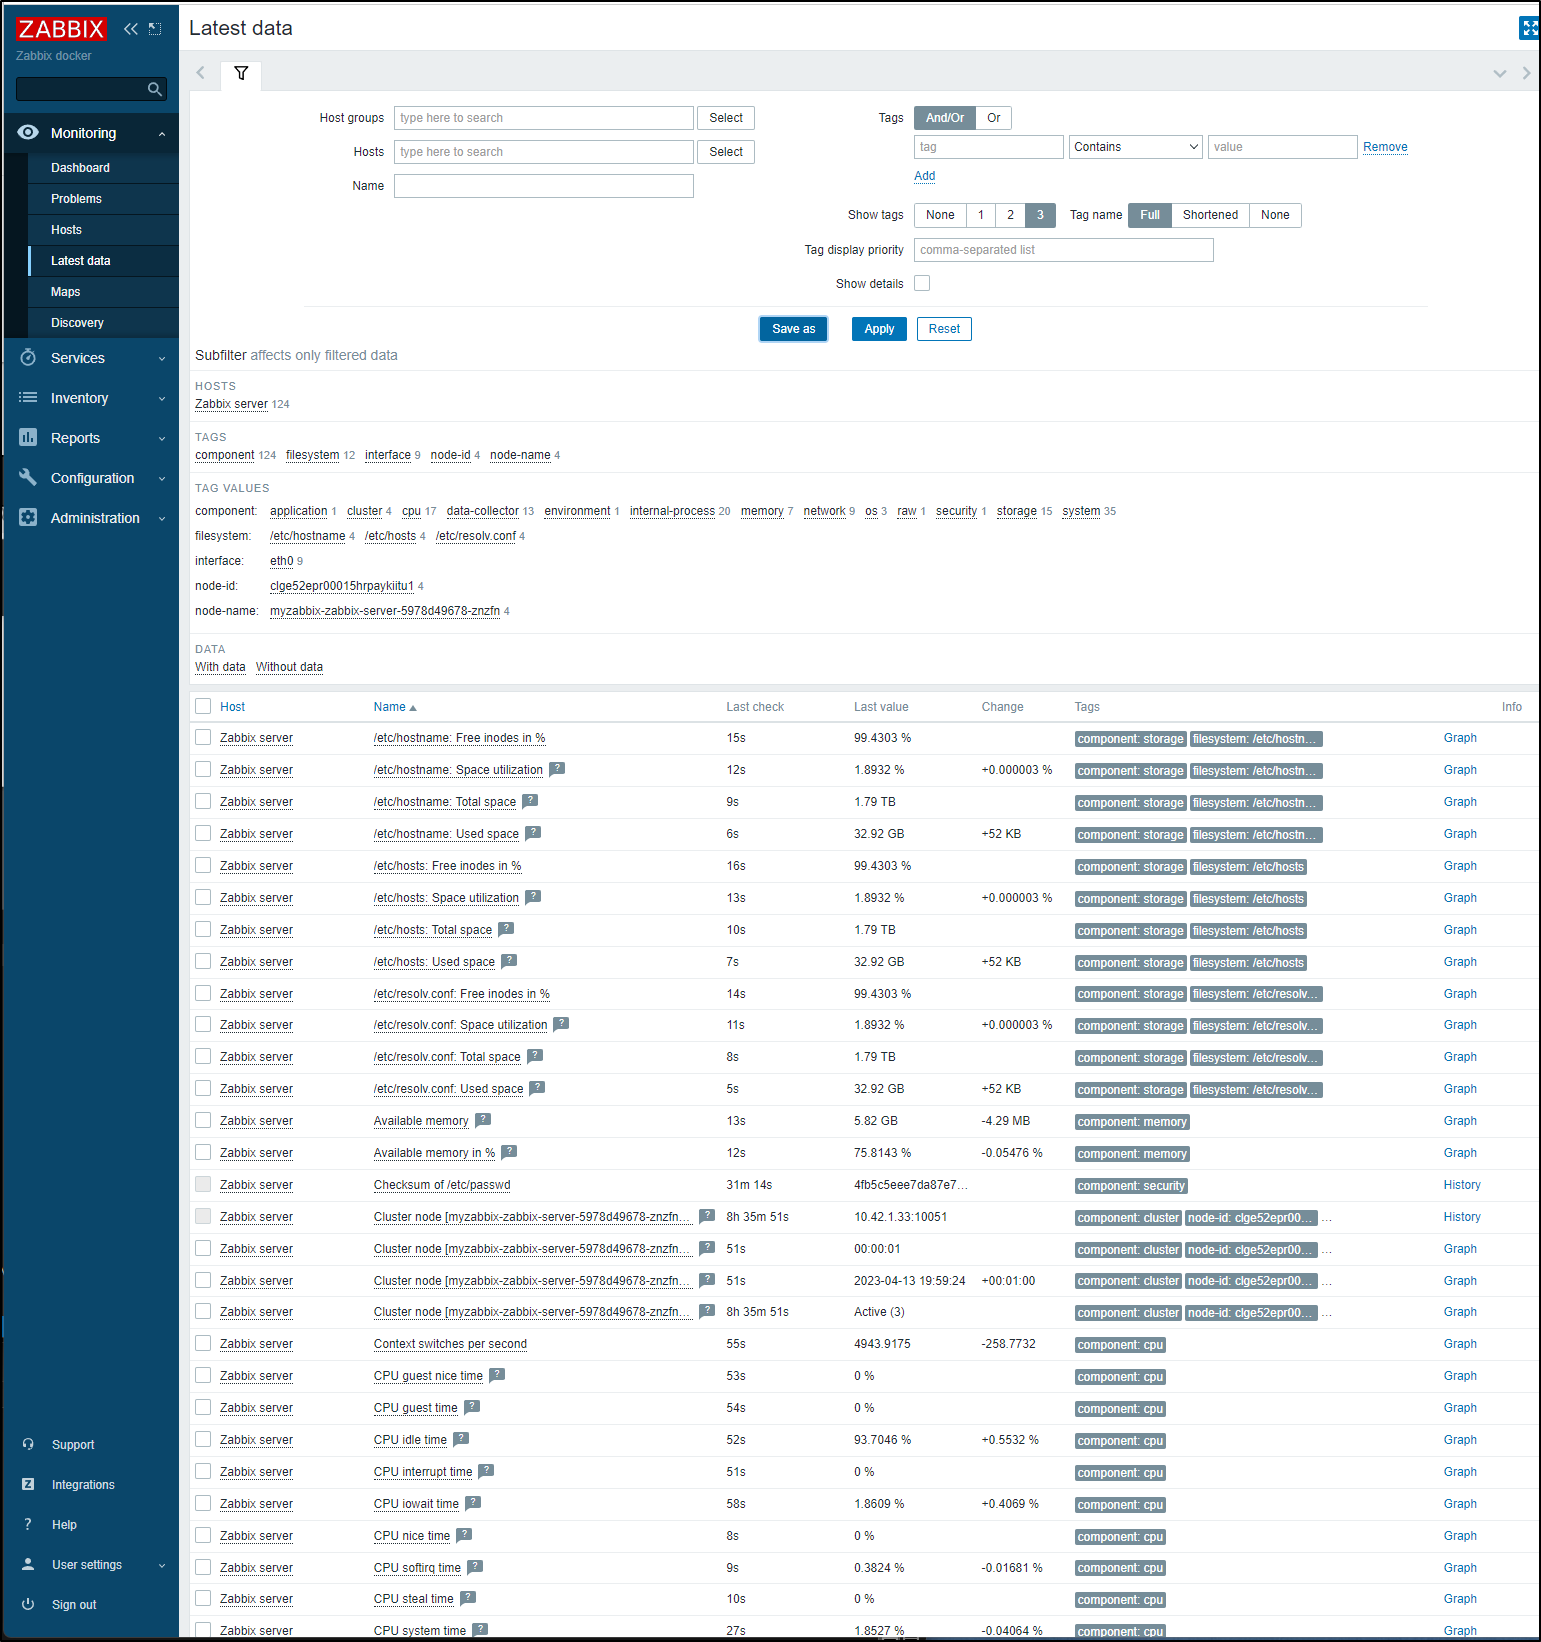
And any one of them lets me graph the data on any time window I desire
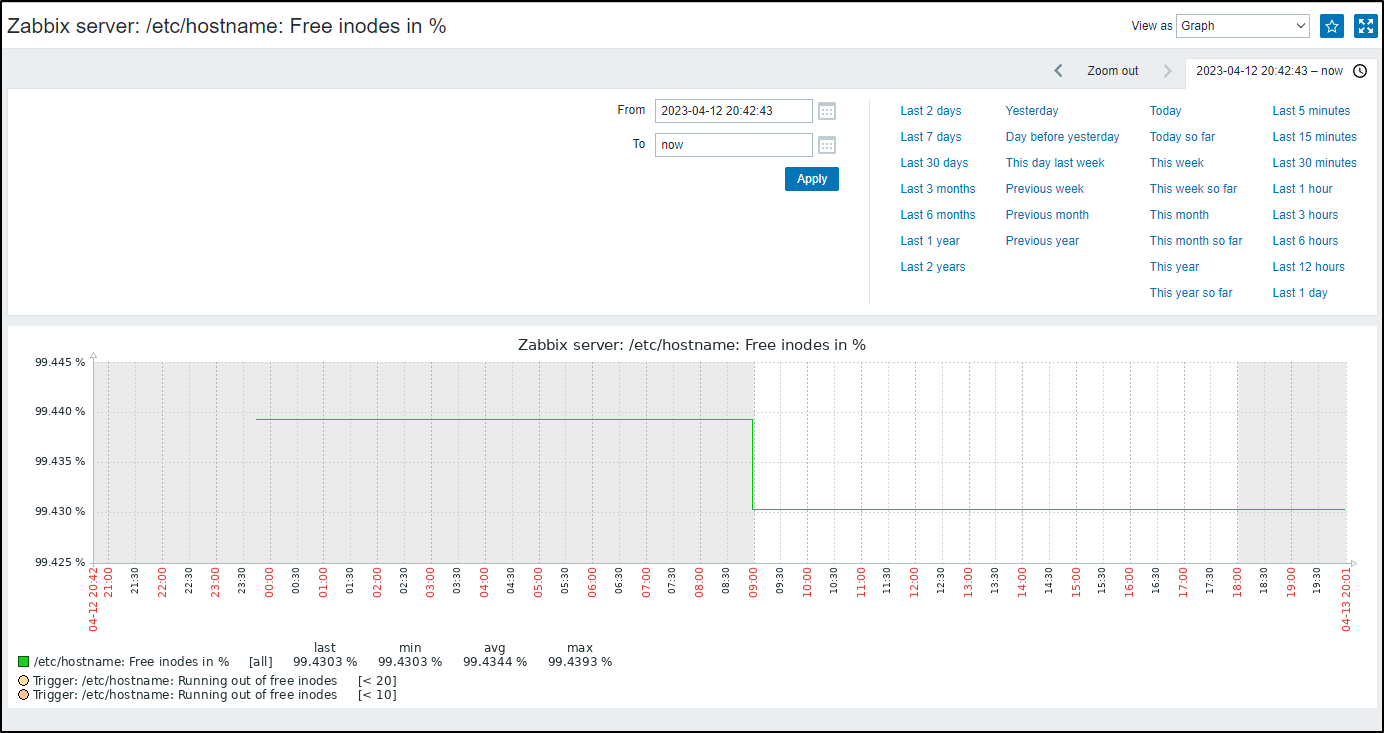
I can get detailed information for the Zabbix server itself, but I cannot for the NAS as it’s not running an agent, just SNMP (Simple Network Management Protocol)
To tackle that, I’ll need to expose Zabbix on an IP my hosts can reach.
Adding a container
Theoretically, we could monitor a container using the Zabbix agent.
As a proof of concept, let’s jump into a basic pod running a apt-based base linux
$ kubectl exec -it vote-front-azure-vote-1678278477-67bb8bb55c-k9cxj -- /bin/bash
root@vote-front-azure-vote-1678278477-67bb8bb55c-k9cxj:/app# which apt
/usr/bin/apt
root@vote-front-azure-vote-1678278477-67bb8bb55c-k9cxj:/app# wget --no-check-certificate https://repo.zabbix.com/zabbix/6.0/ubuntu/pool/main/z/zabbix-release/zabbix-release_6.0-1%2Bubuntu16.04_all.deb
--2023-04-13 17:31:11--  https://repo.zabbix.com/zabbix/6.0/ubuntu/pool/main/z/zabbix-release/zabbix-release_6.0-1%2Bubuntu16.04_all.deb
Resolving repo.zabbix.com (repo.zabbix.com)... 178.128.6.101, 2604:a880:2:d0::2062:d001
Connecting to repo.zabbix.com (repo.zabbix.com)|178.128.6.101|:443... connected.
WARNING: The certificate of ‘repo.zabbix.com’ is not trusted.
WARNING: The certificate of ‘repo.zabbix.com’ has expired.
HTTP request sent, awaiting response... 200 OK
Length: 3422 (3.3K) [application/octet-stream]
Saving to: ‘zabbix-release_6.0-1+ubuntu16.04_all.deb’

zabbix-release_6.0-1+ubuntu16.04_all.deb      100%[=================================================================================================>]   3.34K  --.-KB/s    in 0s

2023-04-13 17:31:11 (49.5 MB/s) - ‘zabbix-release_6.0-1+ubuntu16.04_all.deb’ saved [3422/3422]

root@vote-front-azure-vote-1678278477-67bb8bb55c-k9cxj:/app# dpkg -i zabbix-release_6.0-1+ubuntu16.04_all.deb
Selecting previously unselected package zabbix-release.
(Reading database ... 30117 files and directories currently installed.)
Preparing to unpack zabbix-release_6.0-1+ubuntu16.04_all.deb ...
Unpacking zabbix-release (1:6.0-1+ubuntu16.04) ...
Setting up zabbix-release (1:6.0-1+ubuntu16.04) ...
root@vote-front-azure-vote-1678278477-67bb8bb55c-k9cxj:/app#
Since this doesnt have HTTPS
$ apt-get install apt-transport-https ca-certificates
Then I can apt update
root@vote-front-azure-vote-1678278477-67bb8bb55c-k9cxj:/app# apt update
Ign:1 http://deb.debian.org/debian stretch InRelease
Hit:2 http://deb.debian.org/debian stretch-updates InRelease
Hit:3 http://deb.debian.org/debian stretch Release
Hit:4 http://nginx.org/packages/mainline/debian stretch InRelease
Ign:5 https://repo.zabbix.com/zabbix/6.0/ubuntu xenial InRelease
Err:7 https://repo.zabbix.com/zabbix/6.0/ubuntu xenial Release
  server certificate verification failed. CAfile: /etc/ssl/certs/ca-certificates.crt CRLfile: none
Hit:8 http://security.debian.org stretch/updates InRelease
Reading package lists... Done
E: The repository 'https://repo.zabbix.com/zabbix/6.0/ubuntu xenial Release' does not have a Release file.
N: Updating from such a repository can't be done securely, and is therefore disabled by default.
N: See apt-secure(8) manpage for repository creation and user configuration details.
and install it
root@vote-front-azure-vote-1678278477-67bb8bb55c-k9cxj:/app# apt install zabbix-agent
Reading package lists... Done
Building dependency tree
Reading state information... Done
zabbix-agent is already the newest version (1:3.0.32+dfsg-0+deb9u3).
0 upgraded, 0 newly installed, 0 to remove and 229 not upgraded.
Before we go on, we need to see the IP for the service
$ kubectl get services -n monitoring
NAME                         TYPE        CLUSTER-IP      EXTERNAL-IP   PORT(S)               AGE
myzabbix-zabbix-server       ClusterIP   10.43.168.79    <none>        10051/TCP,10052/TCP   21h
myzabbix-zabbix-agent        ClusterIP   10.43.97.37     <none>        10050/TCP             21h
myzabbix-zabbix-web          ClusterIP   10.43.246.54    <none>        80/TCP                21h
myzabbix-postgresql          ClusterIP   10.43.184.212   <none>        5432/TCP              21h
myzabbix-zabbix-webservice   ClusterIP   10.43.230.124   <none>        10053/TCP             21h
I added all the services as callers, including the PodIP for Zabbix.
root@vote-front-azure-vote-1678278477-67bb8bb55c-k9cxj:/app# cat /etc/zabbix/zabbix_agentd.conf | grep -v ^\# | sed '/^$/d'
PidFile=/var/run/zabbix/zabbix_agentd.pid
LogFile=/var/log/zabbix-agent/zabbix_agentd.log
LogFileSize=0
Server=10.43.168.79,10.43.97.37,10.43.246.54,10.43.230.124,10.42.1.33
ServerActive=10.43.168.79:10051,10.42.1.33:10051
HostnameItem=system.hostname
Include=/etc/zabbix/zabbix_agentd.conf.d/*.conf
We can then restart the Zabbix agent
root@vote-front-azure-vote-1678278477-67bb8bb55c-k9cxj:/app# /etc/init.d/zabbix-agent restart
[ ok ] zabbix_agentd stopping...done (No /usr/sbin/zabbix_agentd found running; none killed.).
[ ok ] zabbix_agentd starting...done.
root@vote-front-azure-vote-1678278477-67bb8bb55c-k9cxj:/app# /etc/init.d/zabbix-agent status
[ ok ] zabbix_agentd is running.
I can see it is running
root@vote-front-azure-vote-1678278477-67bb8bb55c-k9cxj:/var/log# cat zabbix-agent/zabbix_agentd.log
  6507:20230413:174725.816 Starting Zabbix Agent [vote-front-azure-vote-1678278477-67bb8bb55c-k9cxj]. Zabbix 3.0.32 (revision df9ee82371).
  6507:20230413:174725.816 **** Enabled features ****
  6507:20230413:174725.816 IPv6 support:          YES
  6507:20230413:174725.816 TLS support:           YES
  6507:20230413:174725.816 **************************
  6507:20230413:174725.816 using configuration file: /etc/zabbix/zabbix_agentd.conf
  6507:20230413:174725.817 agent #0 started [main process]
  6508:20230413:174725.818 agent #1 started [collector]
  6509:20230413:174725.819 agent #2 started [listener #1]
  6510:20230413:174725.820 agent #3 started [listener #2]
  6511:20230413:174725.855 agent #4 started [listener #3]
  6512:20230413:174725.856 agent #5 started [active checks #1]
  6513:20230413:174725.856 agent #6 started [active checks #2]
  6512:20230413:174725.866 no active checks on server [10.43.168.79:10051]: host [vote-front-azure-vote-1678278477-67bb8bb55c-k9cxj] not found
  6513:20230413:174725.866 no active checks on server [10.42.1.33:10051]: host [vote-front-azure-vote-1678278477-67bb8bb55c-k9cxj] not found
  6513:20230413:174925.905 no active checks on server [10.42.1.33:10051]: host [vote-front-azure-vote-1678278477-67bb8bb55c-k9cxj] not found
  6512:20230413:174925.905 no active checks on server [10.43.168.79:10051]: host [vote-front-azure-vote-1678278477-67bb8bb55c-k9cxj] not found
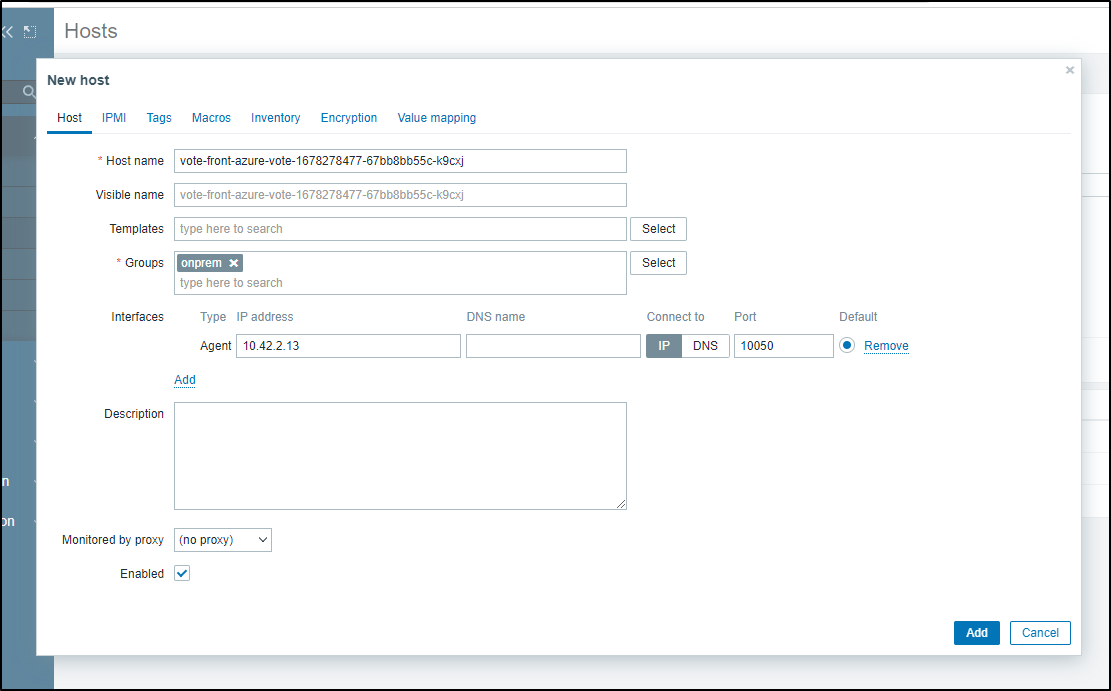
I realized I should have created the Host first in Zabbix, then added the agent.
I created the host in Zabbix:
Then I went back and killed the agent and restarted
root@vote-front-azure-vote-1678278477-67bb8bb55c-k9cxj:/var/log# /etc/init.d/zabbix-agent start
[ ok ] zabbix_agentd starting...done.
root@vote-front-azure-vote-1678278477-67bb8bb55c-k9cxj:/var/log# cat zabbix-agent/zabbix_agentd.log
  6507:20230413:174725.816 Starting Zabbix Agent [vote-front-azure-vote-1678278477-67bb8bb55c-k9cxj]. Zabbix 3.0.32 (revision df9ee82371).
  6507:20230413:174725.816 **** Enabled features ****
  6507:20230413:174725.816 IPv6 support:          YES
  6507:20230413:174725.816 TLS support:           YES
  6507:20230413:174725.816 **************************
  6507:20230413:174725.816 using configuration file: /etc/zabbix/zabbix_agentd.conf
  6507:20230413:174725.817 agent #0 started [main process]
  6508:20230413:174725.818 agent #1 started [collector]
  6509:20230413:174725.819 agent #2 started [listener #1]
  6510:20230413:174725.820 agent #3 started [listener #2]
  6511:20230413:174725.855 agent #4 started [listener #3]
  6512:20230413:174725.856 agent #5 started [active checks #1]
  6513:20230413:174725.856 agent #6 started [active checks #2]
  6512:20230413:174725.866 no active checks on server [10.43.168.79:10051]: host [vote-front-azure-vote-1678278477-67bb8bb55c-k9cxj] not found
  6513:20230413:174725.866 no active checks on server [10.42.1.33:10051]: host [vote-front-azure-vote-1678278477-67bb8bb55c-k9cxj] not found
  6513:20230413:174925.905 no active checks on server [10.42.1.33:10051]: host [vote-front-azure-vote-1678278477-67bb8bb55c-k9cxj] not found
  6512:20230413:174925.905 no active checks on server [10.43.168.79:10051]: host [vote-front-azure-vote-1678278477-67bb8bb55c-k9cxj] not found
zabbix_agentd [6613]: Is this process already running? Could not lock PID file [/var/run/zabbix/zabbix_agentd.pid]: [11] Resource temporarily unavailable
  6507:20230413:175418.340 Got signal [signal:15(SIGTERM),sender_pid:6549,sender_uid:0,reason:0]. Exiting ...
  6507:20230413:175418.344 Zabbix Agent stopped. Zabbix 3.0.32 (revision df9ee82371).
  6658:20230413:175426.998 Starting Zabbix Agent [vote-front-azure-vote-1678278477-67bb8bb55c-k9cxj]. Zabbix 3.0.32 (revision df9ee82371).
  6658:20230413:175426.998 **** Enabled features ****
  6658:20230413:175426.998 IPv6 support:          YES
  6658:20230413:175426.998 TLS support:           YES
  6658:20230413:175426.998 **************************
  6658:20230413:175426.998 using configuration file: /etc/zabbix/zabbix_agentd.conf
  6658:20230413:175426.998 agent #0 started [main process]
  6660:20230413:175426.999 agent #1 started [collector]
  6661:20230413:175426.999 agent #2 started [listener #1]
  6663:20230413:175427.000 agent #3 started [listener #2]
  6664:20230413:175427.000 agent #4 started [listener #3]
  6665:20230413:175427.001 agent #5 started [active checks #1]
  6666:20230413:175427.001 agent #6 started [active checks #2]
Then I could Detect Operating System
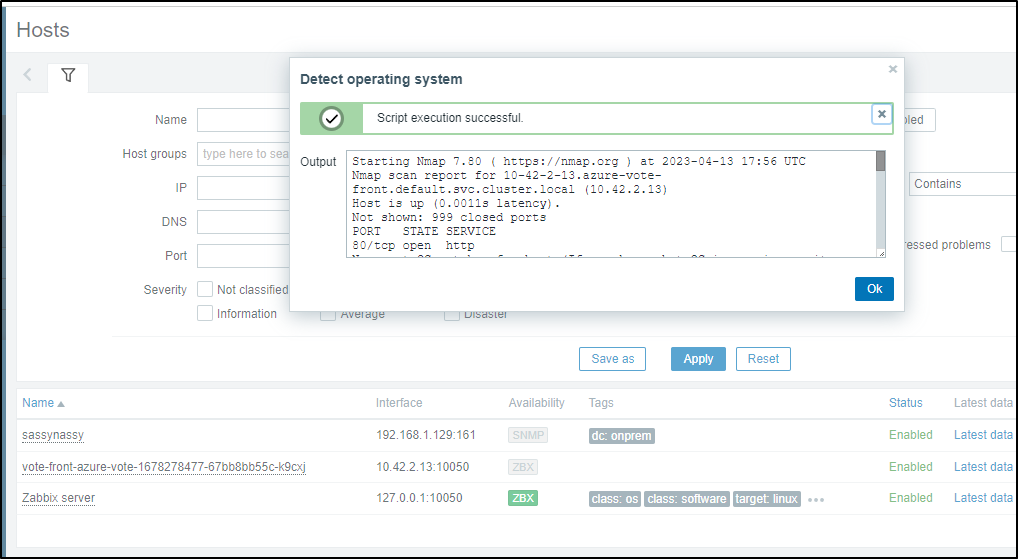
I suspect the reason we cannot fetch data is that our Azure Vote pod is set to only accept traffic via port 80
Not shown: 999 closed ports
PORT   STATE SERVICE
80/tcp open  http
No exact OS matches for host (If you know what OS is running on it, see https://nmap.org/submit/ ).
Linux Host
Let’s now add a physical host, one of my Kubernetes master nodes
I use the Deb package that matches the OS
builder@anna-MacBookAir:~$ wget https://repo.zabbix.com/zabbix/6.0/ubuntu/pool/main/z/zabbix-release/zabbix-release_6.0-4%2Bubuntu20.04_all.deb
--2023-04-13 14:26:53--  https://repo.zabbix.com/zabbix/6.0/ubuntu/pool/main/z/zabbix-release/zabbix-release_6.0-4%2Bubuntu20.04_all.deb
Resolving repo.zabbix.com (repo.zabbix.com)... 178.128.6.101, 2604:a880:2:d0::2062:d001
Connecting to repo.zabbix.com (repo.zabbix.com)|178.128.6.101|:443... connected.
HTTP request sent, awaiting response... 200 OK
Length: 3672 (3.6K) [application/octet-stream]
Saving to: ‘zabbix-release_6.0-4+ubuntu20.04_all.deb’

zabbix-release_6.0-4+ubuntu20.04_all.deb          100%[============================================================================================================>]   3.59K  --.-KB/s    in 0s

2023-04-13 14:26:54 (157 MB/s) - ‘zabbix-release_6.0-4+ubuntu20.04_all.deb’ saved [3672/3672]


builder@anna-MacBookAir:~$ sudo apt update
Hit:1 http://us.archive.ubuntu.com/ubuntu focal InRelease
Get:2 http://us.archive.ubuntu.com/ubuntu focal-updates InRelease [114 kB]
Get:3 http://security.ubuntu.com/ubuntu focal-security InRelease [114 kB]
Hit:4 https://packages.microsoft.com/repos/azure-cli focal InRelease
Get:5 http://packages.cloud.google.com/apt gcsfuse-focal InRelease [5,002 B]
Get:6 http://us.archive.ubuntu.com/ubuntu focal-backports InRelease [108 kB]
Hit:7 https://baltocdn.com/helm/stable/debian all InRelease
Hit:8 http://ppa.launchpad.net/rmescandon/yq/ubuntu focal InRelease
Get:9 http://security.ubuntu.com/ubuntu focal-security/universe i386 Packages [591 kB]
Get:10 http://security.ubuntu.com/ubuntu focal-security/universe amd64 Packages [821 kB]
Get:11 http://security.ubuntu.com/ubuntu focal-security/universe Translation-en [165 kB]
Fetched 1,917 kB in 1s (1,367 kB/s)
Reading package lists... Done
Building dependency tree
Reading state information... Done
81 packages can be upgraded. Run 'apt list --upgradable' to see them.
Next I’ll install the .deb, followed by the agent
builder@anna-MacBookAir:~$ sudo dpkg -i zabbix-release_6.0-4+ubuntu20.04_all.deb
Selecting previously unselected package zabbix-release.
(Reading database ... 369635 files and directories currently installed.)
Preparing to unpack zabbix-release_6.0-4+ubuntu20.04_all.deb ...
Unpacking zabbix-release (1:6.0-4+ubuntu20.04) ...
Setting up zabbix-release (1:6.0-4+ubuntu20.04) ...


builder@anna-MacBookAir:~$ sudo apt install -y zabbix-agent
Reading package lists... Done
Building dependency tree
Reading state information... Done
The following packages were automatically installed and are no longer required:
  libfprint-2-tod1 libfwupdplugin1 libllvm10 libllvm11 shim
Use 'sudo apt autoremove' to remove them.
The following NEW packages will be installed:
  zabbix-agent
0 upgraded, 1 newly installed, 0 to remove and 81 not upgraded.
Need to get 241 kB of archives.
After this operation, 860 kB of additional disk space will be used.
Get:1 http://us.archive.ubuntu.com/ubuntu focal/universe amd64 zabbix-agent amd64 1:4.0.17+dfsg-1 [241 kB]
Fetched 241 kB in 0s (745 kB/s)
Selecting previously unselected package zabbix-agent.
(Reading database ... 369642 files and directories currently installed.)
Preparing to unpack .../zabbix-agent_1%3a4.0.17+dfsg-1_amd64.deb ...
Unpacking zabbix-agent (1:4.0.17+dfsg-1) ...
Setting up zabbix-agent (1:4.0.17+dfsg-1) ...
The settings I changed were to use `0.0.0.0/0’ as allowed hosts, the proper hostname and then to change the ListenPort to 20050 (since we used the default for Kuberentes already)
builder@anna-MacBookAir:~$ sudo vi /etc/zabbix/zabbix_agentd.conf
$ cat /etc/zabbix/zabbix_agentd.conf | grep -v ^\# | sed '/^$/d'
PidFile=/run/zabbix/zabbix_agentd.pid
LogFile=/var/log/zabbix-agent/zabbix_agentd.log
LogFileSize=0
Server=0.0.0.0/0
ListenPort=20050
ServerActive=127.0.0.1
Hostname=anna-MacBookAir
Include=/etc/zabbix/zabbix_agentd.conf.d/*.conf
The service is already running
builder@anna-MacBookAir:~$ sudo systemctl status zabbix-agent.service
● zabbix-agent.service - Zabbix Agent
     Loaded: loaded (/lib/systemd/system/zabbix-agent.service; enabled; vendor preset: enabled)
     Active: active (running) since Thu 2023-04-13 14:28:09 CDT; 6min ago
       Docs: man:zabbix_agentd
   Main PID: 1112391 (zabbix_agentd)
      Tasks: 6 (limit: 9327)
     Memory: 3.6M
     CGroup: /system.slice/zabbix-agent.service
             ├─1112391 /usr/sbin/zabbix_agentd --foreground
             ├─1112392 /usr/sbin/zabbix_agentd: collector [idle 1 sec]
             ├─1112393 /usr/sbin/zabbix_agentd: listener #1 [waiting for connection]
             ├─1112394 /usr/sbin/zabbix_agentd: listener #2 [waiting for connection]
             ├─1112395 /usr/sbin/zabbix_agentd: listener #3 [waiting for connection]
             └─1112396 /usr/sbin/zabbix_agentd: active checks #1 [idle 1 sec]

Apr 13 14:28:09 anna-MacBookAir systemd[1]: Started Zabbix Agent.
Apr 13 14:28:09 anna-MacBookAir zabbix_agentd[1112391]: Starting Zabbix Agent [anna-MacBookAir]. Zabbix 4.0.17 (revision a528a0a4bc).
Apr 13 14:28:09 anna-MacBookAir zabbix_agentd[1112391]: Press Ctrl+C to exit.
Lastly, I restart the service to let it start to use the new conf file
builder@anna-MacBookAir:~$ sudo systemctl restart zabbix-agent.service
And verify it is listening on those ports
builder@anna-MacBookAir:~$ !1291
sudo lsof -i -P -n | grep LISTEN
systemd         1            root  154u  IPv4    14229      0t0  TCP *:111 (LISTEN)
systemd         1            root  163u  IPv6    14233      0t0  TCP *:111 (LISTEN)
rpcbind       688            _rpc    4u  IPv4    14229      0t0  TCP *:111 (LISTEN)
rpcbind       688            _rpc    6u  IPv6    14233      0t0  TCP *:111 (LISTEN)
systemd-r     689 systemd-resolve   13u  IPv4    24250      0t0  TCP 127.0.0.53:53 (LISTEN)
sshd          875            root    3u  IPv4    35963      0t0  TCP *:22 (LISTEN)
sshd          875            root    4u  IPv6    35965      0t0  TCP *:22 (LISTEN)
k3s-serve    1059            root   16u  IPv6    39686      0t0  TCP *:6443 (LISTEN)
k3s-serve    1059            root   17u  IPv4    42283      0t0  TCP 127.0.0.1:6444 (LISTEN)
k3s-serve    1059            root  246u  IPv4    44394      0t0  TCP 127.0.0.1:10257 (LISTEN)
k3s-serve    1059            root  250u  IPv4    44460      0t0  TCP 127.0.0.1:10259 (LISTEN)
k3s-serve    1059            root  251u  IPv4    46137      0t0  TCP 127.0.0.1:10258 (LISTEN)
k3s-serve    1059            root  266u  IPv4    44472      0t0  TCP 127.0.0.1:10256 (LISTEN)
k3s-serve    1059            root  268u  IPv4    44474      0t0  TCP 127.0.0.1:10249 (LISTEN)
k3s-serve    1059            root  302u  IPv6    43767      0t0  TCP *:10250 (LISTEN)
k3s-serve    1059            root  304u  IPv4    44510      0t0  TCP 127.0.0.1:10248 (LISTEN)
container    1318            root   18u  IPv4    42679      0t0  TCP 127.0.0.1:10010 (LISTEN)
cupsd      224456            root    6u  IPv6 18133021      0t0  TCP [::1]:631 (LISTEN)
cupsd      224456            root    7u  IPv4 18133022      0t0  TCP 127.0.0.1:631 (LISTEN)
zabbix_ag 1119577          zabbix    4u  IPv4 19143716      0t0  TCP *:20050 (LISTEN)
zabbix_ag 1119577          zabbix    5u  IPv6 19143717      0t0  TCP *:20050 (LISTEN)
zabbix_ag 1119578          zabbix    4u  IPv4 19143716      0t0  TCP *:20050 (LISTEN)
zabbix_ag 1119578          zabbix    5u  IPv6 19143717      0t0  TCP *:20050 (LISTEN)
zabbix_ag 1119579          zabbix    4u  IPv4 19143716      0t0  TCP *:20050 (LISTEN)
zabbix_ag 1119579          zabbix    5u  IPv6 19143717      0t0  TCP *:20050 (LISTEN)
zabbix_ag 1119580          zabbix    4u  IPv4 19143716      0t0  TCP *:20050 (LISTEN)
zabbix_ag 1119580          zabbix    5u  IPv6 19143717      0t0  TCP *:20050 (LISTEN)
zabbix_ag 1119581          zabbix    4u  IPv4 19143716      0t0  TCP *:20050 (LISTEN)
zabbix_ag 1119581          zabbix    5u  IPv6 19143717      0t0  TCP *:20050 (LISTEN)
zabbix_ag 1119582          zabbix    4u  IPv4 19143716      0t0  TCP *:20050 (LISTEN)
When adding it to the hosts, as we did containers, make sure to select Template/OS Linux

We’ll add to the onprem and Linux groups.
When we add the “Agent” Interface, make sure to use the different port we configured (20050)
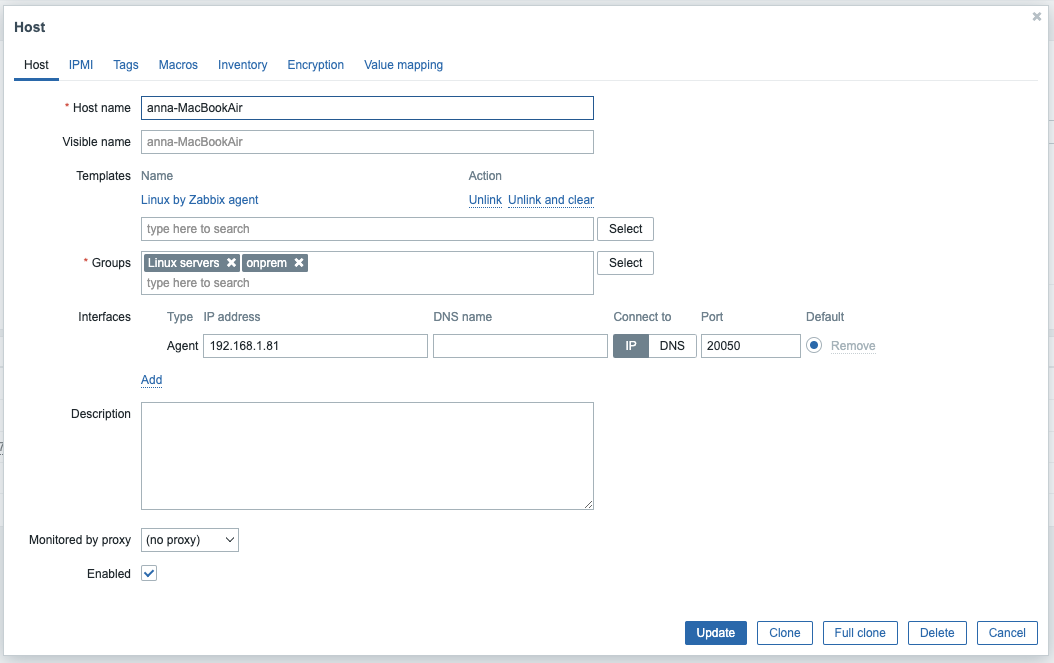
Now we can see it
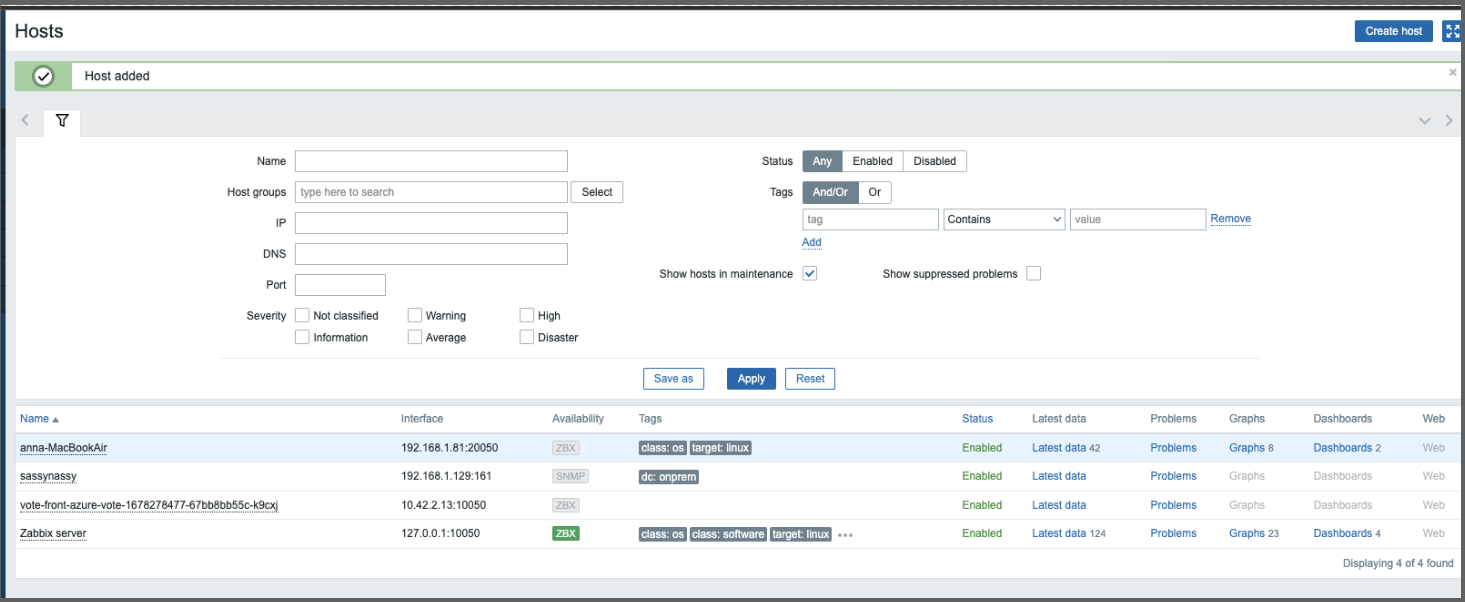
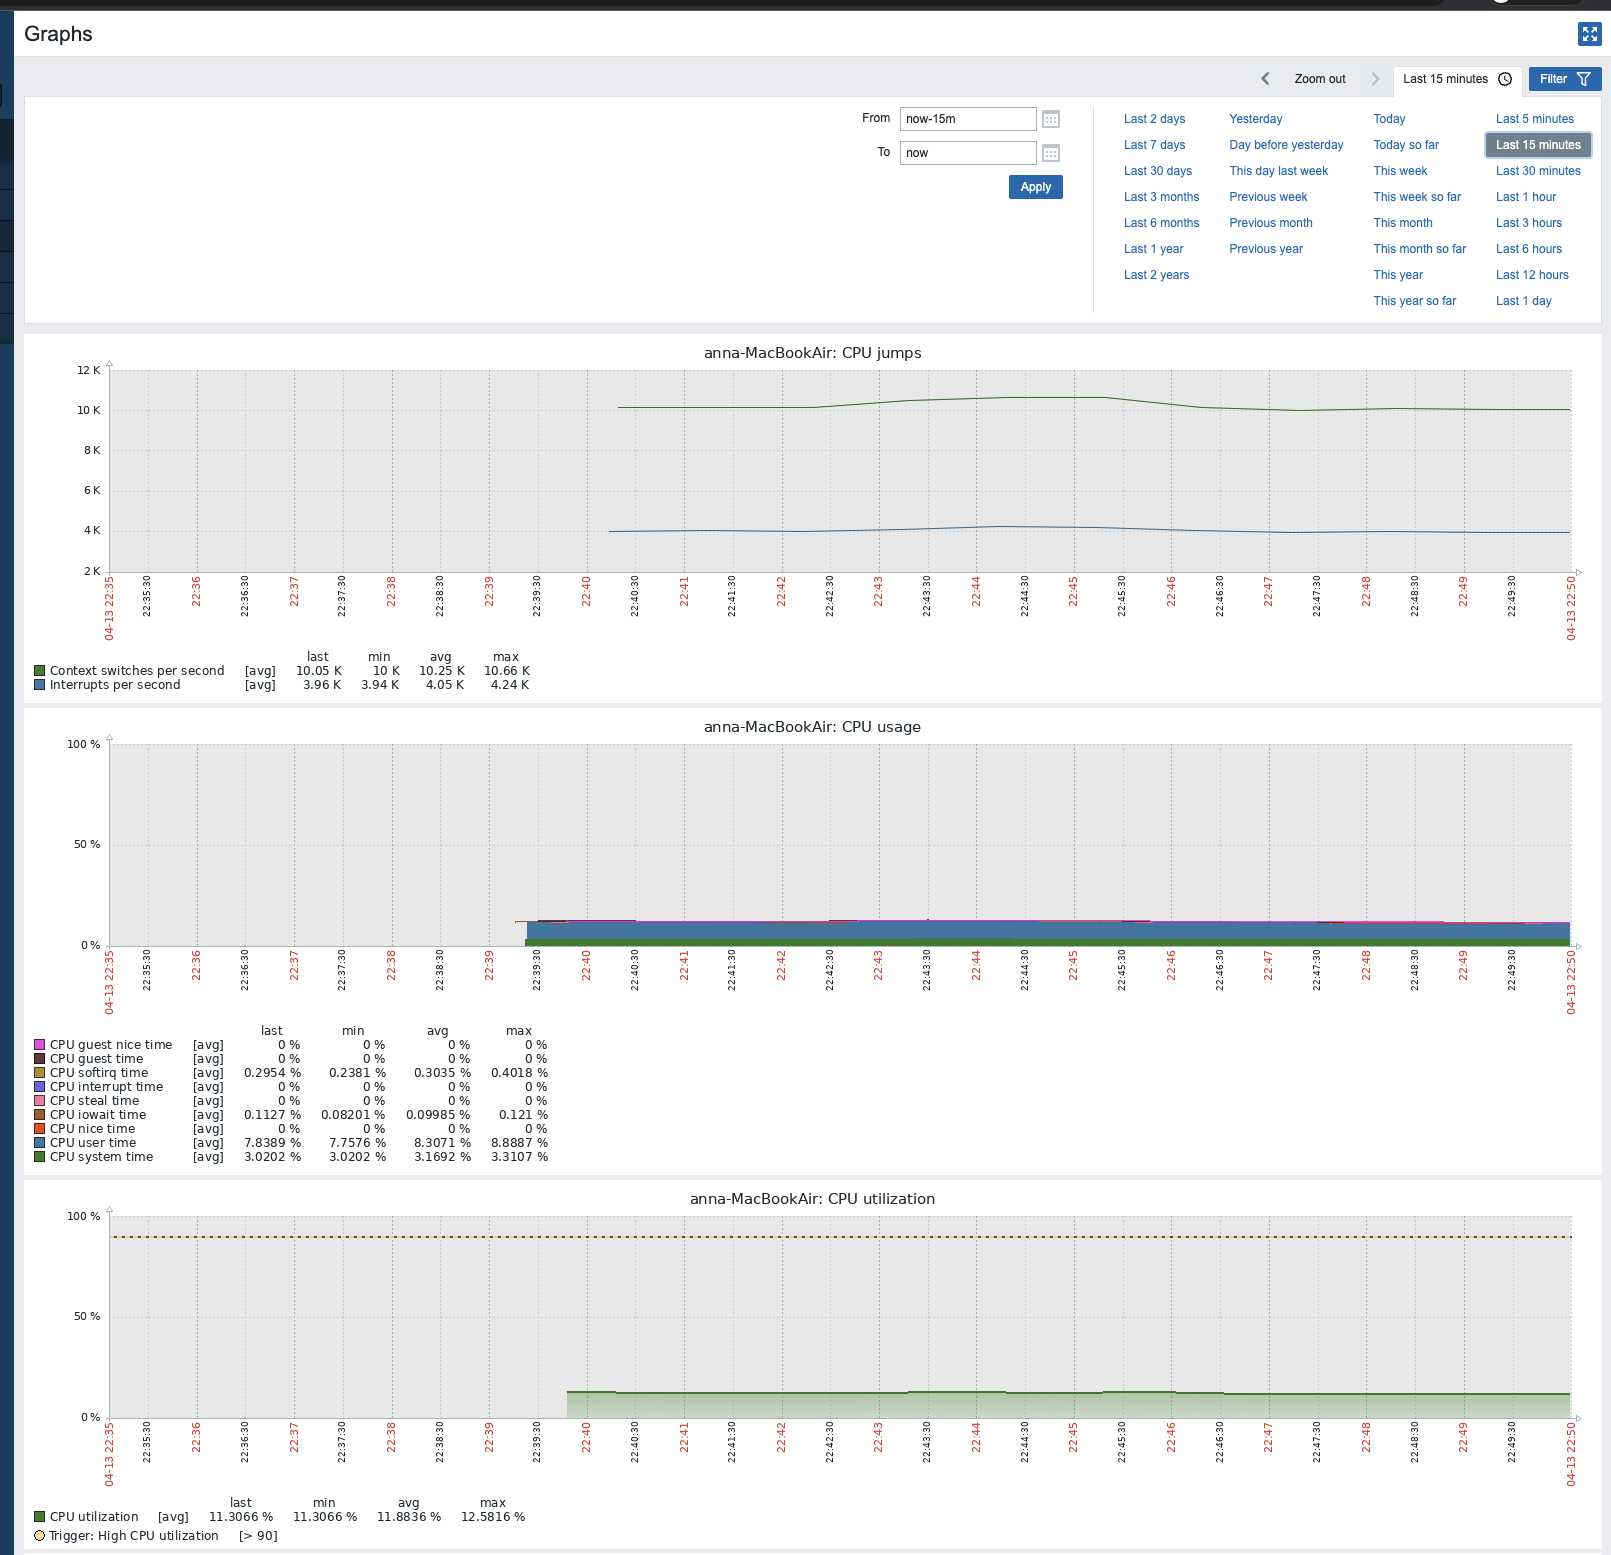
If I go to Graphs, we can now see server specifics
Summary
We installed, using Helm, Zabbix to a K3s on-prem cluster. We configured basic settings, including outgoing email hosts. Next we added a NAS Network Monitoring endpoint and a container (did not work). Then we setup a scheduled report followed by a Linux VM.
What I love is the software/platform is free. It is just gratis and supported on all platforms. They have detailed install instructions. The way the company grows and sustains itself is through a wide array of professional services.
I plan to do a follow-up as this was just a quick introduction. Certainly, Zabbix has some power beyond a basic status dashboard.