Published: Feb 24, 2023 by Isaac Johnson
Today we’ll revisit using Ansible (AWX) to respin and on-prem Kubernetes cluster (K3s). We are not only going to testing creating a K3s cluster without Traefik, but we’ll tackle creating and testing new playbooks that setup Istio and Cert-manager. We’ll then create an Azure SP and tackle Azure DNS with Cert-Manager by making an Azure DNS ClusterIssuer and wrap by building that into a playbook.
Note: All the playbooks referenced below are available in my github repo
Resetting the Secondary On-Prem Cluster with Ansible
Before I can run my playbooks, I really need to ensure az is logged in for the AKV steps. Since most of my accounts have MFA now, this isn’t really something I can over-automate.
I’ll first get a list of hosts
$ kubectl get nodes -o yaml | grep "\- address:"
    - address: 192.168.1.159
    - address: builder-macbookpro2
    - address: 192.168.1.81
    - address: anna-macbookair
    - address: 192.168.1.206
    - address: isaac-macbookpro
On the primary node, first I need to login
$ ssh 192.168.1.81
Welcome to Ubuntu 20.04.4 LTS (GNU/Linux 5.15.0-58-generic x86_64)

 * Documentation:  https://help.ubuntu.com
 * Management:     https://landscape.canonical.com
 * Support:        https://ubuntu.com/advantage

58 updates can be applied immediately.
To see these additional updates run: apt list --upgradable

Your Hardware Enablement Stack (HWE) is supported until April 2025.
Last login: Fri Jan 27 07:34:58 2023 from 192.168.1.160
Dealing with a “stuck” AZ CLI
Then I should upgrade the az cli.
builder@anna-MacBookAir:~$ az upgrade
This command is in preview and under development. Reference and support levels: https://aka.ms/CLI_refstatus
Your current Azure CLI version is 2.39.0. Latest version available is 2.45.0.
Please check the release notes first: https://docs.microsoft.com/cli/azure/release-notes-azure-cli
Do you want to continue? (Y/n): Y
Hit:1 http://us.archive.ubuntu.com/ubuntu focal InRelease
Hit:2 http://us.archive.ubuntu.com/ubuntu focal-updates InRelease
Hit:3 http://us.archive.ubuntu.com/ubuntu focal-backports InRelease
Hit:4 http://packages.cloud.google.com/apt gcsfuse-focal InRelease
Get:5 https://packages.microsoft.com/repos/azure-cli focal InRelease [10.4 kB]
Hit:6 http://ppa.launchpad.net/rmescandon/yq/ubuntu focal InRelease
Hit:7 http://security.ubuntu.com/ubuntu focal-security InRelease
Fetched 10.4 kB in 2s (4,649 B/s)
Reading package lists... Done
Reading package lists... Done
Building dependency tree
Reading state information... Done
azure-cli is already the newest version (2.39.0-1~focal).
The following packages were automatically installed and are no longer required:
  libfprint-2-tod1 libfwupdplugin1 libllvm10 libllvm11 shim
Use 'sudo apt autoremove' to remove them.
0 upgraded, 0 newly installed, 0 to remove and 59 not upgraded.
CLI upgrade failed or aborted.
I tried the alternate approach, but it too says 2.39.0 is as high as I can go
builder@anna-MacBookAir:~$ curl -sL https://aka.ms/InstallAzureCLIDeb | sudo bash
Hit:1 http://us.archive.ubuntu.com/ubuntu focal InRelease
Hit:2 http://us.archive.ubuntu.com/ubuntu focal-updates InRelease
Hit:3 http://us.archive.ubuntu.com/ubuntu focal-backports InRelease
Hit:4 http://packages.cloud.google.com/apt gcsfuse-focal InRelease
Hit:5 http://security.ubuntu.com/ubuntu focal-security InRelease
Hit:6 http://ppa.launchpad.net/rmescandon/yq/ubuntu focal InRelease
Get:7 https://packages.microsoft.com/repos/azure-cli focal InRelease [10.4 kB]
Fetched 10.4 kB in 1s (7,114 B/s)
Reading package lists... Done
Reading package lists... Done
Building dependency tree
Reading state information... Done
lsb-release is already the newest version (11.1.0ubuntu2).
curl is already the newest version (7.68.0-1ubuntu2.15).
gnupg is already the newest version (2.2.19-3ubuntu2.2).
apt-transport-https is already the newest version (2.0.9).
The following packages were automatically installed and are no longer required:
  libfprint-2-tod1 libfwupdplugin1 libllvm10 libllvm11 shim
Use 'sudo apt autoremove' to remove them.
0 upgraded, 0 newly installed, 0 to remove and 59 not upgraded.
Hit:1 http://us.archive.ubuntu.com/ubuntu focal InRelease
Hit:2 http://us.archive.ubuntu.com/ubuntu focal-updates InRelease
Hit:3 http://us.archive.ubuntu.com/ubuntu focal-backports InRelease
Hit:4 http://packages.cloud.google.com/apt gcsfuse-focal InRelease
Hit:5 http://ppa.launchpad.net/rmescandon/yq/ubuntu focal InRelease
Hit:6 http://security.ubuntu.com/ubuntu focal-security InRelease
Get:7 https://packages.microsoft.com/repos/azure-cli focal InRelease [10.4 kB]
Fetched 10.4 kB in 2s (5,951 B/s)
Reading package lists... Done
Reading package lists... Done
Building dependency tree
Reading state information... Done
azure-cli is already the newest version (2.39.0-1~focal).
The following packages were automatically installed and are no longer required:
  libfprint-2-tod1 libfwupdplugin1 libllvm10 libllvm11 shim
Use 'sudo apt autoremove' to remove them.
0 upgraded, 0 newly installed, 0 to remove and 59 not upgraded.
I was reading the notes on the Azure CLI docs where it mentioned an older bundled azure-cli that is part of ubuntu universe.
Once I fully removed azure-cli
builder@anna-MacBookAir:~$ sudo rm /etc/apt/sources.list.d/azure-cli.list
builder@anna-MacBookAir:~$ sudo rm /etc/apt/keyrings/microsoft.gpg
Then the install added the correct current latest.
builder@anna-MacBookAir:~$ curl -sL https://aka.ms/InstallAzureCLIDeb | sudo bash
Hit:1 http://us.archive.ubuntu.com/ubuntu focal InRelease
Hit:2 http://us.archive.ubuntu.com/ubuntu focal-updates InRelease
Hit:3 http://us.archive.ubuntu.com/ubuntu focal-backports InRelease
Hit:4 http://packages.cloud.google.com/apt gcsfuse-focal InRelease
Hit:5 http://security.ubuntu.com/ubuntu focal-security InRelease
Hit:6 http://ppa.launchpad.net/rmescandon/yq/ubuntu focal InRelease
Reading package lists... Done
Reading package lists... Done
Building dependency tree
Reading state information... Done
lsb-release is already the newest version (11.1.0ubuntu2).
curl is already the newest version (7.68.0-1ubuntu2.15).
gnupg is already the newest version (2.2.19-3ubuntu2.2).
apt-transport-https is already the newest version (2.0.9).
The following packages were automatically installed and are no longer required:
  libfprint-2-tod1 libfwupdplugin1 libllvm10 libllvm11 shim
Use 'sudo apt autoremove' to remove them.
0 upgraded, 0 newly installed, 0 to remove and 59 not upgraded.
Hit:1 http://us.archive.ubuntu.com/ubuntu focal InRelease
Hit:2 http://security.ubuntu.com/ubuntu focal-security InRelease
Hit:3 http://us.archive.ubuntu.com/ubuntu focal-updates InRelease
Hit:4 http://packages.cloud.google.com/apt gcsfuse-focal InRelease
Hit:5 http://us.archive.ubuntu.com/ubuntu focal-backports InRelease
Hit:6 http://ppa.launchpad.net/rmescandon/yq/ubuntu focal InRelease
Get:7 https://packages.microsoft.com/repos/azure-cli focal InRelease [10.4 kB]
Get:8 https://packages.microsoft.com/repos/azure-cli focal/main amd64 Packages [10.5 kB]
Fetched 20.9 kB in 2s (10.9 kB/s)
Reading package lists... Done
Reading package lists... Done
Building dependency tree
Reading state information... Done
The following packages were automatically installed and are no longer required:
  libfprint-2-tod1 libfwupdplugin1 libllvm10 libllvm11 shim
Use 'sudo apt autoremove' to remove them.
The following NEW packages will be installed:
  azure-cli
0 upgraded, 1 newly installed, 0 to remove and 59 not upgraded.
Need to get 84.7 MB of archives.
After this operation, 1,250 MB of additional disk space will be used.
Get:1 https://packages.microsoft.com/repos/azure-cli focal/main amd64 azure-cli all 2.45.0-1~focal [84.7 MB]
Fetched 84.7 MB in 5s (15.9 MB/s)
Selecting previously unselected package azure-cli.
(Reading database ... 317327 files and directories currently installed.)
Preparing to unpack .../azure-cli_2.45.0-1~focal_all.deb ...
Unpacking azure-cli (2.45.0-1~focal) ...
Setting up azure-cli (2.45.0-1~focal) ...
Installing new version of config file /etc/bash_completion.d/azure-cli ...
Then I can az login
builder@anna-MacBookAir:~$ az login --use-device-code
To sign in, use a web browser to open the page https://microsoft.com/devicelogin and enter the code A886TCJXQ to authenticate.
The following tenants don't contain accessible subscriptions. Use 'az login --allow-no-subscriptions' to have tenant level access.
2f5b31ae-asdf-asdf-asdf-asdfasdfa741 'mytestdomain'
5b42c447-asdf-asdf-asdf-asdfasdfaec6 'IDJCompleteNonsense'
92a2e5a9-asdf-asdf-asdf-asdfasdfa6d5 'Princess King'
[
  {
    "cloudName": "AzureCloud",
    "homeTenantId": "28c575f6-asdf-asdf-asdf-asdfasdfab4a",
    "id": "d955c0ba-asdf-asdf-asdf-asdfasdfa22d",
    "isDefault": true,
    "managedByTenants": [],
    "name": "Pay-As-You-Go",
    "state": "Enabled",
    "tenantId": "28c575f6-asdf-asdf-asdf-asdfasdfab4a",
    "user": {
      "name": "isaac.johnson@gmail.com",
      "type": "user"
    }
  }
]
I’ll do a quick Sanity check to ensure the AKV is reachable
builder@anna-MacBookAir:~$ az keyvault secret show --vault-name idjakv --name k3sremoteconfig | jq -r .name
k3sremoteconfig
Resetting with AWX
I’ve pointed out my reset playbook before, but now is a good time to use it.
I’ll log into my AWX
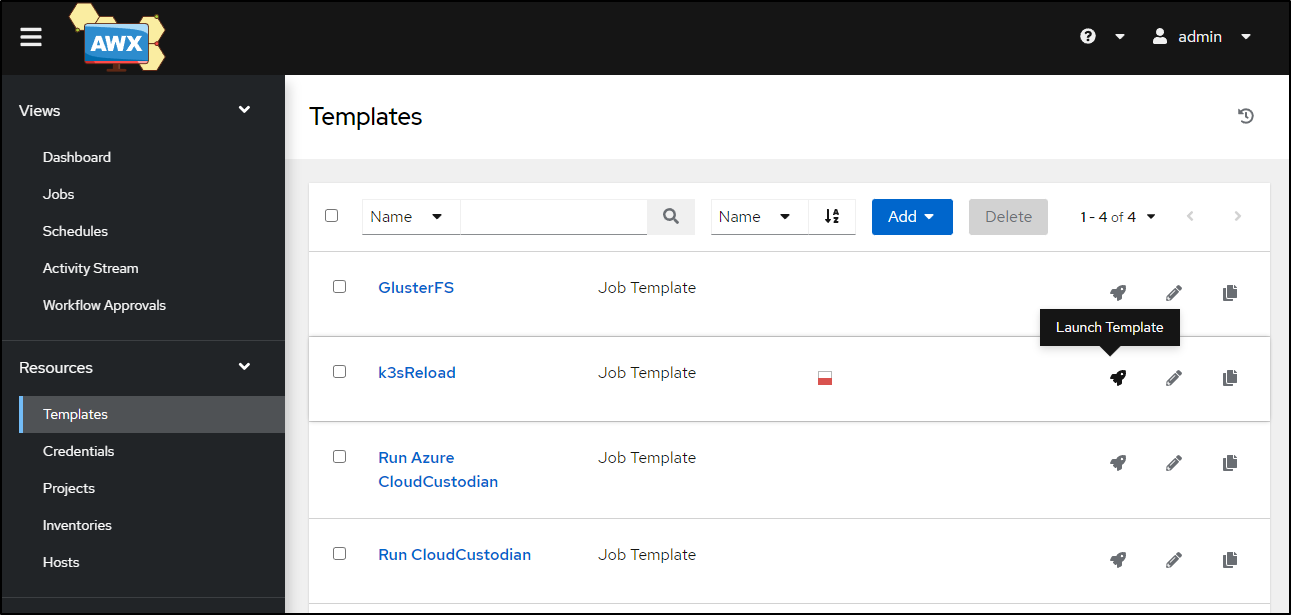
and invoke the Reload Template
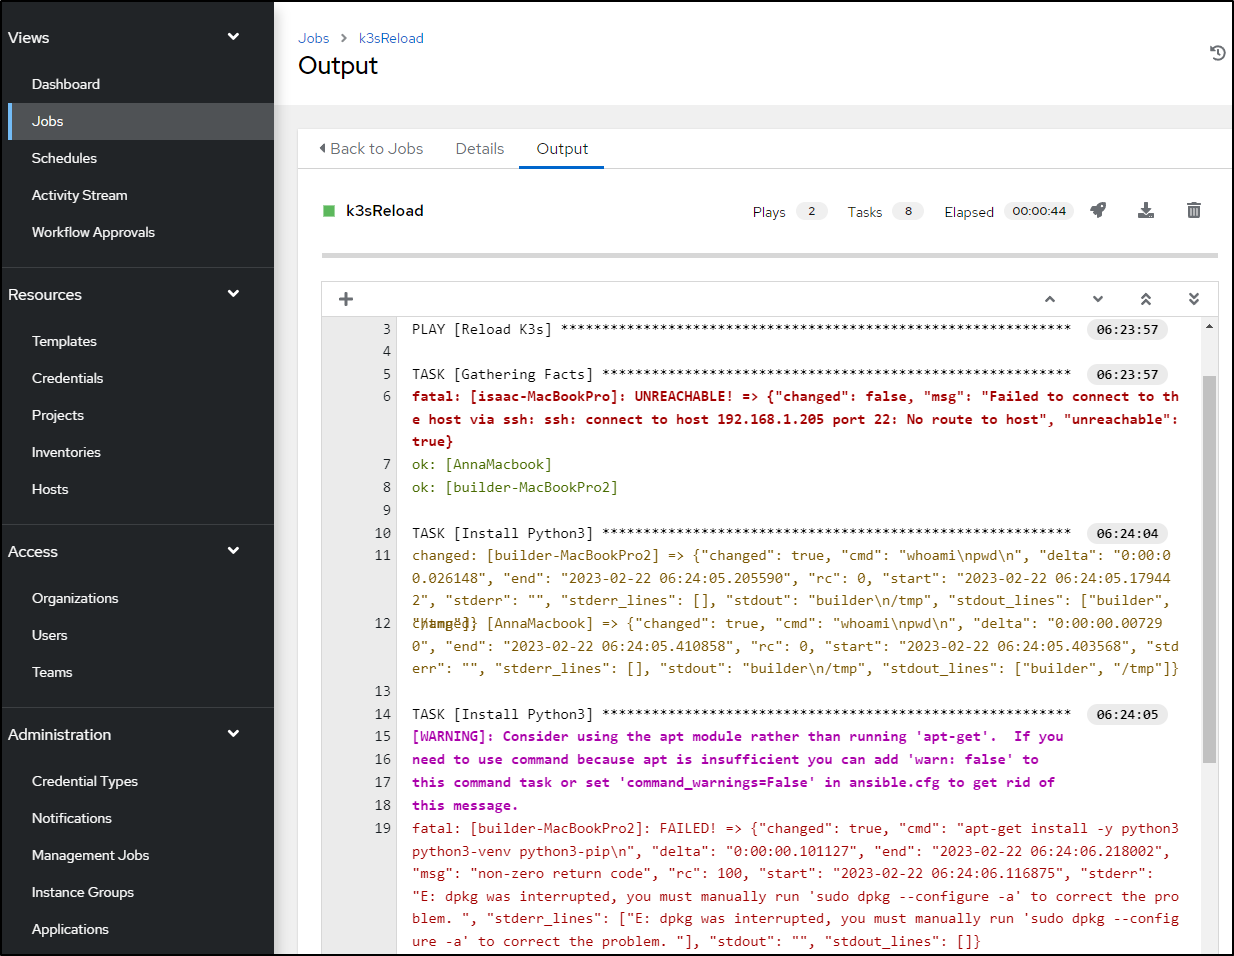
This should wipe and reset my secondary k3s cluster. Looking at the logs
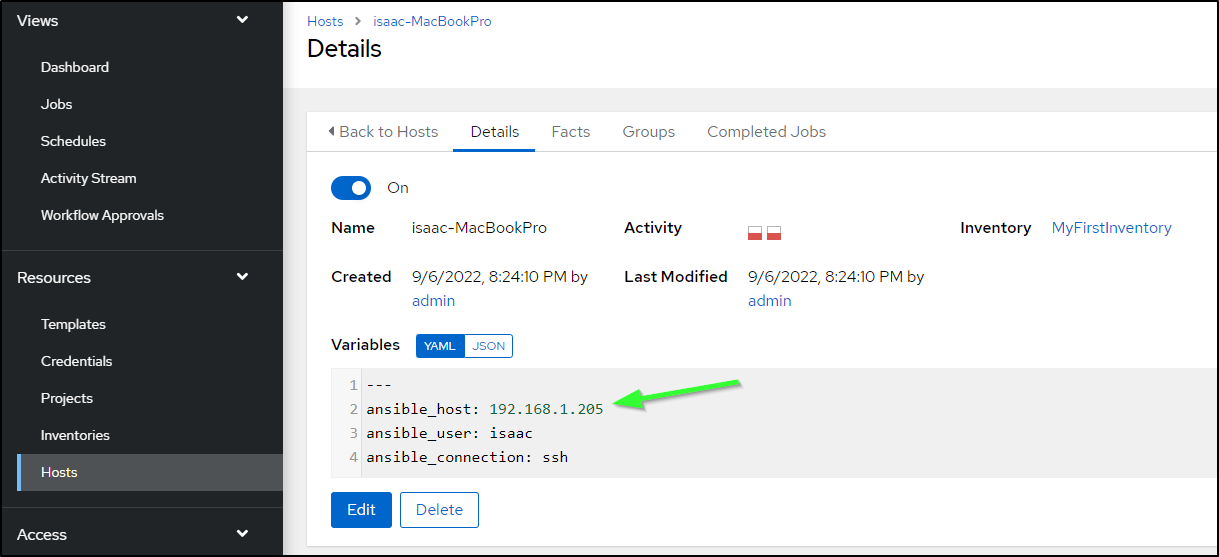
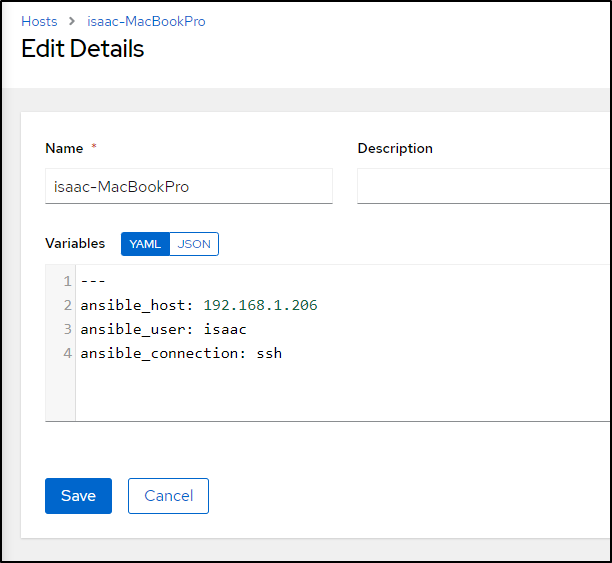
We see one issue, the ‘isaac-MacBookPro’ host is unreachable at 192.168.1.205. If you recall our quick ‘kubectl get nodes` command above, you’ll recall that it did change IPs to 192.168.1.206.
This is a quick fix. I just need to go to Hosts and find the fixed IP
Then edit and save it
The job has completed already and I know that my creds have updated since my primary box can no longer use the cert to reach the mac81 cluster
builder@DESKTOP-QADGF36:~$ kubectx mac81
Switched to context "mac81".
builder@DESKTOP-QADGF36:~$ kubectl get nodes
Unable to connect to the server: x509: certificate signed by unknown authority
I like the idempotence of the playbook. I’ll just run it again.
Correcting dpkg errors on nodes
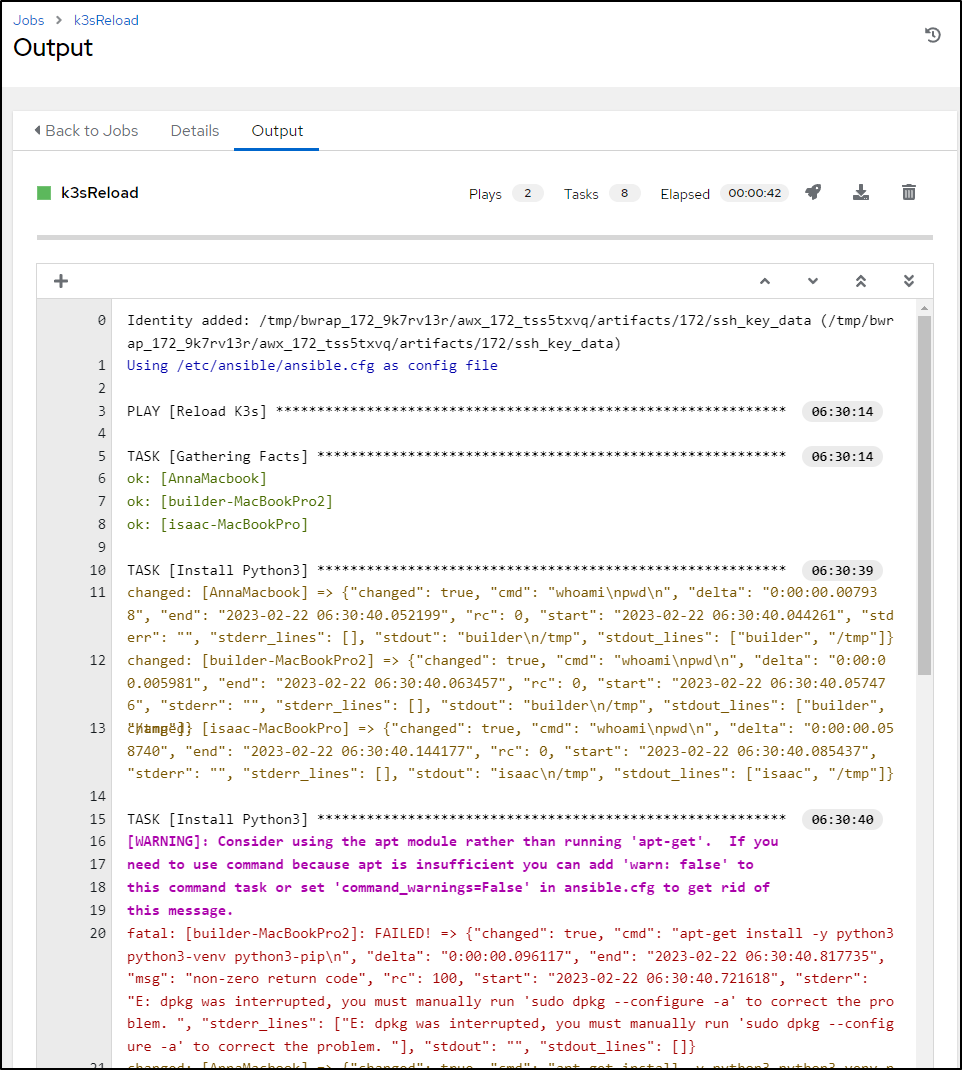
This looks much better, though there seems to be a bit of a dpkg issue on that MacBookPro2 host
I hopped in directly to see what the deal was
builder@builder-MacBookPro2:~$ sudo apt-get install -y python3 python3-venv python3-pip
E: dpkg was interrupted, you must manually run 'sudo dpkg --configure -a' to correct the problem.
I did run the dpkg command which found more and more troubles. A shorthand of what it took to get back to good:
$ sudo apt clean
$ sudo apt update
$ sudo apt -y --fix-broken install
$ sudo apt -y install linux-headers-5.15.0-58-generic
Then the broken step from the playbook worked
builder@builder-MacBookPro2:~$ sudo apt-get install -y python3 python3-venv python3-pip
Reading package lists... Done
Building dependency tree
Reading state information... Done
python3 is already the newest version (3.8.2-0ubuntu2).
python3-venv is already the newest version (3.8.2-0ubuntu2).
The following packages were automatically installed and are no longer required:
  libfprint-2-tod1 libllvm10 linux-headers-5.15.0-46-generic linux-hwe-5.15-headers-5.15.0-46
  linux-image-5.15.0-46-generic linux-image-5.15.0-57-generic linux-modules-5.15.0-46-generic
  linux-modules-5.15.0-57-generic linux-modules-extra-5.15.0-46-generic
  linux-modules-extra-5.15.0-57-generic
Use 'sudo apt autoremove' to remove them.
The following additional packages will be installed:
  python-pip-whl
The following packages will be upgraded:
  python-pip-whl python3-pip
2 upgraded, 0 newly installed, 0 to remove and 121 not upgraded.
Need to get 2,036 kB of archives.
After this operation, 0 B of additional disk space will be used.
Get:1 http://us.archive.ubuntu.com/ubuntu focal-updates/universe amd64 python3-pip all 20.0.2-5ubuntu1.7 [230 kB]
Get:2 http://us.archive.ubuntu.com/ubuntu focal-updates/universe amd64 python-pip-whl all 20.0.2-5ubuntu1.7 [1,805 kB]
Fetched 2,036 kB in 1s (3,284 kB/s)
(Reading database ... 357974 files and directories currently installed.)
Preparing to unpack .../python3-pip_20.0.2-5ubuntu1.7_all.deb ...
Unpacking python3-pip (20.0.2-5ubuntu1.7) over (20.0.2-5ubuntu1.6) ...
Preparing to unpack .../python-pip-whl_20.0.2-5ubuntu1.7_all.deb ...
Unpacking python-pip-whl (20.0.2-5ubuntu1.7) over (20.0.2-5ubuntu1.6) ...
Setting up python-pip-whl (20.0.2-5ubuntu1.7) ...
Setting up python3-pip (20.0.2-5ubuntu1.7) ...
Processing triggers for man-db (2.9.1-1) ...
I had to kick the other host in the pants as well - same issue on ‘isaac-MacBookPro’.
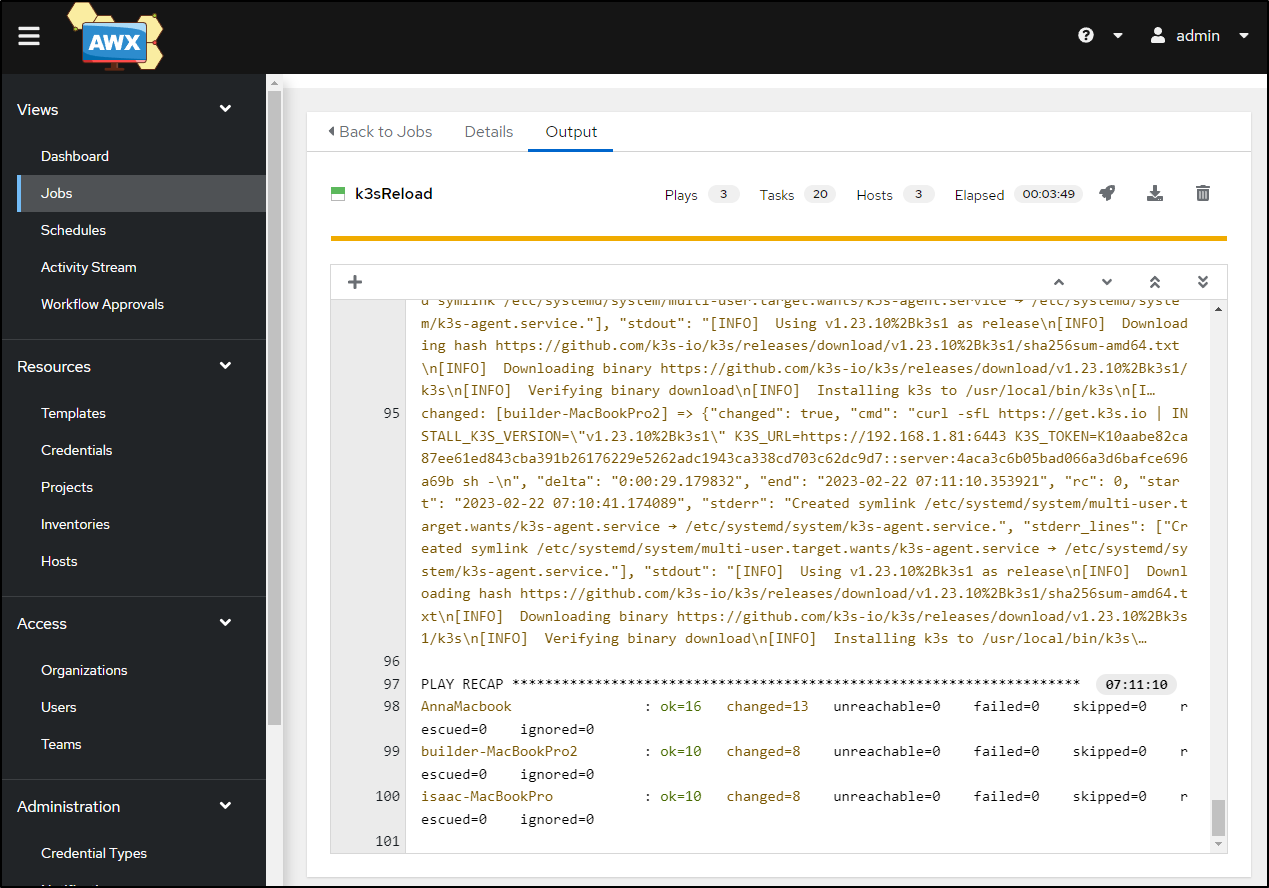
Once all the issues were resolved, the playbook completed successfully
Testing
To use the cluster now, I’ll need to pull a fresh config
builder@DESKTOP-QADGF36:~$ cp ~/.kube/config ~/.kube/config.bak && az keyvault secret show --vault-name idjakv --name k3sremoteconfig | jq -r .value > ~/.kube/config
Then use the context just updated
builder@DESKTOP-QADGF36:~$ kubectx mac81
Switched to context "mac81".
builder@DESKTOP-QADGF36:~$ kubectl get nodes
NAME                  STATUS   ROLES                  AGE     VERSION
builder-macbookpro2   Ready    <none>                 4m51s   v1.23.10+k3s1
isaac-macbookpro      Ready    <none>                 4m59s   v1.23.10+k3s1
anna-macbookair       Ready    control-plane,master   7m34s   v1.23.10+k3s1
Istio
Let’s add Istio
builder@DESKTOP-72D2D9T:~$  helm repo add istio https://istio-release.storage.googleapis.com/charts
"istio" has been added to your repositories
builder@DESKTOP-72D2D9T:~$ helm repo update
Hang tight while we grab the latest from your chart repositories...
...Successfully got an update from the "adwerx" chart repository
...Successfully got an update from the "metallb" chart repository
...Successfully got an update from the "cribl" chart repository
...Successfully got an update from the "novum-rgi-helm" chart repository
...Successfully got an update from the "actions-runner-controller" chart repository
...Successfully got an update from the "longhorn" chart repository
...Successfully got an update from the "lifen-charts" chart repository
...Successfully got an update from the "hashicorp" chart repository
...Successfully got an update from the "ingress-nginx" chart repository
...Successfully got an update from the "harbor" chart repository
...Successfully got an update from the "istio" chart repository
...Successfully got an update from the "rook-release" chart repository
...Successfully got an update from the "datadog" chart repository
...Successfully got an update from the "jenkins" chart repository
...Successfully got an update from the "argo-cd" chart repository
...Successfully got an update from the "gitlab" chart repository
...Successfully got an update from the "stable" chart repository
...Successfully got an update from the "bitnami" chart repository
Update Complete. ⎈Happy Helming!⎈
Let’s add the Istio CRD:
builder@DESKTOP-72D2D9T:~$ helm install istio-base istio/base -n istio-system --create-namespace
NAME: istio-base
LAST DEPLOYED: Wed Feb 22 18:39:27 2023
NAMESPACE: istio-system
STATUS: deployed
REVISION: 1
TEST SUITE: None
NOTES:
Istio base successfully installed!

To learn more about the release, try:
  $ helm status istio-base
  $ helm get all istio-base
Next, we need to install the discovery chart.
builder@DESKTOP-72D2D9T:~$ helm install istiod istio/istiod -n istio-system --wait
NAME: istiod
LAST DEPLOYED: Wed Feb 22 18:43:15 2023
NAMESPACE: istio-system
STATUS: deployed
REVISION: 1
TEST SUITE: None
NOTES:
"istiod" successfully installed!

To learn more about the release, try:
  $ helm status istiod
  $ helm get all istiod

Next steps:
  * Deploy a Gateway: https://istio.io/latest/docs/setup/additional-setup/gateway/
  * Try out our tasks to get started on common configurations:
    * https://istio.io/latest/docs/tasks/traffic-management
    * https://istio.io/latest/docs/tasks/security/
    * https://istio.io/latest/docs/tasks/policy-enforcement/
    * https://istio.io/latest/docs/tasks/policy-enforcement/
  * Review the list of actively supported releases, CVE publications and our hardening guide:
    * https://istio.io/latest/docs/releases/supported-releases/
    * https://istio.io/latest/news/security/
    * https://istio.io/latest/docs/ops/best-practices/security/

For further documentation see https://istio.io website

Tell us how your install/upgrade experience went at https://forms.gle/hMHGiwZHPU7UQRWe9
and get status
$ kubectl get deployments -n istio-system --output wide
NAME     READY   UP-TO-DATE   AVAILABLE   AGE     CONTAINERS   IMAGES                         SELECTOR
istiod   1/1     1            1           3m58s   discovery    docker.io/istio/pilot:1.17.0   istio=pilot
Lastly, setup ingress:
builder@DESKTOP-72D2D9T:~$ helm install istio-ingress istio/gateway -n istio-ingress --wait


^CRelease istio-ingress has been cancelled.
Error: INSTALLATION FAILED: context canceled
I’ll save the debug details. The cause is Traefik already exists as my ingress. Thus unless I disable manually or at intsall, the LoadBalancer will be forever stuck
builder@DESKTOP-72D2D9T:~$ kubectl get svc -n istio-ingress
NAME            TYPE           CLUSTER-IP    EXTERNAL-IP   PORT(S)                                      AGE
istio-ingress   LoadBalancer   10.43.46.25   <pending>     15021:30385/TCP,80:30029/TCP,443:30738/TCP   9m16s
builder@DESKTOP-72D2D9T:~$ kubectl get svc --all-namespaces
NAMESPACE       NAME             TYPE           CLUSTER-IP      EXTERNAL-IP                                PORT(S)                                      AGE
default         kubernetes       ClusterIP      10.43.0.1       <none>                                     443/TCP                                      11h
kube-system     kube-dns         ClusterIP      10.43.0.10      <none>                                     53/UDP,53/TCP,9153/TCP                       11h
kube-system     metrics-server   ClusterIP      10.43.118.85    <none>                                     443/TCP                                      11h
kube-system     traefik          LoadBalancer   10.43.212.240   192.168.1.159,192.168.1.206,192.168.1.81   80:30502/TCP,443:30935/TCP                   11h
istio-system    istiod           ClusterIP      10.43.196.48    <none>                                     15010/TCP,15012/TCP,443/TCP,15014/TCP        16m
istio-ingress   istio-ingress    LoadBalancer   10.43.46.25     <pending>                                  15021:30385/TCP,80:30029/TCP,443:30738/TCP   10m
builder@DESKTOP-72D2D9T:~$
I’m going to change this step
  - name: Install K3s
    ansible.builtin.shell: |
      curl -sfL https://get.k3s.io | INSTALL_K3S_VERSION="v1.23.10%2Bk3s1" K3S_KUBECONFIG_MODE="644" INSTALL_K3S_EXEC="--tls-san 73.242.50.46" sh -
    become: true
    args:
      chdir: /tmp
to
  - name: Install K3s
    ansible.builtin.shell: |
      curl -sfL https://get.k3s.io | INSTALL_K3S_VERSION="v1.23.10%2Bk3s1" K3S_KUBECONFIG_MODE="644" INSTALL_K3S_EXEC="--no-deploy traefik --tls-san 73.242.50.46" sh -
    become: true
    args:
      chdir: /tmp
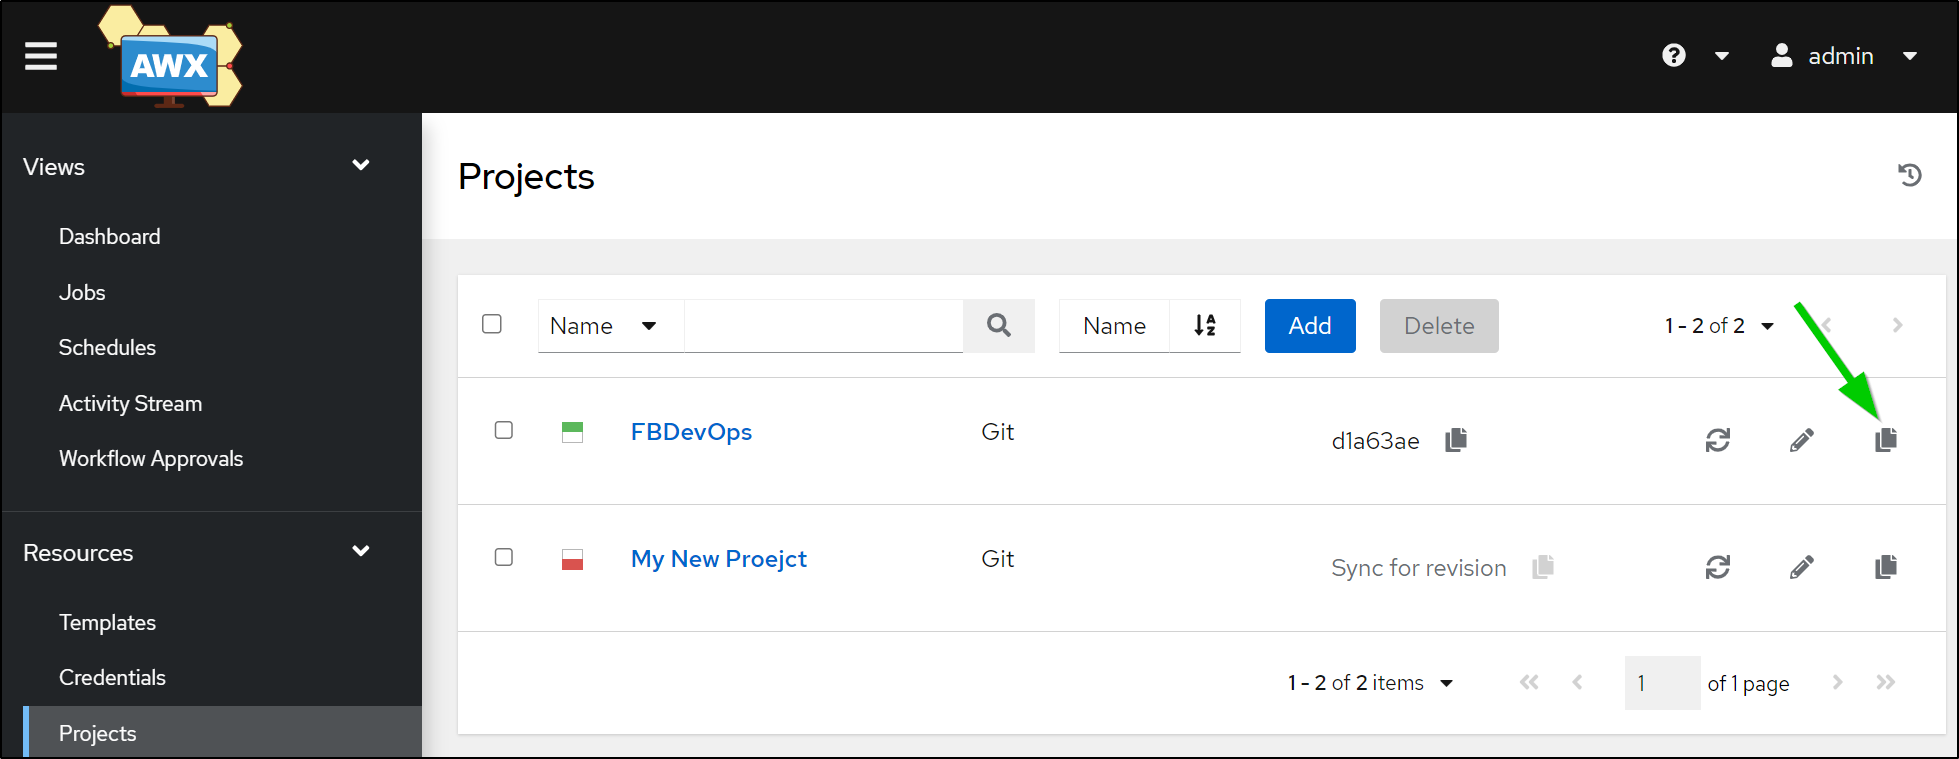
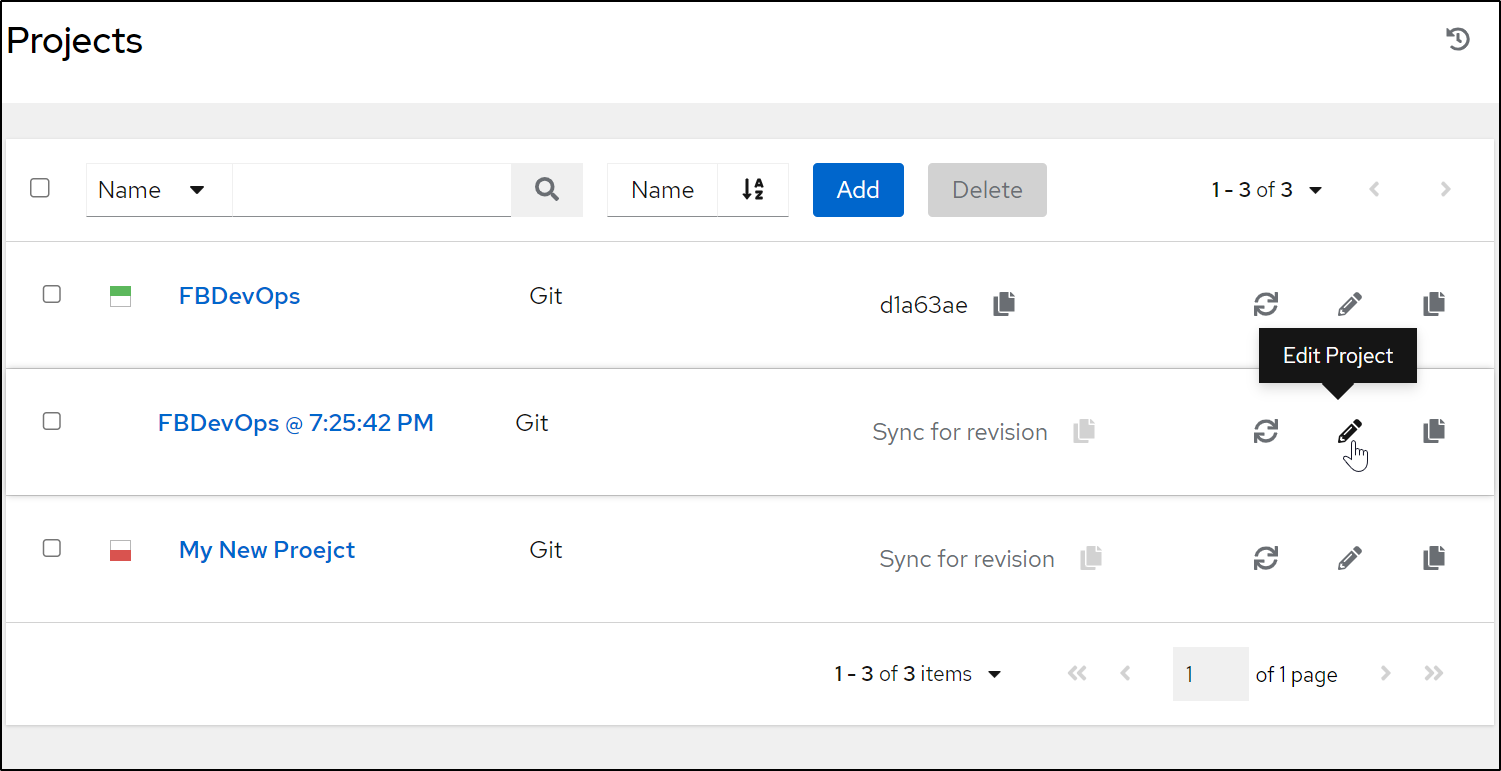
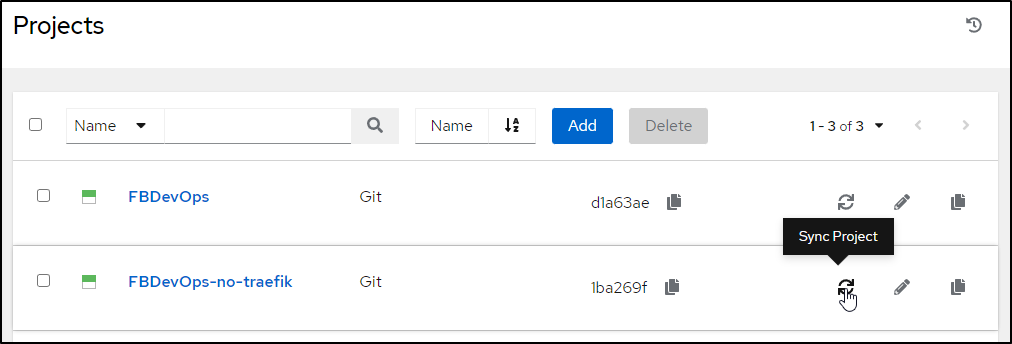
Since I used a new branch, I’ll copy the existing “project”
Then edit the copy
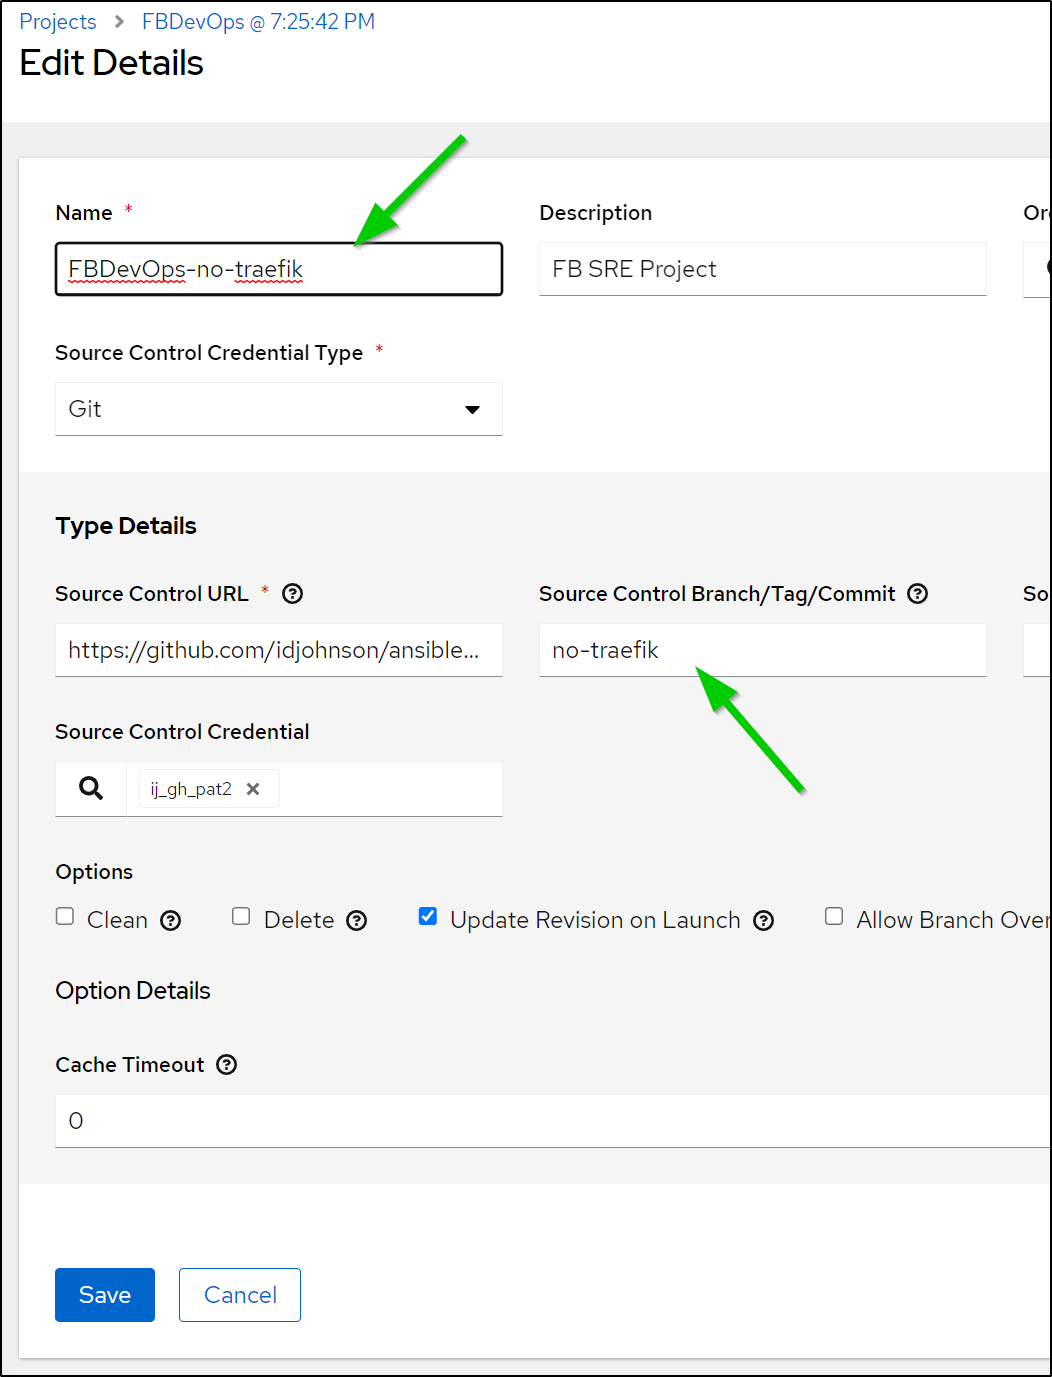
Then I’ll update the branch and name
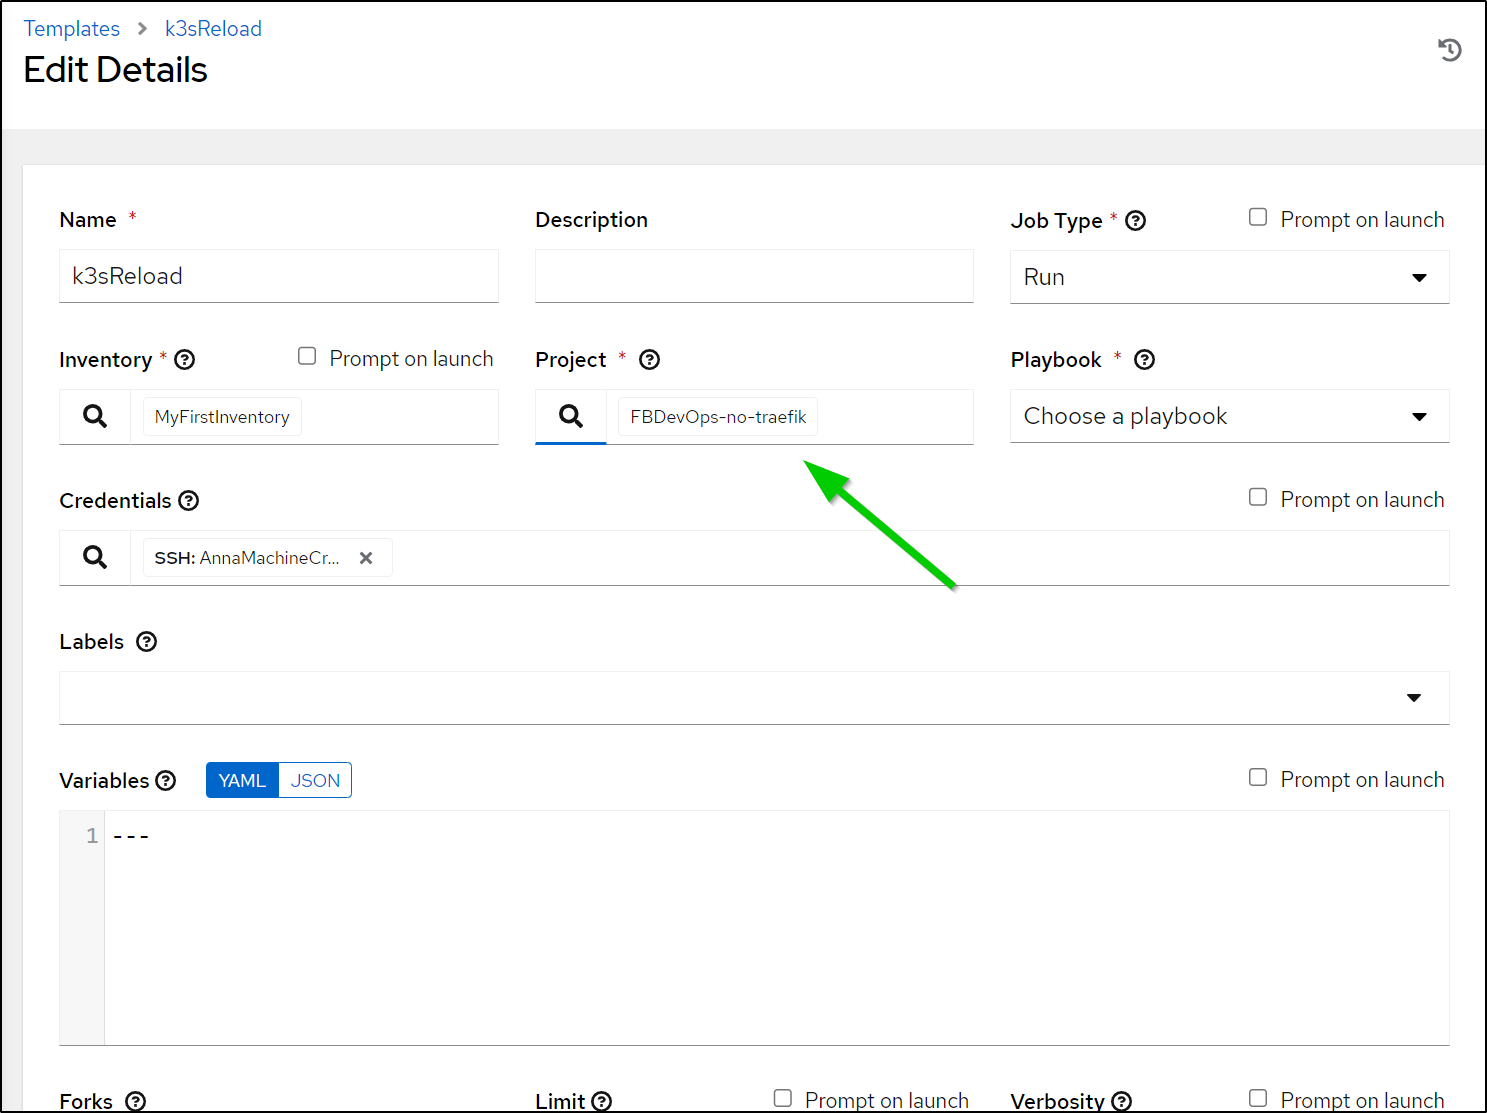
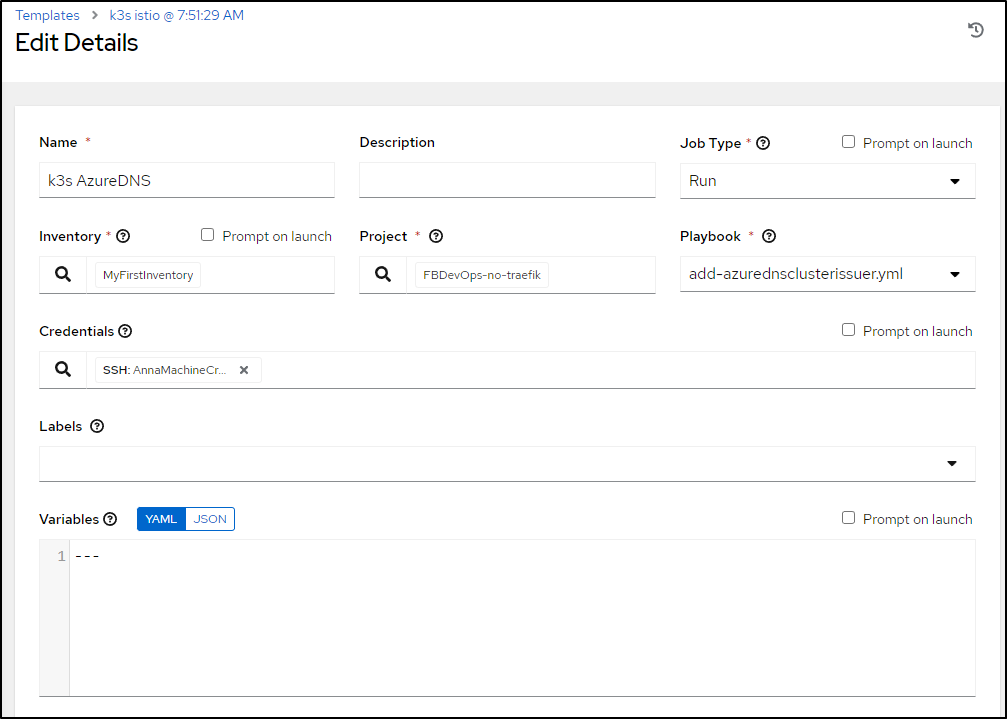
So now I can change the template to use the new project
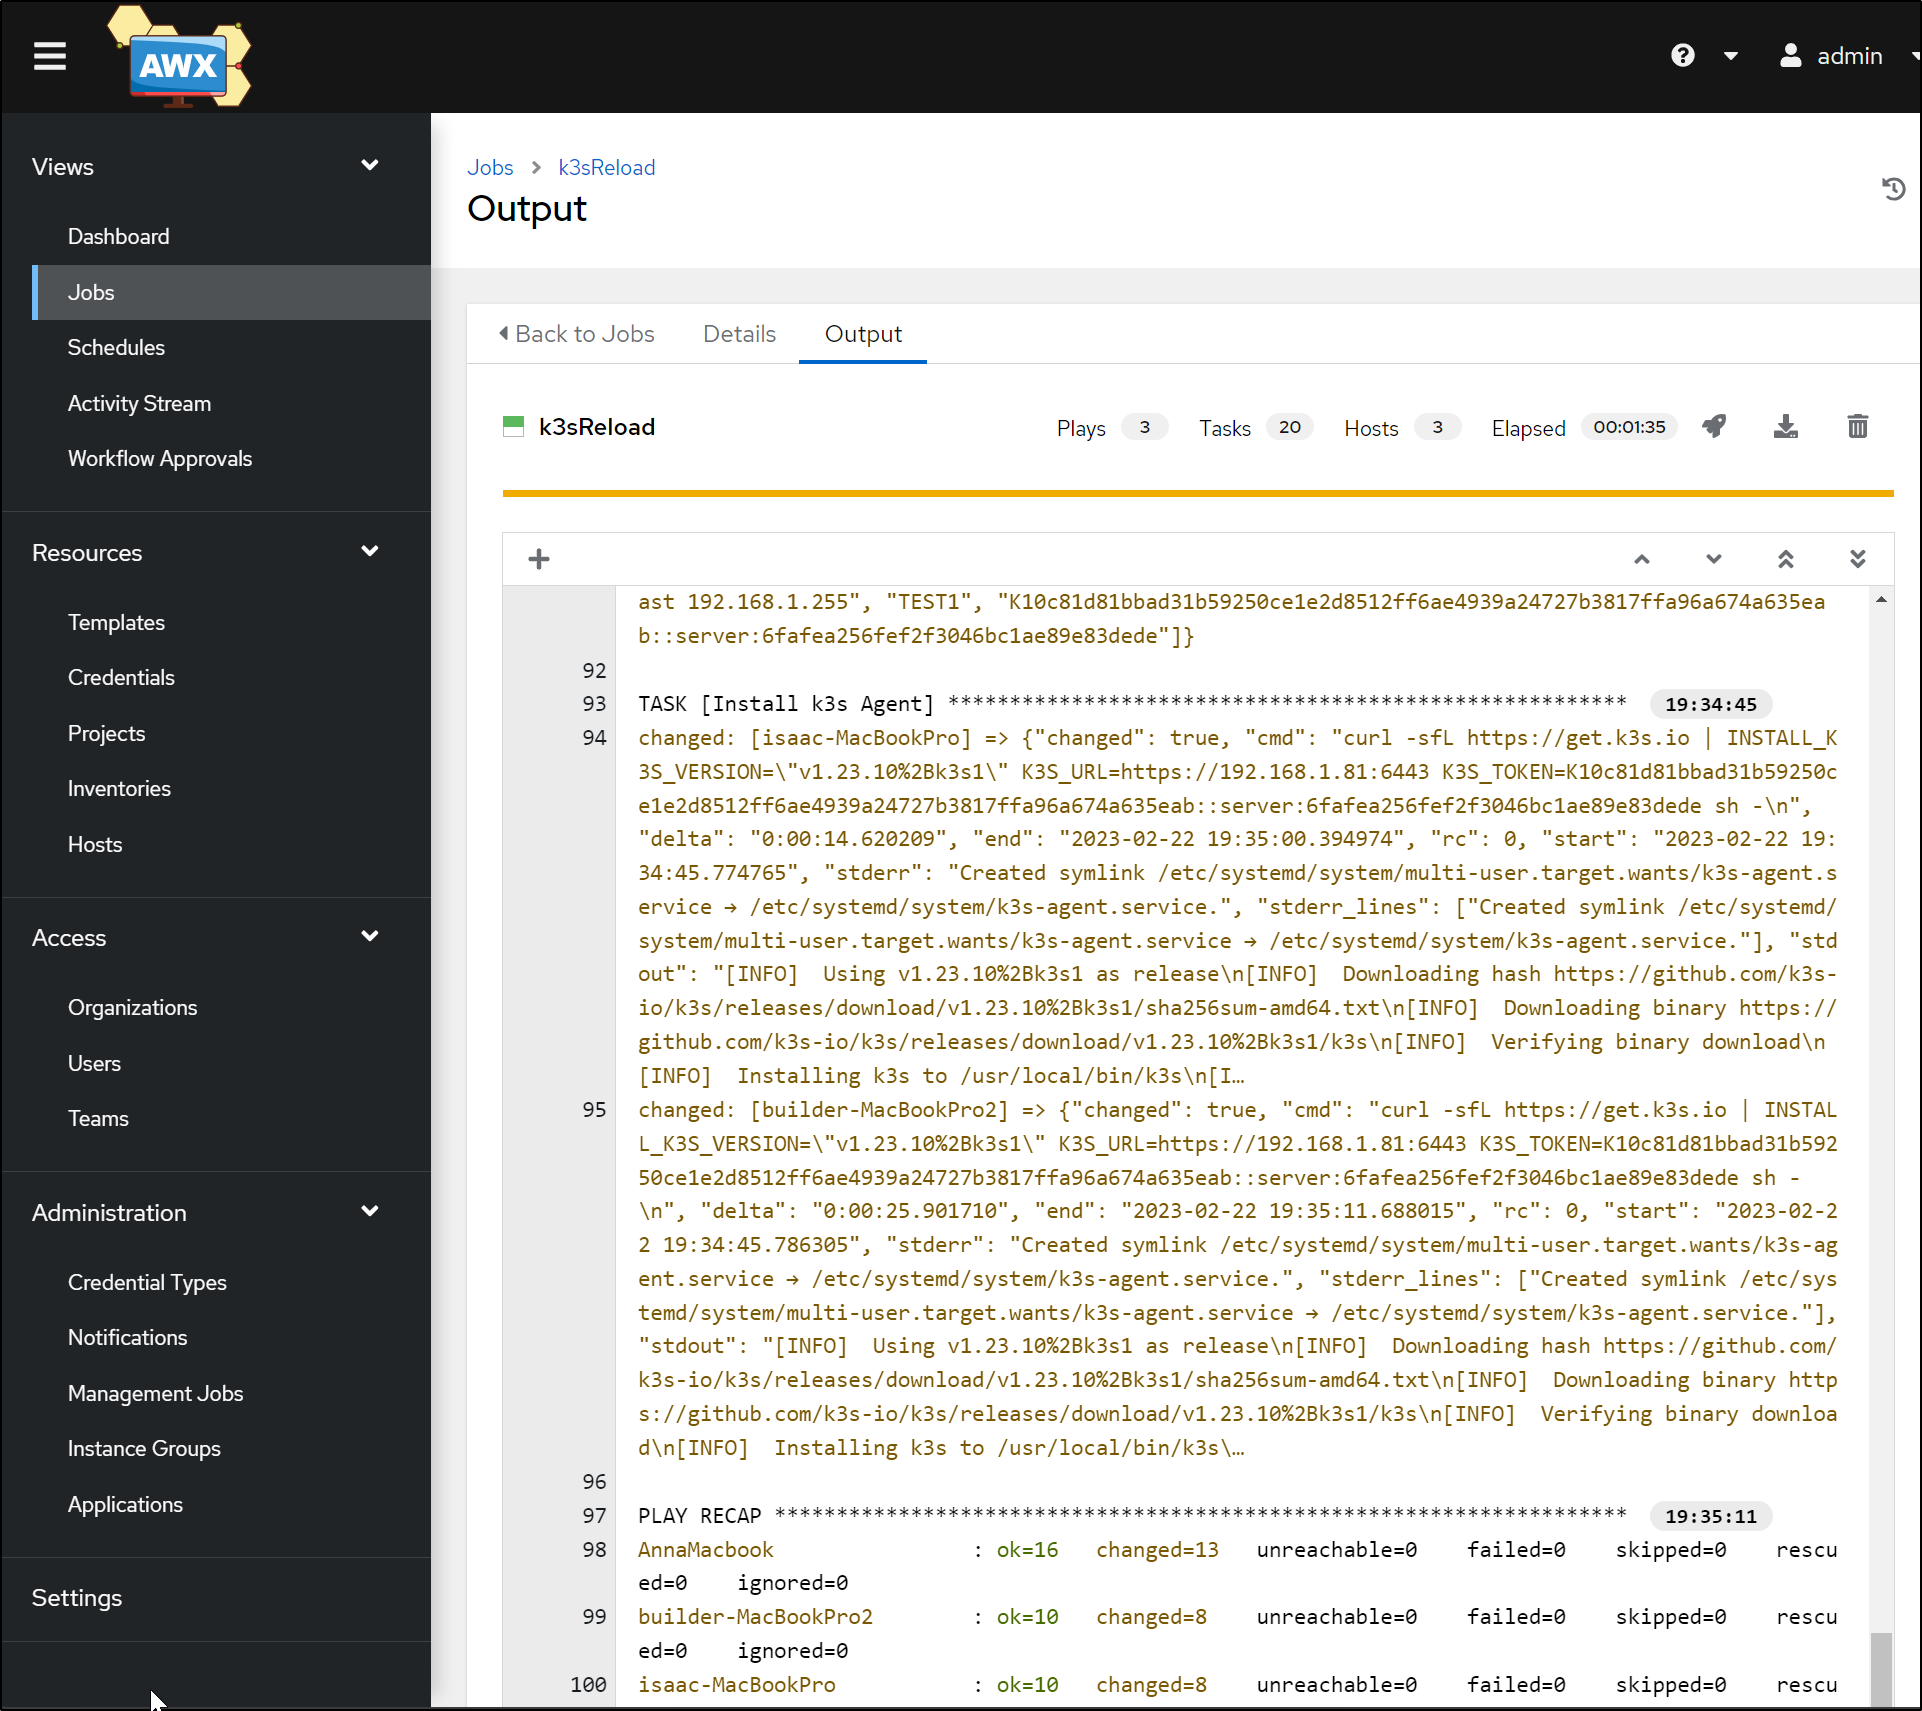
and run it
Now that it’s done, I’ll pull down the new Kube config
builder@DESKTOP-72D2D9T:~/Workspaces/jekyll-blog$ kubectx mac81
Switched to context "mac81".
builder@DESKTOP-72D2D9T:~/Workspaces/jekyll-blog$ kubectl get nodes
NAME                  STATUS   ROLES                  AGE     VERSION
anna-macbookair       Ready    control-plane,master   4m20s   v1.23.10+k3s1
builder-macbookpro2   Ready    <none>                 3m39s   v1.23.10+k3s1
isaac-macbookpro      Ready    <none>                 3m50s   v1.23.10+k3s1
Now it’s gone
builder@DESKTOP-72D2D9T:~/Workspaces/jekyll-blog$ kubectl get svc --all-namespaces
NAMESPACE     NAME             TYPE        CLUSTER-IP     EXTERNAL-IP   PORT(S)                  AGE
default       kubernetes       ClusterIP   10.43.0.1      <none>        443/TCP                  2m16s
kube-system   kube-dns         ClusterIP   10.43.0.10     <none>        53/UDP,53/TCP,9153/TCP   2m13s
kube-system   metrics-server   ClusterIP   10.43.12.251   <none>        443/TCP                  2m12s
builder@DESKTOP-72D2D9T:~/Workspaces/jekyll-blog$
So now I can try Istio again
$ helm install istio-base istio/base -n istio-system --create-namespace
NAME: istio-base
LAST DEPLOYED: Wed Feb 22 19:57:20 2023
NAMESPACE: istio-system
STATUS: deployed
REVISION: 1
TEST SUITE: None
NOTES:
Istio base successfully installed!

To learn more about the release, try:
  $ helm status istio-base
  $ helm get all istio-base
Then discovery
$ helm install istiod istio/istiod -n istio-system --wait
NAME: istiod
LAST DEPLOYED: Wed Feb 22 19:58:27 2023
NAMESPACE: istio-system
STATUS: deployed
REVISION: 1
TEST SUITE: None
NOTES:
"istiod" successfully installed!

To learn more about the release, try:
  $ helm status istiod
  $ helm get all istiod

Next steps:
  * Deploy a Gateway: https://istio.io/latest/docs/setup/additional-setup/gateway/
  * Try out our tasks to get started on common configurations:
    * https://istio.io/latest/docs/tasks/traffic-management
    * https://istio.io/latest/docs/tasks/security/
    * https://istio.io/latest/docs/tasks/policy-enforcement/
    * https://istio.io/latest/docs/tasks/policy-enforcement/
  * Review the list of actively supported releases, CVE publications and our hardening guide:
    * https://istio.io/latest/docs/releases/supported-releases/
    * https://istio.io/latest/news/security/
    * https://istio.io/latest/docs/ops/best-practices/security/

For further documentation see https://istio.io website

Tell us how your install/upgrade experience went at https://forms.gle/hMHGiwZHPU7UQRWe9
and lastly ingress
$ kubectl create namespace istio-ingress
namespace/istio-ingress created

$ kubectl label namespace istio-ingress istio-injection=enabled
namespace/istio-ingress labeled

$ helm install istio-ingress istio/gateway -n istio-ingress --wait
NAME: istio-ingress
LAST DEPLOYED: Wed Feb 22 20:01:29 2023
NAMESPACE: istio-ingress
STATUS: deployed
REVISION: 1
TEST SUITE: None
NOTES:
"istio-ingress" successfully installed!

To learn more about the release, try:
  $ helm status istio-ingress
  $ helm get all istio-ingress

Next steps:
  * Deploy an HTTP Gateway: https://istio.io/latest/docs/tasks/traffic-management/ingress/ingress-control/
  * Deploy an HTTPS Gateway: https://istio.io/latest/docs/tasks/traffic-management/ingress/secure-ingress/
And that worked
$ kubectl get svc --all-namespaces
NAMESPACE       NAME             TYPE           CLUSTER-IP     EXTERNAL-IP                                PORT(S)
         AGE
default         kubernetes       ClusterIP      10.43.0.1      <none>                                     443/TCP
         18m
kube-system     kube-dns         ClusterIP      10.43.0.10     <none>                                     53/UDP,53/TCP,9153/TCP
         18m
kube-system     metrics-server   ClusterIP      10.43.12.251   <none>                                     443/TCP
         18m
istio-system    istiod           ClusterIP      10.43.36.252   <none>                                     15010/TCP,15012/TCP,443/TCP,15014/TCP        4m37s
istio-ingress   istio-ingress    LoadBalancer   10.43.229.35   192.168.1.159,192.168.1.206,192.168.1.81   15021:32219/TCP,80:32336/TCP,443:32298/TCP   97s
Automating Istio
While this worked, I realized I would rather do this with code than have to remember steps each time. So I created the following playbook:
---
- name: Update On Primary
  hosts: AnnaMacbook

  tasks:
  - name: Install Helm
    ansible.builtin.shell: |
      curl https://baltocdn.com/helm/signing.asc | gpg --dearmor | tee /usr/share/keyrings/helm.gpg > /dev/null
      apt-get install apt-transport-https --yes
      echo "deb [arch=$(dpkg --print-architecture) signed-by=/usr/share/keyrings/helm.gpg] https://baltocdn.com/helm/stable/debian/ all main" | tee /etc/apt/sources.list.d/helm-stable-debian.list
      apt-get update
      apt-get install helm
    become: true
    args:
      chdir: /

  - name: Add Istio Helm Repo
    ansible.builtin.shell: |
      helm repo add istio https://istio-release.storage.googleapis.com/charts
      helm repo update
    become: true
    args:
      chdir: /tmp

  - name: Install Istio Base
    ansible.builtin.shell: |
      export KUBECONFIG=/etc/rancher/k3s/k3s.yaml
      helm install istio-base istio/base -n istio-system --create-namespace
    become: true
    args:
      chdir: /tmp

  - name: Install Istio Discovery
    ansible.builtin.shell: |
      export KUBECONFIG=/etc/rancher/k3s/k3s.yaml
      helm install istiod istio/istiod -n istio-system --wait
    become: true
    args:
      chdir: /tmp

  - name: Install Istio Ingress
    ansible.builtin.shell: |
      export KUBECONFIG=/etc/rancher/k3s/k3s.yaml
      kubectl create namespace istio-ingress
      kubectl label namespace istio-ingress istio-injection=enabled
      helm install istio-ingress istio/gateway -n istio-ingress --wait
    become: true
    args:
      chdir: /tmp
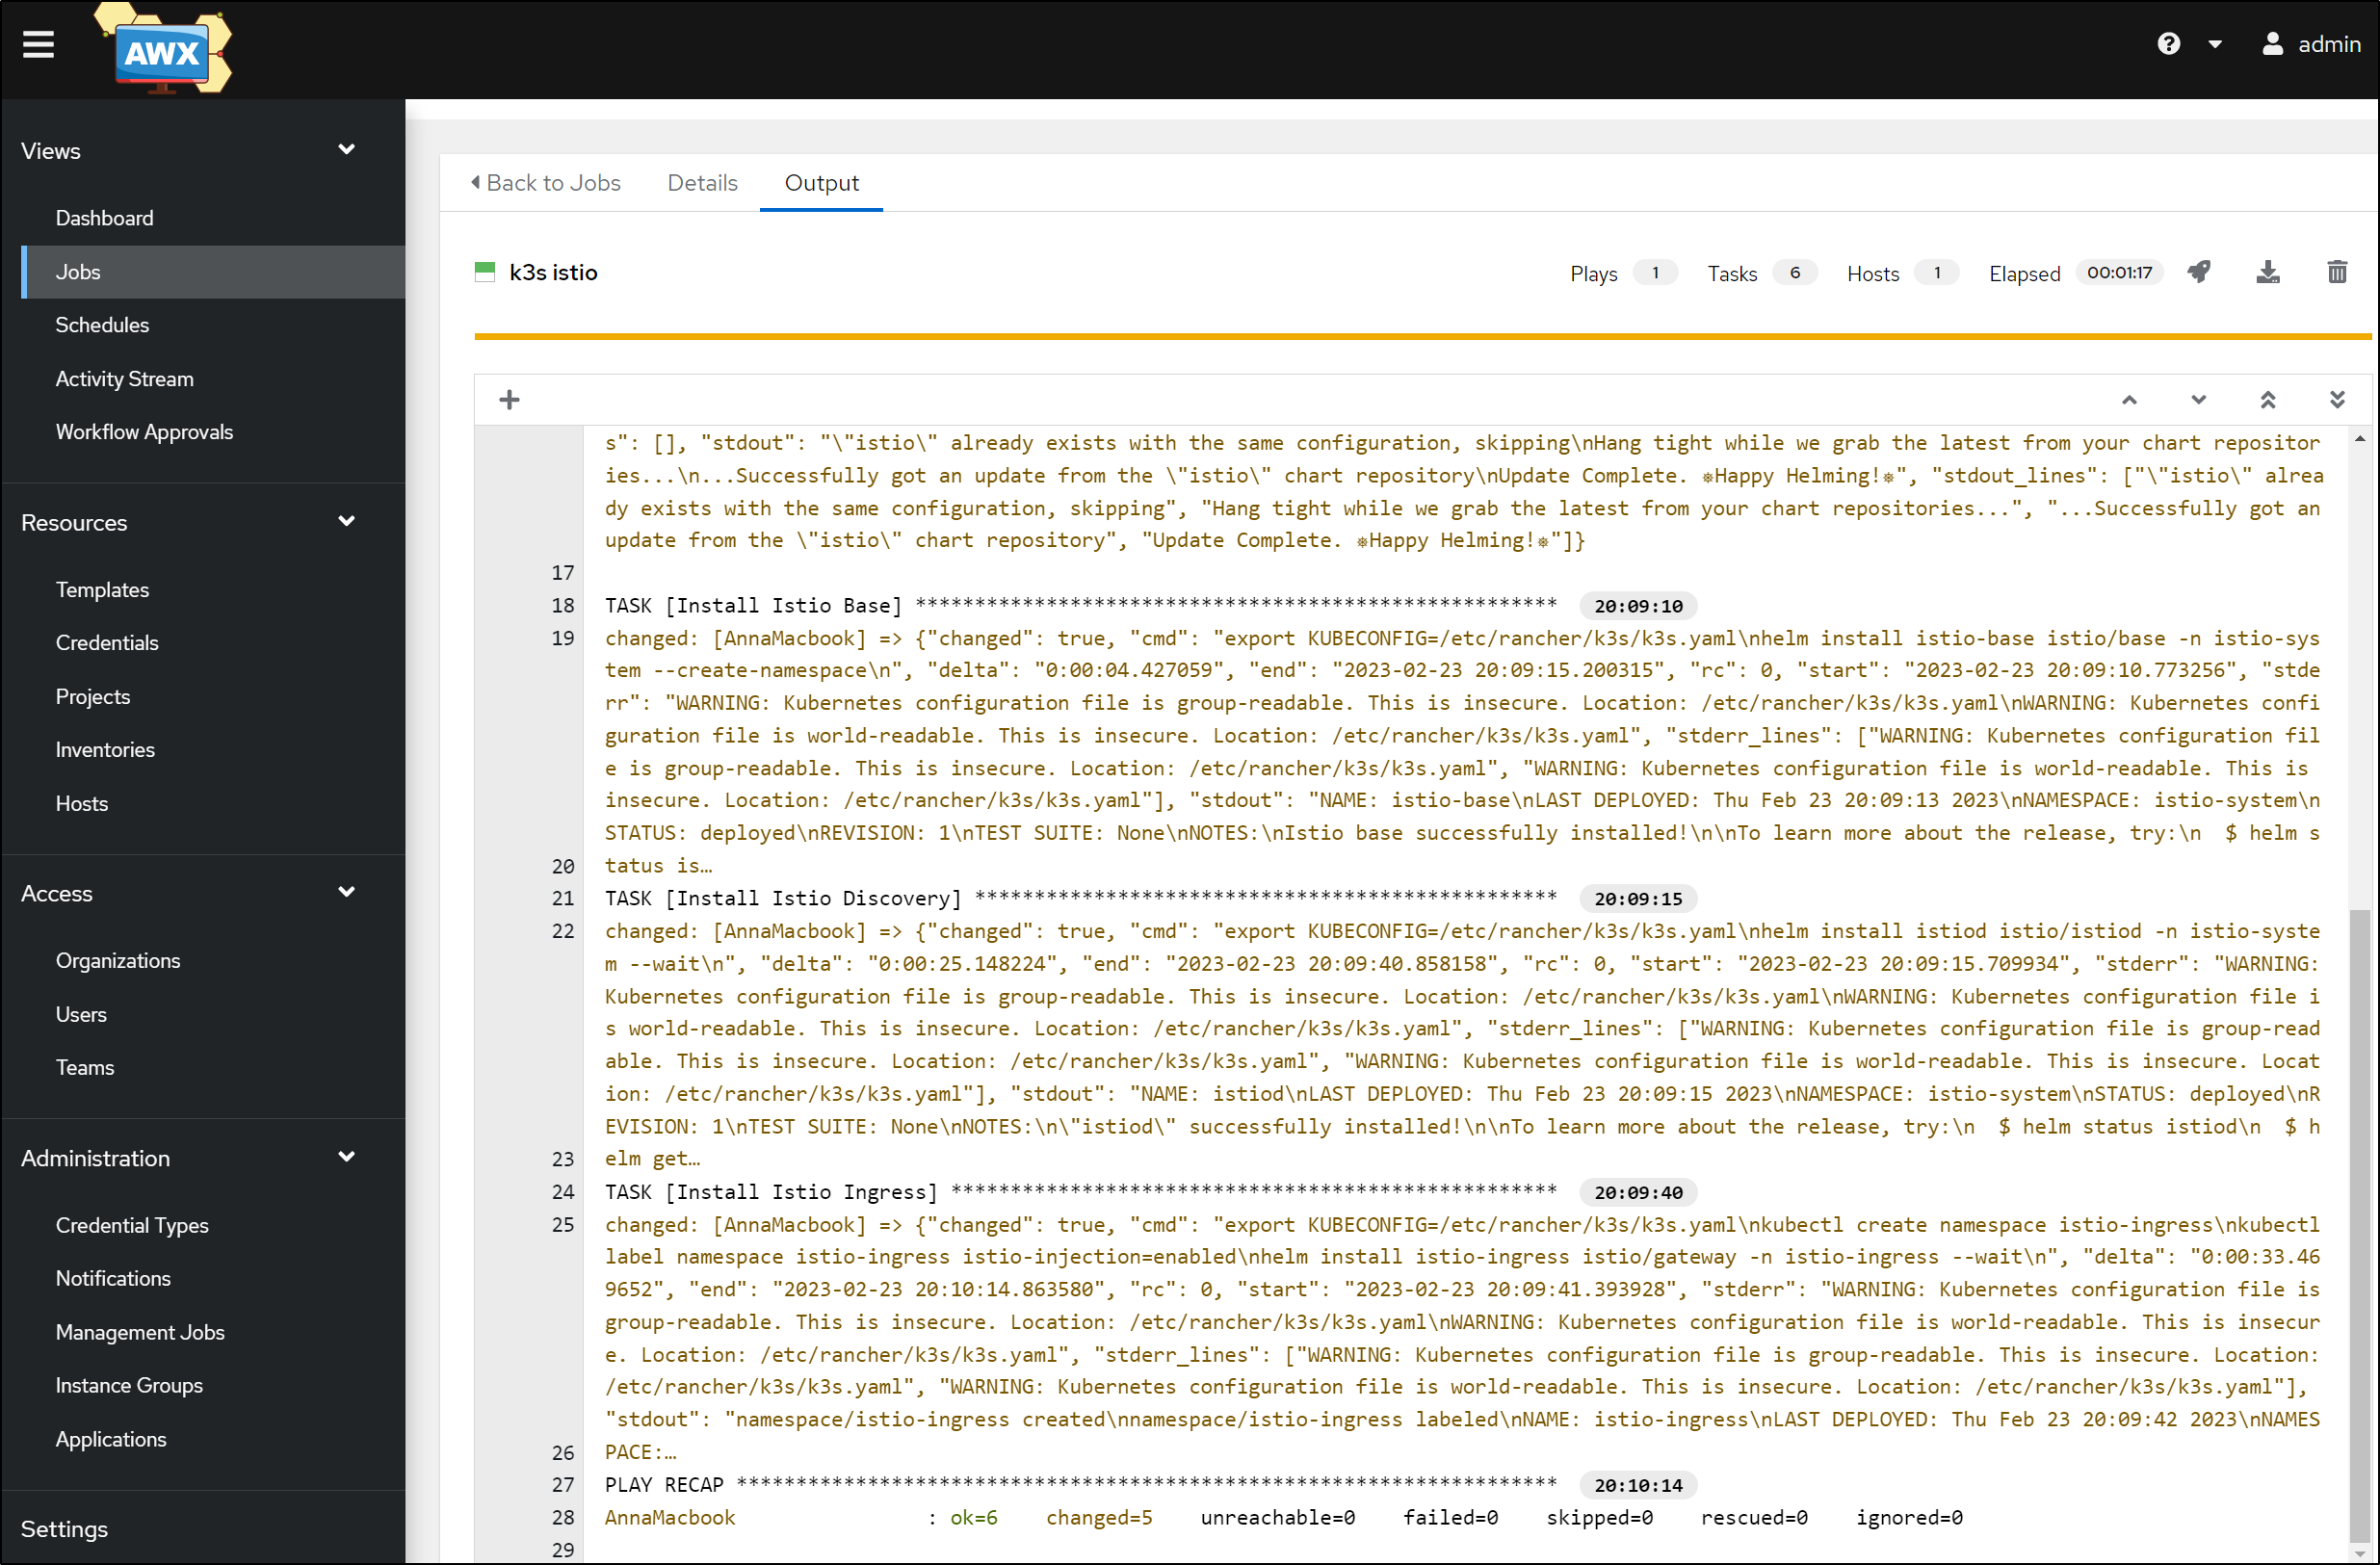
Which we can add
Which when run was successful
And I can see it was installed using helm
root@anna-MacBookAir:~# helm list --all-namespaces
WARNING: Kubernetes configuration file is group-readable. This is insecure. Location: /etc/rancher/k3s/k3s.yaml
WARNING: Kubernetes configuration file is world-readable. This is insecure. Location: /etc/rancher/k3s/k3s.yaml
NAME            NAMESPACE       REVISION        UPDATED                                 STATUS          CHART          APP VERSION
istio-base      istio-system    1               2023-02-23 20:09:13.644561258 -0600 CST deployed        base-1.17.1    1.17.1
istio-ingress   istio-ingress   1               2023-02-23 20:09:42.390759407 -0600 CST deployed        gateway-1.17.1 1.17.1
istiod          istio-system    1               2023-02-23 20:09:15.992114967 -0600 CST deployed        istiod-1.17.1  1.17.1
Then I’ll check locally if I see the service
builder@DESKTOP-72D2D9T:~/Workspaces/jekyll-blog$ cp ~/.kube/config ~/.kube/config.bak && az keyvault secret show --vault-name idjakv --name k3sremoteconfig | jq -r .value > ~/.kube/config
builder@DESKTOP-72D2D9T:~/Workspaces/jekyll-blog$ kubectx mac81
Switched to context "mac81".
builder@DESKTOP-72D2D9T:~/Workspaces/jekyll-blog$ kubectl get svc --all-namespaces
NAMESPACE       NAME             TYPE           CLUSTER-IP      EXTERNAL-IP                                PORT(S)                                      AGE
default         kubernetes       ClusterIP      10.43.0.1       <none>                                     443/TCP                                      35m
kube-system     kube-dns         ClusterIP      10.43.0.10      <none>                                     53/UDP,53/TCP,9153/TCP                       35m
kube-system     metrics-server   ClusterIP      10.43.183.100   <none>                                     443/TCP                                      35m
istio-system    istiod           ClusterIP      10.43.246.89    <none>                                     15010/TCP,15012/TCP,443/TCP,15014/TCP        24m
istio-ingress   istio-ingress    LoadBalancer   10.43.199.160   192.168.1.159,192.168.1.206,192.168.1.81   15021:30343/TCP,80:32245/TCP,443:30262/TCP   24m
Since that worked so well, I decided to roll on to Cert-Manager
  - name: Cert Manager Chart
    ansible.builtin.shell: |
      export KUBECONFIG=/etc/rancher/k3s/k3s.yaml
      helm repo add jetstack https://charts.jetstack.io
      helm repo update
    become: true
    args:
      chdir: /tmp

  - name: Cert Manager Install
    ansible.builtin.shell: |
      export KUBECONFIG=/etc/rancher/k3s/k3s.yaml
      helm install cert-manager jetstack/cert-manager --namespace cert-manager --create-namespace --version v1.11.0 --set installCRDs=true
    become: true
    args:
      chdir: /tmp
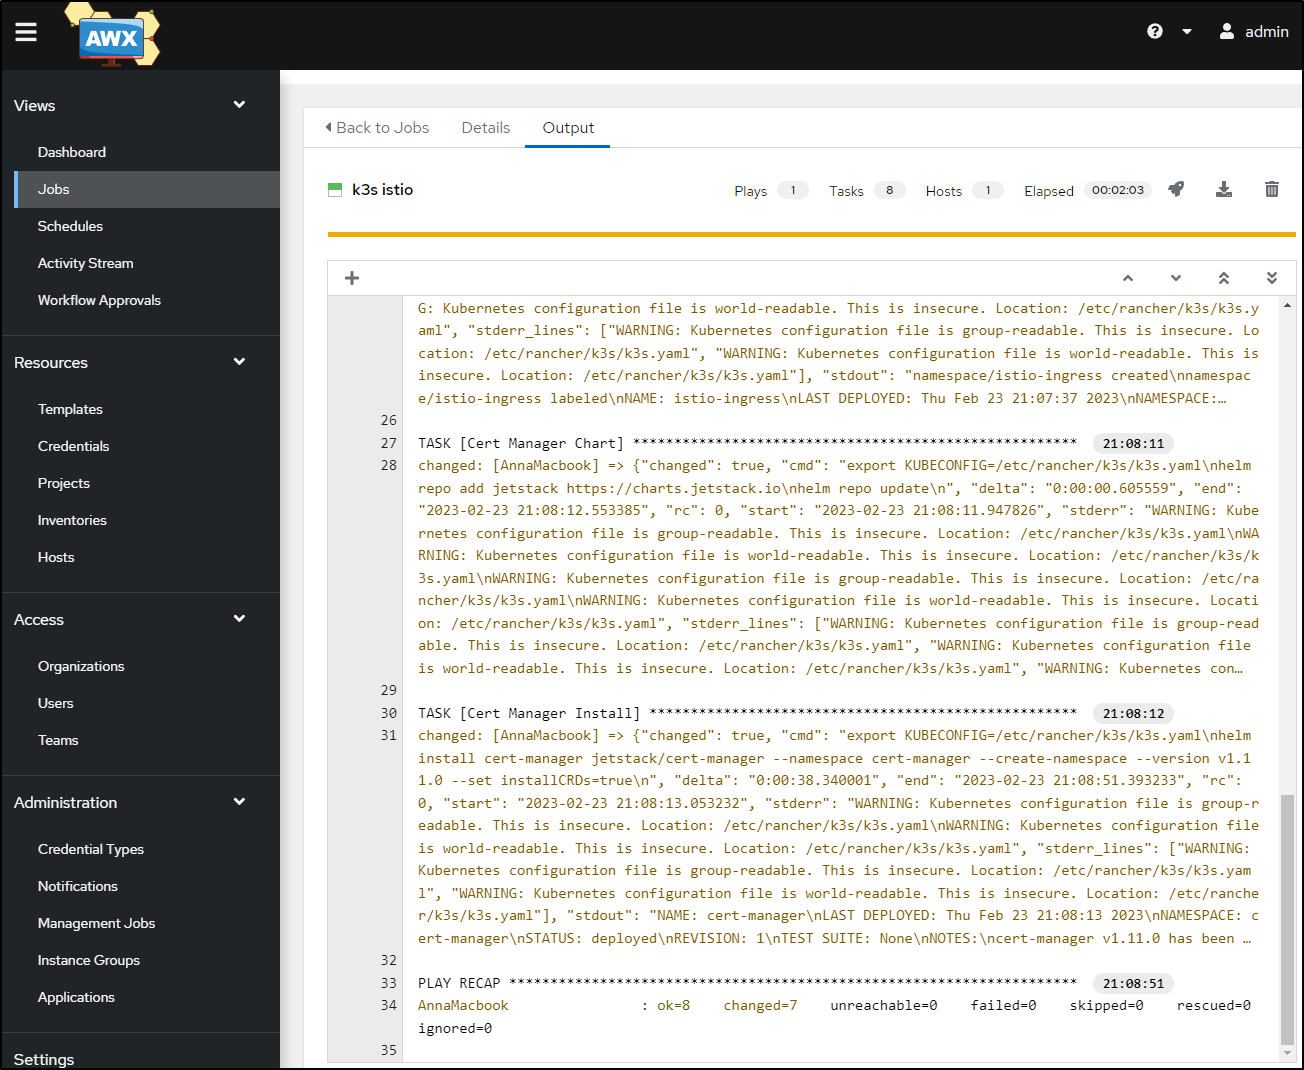
We can see when added to the Istio Ansible playbook, it works just fine
Cert Manager Resolver
I’ve done AWS Route53 ClusterIssuers for years now.
They simply need an AWS IAM user that can affect Route53.
Mine tends to look like this with the IAM Access Key plain text and the Secret Key in a K8s secret:
$ kubectl get clusterissuer letsencrypt-prod -o yaml
apiVersion: cert-manager.io/v1
kind: ClusterIssuer
metadata:
  annotations:
    kubectl.kubernetes.io/last-applied-configuration: |
      {"apiVersion":"cert-manager.io/v1","kind":"ClusterIssuer","metadata":{"annotations":{},"name":"letsencrypt-prod"},"spec":{"acme":{"email":"isaac.johnson@gmail.com","privateKeySecretRef":{"name":"letsencrypt-prod"},"server":"https://acme-v02.api.letsencrypt.org/directory","solvers":[{"dns01":{"route53":{"accessKeyID":"AKIASDFASDFASDFASDFASDF","region":"us-east-1","role":"arn:aws:iam::0123412341234:role/MyACMERole","secretAccessKeySecretRef":{"key":"secret-access-key","name":"prod-route53-credentials-secret"}}},"selector":{"dnsZones":["freshbrewed.science"]}}]}}}
  creationTimestamp: "2022-07-26T02:24:57Z"
  generation: 1
  name: letsencrypt-prod
  resourceVersion: "1243"
  uid: c1188105-asdf-asdf-asdf-e286905317bc
spec:
  acme:
    email: isaac.johnson@gmail.com
    preferredChain: ""
    privateKeySecretRef:
      name: letsencrypt-prod
    server: https://acme-v02.api.letsencrypt.org/directory
    solvers:
    - dns01:
        route53:
          accessKeyID: AKIASDFASDFASDFASDFASDF
          region: us-east-1
          role: arn:aws:iam::0123412341234:role/MyACMERole
          secretAccessKeySecretRef:
            key: secret-access-key
            name: prod-route53-credentials-secret
      selector:
        dnsZones:
        - freshbrewed.science
status:
  acme:
    lastRegisteredEmail: isaac.johnson@gmail.com
    uri: https://acme-v02.api.letsencrypt.org/acme/acct/646879196
  conditions:
  - lastTransitionTime: "2022-07-26T02:24:58Z"
    message: The ACME account was registered with the ACME server
    observedGeneration: 1
    reason: ACMEAccountRegistered
    status: "True"
    type: Ready
But what about Azure or GCP?
Azure DNS in Cert Manager
I have a couple of Hosted Zones already in Azure
Let’s use tpk.life as an example.
I have to dance between a lot of Azure accounts, so before I do anything, I’ll azure login and set my subscription
$ az login
$ az account set --subscription 'Pay-As-You-Go'
I’ll set some basic env vars that we’ll use fo the Zone RG, Name and this new SP Name
builder@DESKTOP-QADGF36:~$ AZURE_CERT_MANAGER_NEW_SP_NAME=paygazurednssa
builder@DESKTOP-QADGF36:~$ AZURE_DNS_ZONE_RESOURCE_GROUP=idjDNSrg
builder@DESKTOP-QADGF36:~$ AZURE_DNS_ZONE=tpk.life
Then I’ll create the SP and capture its JSON creds
builder@DESKTOP-QADGF36:~$ DNS_SP=`az ad sp create-for-rbac --name $AZURE_CERT_MANAGER_NEW_SP_NAME --output json`
WARNING: The output includes credentials that you must protect. Be sure that you do not include these credentials in your code or check the credentials into your source control. For more information, see https://aka.ms/azadsp-cli
Next, I’ll pull some values like the SP ID (App ID), Client Secret and the Tenant from that file. I’ll also get my subscription ID (I passed in the name to keep it clear)
builder@DESKTOP-QADGF36:~$ AZURE_CERT_MANAGER_SP_APP_ID=`echo $DNS_SP | jq -r '.appId'`
builder@DESKTOP-QADGF36:~$ AZURE_CERT_MANAGER_SP_PASSWORD=`echo $DNS_SP | jq -r '.password'`
builder@DESKTOP-QADGF36:~$ AZURE_TENANT_ID=`echo $DNS_SP | jq -r '.tenant'`
builder@DESKTOP-QADGF36:~$ AZURE_SUBSCRIPTION_ID=`az account show --subscription Pay-As-You-Go --output json | jq -r '.id'`
Since we are following the pattern of least-priveledge, let’s remove Contributor (if set), but add in DNS Zone Contributor.
builder@DESKTOP-QADGF36:~$ az role assignment delete --assignee $AZURE_CERT_MANAGER_SP_APP_ID --role Contributor
No matched assignments were found to delete
builder@DESKTOP-QADGF36:~$ DNS_ID=`az network dns zone show --name $AZURE_DNS_ZONE --resource-group $AZURE_DNS_ZONE_RESOURCE_GROUP --query "id" --output tsv`
builder@DESKTOP-QADGF36:~$ az role assignment create --assignee $AZURE_CERT_MANAGER_SP_APP_ID --role "DNS Zone Contributor" --scope $DNS_ID
{
  "canDelegate": null,
  "condition": null,
  "conditionVersion": null,
  "description": null,
  "id": "/subscriptions/asdfsadfasd-asdf-asdf-asdf-asdfasdfasfasdf/resourceGroups/idjdnsrg/providers/Microsoft.Network/dnszones/tpk.life/providers/Microsoft.Authorization/roleAssignments/asdfasdfasdf-asdf-asdf-asdf-asdfasdfsa",
  "name": "asdfasdfasd-asdf-asdf-asdf-asdfasdfas",
  "principalId": "asdfasdf-asdf-asfd-asdf-asfadsfas",
  "principalType": "ServicePrincipal",
  "resourceGroup": "idjdnsrg",
  "roleDefinitionId": "/subscriptions/asfdasdf-asdf-asfd-asdf-asfasdfasafas/providers/Microsoft.Authorization/roleDefinitions/asdfasfd-asfd-asdf-asdf-272fasdfasfasdff33ce314",
  "scope": "/subscriptions/asfdasfd-asdf-asdf-asfd-asfasdfas/resourceGroups/idjdnsrg/providers/Microsoft.Network/dnszones/tpk.life",
  "type": "Microsoft.Authorization/roleAssignments"
}
I can now check which assignments this SP has.
$ az role assignment list --all --assignee $AZURE_CERT_MANAGER_SP_APP_ID | jq '.[] | .roleDefinitionName'
"DNS Zone Contributor"
Using our env vars
I’ll first create a secret in K8s that the ClusterIssuer will use
$ kubectl create secret generic azuredns-config --from-literal=client-secret=$AZURE_CERT_MANAGER_SP_PASSWORD
secret/azuredns-config created
Then I’ll create a YAML file with the values
cat <<EOF > certmanagerazure.yaml
apiVersion: cert-manager.io/v1
kind: ClusterIssuer
metadata:
  name: azuredns-issuer
spec:
  acme:
    email: isaac.johnson@gmail.com
    preferredChain: ""
    privateKeySecretRef:
      name: letsencrypt-azuredns-prod
    server: https://acme-v02.api.letsencrypt.org/directory
    solvers:
    - dns01:
        azureDNS:
          clientID: $AZURE_CERT_MANAGER_SP_APP_ID
          clientSecretSecretRef:
          # The following is the secret we created in Kubernetes. Issuer will use this to present challenge to Azure DNS.
            name: azuredns-config
            key: client-secret
          subscriptionID: $AZURE_SUBSCRIPTION_ID
          tenantID: $AZURE_TENANT_ID
          resourceGroupName: $AZURE_DNS_ZONE_RESOURCE_GROUP
          hostedZoneName: $AZURE_DNS_ZONE
          # Azure Cloud Environment, default to AzurePublicCloud
          environment: AzurePublicCloud
      selector:
        dnsZones:
        - $AZURE_DNS_ZONE
EOF
That should look like
$ cat certmanagerazure.yaml
apiVersion: cert-manager.io/v1
kind: ClusterIssuer
metadata:
  name: azuredns-issuer
spec:
  acme:
    email: isaac.johnson@gmail.com
    preferredChain: ""
    privateKeySecretRef:
      name: letsencrypt-azuredns-prod
    server: https://acme-v02.api.letsencrypt.org/directory
    solvers:
    - dns01:
        azureDNS:
          clientID: 404f849b-asdf-asdf-asdf-asdfasfsafasdas
          clientSecretSecretRef:
          # The following is the secret we created in Kubernetes. Issuer will use this to present challenge to Azure DNS.
            name: azuredns-config
            key: client-secret
          subscriptionID: d955c0ba-asdf-asdf-asdf-asdfasfsafasdas
          tenantID: 28c575f6-asdf-asdf-asdf-asdfasfsafasdas
          resourceGroupName: idjDNSrg
          hostedZoneName: tpk.life
          # Azure Cloud Environment, default to AzurePublicCloud
          environment: AzurePublicCloud
      selector:
        dnsZones:
        - tpk.life
We can now create that ClusterIssuer
$ kubectl apply -f certmanagerazure.yaml
clusterissuer.cert-manager.io/azkubectl get uredns-issuer created
I can now see the secrets; both the one I set with SP Pass and the created Cluster Issuer secret. I can also see my ClusterIssuer is live and ready
builder@DESKTOP-QADGF36:~/Workspaces/ansible-playbooks$ kubectl get secret --all-namespaces | grep azuredns
default           azuredns-config                                      Opaque                                1      20m
cert-manager      letsencrypt-azuredns-prod                            Opaque                                1      15m
builder@DESKTOP-QADGF36:~/Workspaces/ansible-playbooks$ kubectl get clusterissuer
NAME              READY   AGE
azuredns-issuer   True    15m
Let’s test by making a sample cert
$ cat <<EOF >testcert.yml
apiVersion: cert-manager.io/v1
kind: Certificate
metadata:
  name: tpk-life-test-cert
  namespace: istio-system
spec:
  secretName: tpk-life-test-cert
  duration: 2160h # 90d
  renewBefore: 360h # 15d
  isCA: false
  privateKey:
    algorithm: RSA
    encoding: PKCS1
    size: 2048
  usages:
    - server auth
    - client auth
  dnsNames:
    - "testing123.tpk.life"
  issuerRef:
    name: letsencrypt-azuredns-prod
    kind: ClusterIssuer
    group: cert-manager.io
EOF

$ kubectl apply -f testcert.yml
certificate.cert-manager.io/tpk-life-test-cert created

$ kubectl get cert -n istio-system
NAME                 READY   SECRET               AGE
tpk-life-test-cert   False   tpk-life-test-cert   52s

$ kubectl get certificaterequest --all-namespaces
NAMESPACE      NAME                       APPROVED   DENIED   READY   ISSUER                      REQUESTOR                                         AGE
istio-system   tpk-life-test-cert-4w866   True                False   letsencrypt-azuredns-prod   system:serviceaccount:cert-manager:cert-manager   76s
I see that my clusterissuer being in ‘default’ namespace is causing some issues
builder@DESKTOP-QADGF36:~/Workspaces/ansible-playbooks$ kubectl describe certificaterequest tpk-life-test-cert-4w866 -n istio-system | tail -n5
  Normal  IssuerNotFound      2m30s  cert-manager-certificaterequests-issuer-ca          Referenced "ClusterIssuer" not found: clusterissuer.cert-manager.io "letsencrypt-azuredns-prod" not found
  Normal  IssuerNotFound      2m30s  cert-manager-certificaterequests-issuer-selfsigned  Referenced "ClusterIssuer" not found: clusterissuer.cert-manager.io "letsencrypt-azuredns-prod" not found
  Normal  IssuerNotFound      2m30s  cert-manager-certificaterequests-issuer-vault       Referenced "ClusterIssuer" not found: clusterissuer.cert-manager.io "letsencrypt-azuredns-prod" not found
  Normal  IssuerNotFound      2m30s  cert-manager-certificaterequests-issuer-venafi      Referenced "ClusterIssuer" not found: clusterissuer.cert-manager.io "letsencrypt-azuredns-prod" not found
  Normal  IssuerNotFound      2m30s  cert-manager-certificaterequests-issuer-acme        Referenced "ClusterIssuer" not found: clusterissuer.cert-manager.io "letsencrypt-azuredns-prod" not found
I’ll delete and try again, but in default (and changing the Issuer from letsencrypt-azuredns-prod to azuredns-issuer)
$ kubectl delete -f testcert.yml
certificate.cert-manager.io "tpk-life-test-cert" deleted
$ vi testcert.yml
$ cat testcert.yml
apiVersion: cert-manager.io/v1
kind: Certificate
metadata:
  name: tpk-life-test3-cert
spec:
  secretName: tpk-life-test3-cert
  duration: 2160h # 90d
  renewBefore: 360h # 15d
  isCA: false
  privateKey:
    algorithm: RSA
    encoding: PKCS1
    size: 2048
  usages:
    - server auth
    - client auth
  dnsNames:
    - "testing1234.tpk.life"
  issuerRef:
    name: azuredns-issuer
    kind: ClusterIssuer
    group: cert-manager.io
$ kubectl apply -f testcert.yml
certificate.cert-manager.io/tpk-life-test2-cert created
I can check the status
$ kubectl get certificaterequest --all-namespaces
NAMESPACE   NAME                        APPROVED   DENIED   READY   ISSUER            REQUESTOR                                         AGE
default     tpk-life-test3-cert-fn85s   True                False   azuredns-issuer   system:serviceaccount:cert-manager:cert-manager   42s
This time it looks like we are moving along just fine
$ kubectl describe certificaterequest tpk-life-test3-cert-fn85s | tail -n10
  Type    Reason              Age   From                                                Message
  ----    ------              ----  ----                                                -------
  Normal  WaitingForApproval  63s   cert-manager-certificaterequests-issuer-acme        Not signing CertificateRequest until it is Approved
  Normal  WaitingForApproval  63s   cert-manager-certificaterequests-issuer-vault       Not signing CertificateRequest until it is Approved
  Normal  WaitingForApproval  63s   cert-manager-certificaterequests-issuer-venafi      Not signing CertificateRequest until it is Approved
  Normal  WaitingForApproval  63s   cert-manager-certificaterequests-issuer-selfsigned  Not signing CertificateRequest until it is Approved
  Normal  WaitingForApproval  63s   cert-manager-certificaterequests-issuer-ca          Not signing CertificateRequest until it is Approved
  Normal  cert-manager.io     63s   cert-manager-certificaterequests-approver           Certificate request has been approved by cert-manager.io
  Normal  OrderCreated        63s   cert-manager-certificaterequests-issuer-acme        Created Order resource default/tpk-life-test3-cert-fn85s-2261516670
  Normal  OrderPending        63s   cert-manager-certificaterequests-issuer-acme        Waiting on certificate issuance from order default/tpk-life-test3-cert-fn85s-2261516670: ""
This seemed hung for a while, so i checked the logs of the cert-manager pod
builder@DESKTOP-QADGF36:~/Workspaces/ansible-playbooks$ kubectl logs cert-manager-6b4d84674-6pt8m -n cert-manager | tail -n5
E0224 13:31:23.639285       1 controller.go:167] cert-manager/challenges "msg"="re-queuing item due to error processing" "error"="error getting azuredns client secret: secret \"azuredns-config\" not found" "key"="default/tpk-life-test3-cert-fn85s-2261516670-4040977514"
E0224 13:31:28.639842       1 controller.go:167] cert-manager/challenges "msg"="re-queuing item due to error processing" "error"="error getting azuredns client secret: secret \"azuredns-config\" not found" "key"="default/tpk-life-test3-cert-fn85s-2261516670-4040977514"
E0224 13:31:48.642581       1 controller.go:167] cert-manager/challenges "msg"="re-queuing item due to error processing" "error"="error getting azuredns client secret: secret \"azuredns-config\" not found" "key"="default/tpk-life-test3-cert-fn85s-2261516670-4040977514"
E0224 13:32:28.645344       1 controller.go:167] cert-manager/challenges "msg"="re-queuing item due to error processing" "error"="error getting azuredns client secret: secret \"azuredns-config\" not found" "key"="default/tpk-life-test3-cert-fn85s-2261516670-4040977514"
E0224 13:33:48.647397       1 controller.go:167] cert-manager/challenges "msg"="re-queuing item due to error processing" "error"="error getting azuredns client secret: secret \"azuredns-config\" not found" "key"="default/tpk-life-test3-cert-fn85s-2261516670-4040977514"
That secret most definitely exists, however, it exists in default where I created the clusterIssuer. Let’s just do a sanity and create the secret in the cert-manager namespace
$ kubectl get secret azuredns-config -o yaml | sed 's/namespace: default/namespace: cert-manager/g' > azdnssecret.yaml
$ kubectl apply -f azdnssecret.yaml
secret/azuredns-config created
That seemed to do it!
$ kubectl get certificate
NAME                  READY   SECRET                AGE
tpk-life-test3-cert   True    tpk-life-test3-cert   12m
We could now use that in an Istio Gateway:
$ cat istioGw.yaml
apiVersion: networking.istio.io/v1alpha3
kind: Gateway
metadata:
  name: gateway
spec:
  selector:
    istio: ingressgateway
  servers:
  - port:
      number: 443
      name: https
      protocol: HTTPS
    tls:
      mode: SIMPLE
      credentialName: tpk-life-test3-cert
    hosts:
    - testing1234.tpk.life # This should match a DNS name in the Certificate
$ kubectl apply -f istioGw.yaml
gateway.networking.istio.io/gateway created
$ kubectl describe gateway gateway | tail -n14
Spec:
  Selector:
    Istio:  ingressgateway
  Servers:
    Hosts:
      testing1234.tpk.life
    Port:
      Name:      https
      Number:    443
      Protocol:  HTTPS
    Tls:
      Credential Name:  tpk-life-test3-cert
      Mode:             SIMPLE
Events:                 <none>
To use it would then require actual ingress setup for this test cluster which is out of scope for now.
Note, we could also use an ingress via Istio, just like NGinx and specify the secret name
apiVersion: networking.k8s.io/v1beta1
kind: Ingress
metadata:
  name: testing1234-ingress
  annotations:
    kubernetes.io/ingress.class: istio
spec:
  rules:
  - host: testin1234.tpk.life
    http: ...
  tls:
  - hosts:
    - my.example.com # This should match a DNS name in the Certificate
    secretName: tpk-life-test3-certt
Creating an Azure DNS Cluster Issuer Playbook
Clearly, like Istio and the rest, I’ll want to make it into a playbook.
I’m going to cheat on ansible secrets.
Since I already have a dependency on Azure for the secrets for our Kubeconfig, I’ll be storing my secrets in AKV.
$ az keyvault secret set --vault-name idjhomelabakv --name azure-payg-dnssp-client-id --value $AZURE_CERT_MANAGER_SP_APP_ID
$ az keyvault secret set --vault-name idjhomelabakv --name azure-payg-dnssp-client-pass --value $AZURE_CERT_MANAGER_SP_PASSWORD
$ az keyvault secret set --vault-name idjhomelabakv --name azure-payg-dnssp-client-subid --value $AZURE_SUBSCRIPTION_ID
$ az keyvault secret set --vault-name idjhomelabakv --name azure-payg-dnssp-client-tenantid --value $AZURE_TENANT_ID
The rest of the information isn’t secret so I won’t bother to store that in AKV.
Our playbook looks like this:
---
- name: Update On Primary
  hosts: AnnaMacbook

  tasks:
  - name: Set SP Secret
    ansible.builtin.shell: |
      # These should here. But I want which to fail if absent
      which jq
      which az

      export KUBECONFIG=/etc/rancher/k3s/k3s.yaml

      export AZURE_CERT_MANAGER_SP_PASSWORD=`az keyvault secret show --vault-name idjhomelabakv --name azure-payg-dnssp-client-pass -o json | jq -r .value | tr -d '\n'`

      kubectl create secret generic azuredns-config --from-literal=client-secret=$AZURE_CERT_MANAGER_SP_PASSWORD
      # for cert requests, needs to exist in Cert Manager namespace
      kubectl create secret -n cert-manager generic azuredns-config --from-literal=client-secret=$AZURE_CERT_MANAGER_SP_PASSWORD
    become: true
    args:
      chdir: /

  - name: Set Cluster Issuer
    ansible.builtin.shell: |
      # These should here. But I want which to fail if absent
      which jq
      which az

      export KUBECONFIG=/etc/rancher/k3s/k3s.yaml

      export AZURE_CERT_MANAGER_SP_APP_ID=`az keyvault secret show --vault-name idjhomelabakv --name azure-payg-dnssp-client-id -o json | jq -r .value | tr -d '\n'`
      export AZURE_SUBSCRIPTION_ID=`az keyvault secret show --vault-name idjhomelabakv --name azure-payg-dnssp-client-subid -o json | jq -r .value | tr -d '\n'`
      export AZURE_TENANT_ID=`az keyvault secret show --vault-name idjhomelabakv --name azure-payg-dnssp-client-tenantid -o json | jq -r .value | tr -d '\n'`
      export AZURE_DNS_ZONE_RESOURCE_GROUP="idjDNSrg"
      export AZURE_DNS_ZONE="tpk.life"

      cat <<EOF > certmanagerazure.yaml
      apiVersion: cert-manager.io/v1
      kind: ClusterIssuer
      metadata:
        name: azuredns-issuer
      spec:
        acme:
          email: isaac.johnson@gmail.com
          preferredChain: ""
          privateKeySecretRef:
            name: letsencrypt-azuredns-prod
          server: https://acme-v02.api.letsencrypt.org/directory
          solvers:
          - dns01:
              azureDNS:
                clientID: $AZURE_CERT_MANAGER_SP_APP_ID
                clientSecretSecretRef:
                # The following is the secret we created in Kubernetes. Issuer will use this to present challenge to Azure DNS.
                  name: azuredns-config
                  key: client-secret
                subscriptionID: $AZURE_SUBSCRIPTION_ID
                tenantID: $AZURE_TENANT_ID
                resourceGroupName: $AZURE_DNS_ZONE_RESOURCE_GROUP
                hostedZoneName: $AZURE_DNS_ZONE
                # Azure Cloud Environment, default to AzurePublicCloud
                environment: AzurePublicCloud
            selector:
              dnsZones:
              - $AZURE_DNS_ZONE
      EOF

      kubectl apply -f certmanagerazure.yaml
    become: true
    args:
      chdir: /
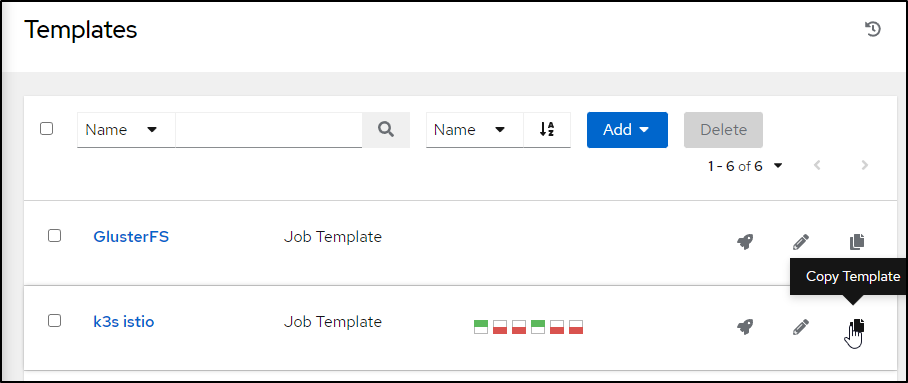
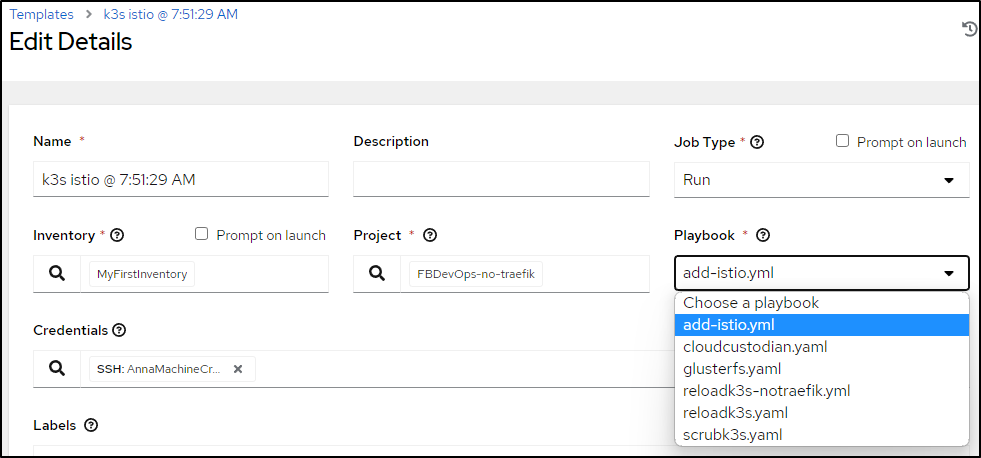
I’ll create a fork of the Istio playbook:
Note: the new playbook will be absent
until I refresh the project from the projects page
I’ll fix the name and playbook then save
Testing
Let’s test it
I’ll remove the existing ones i used above
builder@DESKTOP-QADGF36:~/Workspaces/ansible-playbooks$ kubectl delete secret azuredns-config
secret "azuredns-config" deleted
builder@DESKTOP-QADGF36:~/Workspaces/ansible-playbooks$ kubectl delete secret azuredns-config -n cert-manager
secret "azuredns-config" deleted
builder@DESKTOP-QADGF36:~/Workspaces/ansible-playbooks$ kubectl delete clusterissuer azuredns-issuer
clusterissuer.cert-manager.io "azuredns-issuer" deleted
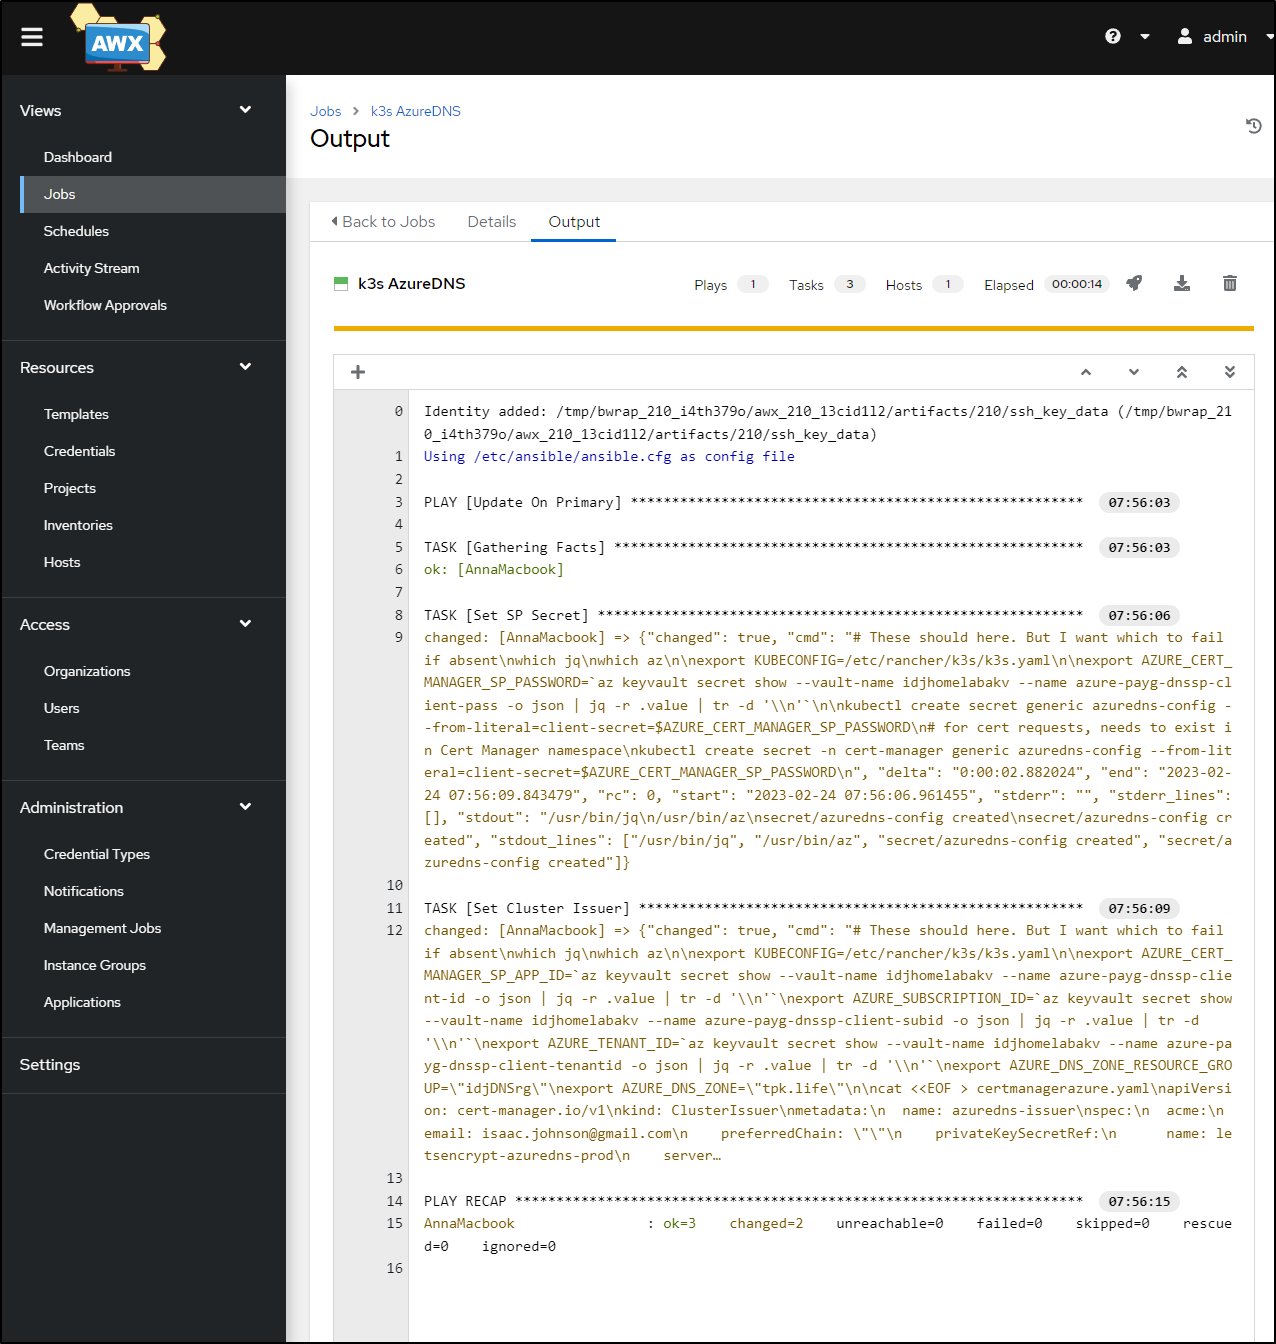
Then launch the playbook
I can now see it completed just fine
builder@DESKTOP-QADGF36:~/Workspaces/ansible-playbooks$ kubectl get secrets azuredns-config -n cert-manager
NAME              TYPE     DATA   AGE
azuredns-config   Opaque   1      41s
builder@DESKTOP-QADGF36:~/Workspaces/ansible-playbooks$ kubectl get clusterissuer
NAME              READY   AGE
azuredns-issuer   True    40s
Summary
Let’s first see a full end-to-end in action
Here we used the reloadk3s-notraefik to wipe and refresh the K3s cluster. We then used the add-istio playbook to add both Istio and Cert-Manager. Lastly, we ran the add-azurednsclusterissuer playbook to add an AzureDNS Cluster Issuer leveraging AKV as our secret store.
In the future, I could see pivoting to storing secrets for Ansible in Hashi Vault as well as fully parameterizing the AzureDNS playbook to set the HostedZone and ResourceGroup as standard YAML variables instead of hardcoded values in the playbook.
We could also continue on to creating a Certificate request and then applying to an Istio Gateway. But those activities skirt the line between Infrastructure setup and Application deploys. I’ve seen cases at past enterprises I’ve had the honor of serving of both ways; Allowing development teams to manage their gateways and thus DNS entries and enterprises where the “gateway” is a provided endpoint tied to a GCP DNS Hosted Zone (teams controlled their VirtualServices, but shared the Gateway).


