

Published: Feb 21, 2023 by Isaac Johnson
Hashi Vault is a robust secrets service that we can use many different ways; as a SaaS offering (HCP Vault), marketplace option in our cloud provider or host it ourselves. Today we’ll setup Vault on Kubernetes with AKV auto-unseal. Then we’ll configure user/pass authentication with MFA using Duo.
Getting an SP Ready
We’re going to jump right in to Hashi Vault HA with AKV backed auto-unsealing. To do this, we need to create a Service Principal.
The common way is something like this
$ az group create --name ijvaultk8srg --location centralus
$ az ad sp create-for-rbac -n ijvaultk8ssp --skip-assignment --output json > my_sp.json
$ export SP_PASS=`cat my_sp.json | jq -r .password`
$ export SP_ID=`cat my_sp.json | jq -r .appId`
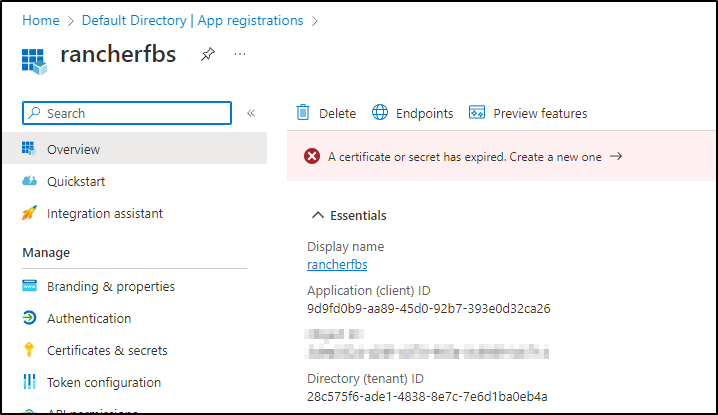
However, I’m going to use an existing SP this time that just needs some fresh certs.
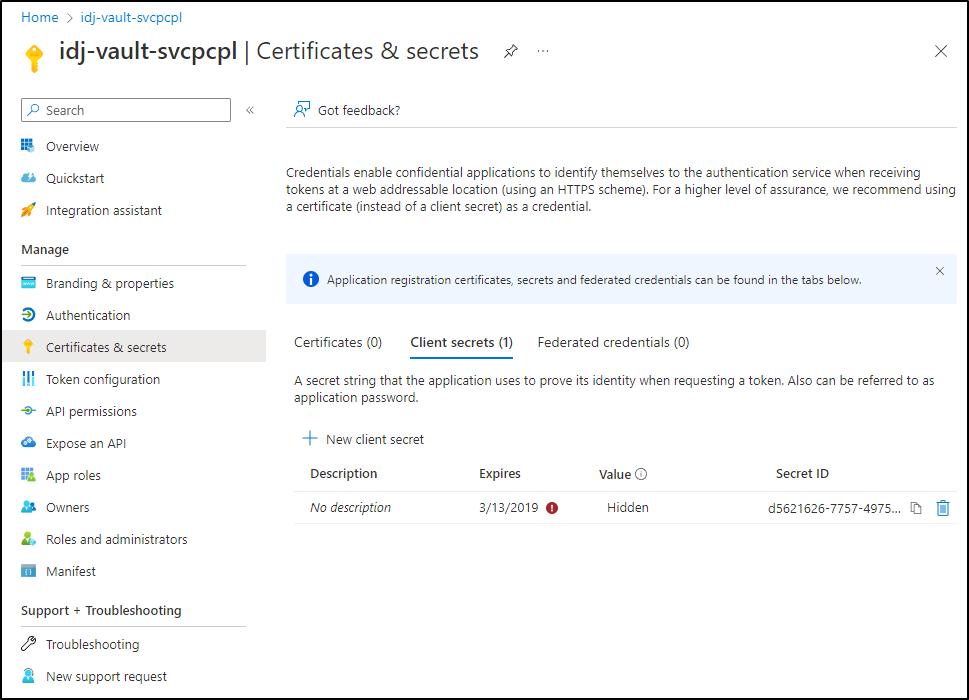
Below we see an older SP that has the right name, but has well expired creds:
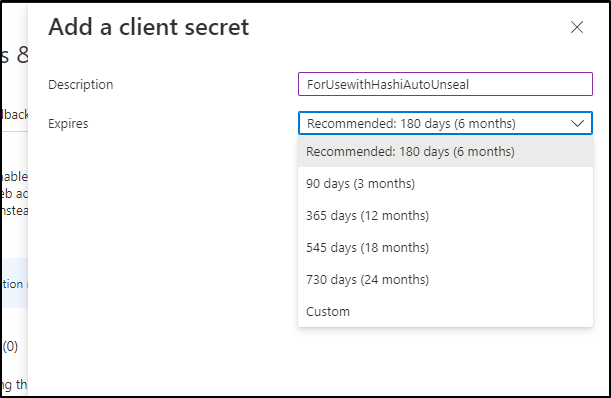
I’ll click “+ Add Client Secret” and give it a name and duration (up to 3y)
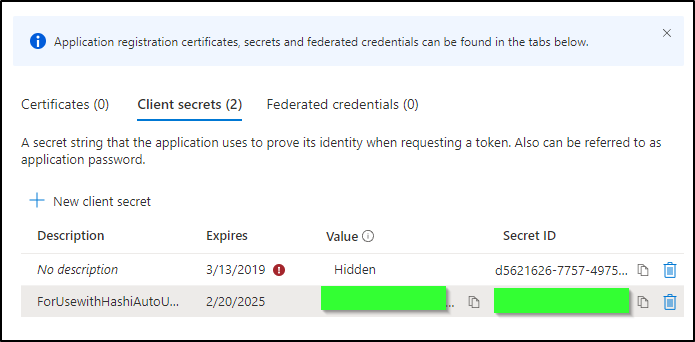
That will give us a new value we can copy
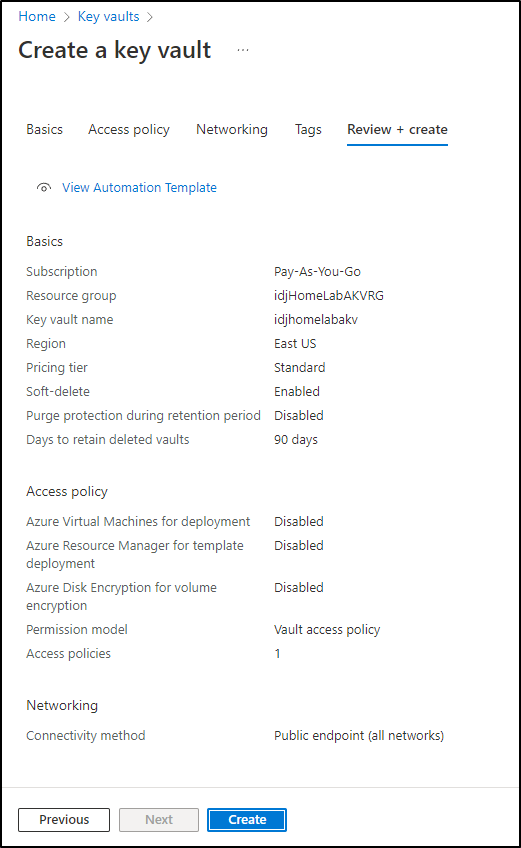
Next, we’ll need a KeyVault to use. As before, we could use the command line
$ az keyvault create -n ijvaultakv -g ijvaultk8srg
However, I’ll use the UI.
I’ll create a new resource group and give this AKV a unique name
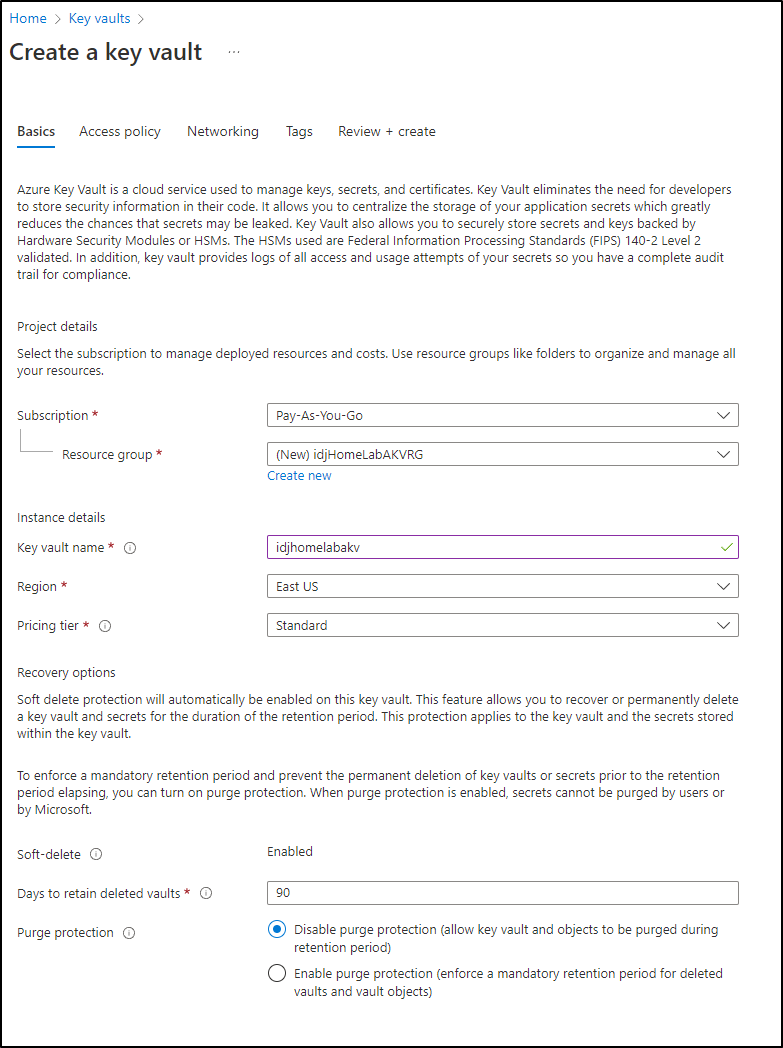
Then click “Create” to create it
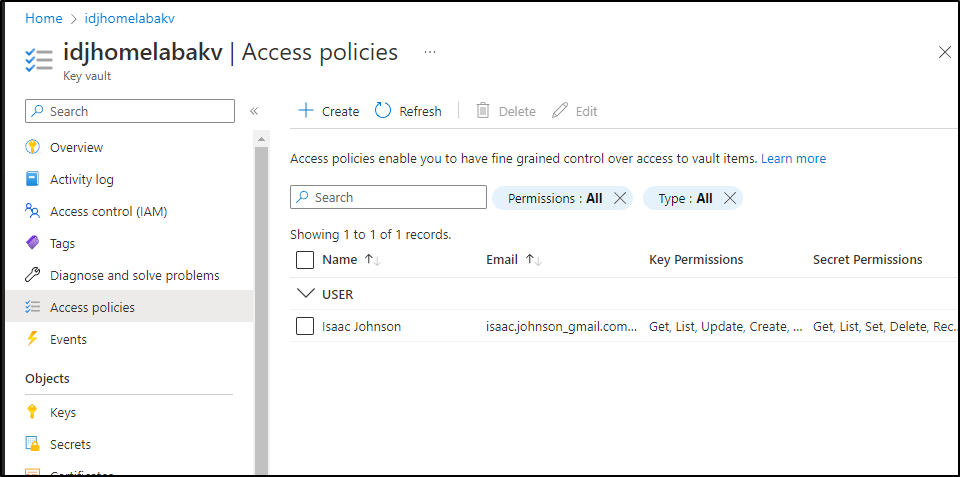
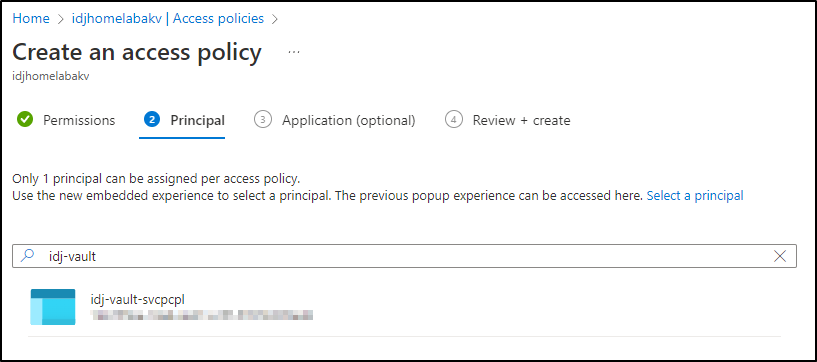
Our last step is then to grant the SP we used at the start access to Secrets in AKV.
We’ll go to “Access Policies” and click create:
I’ll chose “Key, Secret, & Certificate Management” for the template.
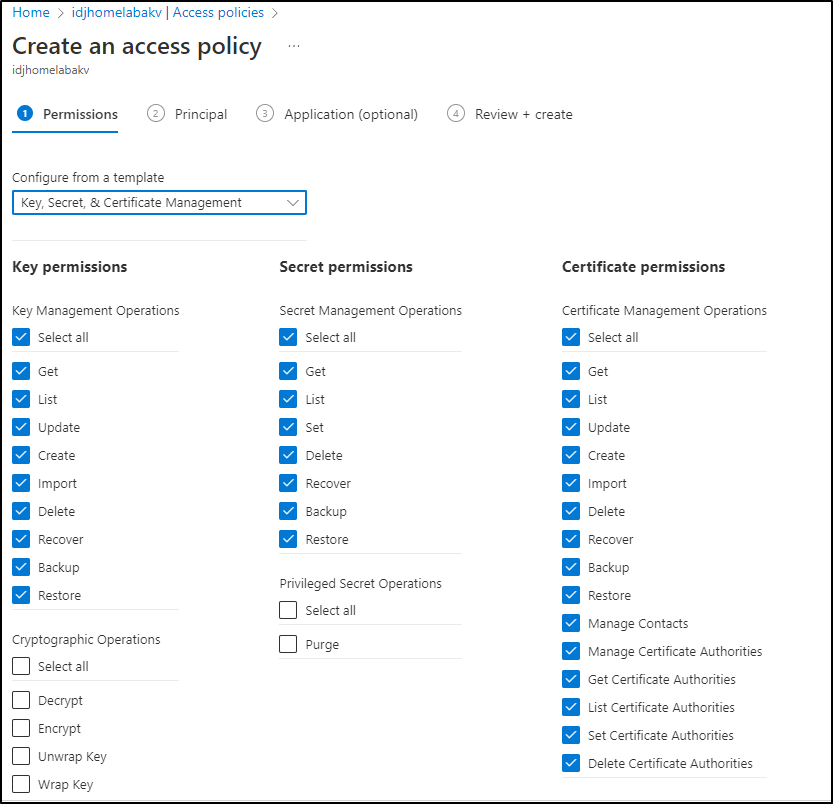
In the next step, I’ll select the principal we updated.
Lastly, I’ll review and create.
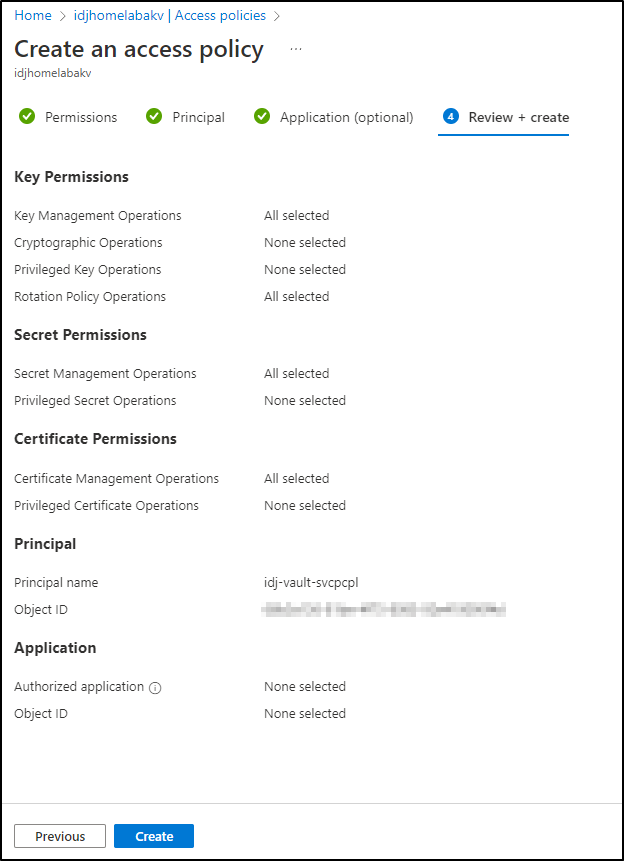
One other area we will need is Cryptographic Operations. I went and clicked the SP under Access Policies and chose Edit to add them after the fact.
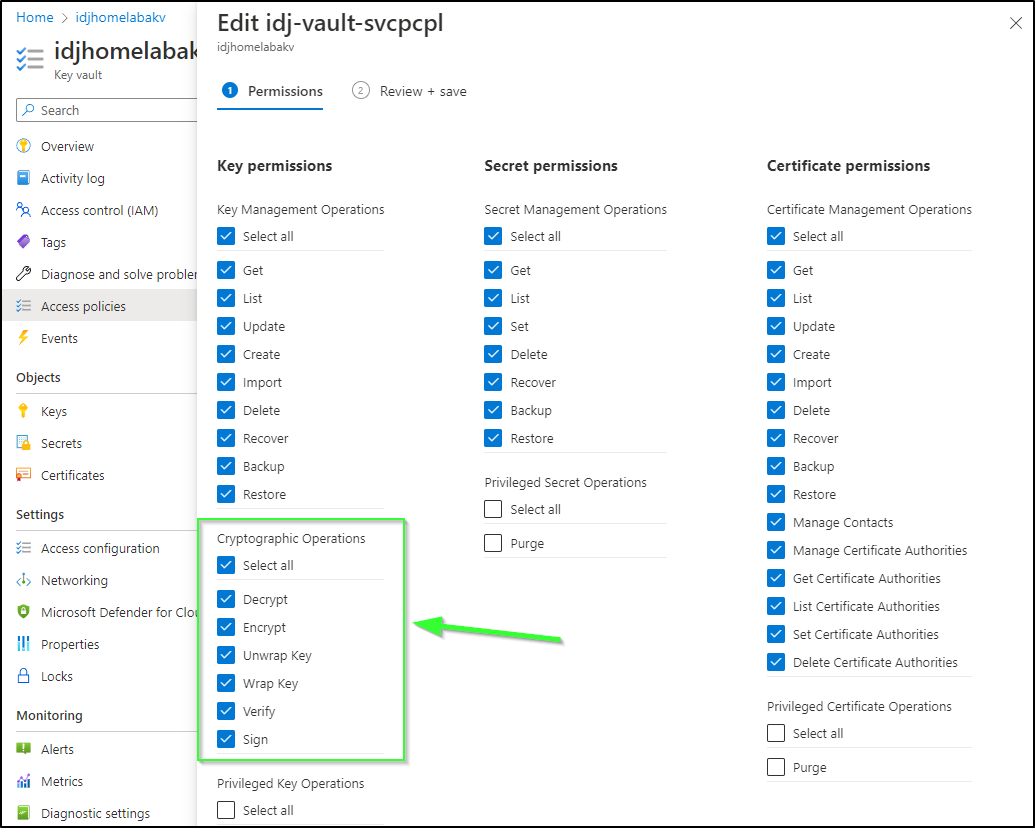
(Make sure to hit save to make the changes live)
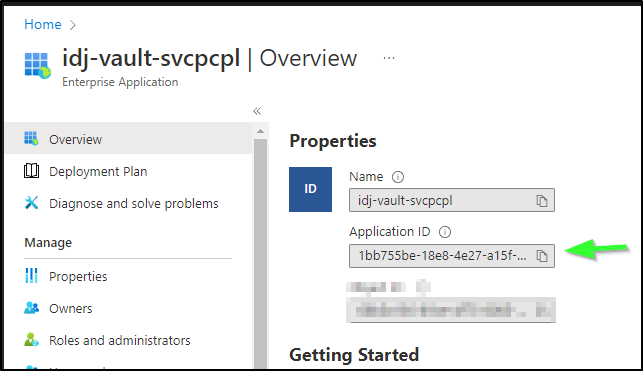
We’ll end up needing the client_id and client_secret, which comes from the SP credential.
If you used an Enterprise Application, you’ll find the client_id as the “Application ID” in Overview:
If you used a standard App Registration, you’ll see the Application ID and Directory (tenant) under a standard “App Registration” in Overview:
Key Vault
Let’s now setup Hashi Vault in our Cluster.
I’ll make sure I’m logged into the primary/infrastructure cluster:
builder@DESKTOP-QADGF36:~/Workspaces/jekyll-blog$ kubectx mac77
Switched to context "mac77".
builder@DESKTOP-QADGF36:~/Workspaces/jekyll-blog$ kubectl get nodes
NAME                          STATUS   ROLES                  AGE    VERSION
hp-hp-elitebook-850-g2        Ready    <none>                 209d   v1.23.9+k3s1
isaac-macbookair              Ready    control-plane,master   209d   v1.23.9+k3s1
builder-hp-elitebook-850-g2   Ready    <none>                 201d   v1.23.9+k3s1
builder-hp-elitebook-850-g1   Ready    <none>                 209d   v1.23.9+k3s1
Note: If you don’t have an on-prem cluster, I have created a series of articles on setting up k3s, from “Getting Started with K3S”, a more recent K3s rebuild, and more
Let’s now add the Hashi helm chart and update:
builder@DESKTOP-QADGF36:~/Workspaces/jekyll-blog$ helm repo add hashicorp https://helm.releases.hashicorp.com
"hashicorp" already exists with the same configuration, skipping
builder@DESKTOP-QADGF36:~/Workspaces/jekyll-blog$ helm repo update
Hang tight while we grab the latest from your chart repositories...
...Successfully got an update from the "freshbrewed" chart repository
...Successfully got an update from the "myharbor" chart repository
...Successfully got an update from the "confluentinc" chart repository
...Successfully got an update from the "kuma" chart repository
...Successfully got an update from the "actions-runner-controller" chart repository
...Successfully got an update from the "dapr" chart repository
...Successfully got an update from the "azure-samples" chart repository
...Successfully got an update from the "uptime-kuma" chart repository
...Successfully got an update from the "sonarqube" chart repository
...Successfully got an update from the "novum-rgi-helm" chart repository
...Successfully got an update from the "adwerx" chart repository
...Successfully got an update from the "rhcharts" chart repository
...Successfully got an update from the "longhorn" chart repository
...Successfully got an update from the "hashicorp" chart repository
...Successfully got an update from the "kubecost" chart repository
...Successfully got an update from the "epsagon" chart repository
...Successfully got an update from the "lifen-charts" chart repository
...Successfully got an update from the "nginx-stable" chart repository
...Successfully got an update from the "sumologic" chart repository
...Successfully got an update from the "open-telemetry" chart repository
...Successfully got an update from the "rook-release" chart repository
...Successfully got an update from the "elastic" chart repository
...Successfully got an update from the "harbor" chart repository
...Successfully got an update from the "datadog" chart repository
...Successfully got an update from the "argo-cd" chart repository
...Successfully got an update from the "incubator" chart repository
...Successfully got an update from the "crossplane-stable" chart repository
...Successfully got an update from the "newrelic" chart repository
...Successfully got an update from the "gitlab" chart repository
...Successfully got an update from the "bitnami" chart repository
...Successfully got an update from the "rancher-latest" chart repository
Update Complete. ⎈Happy Helming!⎈
Then we can install it with helm.
builder@DESKTOP-QADGF36:~/Workspaces/jekyll-blog$ helm install vault hashicorp/vault
NAME: vault
LAST DEPLOYED: Mon Feb 20 06:43:14 2023
NAMESPACE: default
STATUS: deployed
REVISION: 1
NOTES:
Thank you for installing HashiCorp Vault!

Now that you have deployed Vault, you should look over the docs on using
Vault with Kubernetes available here:

https://www.vaultproject.io/docs/


Your release is named vault. To learn more about the release, try:

  $ helm status vault
  $ helm get manifest vault
I had expected to see a vault-0 ui pod when launched (as I had before)
However, there is only the injector:
builder@DESKTOP-QADGF36:~/Workspaces/jekyll-blog$ kubectl get pod --all-namespaces | grep vault
default                 vault-agent-injector-54bdddbb94-qrdb5                      1/1     Running            0                  3m42s
I pulled the helm chart all values and noted that now the UI is, by default, disabled
builder@DESKTOP-QADGF36:~/Workspaces/jekyll-blog$ helm get values --all vault
COMPUTED VALUES:
csi:
  daemonSet:
    annotations: {}
    extraLabels: {}
    kubeletRootDir: /var/lib/kubelet
    providersDir: /etc/kubernetes/secrets-store-csi-providers
    securityContext:
      container: {}
      pod: {}
    updateStrategy:
      maxUnavailable: ""
      type: RollingUpdate
  debug: false
  enabled: false
  extraArgs: []
  image:
    pullPolicy: IfNotPresent
    repository: hashicorp/vault-csi-provider
    tag: 1.2.1
  livenessProbe:
    failureThreshold: 2
    initialDelaySeconds: 5
    periodSeconds: 5
    successThreshold: 1
    timeoutSeconds: 3
  pod:
    annotations: {}
    extraLabels: {}
    tolerations: []
  priorityClassName: ""
  readinessProbe:
    failureThreshold: 2
    initialDelaySeconds: 5
    periodSeconds: 5
    successThreshold: 1
    timeoutSeconds: 3
  resources: {}
  serviceAccount:
    annotations: {}
    extraLabels: {}
  volumeMounts: null
  volumes: null
global:
  enabled: true
  externalVaultAddr: ""
  imagePullSecrets: []
  openshift: false
  psp:
    annotations: |
      seccomp.security.alpha.kubernetes.io/allowedProfileNames: docker/default,runtime/default
      apparmor.security.beta.kubernetes.io/allowedProfileNames: runtime/default
      seccomp.security.alpha.kubernetes.io/defaultProfileName:  runtime/default
      apparmor.security.beta.kubernetes.io/defaultProfileName:  runtime/default
    enable: false
  serverTelemetry:
    prometheusOperator: false
  tlsDisable: true
injector:
  affinity: |
    podAntiAffinity:
      requiredDuringSchedulingIgnoredDuringExecution:
        - labelSelector:
            matchLabels:
              app.kubernetes.io/name: {{ template "vault.name" . }}-agent-injector
              app.kubernetes.io/instance: "{{ .Release.Name }}"
              component: webhook
          topologyKey: kubernetes.io/hostname
  agentDefaults:
    cpuLimit: 500m
    cpuRequest: 250m
    memLimit: 128Mi
    memRequest: 64Mi
    template: map
    templateConfig:
      exitOnRetryFailure: true
      staticSecretRenderInterval: ""
  agentImage:
    repository: hashicorp/vault
    tag: 1.12.1
  annotations: {}
  authPath: auth/kubernetes
  certs:
    caBundle: ""
    certName: tls.crt
    keyName: tls.key
    secretName: null
  enabled: '-'
  externalVaultAddr: ""
  extraEnvironmentVars: {}
  extraLabels: {}
  failurePolicy: Ignore
  hostNetwork: false
  image:
    pullPolicy: IfNotPresent
    repository: hashicorp/vault-k8s
    tag: 1.1.0
  leaderElector:
    enabled: true
  logFormat: standard
  logLevel: info
  metrics:
    enabled: false
  namespaceSelector: {}
  nodeSelector: {}
  objectSelector: {}
  podDisruptionBudget: {}
  port: 8080
  priorityClassName: ""
  replicas: 1
  resources: {}
  revokeOnShutdown: false
  securityContext:
    container: {}
    pod: {}
  service:
    annotations: {}
  serviceAccount:
    annotations: {}
  strategy: {}
  tolerations: []
  topologySpreadConstraints: []
  webhook:
    annotations: {}
    failurePolicy: Ignore
    matchPolicy: Exact
    namespaceSelector: {}
    objectSelector: |
      matchExpressions:
      - key: app.kubernetes.io/name
        operator: NotIn
        values:
        - {{ template "vault.name" . }}-agent-injector
    timeoutSeconds: 30
  webhookAnnotations: {}
server:
  affinity: |
    podAntiAffinity:
      requiredDuringSchedulingIgnoredDuringExecution:
        - labelSelector:
            matchLabels:
              app.kubernetes.io/name: {{ template "vault.name" . }}
              app.kubernetes.io/instance: "{{ .Release.Name }}"
              component: server
          topologyKey: kubernetes.io/hostname
  annotations: {}
  auditStorage:
    accessMode: ReadWriteOnce
    annotations: {}
    enabled: false
    mountPath: /vault/audit
    size: 10Gi
    storageClass: null
  authDelegator:
    enabled: true
  dataStorage:
    accessMode: ReadWriteOnce
    annotations: {}
    enabled: true
    mountPath: /vault/data
    size: 10Gi
    storageClass: null
  dev:
    devRootToken: root
    enabled: false
  enabled: '-'
  enterpriseLicense:
    secretKey: license
    secretName: ""
  extraArgs: ""
  extraContainers: null
  extraEnvironmentVars: {}
  extraInitContainers: null
  extraLabels: {}
  extraSecretEnvironmentVars: []
  extraVolumes: []
  ha:
    apiAddr: null
    clusterAddr: null
    config: |
      ui = true

      listener "tcp" {
        tls_disable = 1
        address = "[::]:8200"
        cluster_address = "[::]:8201"
      }
      storage "consul" {
        path = "vault"
        address = "HOST_IP:8500"
      }

      service_registration "kubernetes" {}

      # Example configuration for using auto-unseal, using Google Cloud KMS. The
      # GKMS keys must already exist, and the cluster must have a service account
      # that is authorized to access GCP KMS.
      #seal "gcpckms" {
      #   project     = "vault-helm-dev-246514"
      #   region      = "global"
      #   key_ring    = "vault-helm-unseal-kr"
      #   crypto_key  = "vault-helm-unseal-key"
      #}

      # Example configuration for enabling Prometheus metrics.
      # If you are using Prometheus Operator you can enable a ServiceMonitor resource below.
      # You may wish to enable unauthenticated metrics in the listener block above.
      #telemetry {
      #  prometheus_retention_time = "30s",
      #  disable_hostname = true
      #}
    disruptionBudget:
      enabled: true
      maxUnavailable: null
    enabled: false
    raft:
      config: |
        ui = true

        listener "tcp" {
          tls_disable = 1
          address = "[::]:8200"
          cluster_address = "[::]:8201"
          # Enable unauthenticated metrics access (necessary for Prometheus Operator)
          #telemetry {
          #  unauthenticated_metrics_access = "true"
          #}
        }

        storage "raft" {
          path = "/vault/data"
        }

        service_registration "kubernetes" {}
      enabled: false
      setNodeId: false
    replicas: 3
  hostNetwork: false
  image:
    pullPolicy: IfNotPresent
    repository: hashicorp/vault
    tag: 1.12.1
  ingress:
    activeService: true
    annotations: {}
    enabled: false
    extraPaths: []
    hosts:
    - host: chart-example.local
      paths: []
    ingressClassName: ""
    labels: {}
    pathType: Prefix
    tls: []
  livenessProbe:
    enabled: false
    failureThreshold: 2
    initialDelaySeconds: 60
    path: /v1/sys/health?standbyok=true
    periodSeconds: 5
    successThreshold: 1
    timeoutSeconds: 3
  logFormat: ""
  logLevel: ""
  networkPolicy:
    egress: []
    enabled: false
  nodeSelector: {}
  postStart: []
  preStopSleepSeconds: 5
  priorityClassName: ""
  readinessProbe:
    enabled: true
    failureThreshold: 2
    initialDelaySeconds: 5
    periodSeconds: 5
    successThreshold: 1
    timeoutSeconds: 3
  resources: {}
  route:
    activeService: true
    annotations: {}
    enabled: false
    host: chart-example.local
    labels: {}
    tls:
      termination: passthrough
  service:
    active:
      enabled: true
    annotations: {}
    enabled: true
    externalTrafficPolicy: Cluster
    instanceSelector:
      enabled: true
    port: 8200
    publishNotReadyAddresses: true
    standby:
      enabled: true
    targetPort: 8200
  serviceAccount:
    annotations: {}
    create: true
    extraLabels: {}
    name: ""
    serviceDiscovery:
      enabled: true
  shareProcessNamespace: false
  standalone:
    config: |
      ui = true

      listener "tcp" {
        tls_disable = 1
        address = "[::]:8200"
        cluster_address = "[::]:8201"
        # Enable unauthenticated metrics access (necessary for Prometheus Operator)
        #telemetry {
        #  unauthenticated_metrics_access = "true"
        #}
      }
      storage "file" {
        path = "/vault/data"
      }

      # Example configuration for using auto-unseal, using Google Cloud KMS. The
      # GKMS keys must already exist, and the cluster must have a service account
      # that is authorized to access GCP KMS.
      #seal "gcpckms" {
      #   project     = "vault-helm-dev"
      #   region      = "global"
      #   key_ring    = "vault-helm-unseal-kr"
      #   crypto_key  = "vault-helm-unseal-key"
      #}

      # Example configuration for enabling Prometheus metrics in your config.
      #telemetry {
      #  prometheus_retention_time = "30s",
      #  disable_hostname = true
      #}
    enabled: '-'
  statefulSet:
    annotations: {}
    securityContext:
      container: {}
      pod: {}
  terminationGracePeriodSeconds: 10
  tolerations: []
  topologySpreadConstraints: []
  updateStrategyType: OnDelete
  volumeMounts: null
  volumes: null
serverTelemetry:
  prometheusRules:
    enabled: false
    rules: {}
    selectors: {}
  serviceMonitor:
    enabled: false
    interval: 30s
    scrapeTimeout: 10s
    selectors: {}
ui:
  activeVaultPodOnly: false
  annotations: {}
  enabled: false
  externalPort: 8200
  externalTrafficPolicy: Cluster
  publishNotReadyAddresses: true
  serviceNodePort: null
  serviceType: ClusterIP
  targetPort: 8200
I set the current values asside
builder@DESKTOP-QADGF36:~/Workspaces/jekyll-blog$ helm get values -o yaml --all vault > currentValues.yaml
builder@DESKTOP-QADGF36:~/Workspaces/jekyll-blog$ helm get values -o yaml --all vault > currentValues.yaml.bak
Then I edited it. I noted that Standalone mode was errantly set to “-“ instead of true which is why I likely didn’t get the UI. I also enabled the UI in the UI block. (foreshadowing… this isn’t the issue)
builder@DESKTOP-QADGF36:~/Workspaces/jekyll-blog$ diff -c currentValues.yaml currentValues.yaml.bak
*** currentValues.yaml  2023-02-20 06:54:36.402358212 -0600
--- currentValues.yaml.bak      2023-02-20 06:48:55.298980129 -0600
***************
*** 337,343 ****
        #  prometheus_retention_time = "30s",
        #  disable_hostname = true
        #}
!     enabled: true
    statefulSet:
      annotations: {}
      securityContext:
--- 337,343 ----
        #  prometheus_retention_time = "30s",
        #  disable_hostname = true
        #}
!     enabled: '-'
    statefulSet:
      annotations: {}
      securityContext:
***************
*** 362,368 ****
  ui:
    activeVaultPodOnly: false
    annotations: {}
!   enabled: true
    externalPort: 8200
    externalTrafficPolicy: Cluster
    publishNotReadyAddresses: true
--- 362,368 ----
  ui:
    activeVaultPodOnly: false
    annotations: {}
!   enabled: false
    externalPort: 8200
    externalTrafficPolicy: Cluster
    publishNotReadyAddresses: true
I’ll update the installed chart to use the values we set:
builder@DESKTOP-QADGF36:~/Workspaces/jekyll-blog$ helm upgrade vault -f currentValues.yaml hashicorp/vault
Release "vault" has been upgraded. Happy Helming!
NAME: vault
LAST DEPLOYED: Mon Feb 20 06:56:30 2023
NAMESPACE: default
STATUS: deployed
REVISION: 2
NOTES:
Thank you for installing HashiCorp Vault!

Now that you have deployed Vault, you should look over the docs on using
Vault with Kubernetes available here:

https://www.vaultproject.io/docs/


Your release is named vault. To learn more about the release, try:

  $ helm status vault
  $ helm get manifest vault
I realized my error after reviewing manifest. While the injectors are still normal pods
builder@DESKTOP-QADGF36:~/Workspaces/jekyll-blog$ kubectl get pods --all-namespaces | grep vault
default                 vault-agent-injector-54bdddbb94-gc5wl                      1/1     Running            0                  83s
The vault (main) is actually a statefulset. (Nope… this isn’t the problem either…)
builder@DESKTOP-QADGF36:~/Workspaces/jekyll-blog$ kubectl get statefulset vault
NAME    READY   AGE
vault   0/1     2m36s
moreover, the reason my SS is failing is because it cannot create a PVC (Here we go… this is my goof)
Events:
  Type     Reason        Age                     From                    Message
  ----     ------        ----                    ----                    -------
  Warning  FailedCreate  4m13s (x12 over 4m23s)  statefulset-controller  create Pod vault-0 in StatefulSet vault failed error: failed to create PVC data-vault-0: persistentvolumeclaims "data-vault-0" is forbidden: Internal error occurred: 2 default StorageClasses were found
  Warning  FailedCreate  4m2s (x13 over 4m23s)   statefulset-controller  create Claim data-vault-0 for Pod vault-0 in StatefulSet vault failed error: persistentvolumeclaims "data-vault-0" is forbidden: Internal error occurred: 2 default StorageClasses were found
And indeed, I see the oops on my part - two default StorageClasses
builder@DESKTOP-QADGF36:~/Workspaces/jekyll-blog$ kubectl get storageclass
NAME                            PROVISIONER                                       RECLAIMPOLICY   VOLUMEBINDINGMODE      ALLOWVOLUMEEXPANSION   AGE
nfs                             cluster.local/nfs-server-provisioner-1658802767   Delete          Immediate              true
      209d
managed-nfs-storage (default)   fuseim.pri/ifs                                    Delete          Immediate              true
      208d
local-path (default)            rancher.io/local-path                             Delete          WaitForFirstConsumer   false
      209d
There are two places in the values that set storage class. When set to ‘null’ they drop to “default” which is in error at the moment. I’ll set these directly to managed-nfs
builder@DESKTOP-QADGF36:~/Workspaces/jekyll-blog$ diff currentValues.yaml currentValues.yaml.bak
152c152
<     storageClass: managed-nfs-storage
---
>     storageClass: null
161c161
<     storageClass: managed-nfs-storage
---
>     storageClass: null
340c340
<     enabled: true
---
>     enabled: '-'
365c365
<   enabled: true
---
>   enabled: false
That fixed my issue
builder@DESKTOP-QADGF36:~/Workspaces/jekyll-blog$ kubectl describe statefulset vault | tail -n3
  ----    ------            ----  ----                    -------
  Normal  SuccessfulCreate  17s   statefulset-controller  create Claim data-vault-0 Pod vault-0 in StatefulSet vault success
  Normal  SuccessfulCreate  17s   statefulset-controller  create Pod vault-0 in StatefulSet vault successful
Quick Note: How to fix doubled default Storage Classes
builder@DESKTOP-QADGF36:~/Workspaces/jekyll-blog$ kubectl get sc
NAME                            PROVISIONER                                       RECLAIMPOLICY   VOLUMEBINDINGMODE      ALLOWVOLUMEEXPANSION   AGE
nfs                             cluster.local/nfs-server-provisioner-1658802767   Delete          Immediate              true                   209d
managed-nfs-storage (default)   fuseim.pri/ifs                                    Delete          Immediate              true                   208d
local-path (default)            rancher.io/local-path                             Delete          WaitForFirstConsumer   false                  209d
builder@DESKTOP-QADGF36:~/Workspaces/jekyll-blog$ kubectl patch storageclass local-path -p '{"metadata": {"annotations":{"storageclass.kubernetes.io/is-default-class":"false"}}}'
storageclass.storage.k8s.io/local-path patched
builder@DESKTOP-QADGF36:~/Workspaces/jekyll-blog$ kubectl get sc
NAME                            PROVISIONER                                       RECLAIMPOLICY   VOLUMEBINDINGMODE      ALLOWVOLUMEEXPANSION   AGE
nfs                             cluster.local/nfs-server-provisioner-1658802767   Delete          Immediate              true                   209d
managed-nfs-storage (default)   fuseim.pri/ifs                                    Delete          Immediate              true                   208d
local-path                      rancher.io/local-path                             Delete          WaitForFirstConsumer   false                  209d
Now we see both pods
builder@DESKTOP-QADGF36:~/Workspaces/jekyll-blog$ kubectl get pods | grep vault
vault-agent-injector-54bdddbb94-d9znc                    1/1     Running   0                  2m6s
vault-0                                                  0/1     Running   0                  2m6s
Setting up first time
Let’s port-forward to the ‘vault-0’
builder@DESKTOP-QADGF36:~/Workspaces/jekyll-blog$ kubectl port-forward vault-0 8200:8200
Forwarding from 127.0.0.1:8200 -> 8200
Forwarding from [::1]:8200 -> 8200
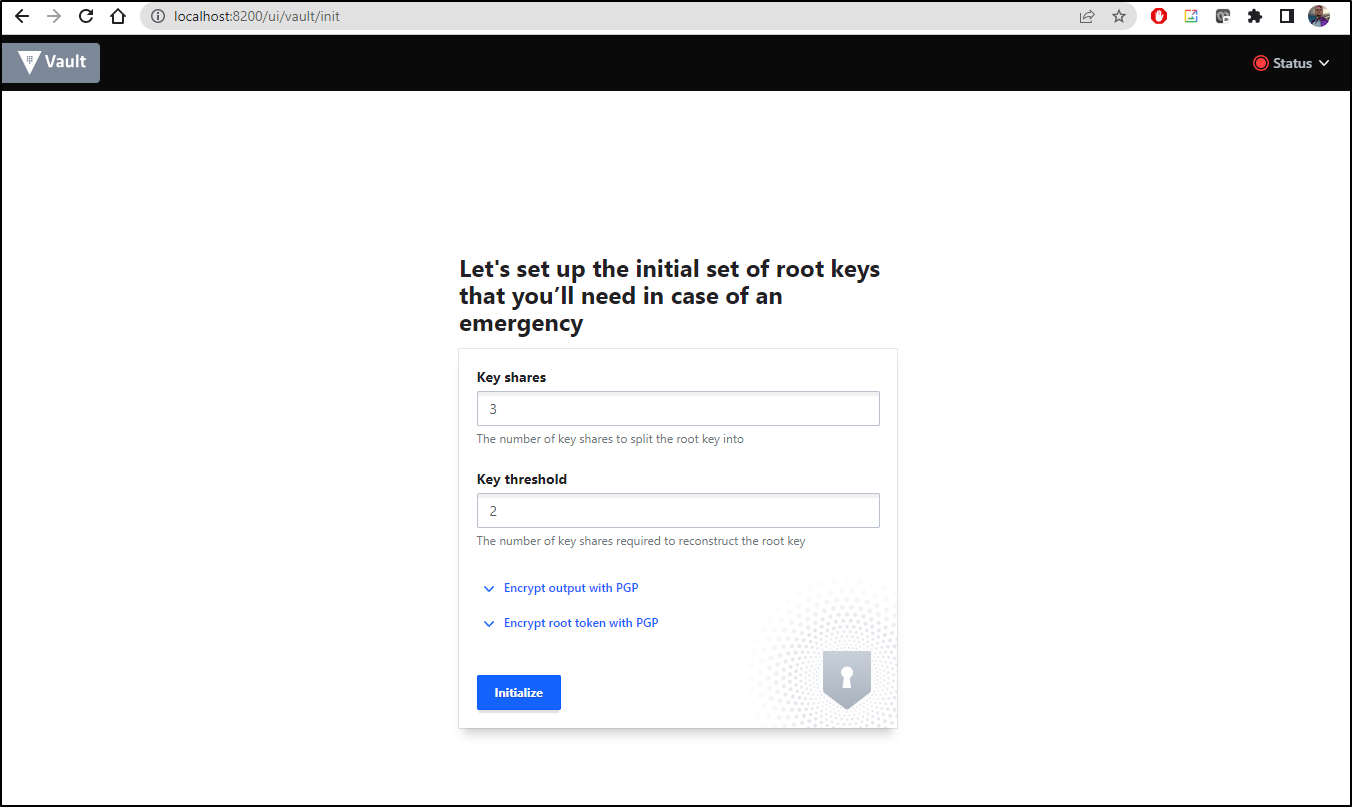
I’ll set 3 shares with 2 minimum
I’ll then get a master init root token and 3 keys. We’ll download the JSON (Click “Download Keys”)
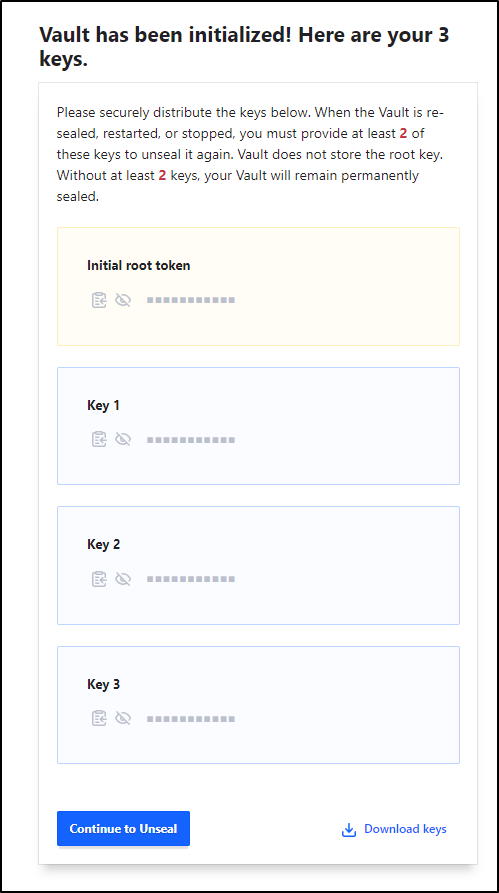
We will “Continue to Unseal” which will use those keys.

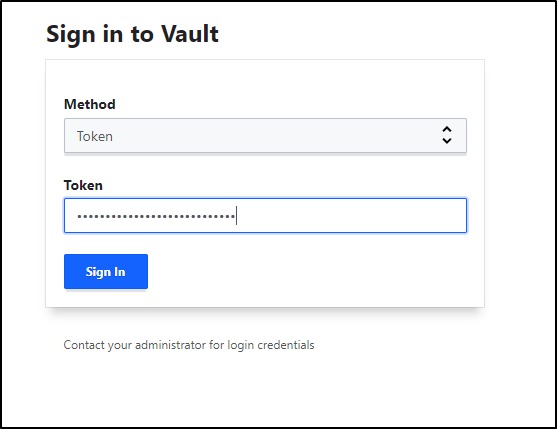
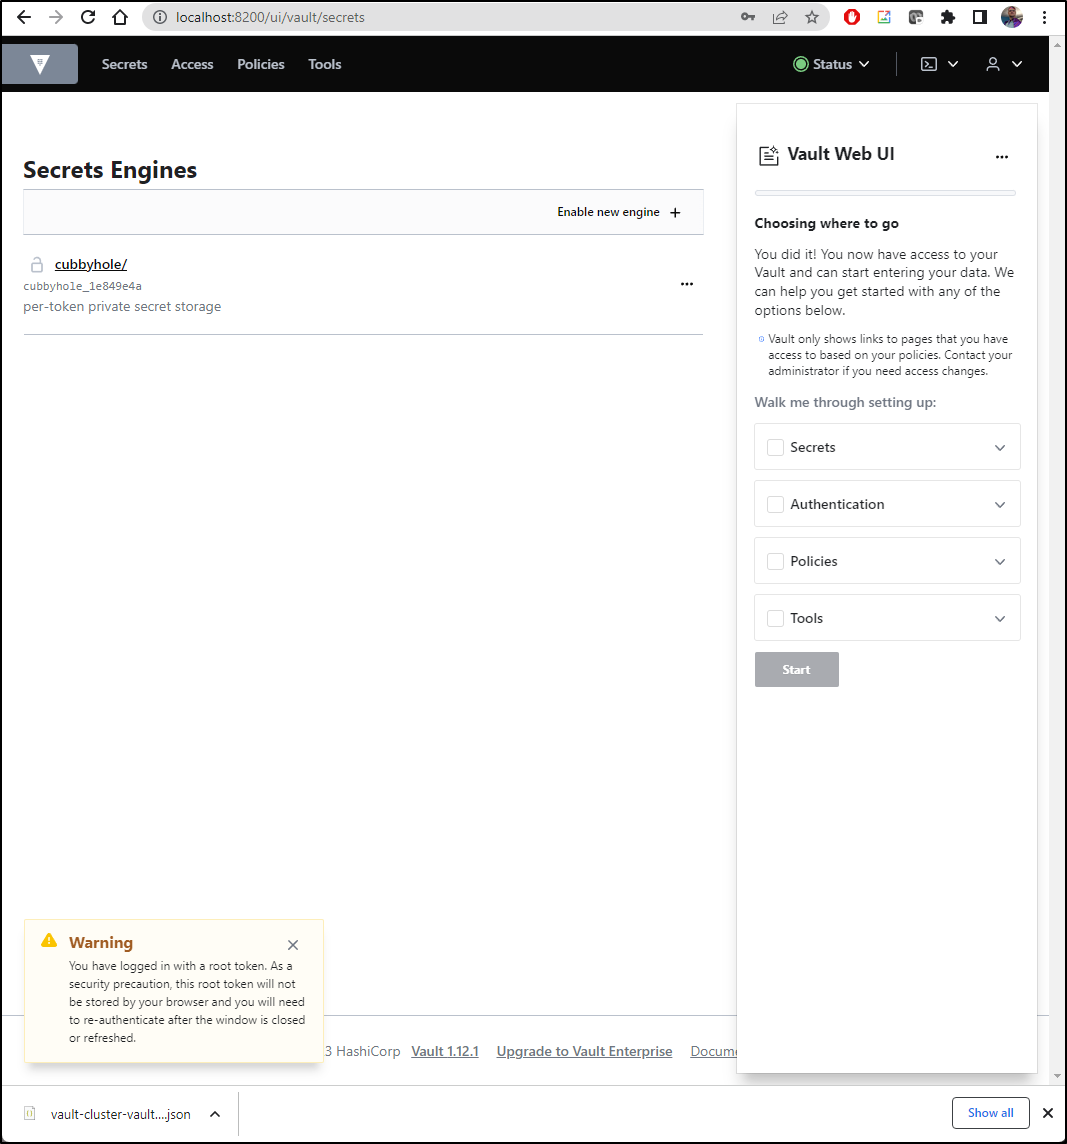
Now we can sign in using the root token
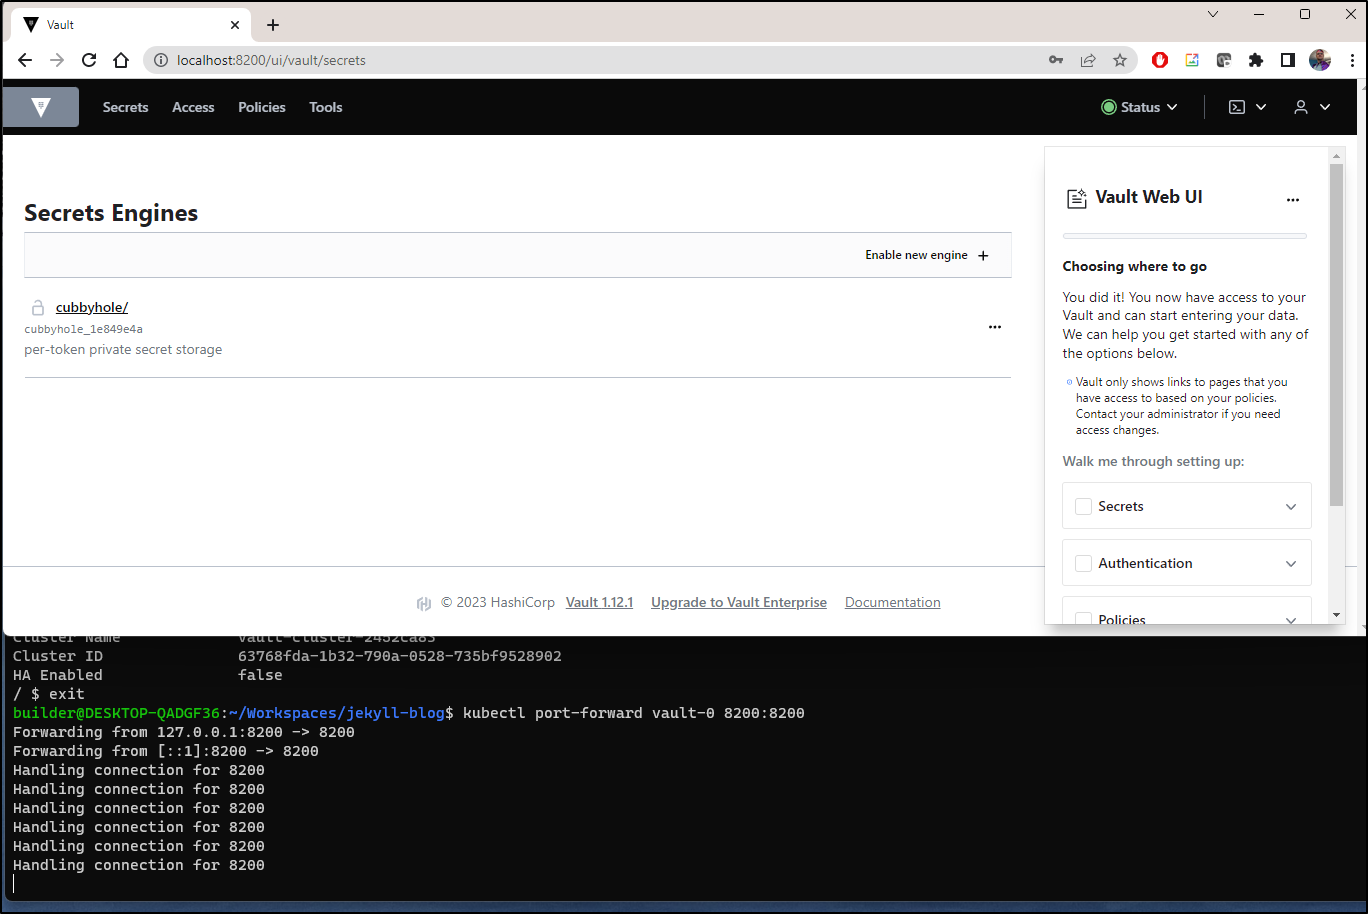
At this point you should have a running functional, albeit empty, Hashi Vault instance running in your cluster
Setting up Auto Unseal
In our currentValues.yaml (or whatever you named your Hashi Helm Chart values file), we see the commented out block for GCP KMS unseal
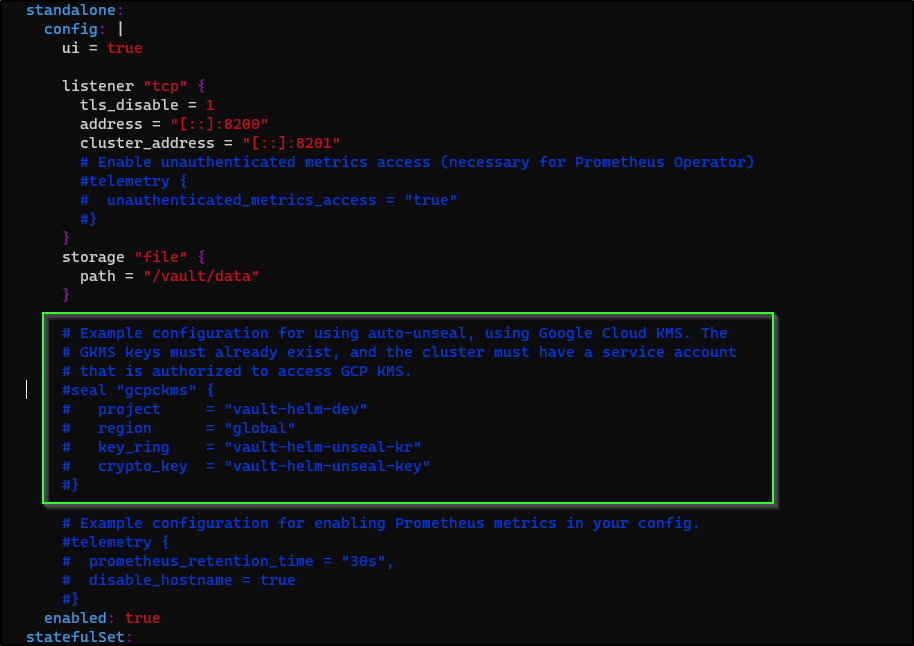
Which will be similar to
--- 329,352 ----
        #   project     = "vault-helm-dev"
        #   region      = "global"
        #   key_ring    = "vault-helm-unseal-kr"
        #   crypto_key  = "vault-helm-unseal-key"
        #}
+       seal "azurekeyvault" {
+          client_id         = "1bb755be-asdf-asdf-asdf-asdfasdf2ad8"
+          tenant_id         = "28c575f6-asdf-asdf-asdf-asdfasdfeb4a"
+          client_secret     = "hasdfasfasfasdfasdfasdfasdfasdfasdfa-"
+          vault_name        = "idjhomelabakv"
+          key_name          = "homevaultunseal"
+       }

        # Example configuration for enabling Prometheus metrics in your config.
        #telemetry {
        #  prometheus_retention_time = "30s",
        #  disable_hostname = true
        #}
I’ll now “upgrade” the chart to use the values
builder@DESKTOP-QADGF36:~/Workspaces/jekyll-blog$ helm upgrade vault -f currentValues.yaml hashicorp/vault
Release "vault" has been upgraded. Happy Helming!
NAME: vault
LAST DEPLOYED: Mon Feb 20 07:23:57 2023
NAMESPACE: default
STATUS: deployed
REVISION: 2
NOTES:
Thank you for installing HashiCorp Vault!

Now that you have deployed Vault, you should look over the docs on using
Vault with Kubernetes available here:

https://www.vaultproject.io/docs/


Your release is named vault. To learn more about the release, try:

  $ helm status vault
  $ helm get manifest vault
In testing this I grew confused. Rotating gave a failure:
builder@DESKTOP-QADGF36:~/Workspaces/jekyll-blog$ kubectl logs vault-0
2023-02-20T22:39:41.009Z [INFO]  proxy environment: http_proxy="" https_proxy="" no_proxy=""
Error parsing Seal configuration: error fetching Azure Key Vault wrapper key information: keyvault.BaseClient#GetKey: Failure responding to request: StatusCode=404 -- Original Error: autorest/azure: Service returned an error. Status=404 Code="KeyNotFound" Message="A key with (name/id) homevaultunseal was not found in this key vault. If you recently deleted this key you may be able to recover it using the correct recovery command. For help resolving this issue, please see https://go.microsoft.com/fwlink/?linkid=2125182"
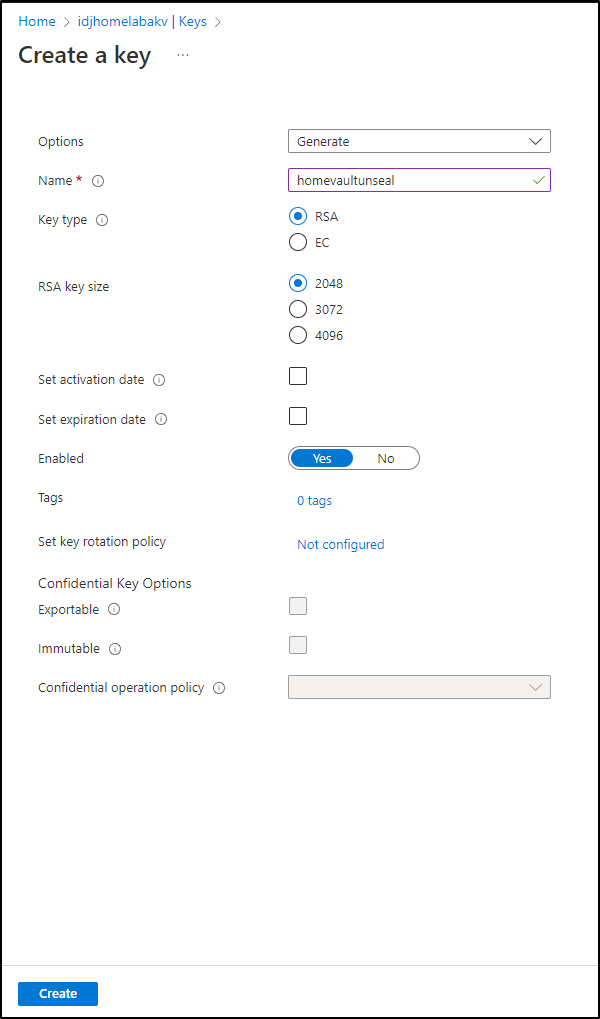
It was then I realized that my habit was to always create “Secret”s not “Key”s
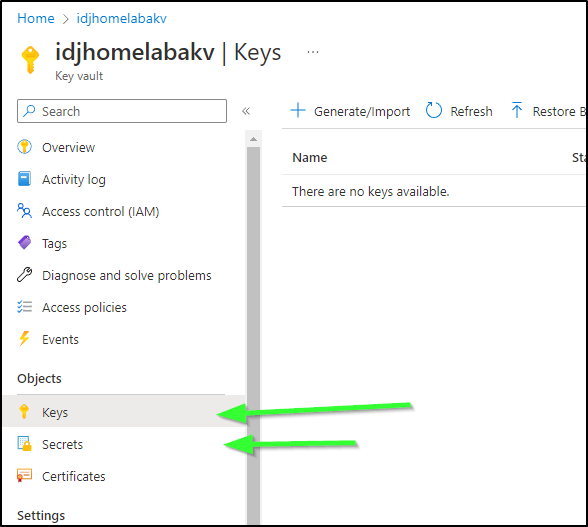
To be clear; what I needed to do was go to Keys and make a new one.
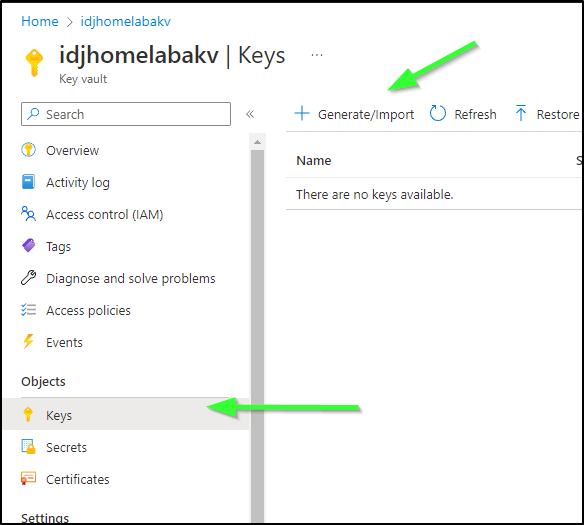
The key needs to be of type RSA and 2048 bits:
Now we can pod rotate vault and see it picks up the new key from AKV:
builder@DESKTOP-QADGF36:~/Workspaces/jekyll-blog$ kubectl delete pod vault-0
pod "vault-0" deleted
builder@DESKTOP-QADGF36:~/Workspaces/jekyll-blog$ kubectl logs vault-0
builder@DESKTOP-QADGF36:~/Workspaces/jekyll-blog$ kubectl logs vault-0
==> Vault server configuration:

             Api Address: http://10.42.1.81:8200
                     Cgo: disabled
         Cluster Address: https://vault-0.vault-internal:8201
              Go Version: go1.19.2
              Listener 1: tcp (addr: "[::]:8200", cluster address: "[::]:8201", max_request_duration: "1m30s", max_request_size: "33554432", tls: "disabled")
               Log Level: info
                   Mlock: supported: true, enabled: false
           Recovery Mode: false
                 Storage: file
                 Version: Vault v1.12.1, built 2022-10-27T12:32:05Z
             Version Sha: e34f8a14fb7a88af4640b09f3ddbb5646b946d9c

==> Vault server started! Log data will stream in below:

2023-02-20T22:47:17.231Z [INFO]  proxy environment: http_proxy="" https_proxy="" no_proxy=""
2023-02-20T22:47:18.062Z [WARN]  core: entering seal migration mode; Vault will not automatically unseal even if using an autoseal: from_barrier_type=shamir to_barrier_type=azurekeyvault
2023-02-20T22:47:18.062Z [INFO]  core: Initializing version history cache for core
I’ll unseal it just this one time
builder@DESKTOP-QADGF36:~/Workspaces/jekyll-blog$ kubectl exec -it vault-0 -- /bin/sh
/ $ vault operator unseal -migrate
Unseal Key (will be hidden):
Key                           Value
---                           -----
Recovery Seal Type            shamir
Initialized                   true
Sealed                        true
Total Recovery Shares         3
Threshold                     2
Unseal Progress               1/2
Unseal Nonce                  4ad8785a-8236-661f-8225-fa2bd3d74153
Seal Migration in Progress    true
Version                       1.12.1
Build Date                    2022-10-27T12:32:05Z
Storage Type                  file
HA Enabled                    false
/ $ vault operator unseal -migrate
Unseal Key (will be hidden):
Key                      Value
---                      -----
Recovery Seal Type       shamir
Initialized              true
Sealed                   false
Total Recovery Shares    3
Threshold                2
Version                  1.12.1
Build Date               2022-10-27T12:32:05Z
Storage Type             file
Cluster Name             vault-cluster-2452ca83
Cluster ID               63768fda-1b32-790a-0528-735bf9528902
HA Enabled               false
I’ll login just to double check it’s active and unlocked.
Let’s watch auto-unseal in action as I rotate the pod and show it comes back unsealed (using AKV)
So far everything we’ve done, we’ve done before.
Username / Pass
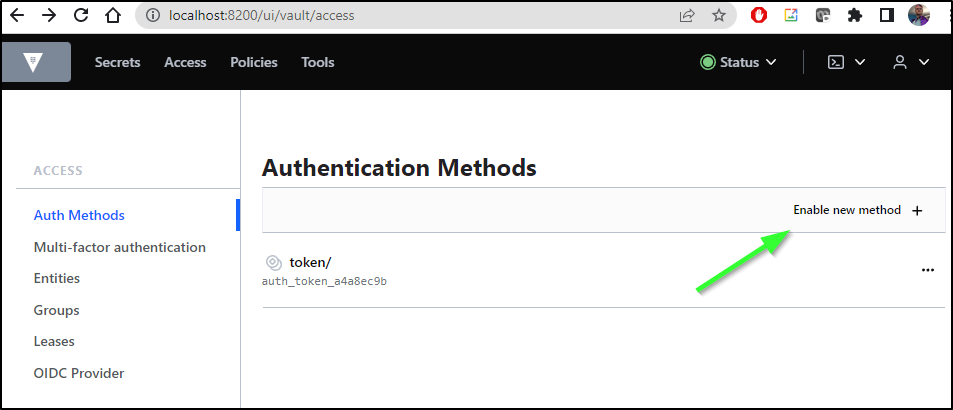
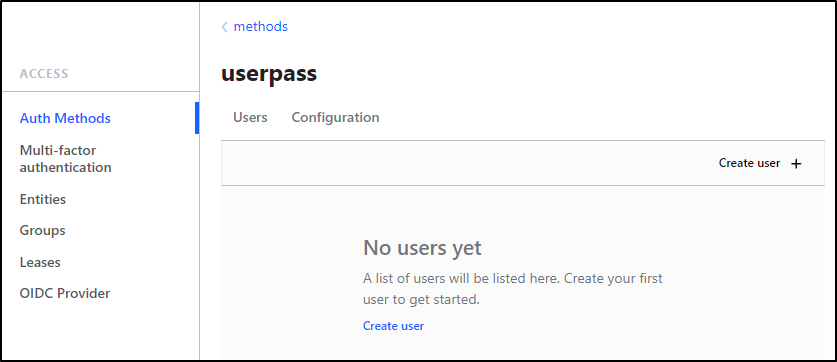
Let’s go to Auth Methods in Access and “Enable new method”
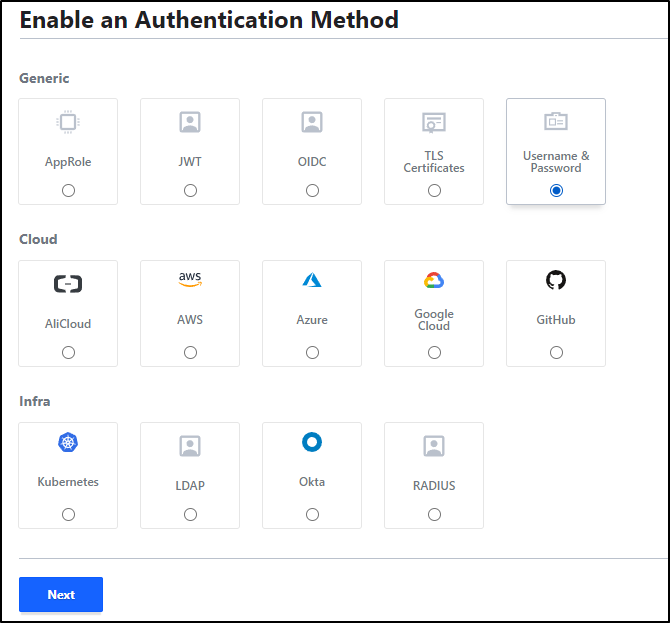
We’ll select Username and Password and click “Next”
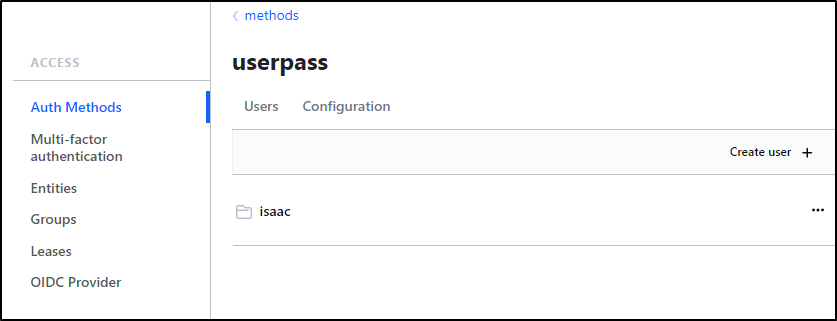
Under “Auth Methods”, let’s now click the newly created “userpass”, then “Create use +”
To keep it simple, I’ll create a user with my first name.
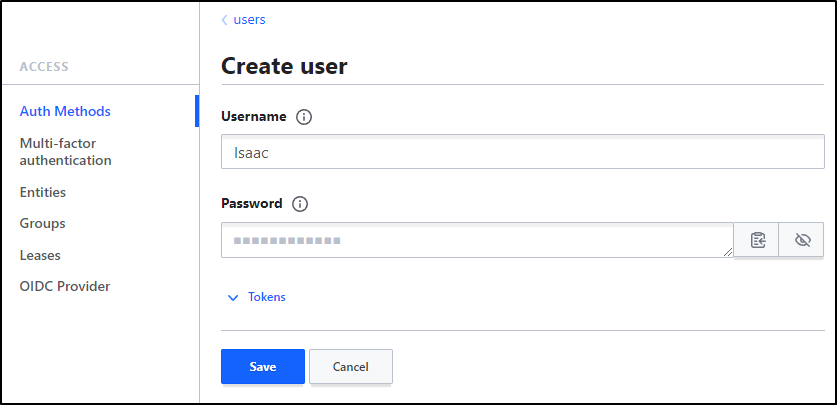
And save
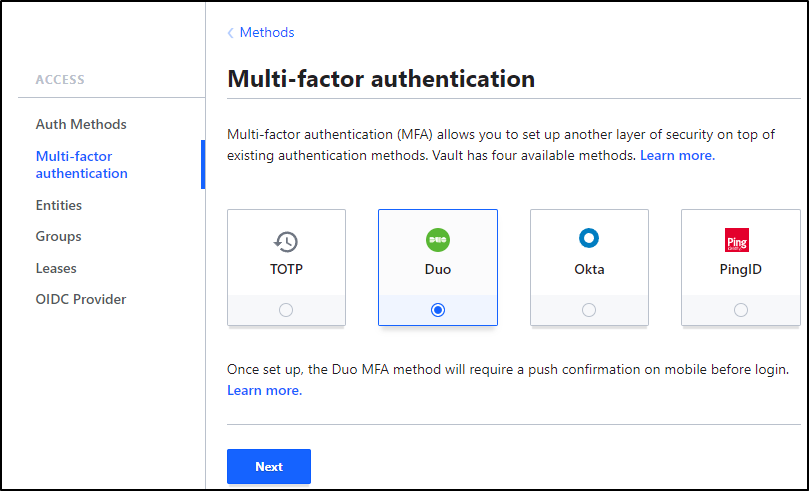
MFA
As far as built-in MFA options, we have 4, at the time of this writing, from which we can choose:

TOTP is a more generic option that, with some work, you can manage to integrate with an authenticator app.
The other three options are commercial. Since I’m cheap, let’s talk just about price - assume all three could likely do the job:
| ame | Description | Per user | Minimum Spend | Free Trial | Free Tier |
|---|---|---|---|---|---|
| Okta | Most common, bought up Auth0 | US$3/user/month | Minium $1500/annual contract | Yes | No |
| Ping | Plus option for MFA | - | US$40,000 Annually | Yes | No |
| Duo | Owned by Cisco now | US$3/user/month | - | Yes | Yes |
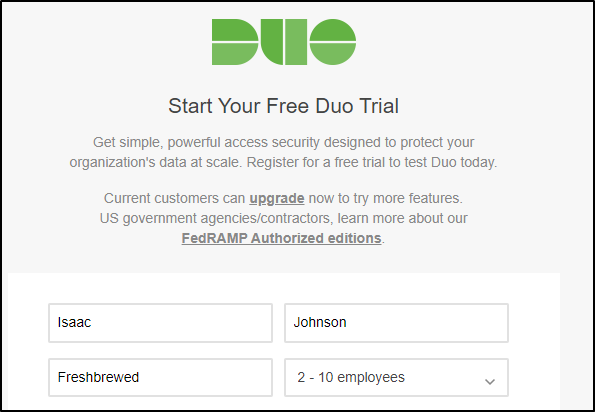
Signing up for Duo
I’ll go to Duo and sign-up for a free trial. However, we will be within the free tier.

I’ll put in some details and “Start My Trial”.
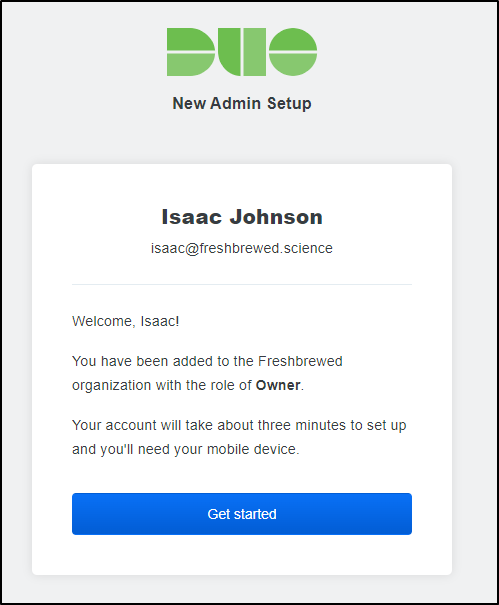
I’ll verify the email and click “Get started”.
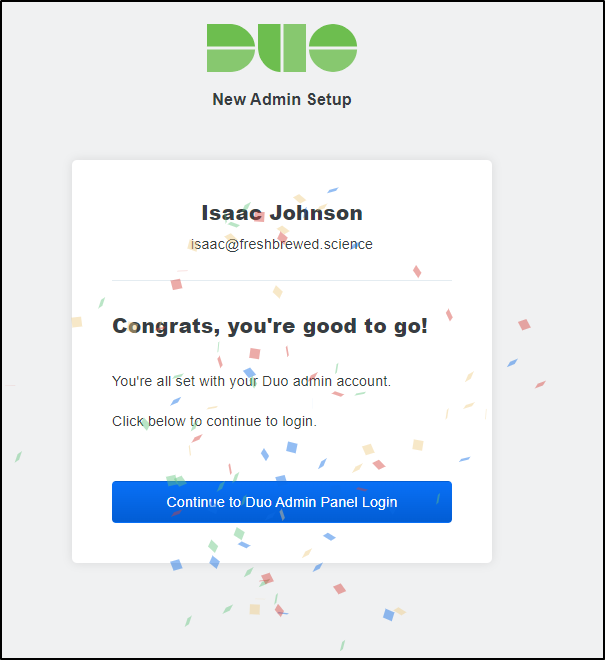
Once I setup the mobile app and finished the process, I get the notice that we are complete.
I then logged into the Admin panel.
Back in Hashi Vault, I’ll set Duo for MFA and click “Next”

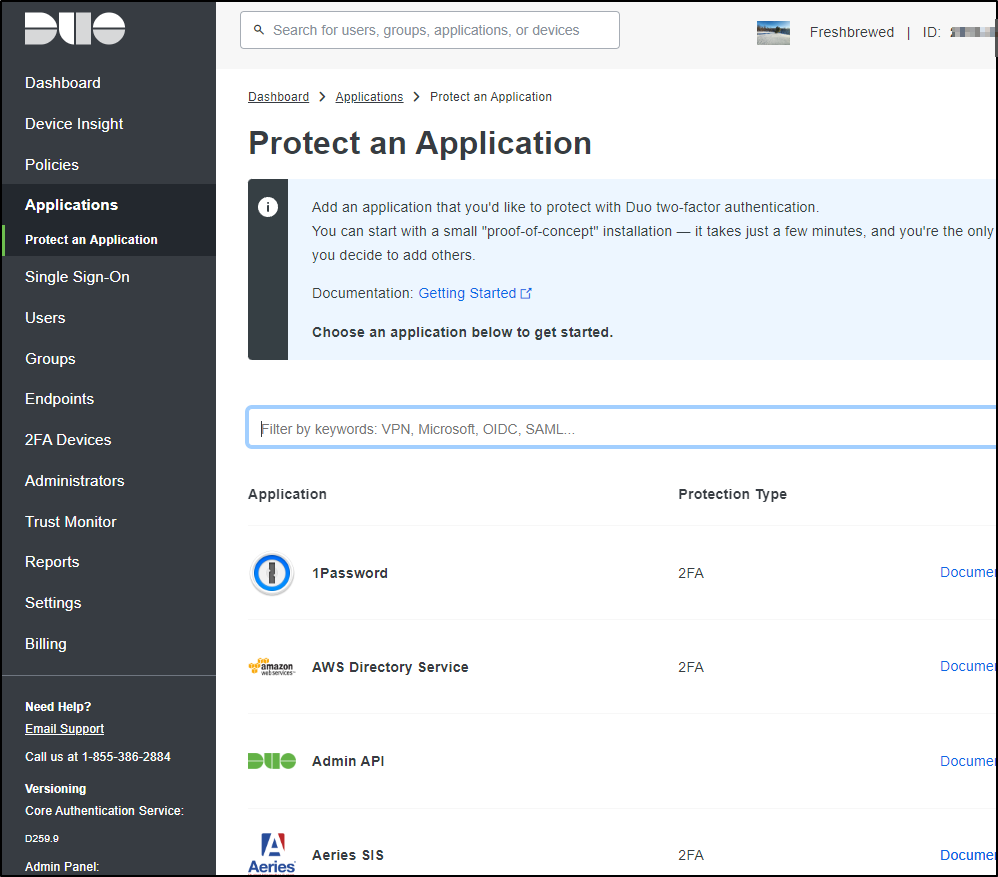
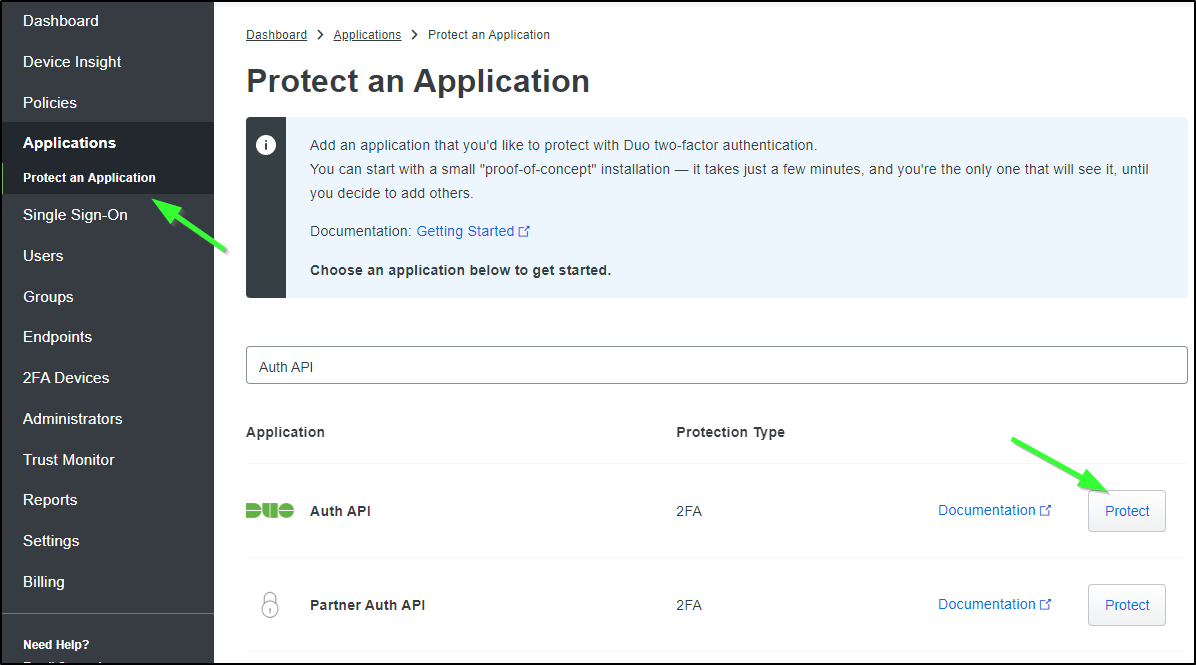
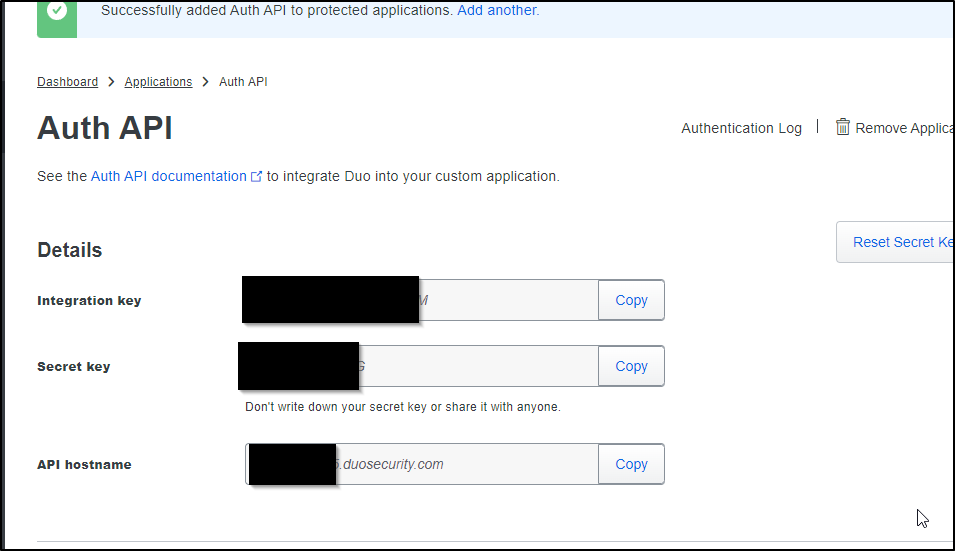
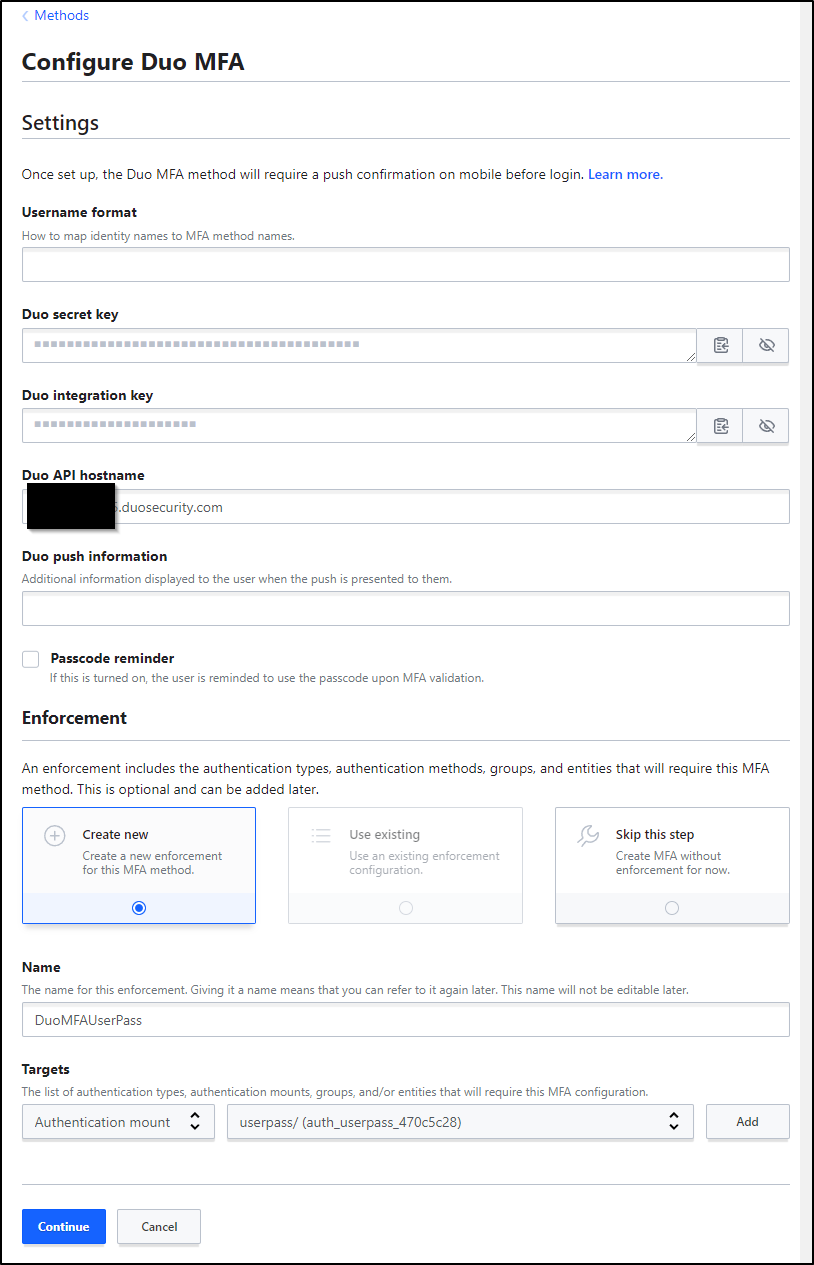
In Duo Admin panel, I’ll need to get a Secret Key, Integration Key and API Hostname. We can get these by going to “Protect and Application” and clicking “Protect” on an “Auth API” application
We’ll copy those values:
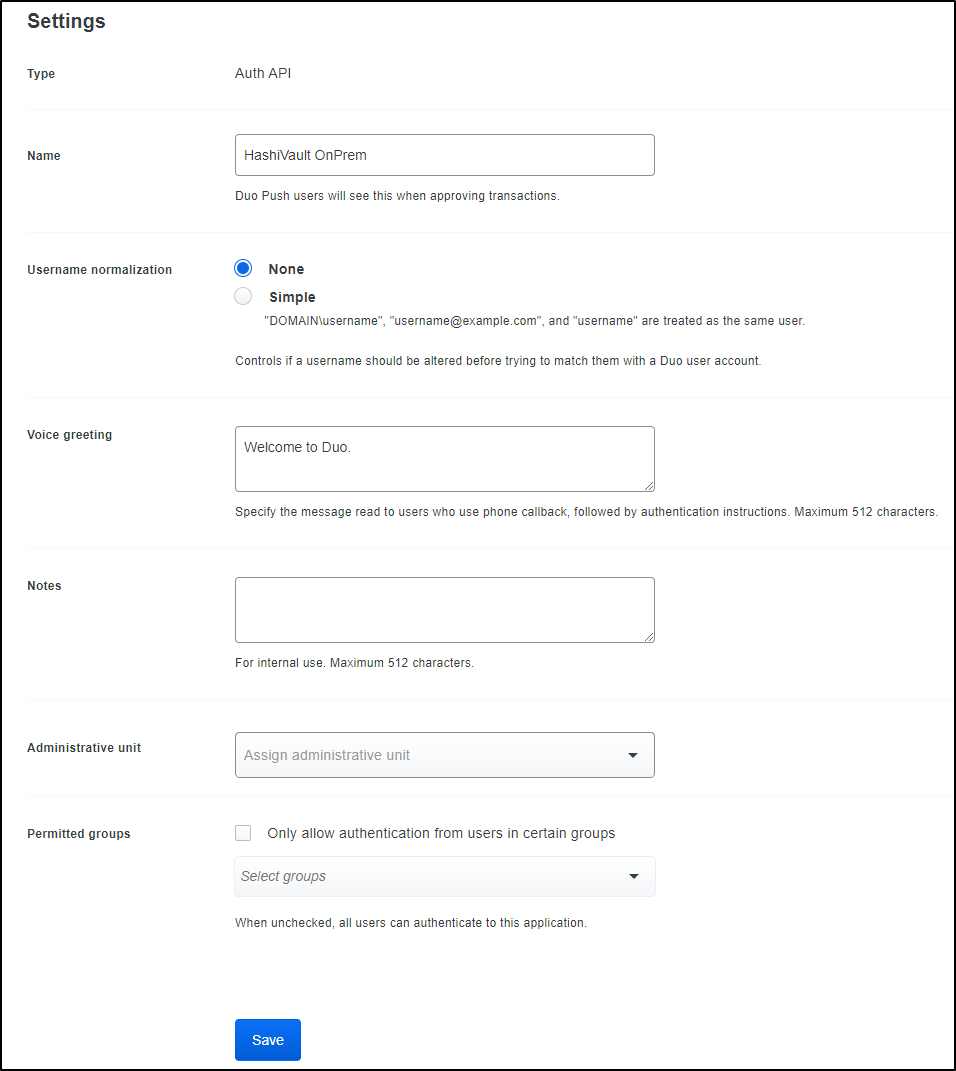
And I’ll give it a name:
Duo User
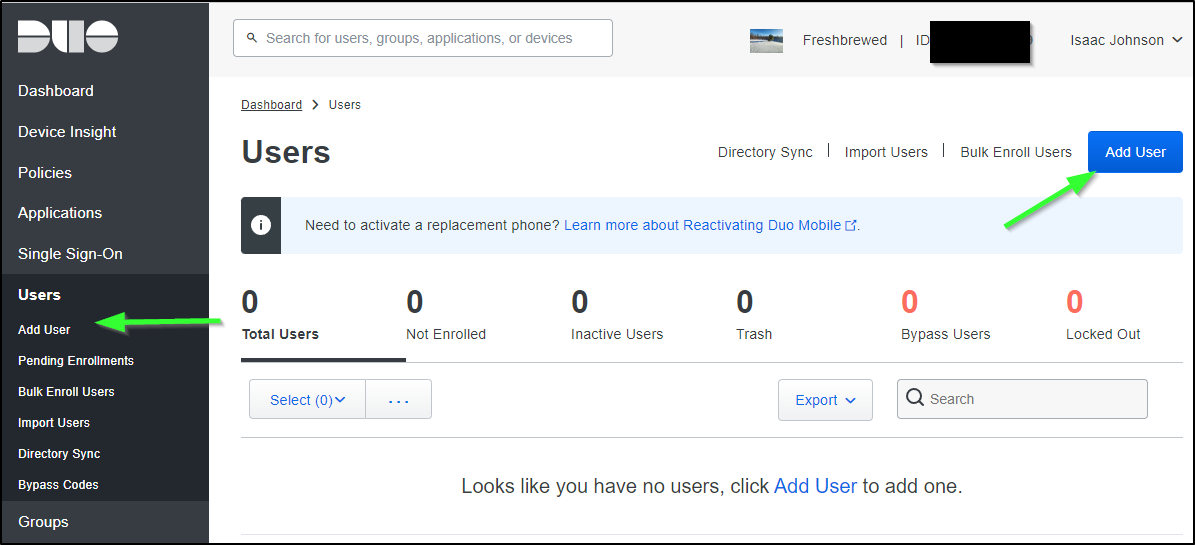
I then need to create a User. We will make our users match what we created in Vault earlier.
I’ll select “Add User”
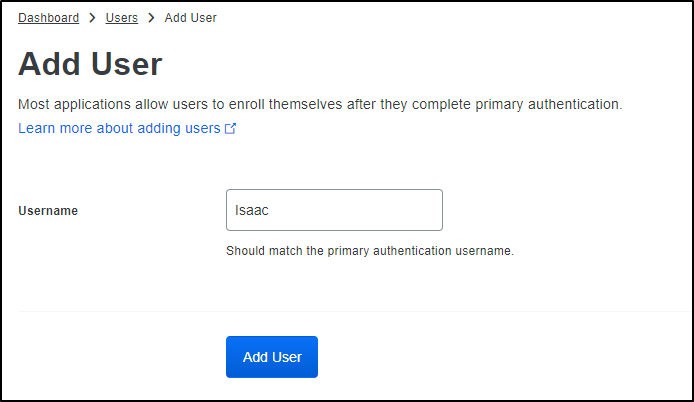
Give it the same username as before
Then give the user, at the very least, an email address

I’ll click “Send Enrollment Email”

I followed the setup and now have an “Admin” Duo profile and a “User” profile.
(Note: it took a few hours for this user to become live when I tested. It could be because I had a brand new account)
Back in Vault#
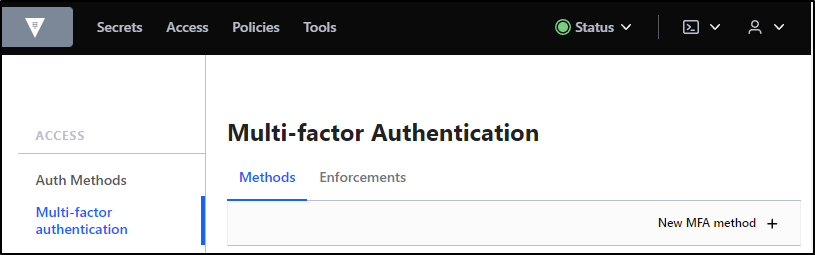
I’ll go to Access and select “Multi-factor authentication”, then click “New MFA method +”
Then click “Next”
I’ll add the Secret key, Integration key and API Hostname.
Lastly, I have to set the Authentication mount to the userpass one we created earlier in the “Enforcement” section.
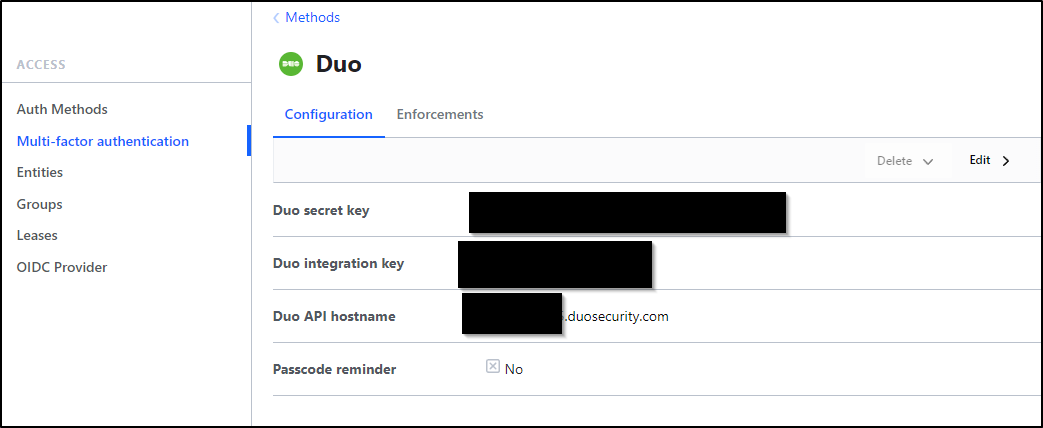
We can now see it is saved.
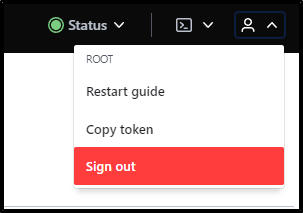
Lastly, I’ll sign out to test.
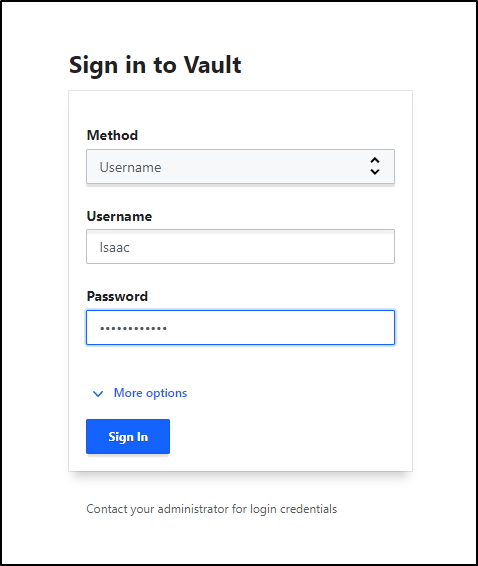
Then when I go to signin, I’ll chose Username this time.
After enrollment completed, I was able to see the Duo prompt.

I continued to get denied on Duo passcode.
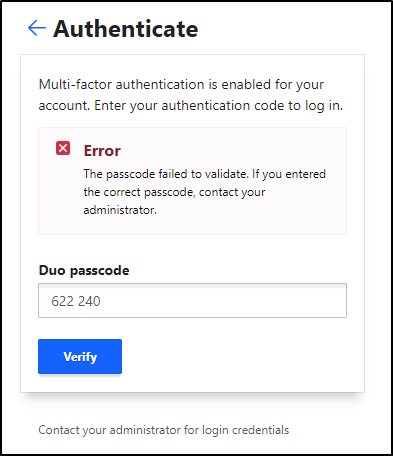
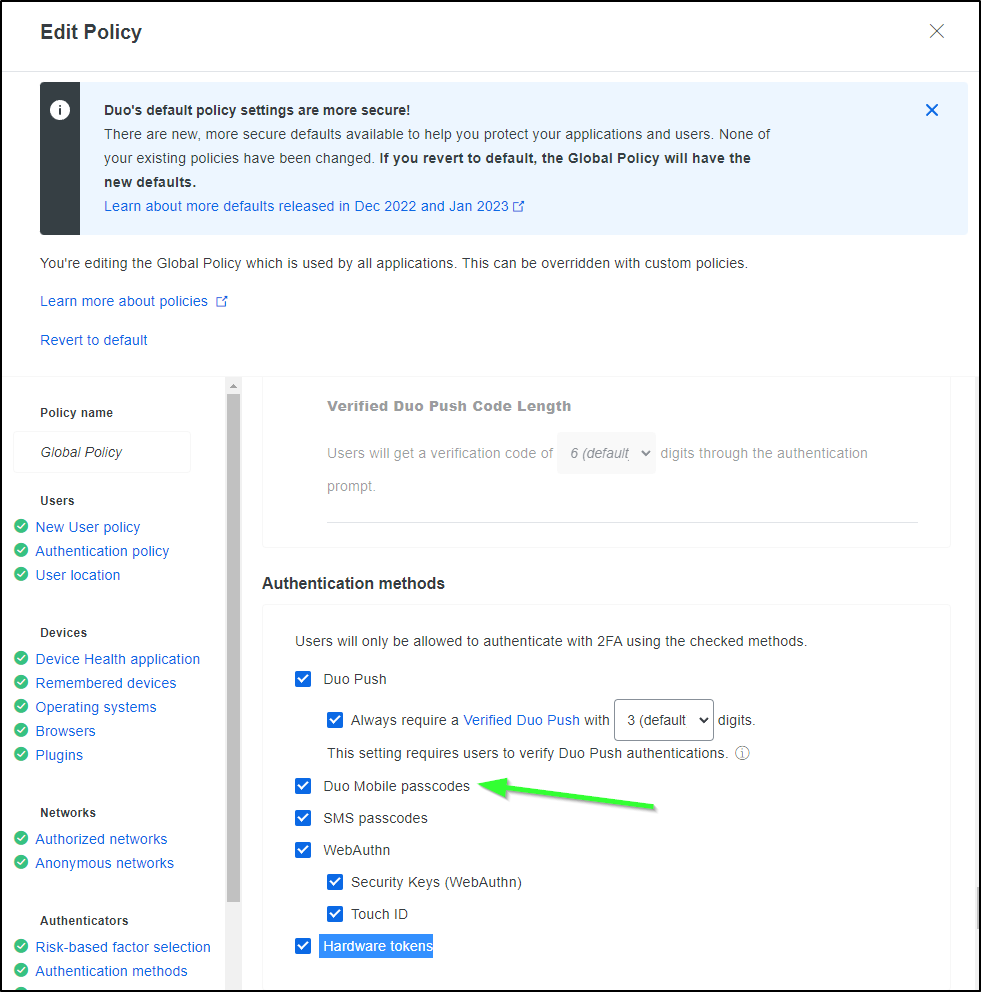
I enabled Passcodes in the global policy.
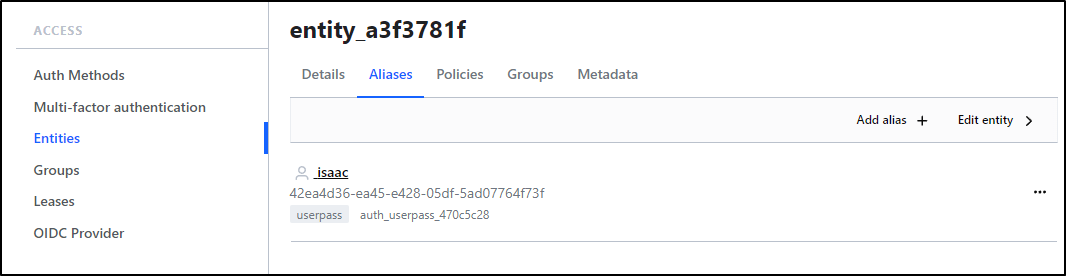
One last nuance; the item passed will be the entity name not the User’s ID.
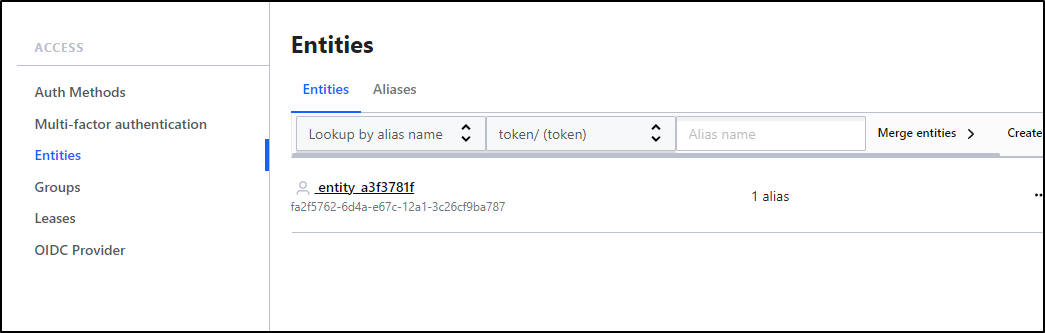
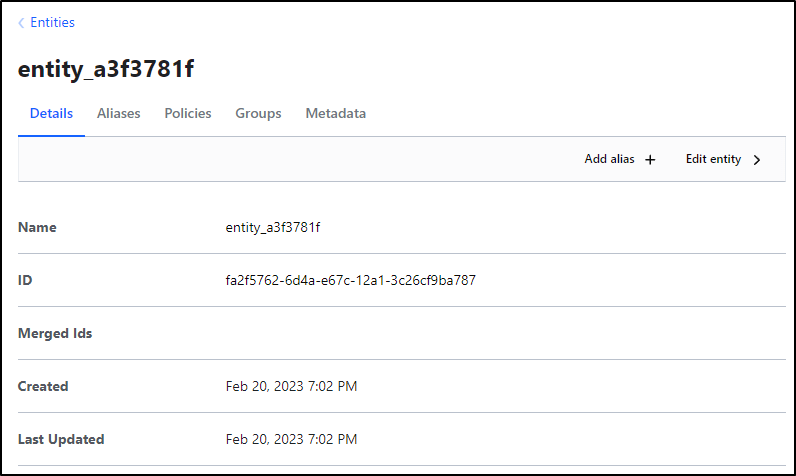
If we go to “Entities”, We can see one was created for our User.
I know this because if I click on the entity and go to “Aliases”
I can see it’s me:
Now we can see the full MFA flow in action.
This works just as well with the CLI.
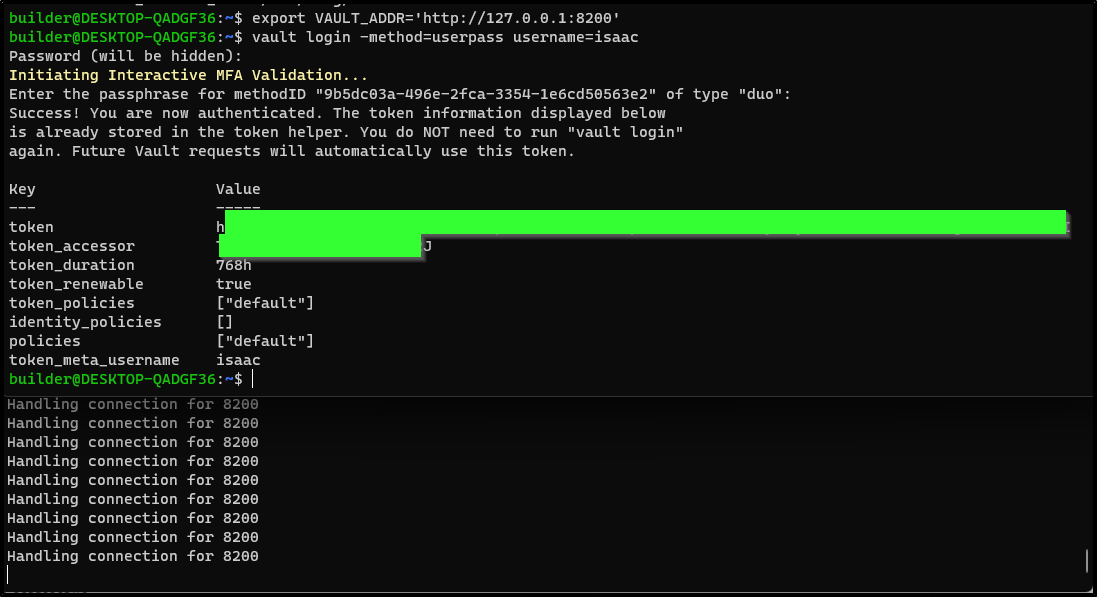
Again, we can see that in action as well:
Ingress
If I wish, I can expose my Vault service externally.
First, I would create an R53 record and apply
$ cat r53-vault.json
{
    "Comment": "CREATE vault fb.s A record ",
    "Changes": [
      {
        "Action": "CREATE",
        "ResourceRecordSet": {
          "Name": "vault.freshbrewed.science",
          "Type": "A",
          "TTL": 300,
          "ResourceRecords": [
            {
              "Value": "73.242.50.46"
            }
          ]
        }
      }
    ]
  }
$ aws route53 change-resource-record-sets --hosted-zone-id Z39E8QFU0F9PZP --change-batch file://r53-vault.json
{
    "ChangeInfo": {
        "Id": "/change/C0527907RMA9WQR6QGNU",
        "Status": "PENDING",
        "SubmittedAt": "2023-02-21T12:28:34.533Z",
        "Comment": "CREATE vault fb.s A record "
    }
}
Then an ingress that points to the Vault service and apply that as well
$ cat ingress-vault.yml
apiVersion: networking.k8s.io/v1
kind: Ingress
metadata:
  annotations:
    cert-manager.io/cluster-issuer: letsencrypt-prod
    kubernetes.io/ingress.class: nginx
    kubernetes.io/tls-acme: "true"
  labels:
    app.kubernetes.io/instance: vault
    app.kubernetes.io/name: vault
  name: vault
  namespace: default
spec:
  rules:
  - host: vault.freshbrewed.science
    http:
      paths:
      - backend:
          service:
            name: vault
            port:
              number: 8200
        path: /
        pathType: ImplementationSpecific
  tls:
  - hosts:
    - vault.freshbrewed.science
    secretName: vault-tls
$ kubectl apply -f ingress-vault.yml
ingress.networking.k8s.io/vault created
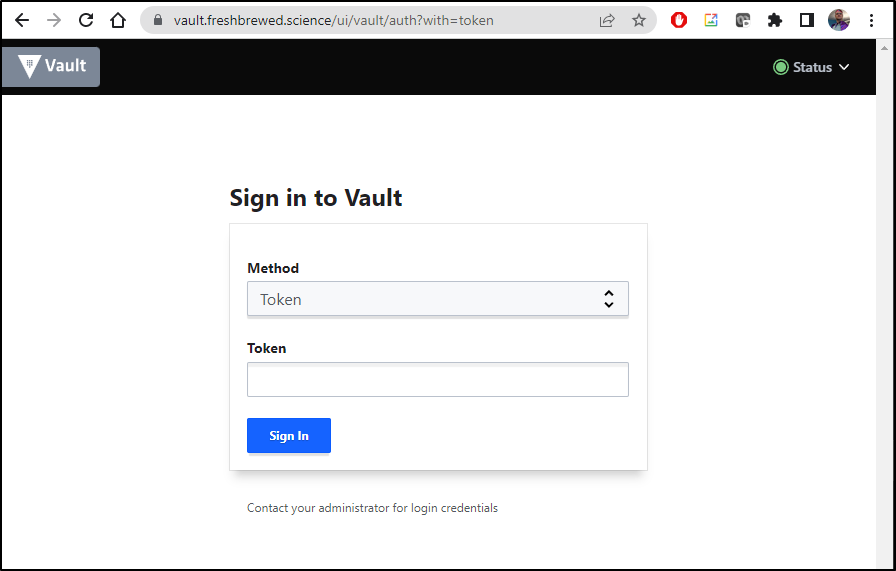
This is now live, but it’s a demo so no real data will be there.
We should be able to restrict by CIDR using the denylist and whitelist annotations as documented here. (e.g. nginx.ingress.kubernetes.io/whitelist-source-range: 192.168.1.0/24). However, in my testing, I did not find they work.
I tried both forms of the annotation and including my local network and external, and it still let me through.
$ cat ingress-vault.yml
apiVersion: networking.k8s.io/v1
kind: Ingress
metadata:
  annotations:
    cert-manager.io/cluster-issuer: letsencrypt-prod
    kubernetes.io/ingress.class: nginx
    kubernetes.io/tls-acme: "true"
    nginx.ingress.kubernetes.io/denylist-source-range: "192.168.0.0/16, 73.242.50.46/32"
    ingress.kubernetes.io/denylist-source-range: "192.168.0.0/16, 73.242.50.46/32"
  labels:
    app.kubernetes.io/instance: vault
    app.kubernetes.io/name: vault
  name: vault
  namespace: default
spec:
  rules:
  - host: vault.freshbrewed.science
    http:
      paths:
      - backend:
          service:
            name: vault
            port:
              number: 8200
        path: /
        pathType: ImplementationSpecific
  tls:
  - hosts:
    - vault.freshbrewed.science
    secretName: vault-tls
Summary
Today we setup Hashi Vault in Kubernetes. To make it more durable, we set up an Azure AKV backend for Auto-unsealing and tested that it worked over a scaling event. We then setup User/Pass authentication with a named users. To make that more secure, we enabled MFA through Duo Security.
Lastly, we exposed the service externally via NGinx with TLS and attempted to restrict with CIDR whitelisting. The idea is that we could use the primary Vault cluster with remote workloads such as another Kubernetes cluster (we covered this using LKE with AKS here).