Published: Feb 14, 2023 by Isaac Johnson
Recently, my colleague at Github pointed out that my method for accessing GCP and Azure was fine, but perhaps a bit dated. There are new ways using OpenID Connect that do not require one to create Service Principals Secret Access Keys that can be used to connect.
Today we’ll tackle not only connecting Github to Azure using OpenID Connect OAuth connections, but also AWS and GCP. We’ll walk through the full process with the idea of “Secrets” access. We’ll show how to access AKV, Parameter Store and Secret Manager in Azure, AWS and GCP, respectively.
OpenID Connect
OIDC stands for OpenID Connect, which is a simple identity layer built as an authentication protocol leveraging the OAuth 2.0 framework. It provides a simple and secure way for authentication and authorization between a client and a server, allowing the client to verify the identity of the end-user, as well as obtain information about the end-user’s attributes, such as name and email.
OIDC uses JSON Web Tokens (JWT) to transmit this information. This provides a flexible mechanism for AuthN and AuthZ’ing users and applications. It followed SAML (2005) and was initiated by Brad Fitzpatrick who founded LiveJournal. It took off in 2008 when both Yahoo and MySpace announced support for it and by 2009 had 1 billion OpenID Accounts enabled.
To be clear, OAuth is about delegated AuthZ whereas OpenID just about AuthN. The authorization is determined really by the supporting system in whatever makes sense to it. That is, OpenID can say in a reliable way, you are who you say your are. The rest is up to your tooling on what to do with that information.
Azure
In Azure, the process is to create an App Registration, the leveraging Certificates, we setup a Federated Credential to Github. That Github OIDC App can then be used in our Github Action.
Steps
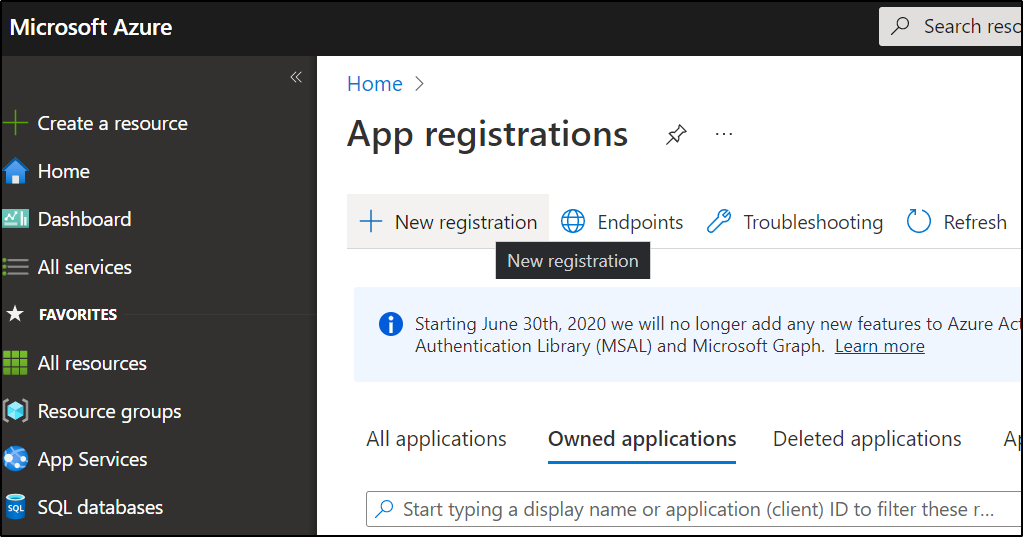
First, in Azure, we’ll go create a new App Registration
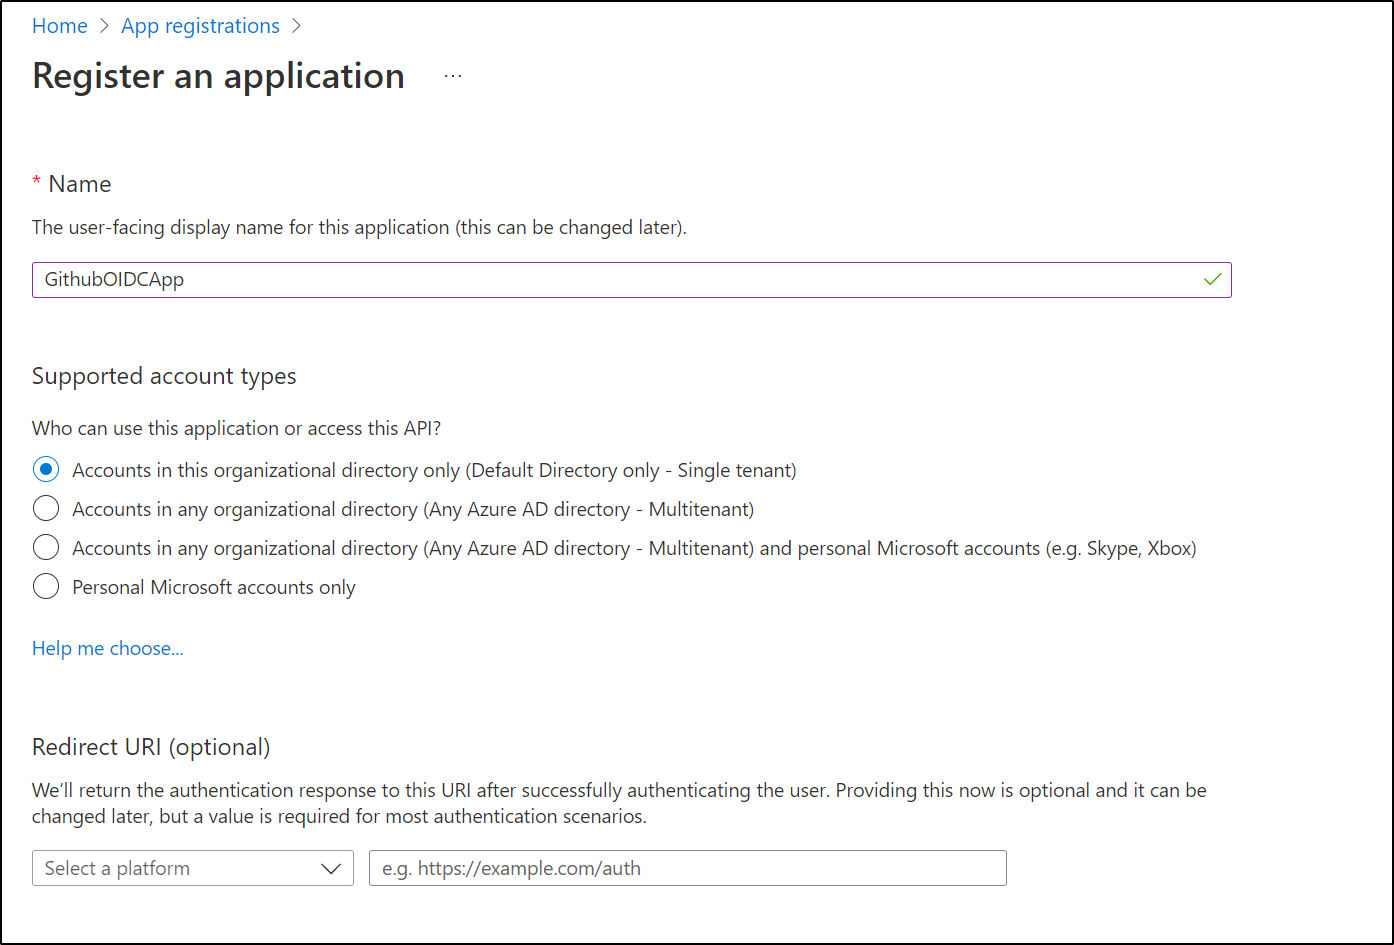
I’ll give it a name and click “Register” at the bottom
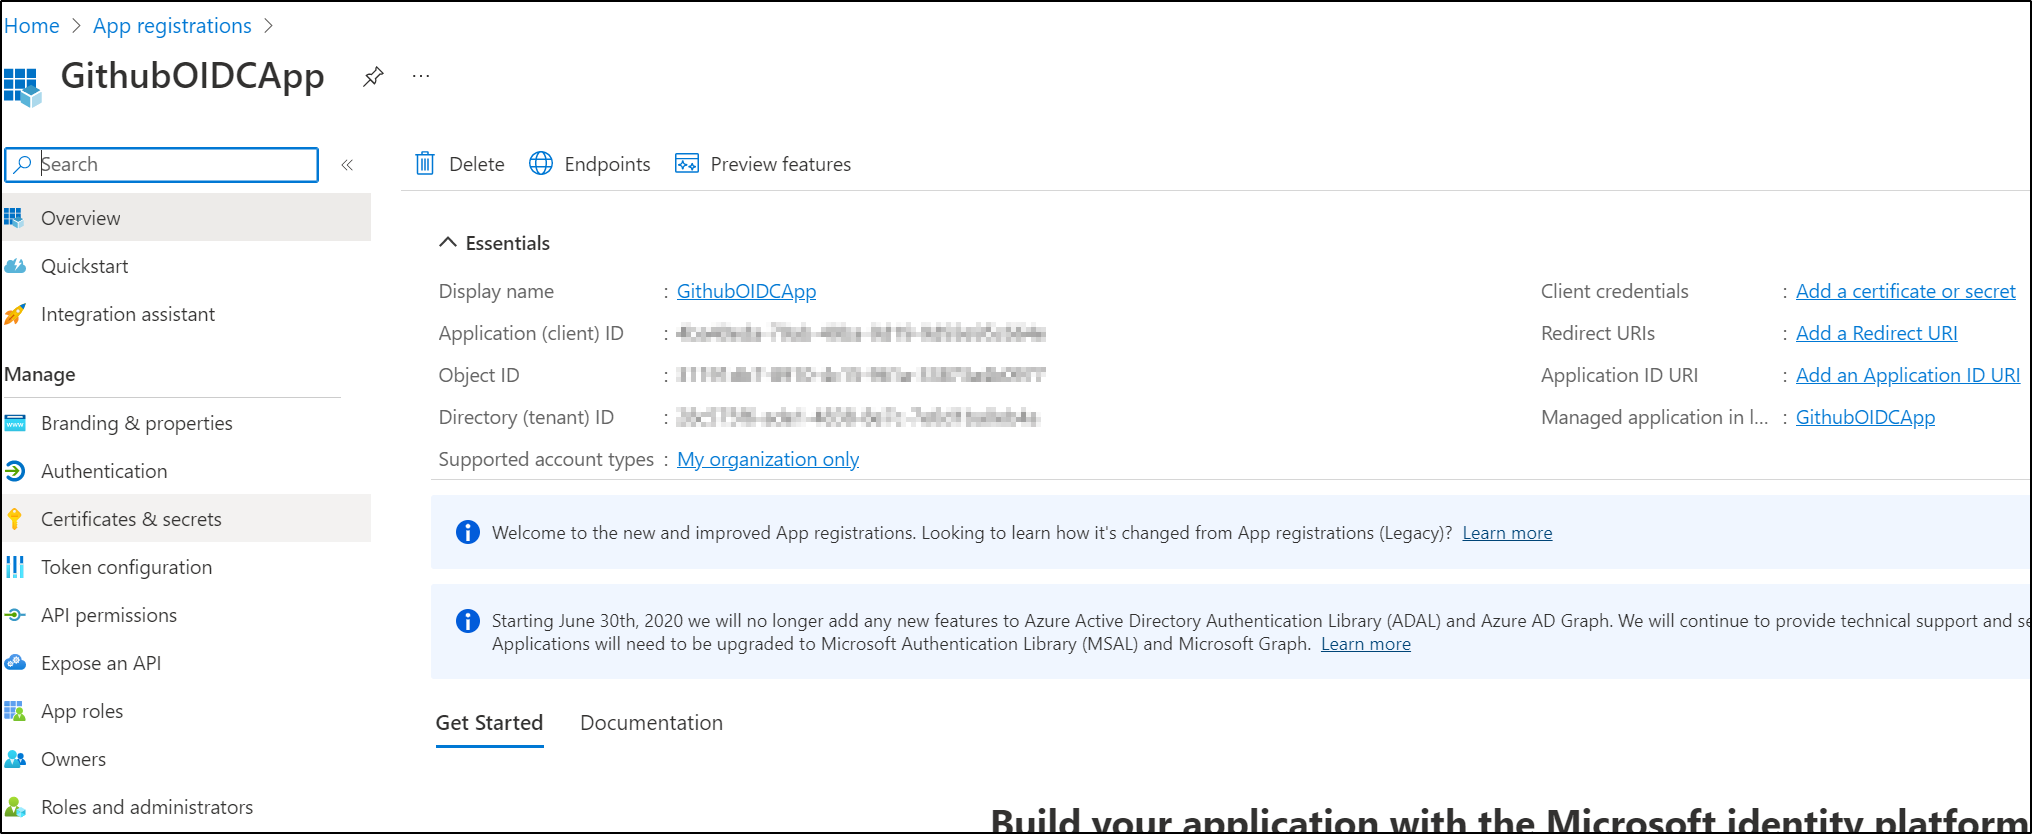
Once created, go to Certificates and Secrets
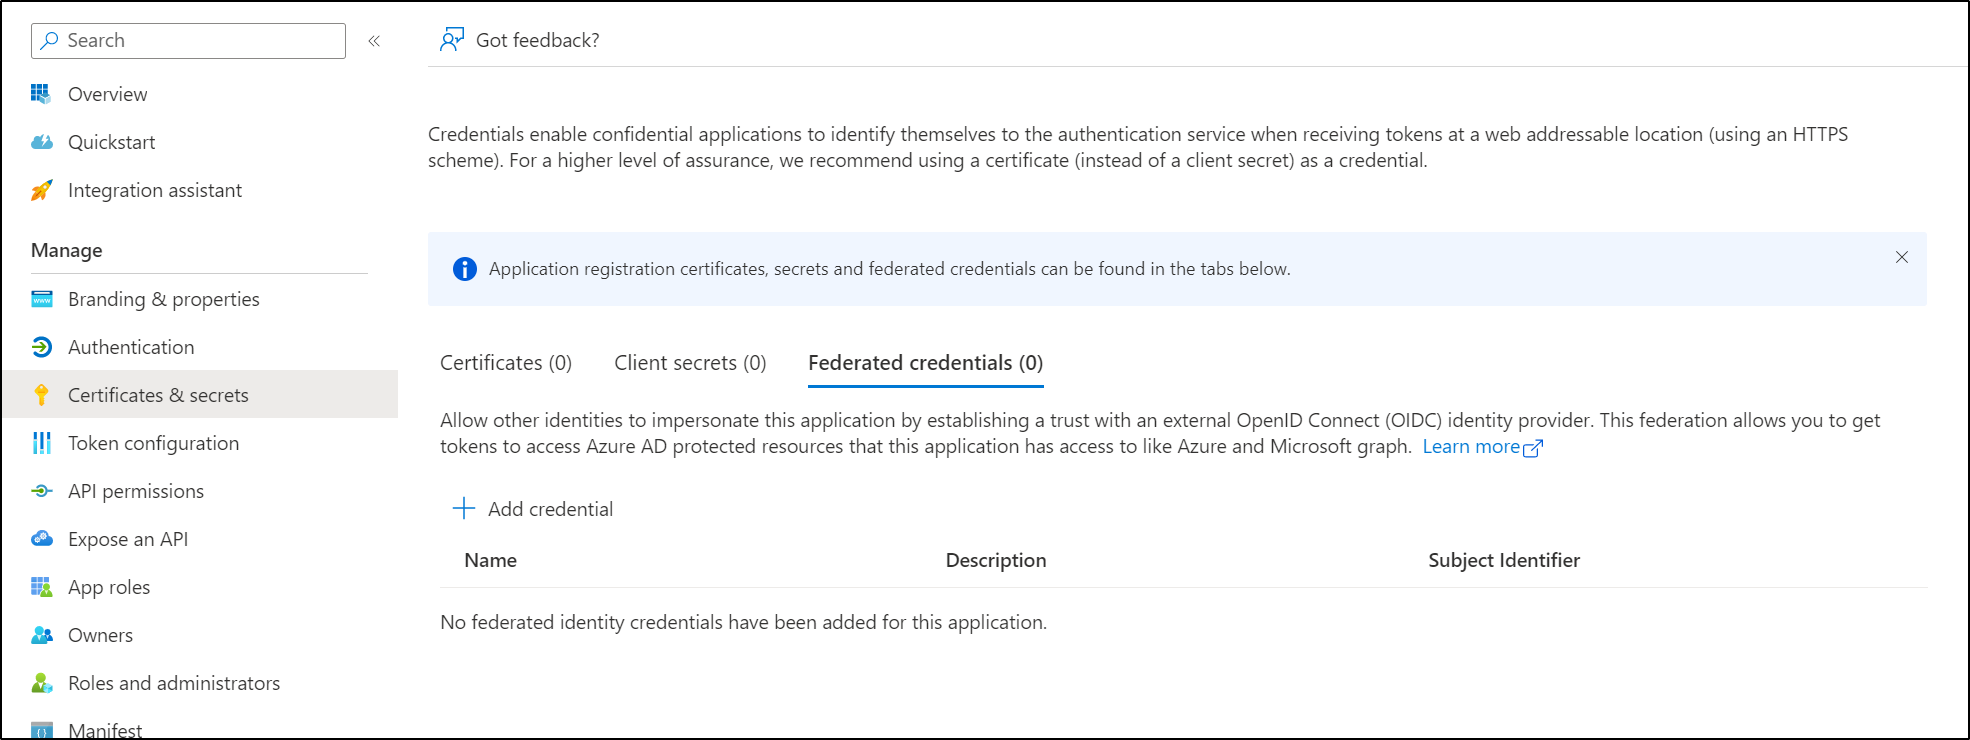
Choose Federated, then “Add Credential”
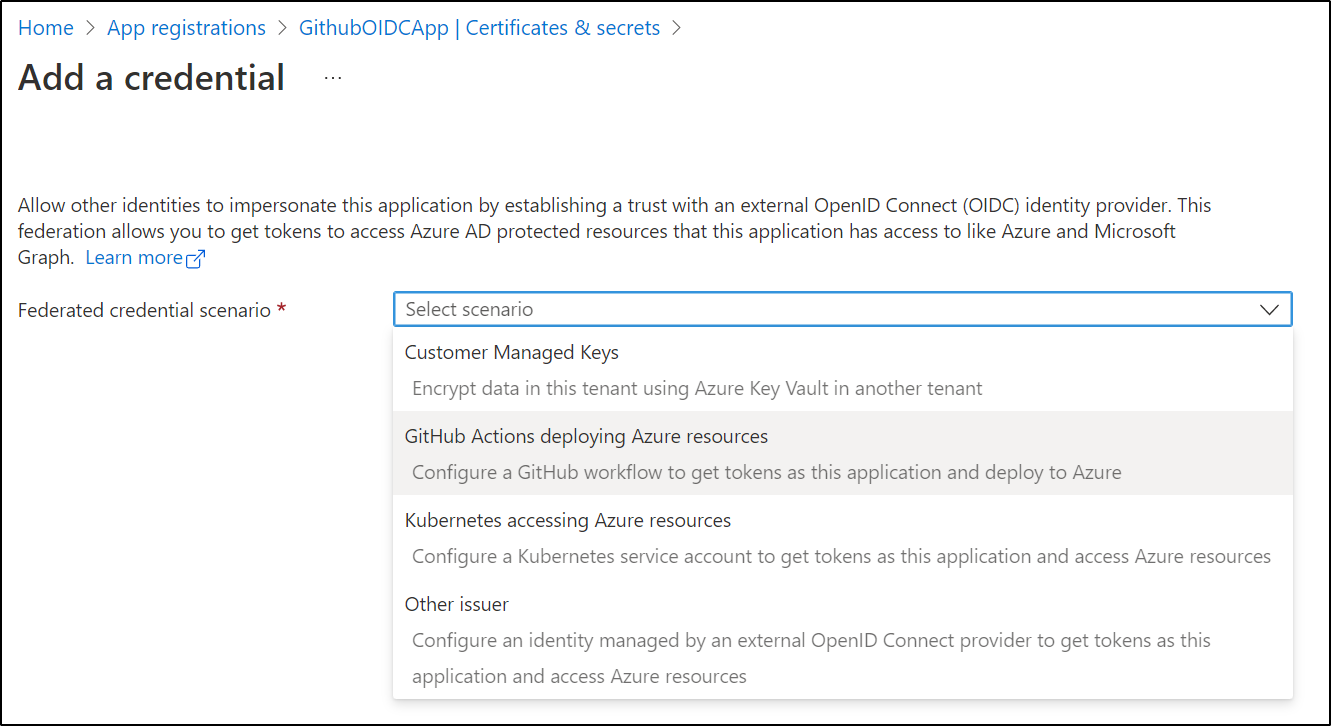
From there, we pick “Github Actions creating Azure Resources” from the list
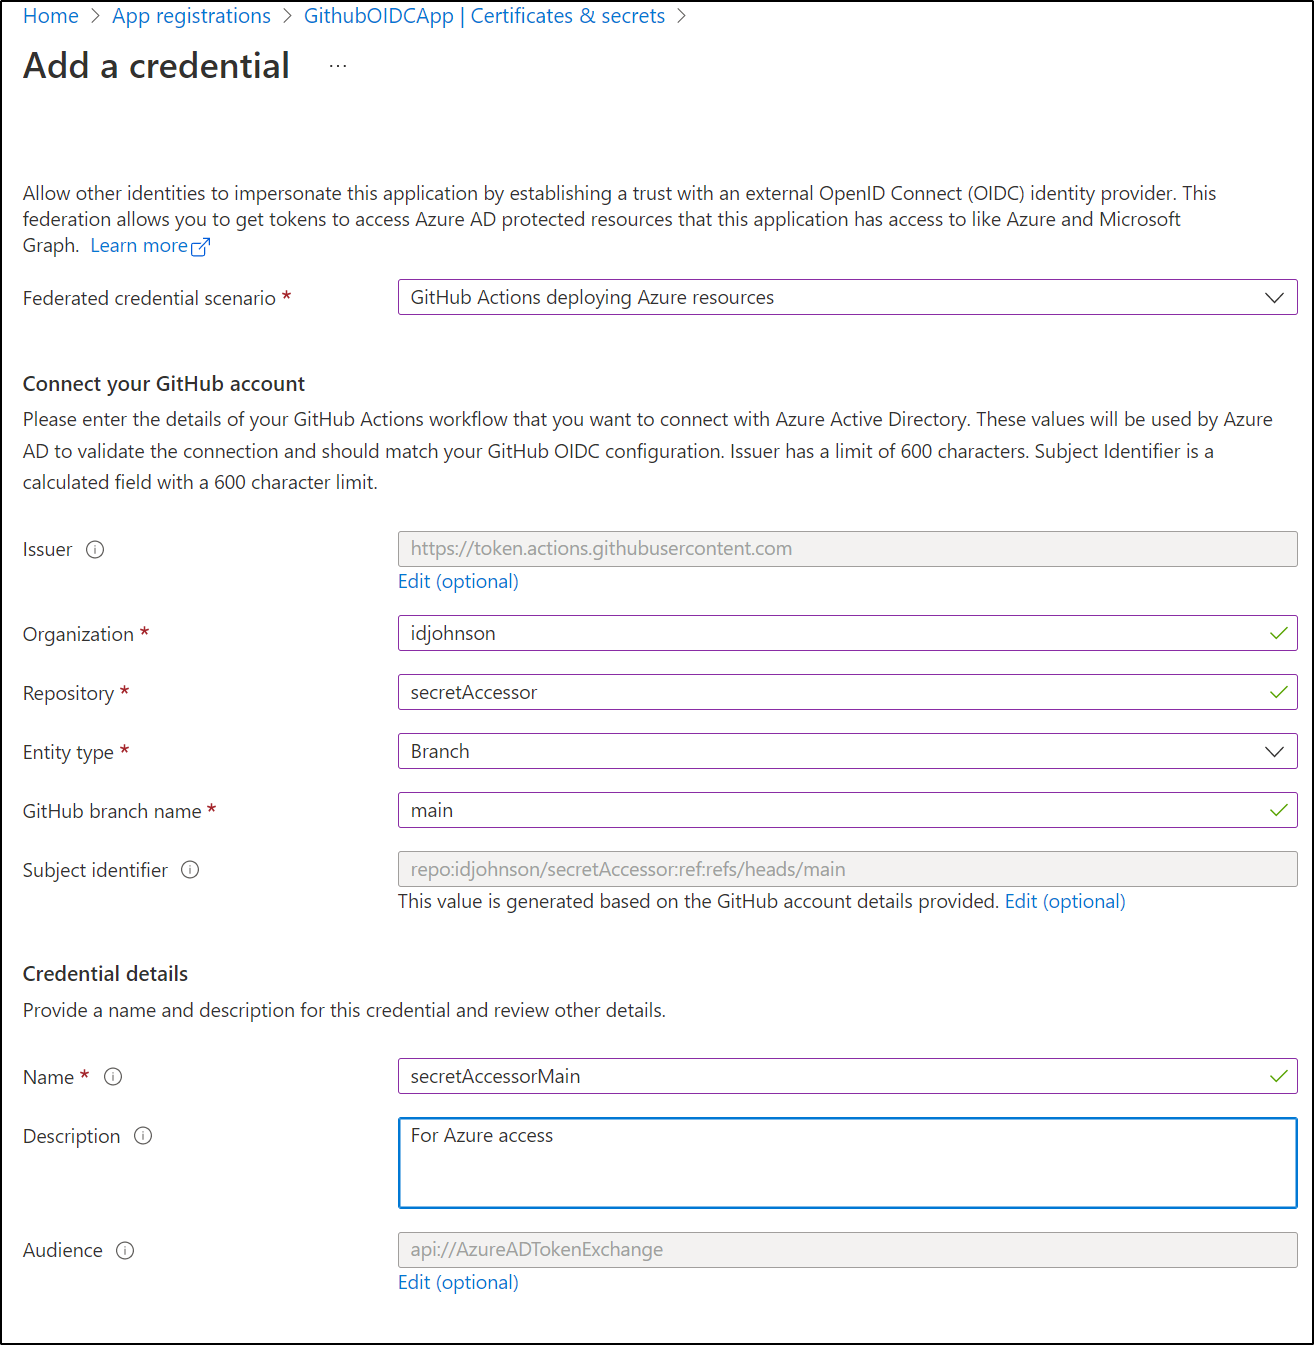
We can decide for what we are granting permission. Here I’ll give it access to the main branch
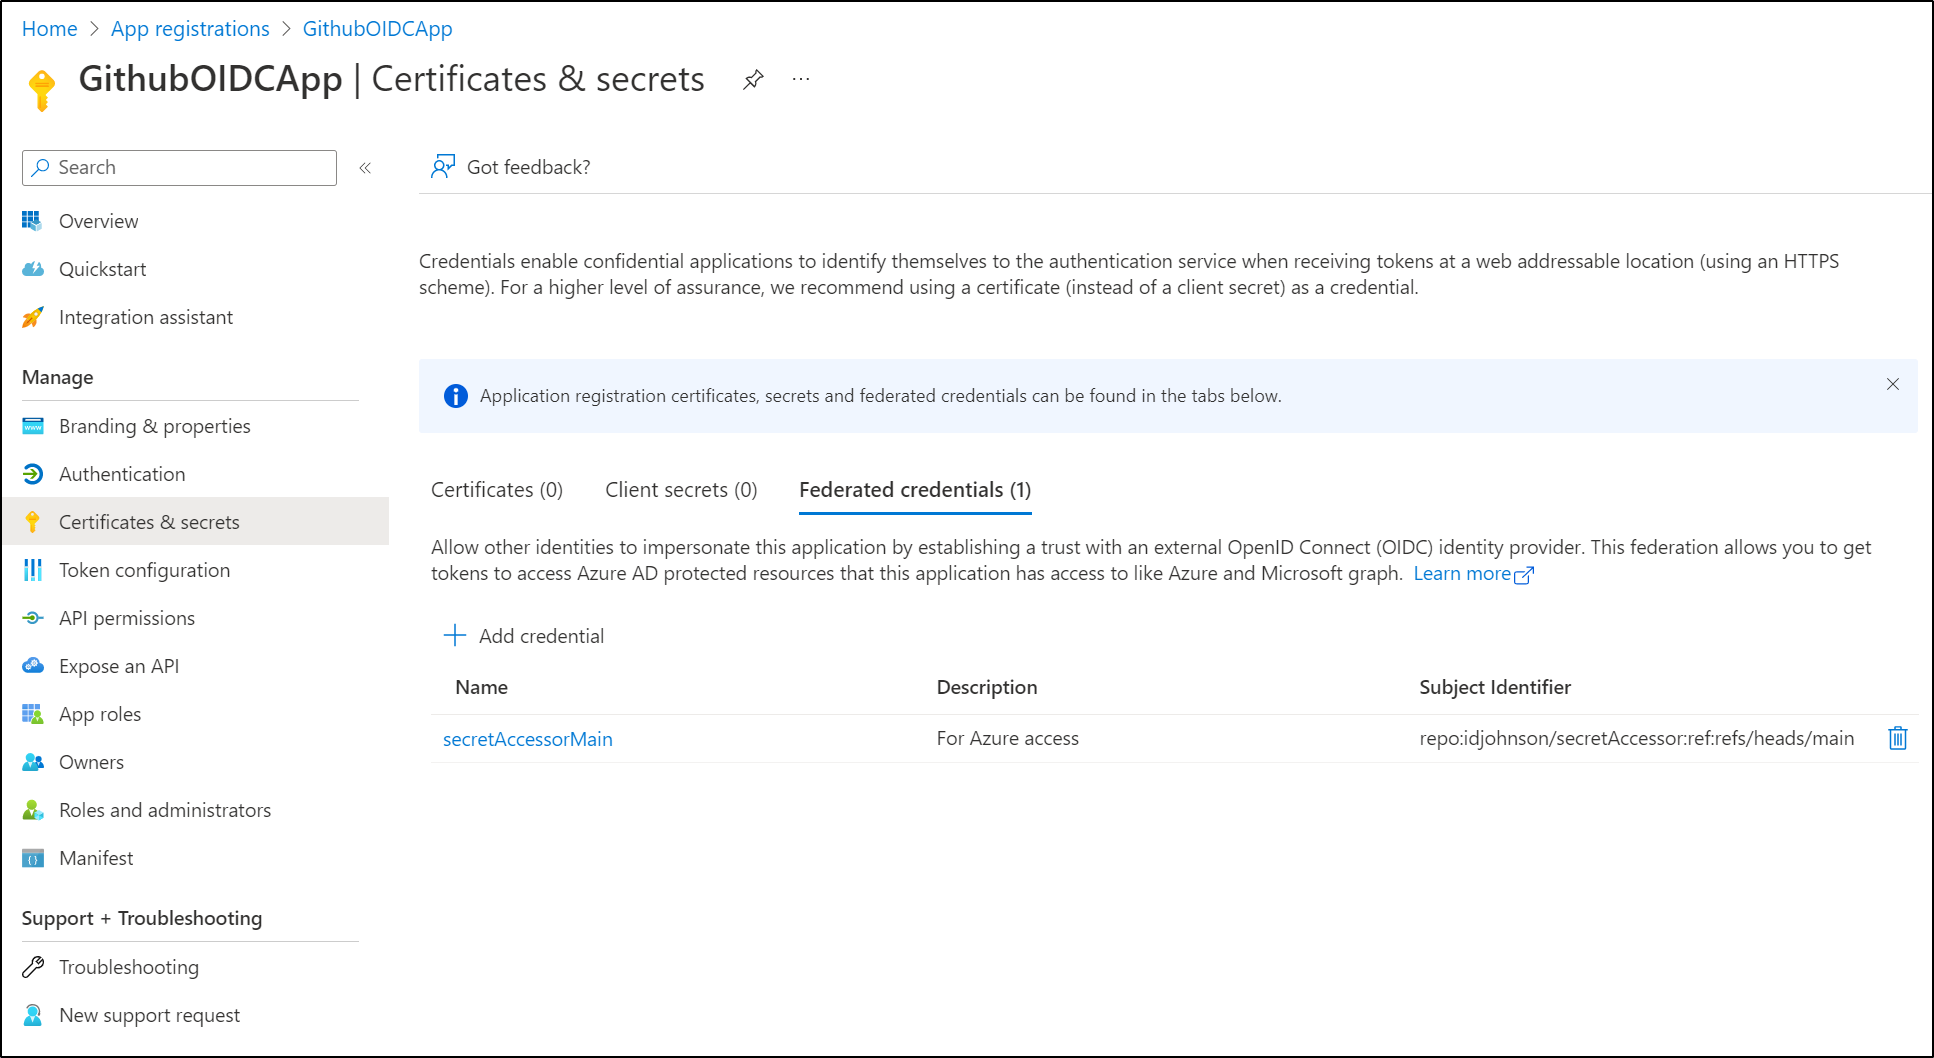
We can now see it has been added
Next, I’ll want to grant access to a resource. We have an identity (GithubOIDCApp), but it has no rights as of yet.
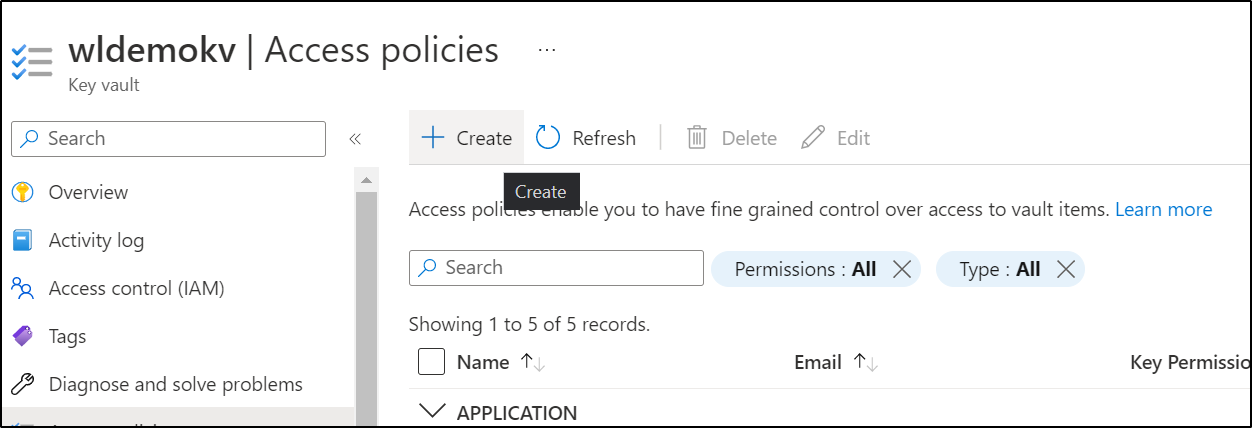
I’ll use an old AKV that has nothing important in it
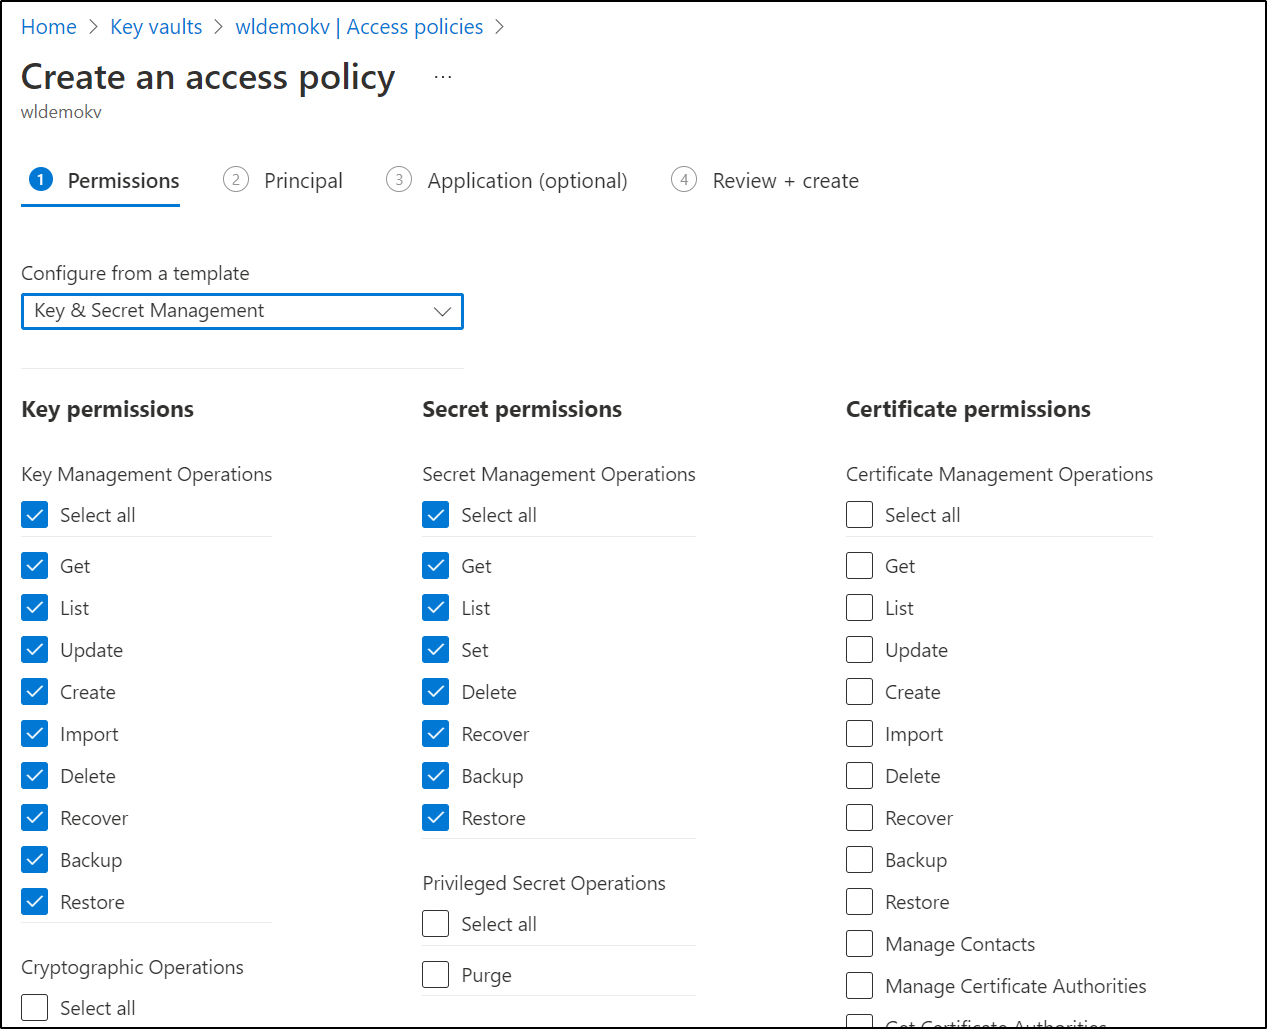
I’ll click create and choose Key and Secret permissions
Using in Github
We’ll now create a Github Action that should work when run from the main branch on the repo we enabled
name: Run Azure Login with OIDC
on: [push]

permissions:
      id-token: write
      contents: read
jobs:
  build-and-deploy:
    runs-on: ubuntu-latest
    steps:
      - name: 'Az CLI login'
        uses: azure/login@v1
        with:
          client-id: '4ba40eda-aaaa-bbbb-cccc-9d93e95c664e'
          tenant-id: '$'
          subscription-id: '$'

      - name: 'Run az commands'
        run: |
          az account show
          az group list
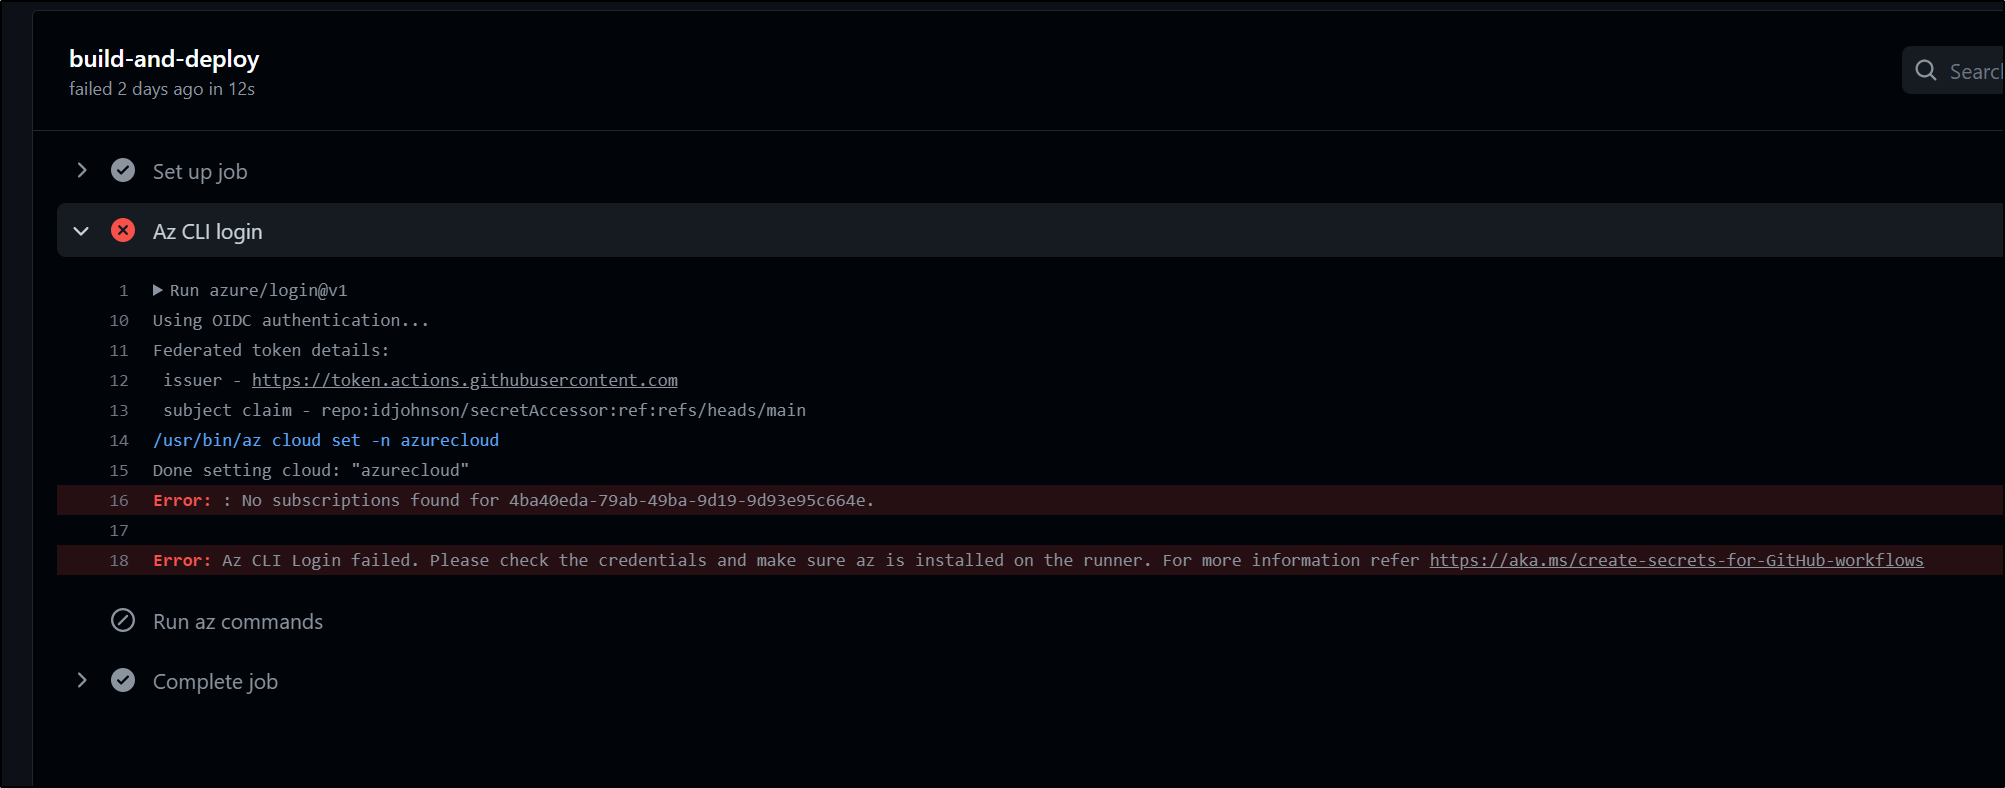
I kept getting errors about no Subscriptions found for the App ID.
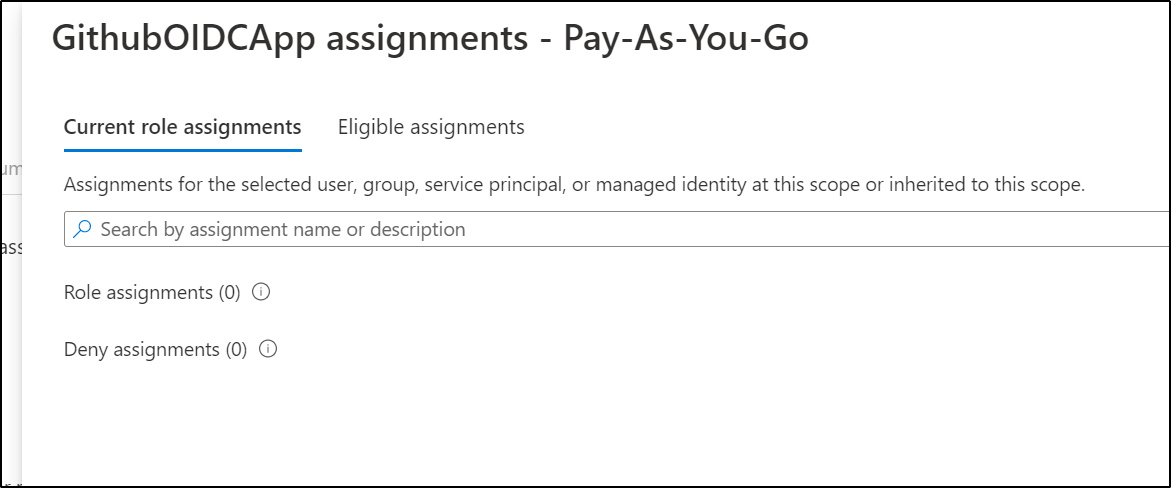
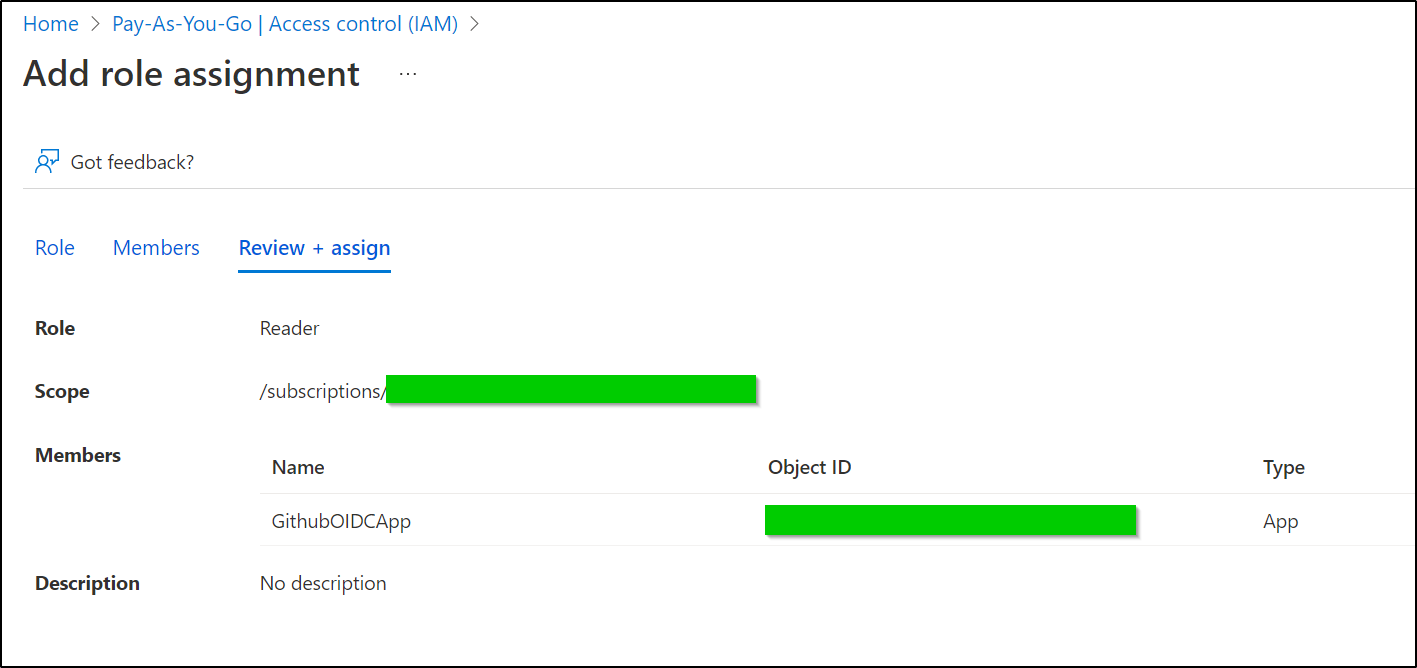
It then dawned on me that I neglected to add the App to our subscription.
At the least, it should be added as a reader
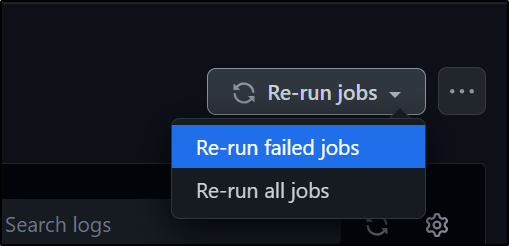
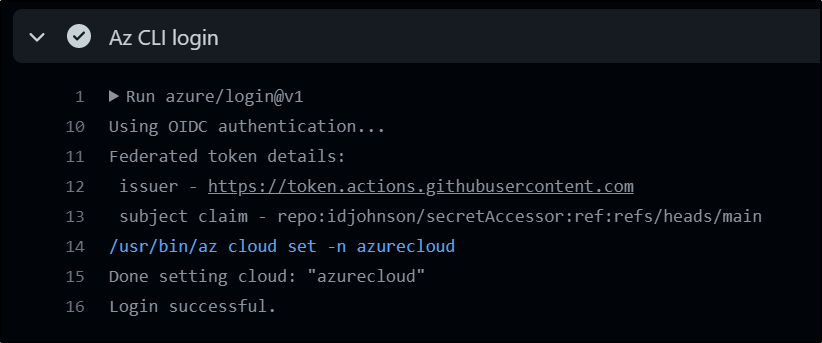
Since I didn’t change code, I’ll just re-run the job
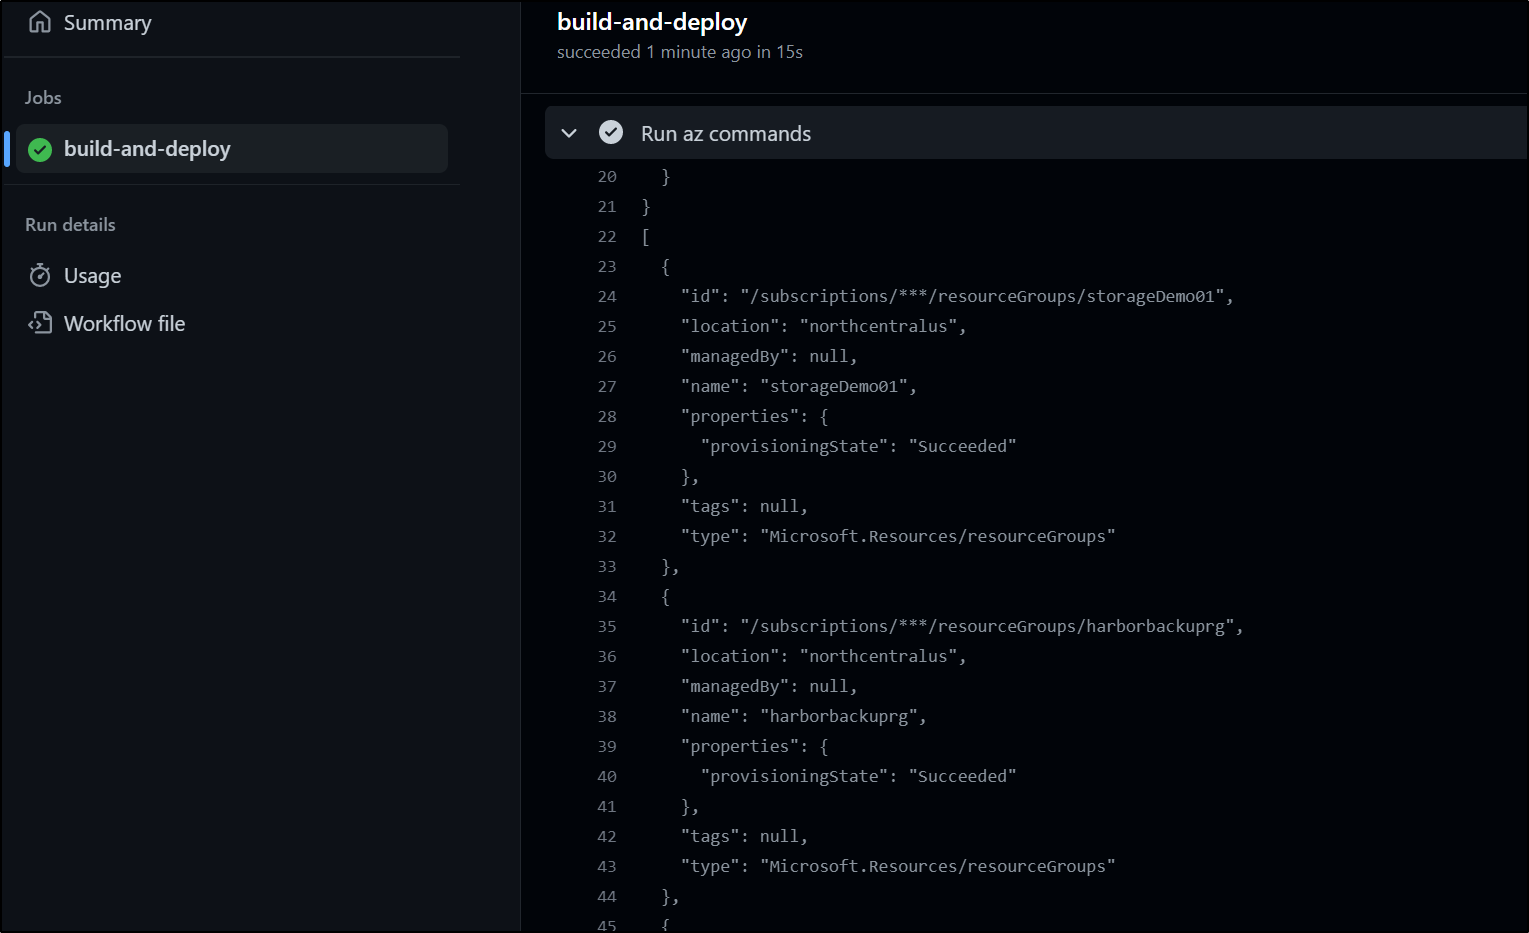
This now works and we can see a listing of our secrets
This means by only providing YAML that indicates our Tenant and Subscription as well as AppID:
name: Run Azure Login with OIDC
on: [push]

permissions:
      id-token: write
      contents: read
jobs:
  build-and-deploy:
    runs-on: ubuntu-latest
    steps:
      - name: 'Az CLI login'
        uses: azure/login@v1
        with:
          client-id: '4ba40eda-aaaa-bbbb-cccc-9d93e95c664e'
          tenant-id: '$'
          subscription-id: '$'

      - name: 'Run az commands'
        run: |
          az account show
          az group list
We know we added only Reader to the subscription. So now we can check our permissions to AKV
      - name: 'Check AKV'
        run: |
          az keyvault secret list --vault wldemokv -o table
I immediately got the error
Run az keyvault secret list --vault wldemokv -o table

ERROR: The user, group or application 'appid=4ba40eda-aaaa-bbbb-cccc-9d93e95c664e;oid=427bedeb-eeee-ffff-1111-c38ef8874f69;iss=https://sts.windows.net/***/' does not have secrets list permission on key vault 'wldemokv;location=eastus'. For help resolving this issue, please see https://go.microsoft.com/fwlink/?linkid=2125287
Error: Process completed with exit code 1.
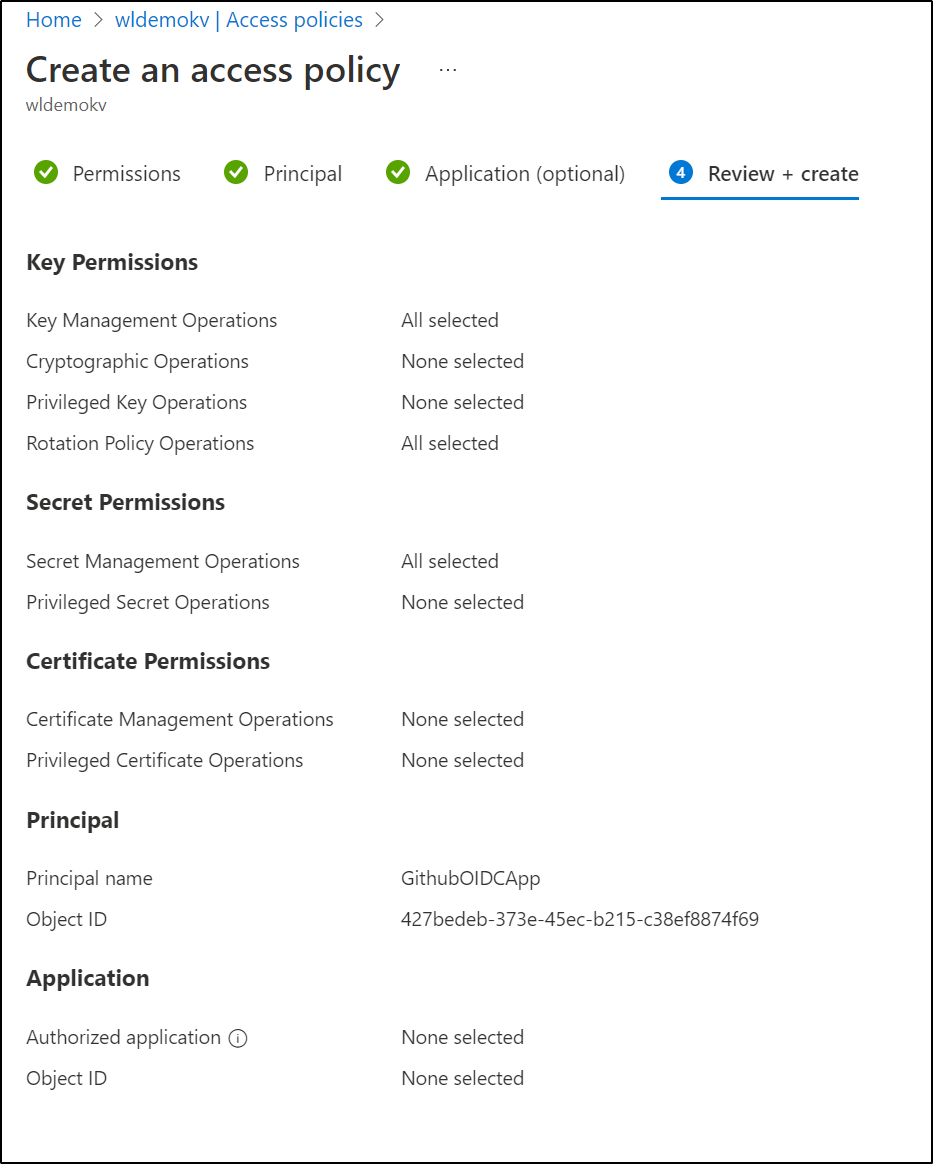
I can’t explain how it was missing in AKV, but indeed the App lacked secrets permissions. I added the Secrets access policy:
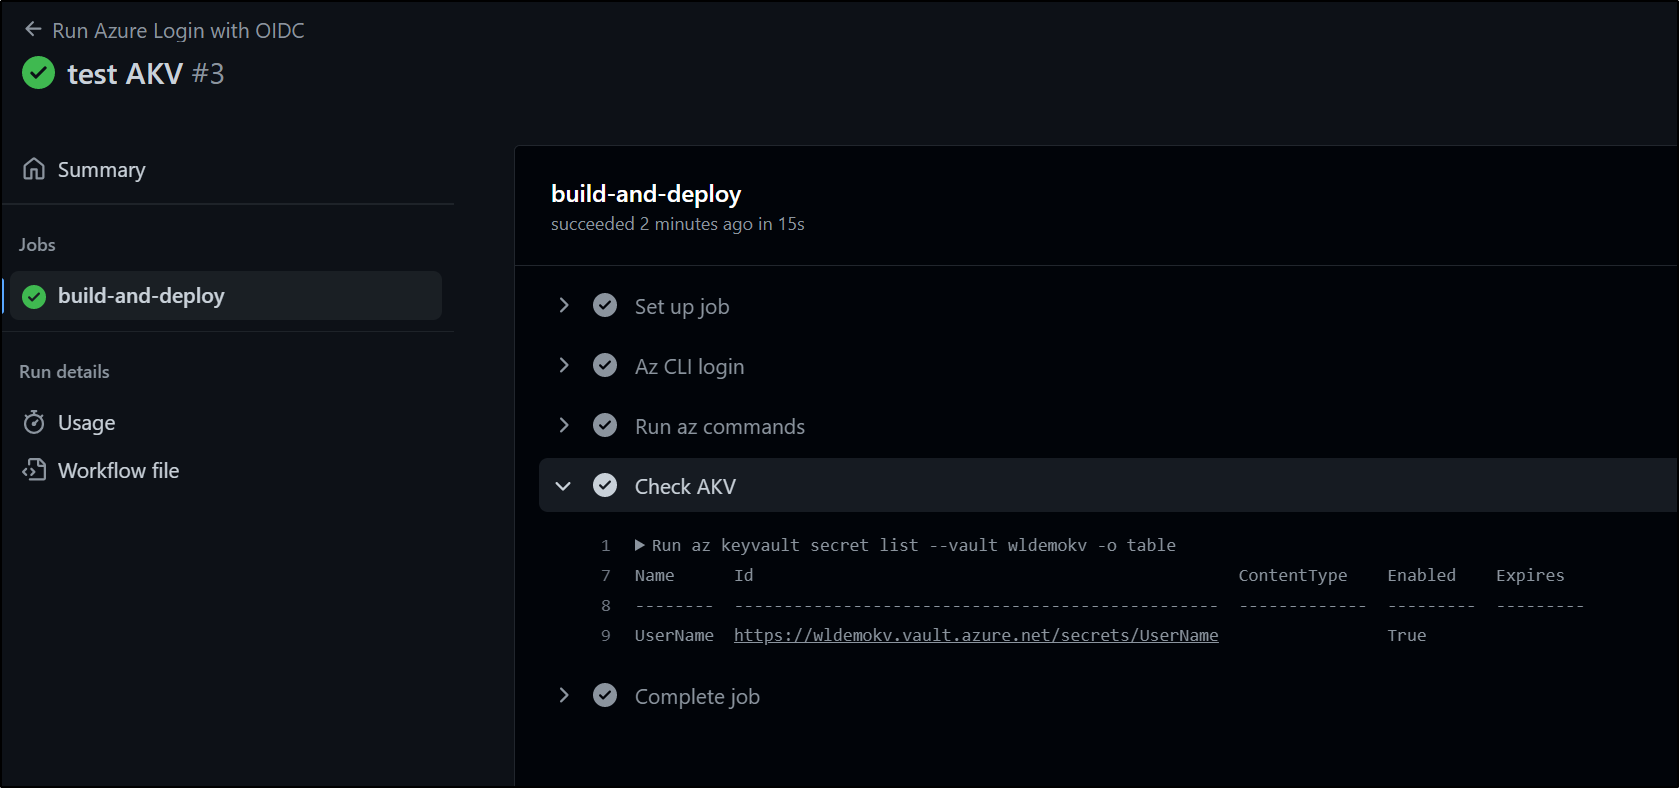
then tried again and showed that solved it
What this means is that we have granted revokable secrets access to a specific Key Vault without ever having to transmit, track or store the secret. The entire transaction happens behind the scenes with the object claim
GCP
In Google Cloud, we’ll create a Service Account like any other identity, then bind that with a newly created Workload Identity Pool. This adds an extra layer of abstraction in that our Service Account ties to a Workload Identity Pool which in turn ties to an OIDC Provider. Permissions and API Access are then applied to the Service Account itself.
Steps
With GCP, we’ll need to first create a Service Account and a Workload Identity Pool.
I’ll start by logging in via the command line
$ gcloud auth login --no-launch-browser
Go to the following link in your browser:

    https://accounts.google.com/o/oauth2/auth?response_type=code&client_id=32555940559.apps.googleusercontent.com&redirect_uri=https%3A%2F%2Fsdk.cloud.google.com%2Fauthcode.html&scope=openid+https%3A%2F%2Fwww.googleapis.com%2Fauth%2Fuserinfo.email+https%3A%2F%2Fwww.googleapis.com%2Fauth%2Fcloud-platform+https%3A%2F%2Fwww.googleapis.com%2Fauth%2Fappengine.admin+https%3A%2F%2Fwww.googleapis.com%2Fauth%2Fsqlservice.login+https%3A%2F%2Fwww.googleapis.com%2Fauth%2Fcompute+https%3A%2F%2Fwww.googleapis.com%2Fauth%2Faccounts.reauth&state=uftzinjdMdKWMi8xo8XQwaH0X5bz2h&prompt=consent&access_type=offline&code_challenge=t-asdfasdfsafsadfasfsadfsafsf&code_challenge_method=S256

Enter authorization code:
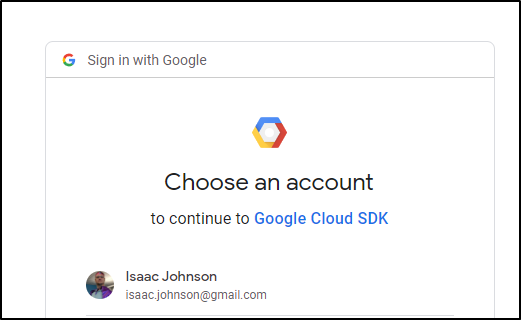
I’ll use the URL in a browser. I’ll pick my identity for GCP
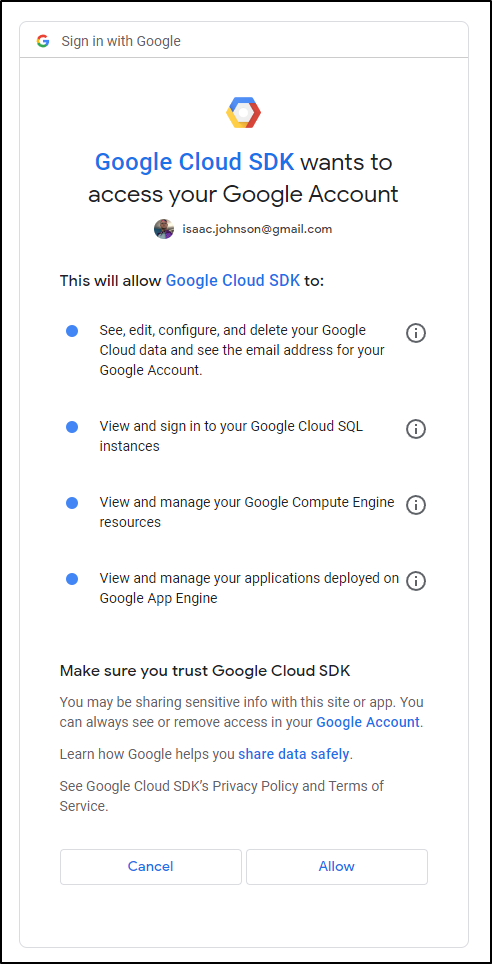
Confirm access
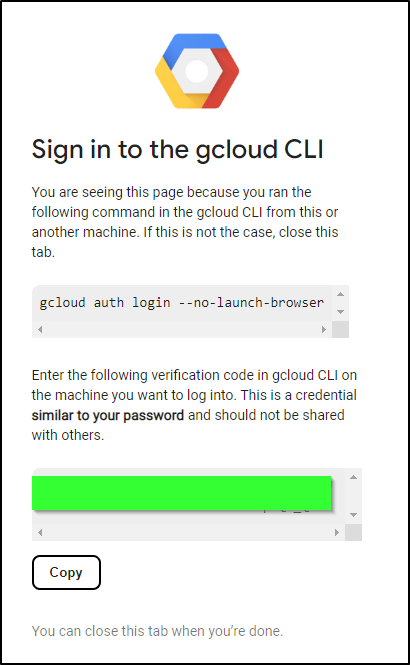
Then get a code I can use for the ‘authorization code’
Enter authorization code:  4/asdfasdfasdfasdfasdfasdfasdfsadfasdsadfsadfasdfasdft_Q

You are now logged in as [isaac.johnson@gmail.com].
Your current project is [gkedemo01].  You can change this setting by running:
  $ gcloud config set project PROJECT_ID
It defaults to an old project, so let’s change that
$ gcloud config set project myanthosproject2
Updated property [core/project].
Create a Workload Identity Pool
First, I’ll create a new pool
$ gcloud iam workload-identity-pools create github-wif-pool --location="global" --project myanthosproject2
Created workload identity pool [github-wif-pool].
Once created, I can add a pool provider
$ gcloud iam workload-identity-pools providers create-oidc githubwif --location="global" --workload-identity-pool="github-wif-pool" --issuer-uri="https://token.actions.githubusercontent.com" --attribute-mapping="attribute.actor=assertion.actor,google.subject=assertion.sub,attribute.repository=assertion.repository" --project myanthosproject2
Created workload identity pool provider [githubwif].
Creating a Service Account
Let’s create a Service Account in IAM we can use
$ gcloud iam service-accounts create test-wif --display-name="Service account used by FB POC" --project myanthosproject2
Created service account [test-wif].
Permissions
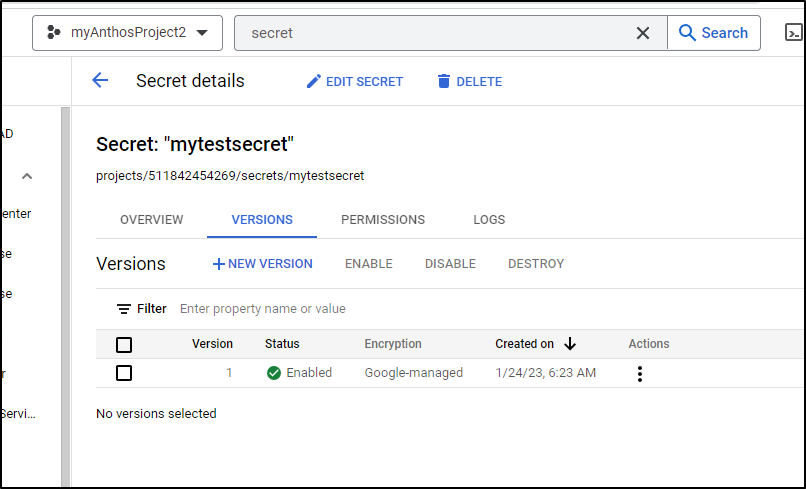
Since I want this SA to view a given secret:
I’ll create a fresh IAM policy binding
$ gcloud projects add-iam-policy-binding myanthosproject2 --member='serviceAccount:test-wif@myanthosproject2.iam.gserviceaccount.com' --role="roles/secretmanager.secretAccessor"

$ gcloud projects add-iam-policy-binding myanthosproject2 --member='serviceAccount:test-wif@myanthosproject2.iam.gserviceaccount.com' --role="roles/secretmanager.viewer"

$ gcloud beta secrets add-iam-policy-binding projects/9876543210/secrets/mytestsecret --member='serviceAccount:test-wif@myanthosproject2.iam.gserviceaccount.com' --role="roles/secretmanager.secretAccessor"
Updated IAM policy for secret [mytestsecret].
bindings:
- members:
  - serviceAccount:myGithubOIDCSA@myanthosproject2.iam.gserviceaccount.com
  - serviceAccount:test-wif@myanthosproject2.iam.gserviceaccount.com
  role: roles/secretmanager.secretAccessor
etag: BwX0ZCtRtUM=
version: 1
Policy Binding
The last mile is to type the service account to the policy binding and role.
Now add the policy binding
$ gcloud iam service-accounts add-iam-policy-binding test-wif@myanthosproject2.iam.gserviceaccount.com --project=myanthosproject2 --role="roles/iam.workloadIdentityUser" --member="principalSet://iam.googleapis.com/projects/9876543210/locations/global/workloadIdentityPools/github-wif-pool/attribute.repository/idjohnson/secretAccessor"
Updated IAM policy for serviceAccount [test-wif@myanthosproject2.iam.gserviceaccount.com].
bindings:
- members:
  - principalSet://iam.googleapis.com/projects/9876543210/locations/global/workloadIdentityPools/github-wif-pool/attribute.repository/idjohnson/secretAccessor
  role: roles/iam.workloadIdentityUser
etag: BwX0ZEHVW5g=
version: 1
We can now put it together to use in our Github Workflow
name: Run GCP Login with OIDC
on: [push]

permissions:
      id-token: write
      contents: read

jobs:
  build:
    name: "Test Build 2"
    runs-on: ubuntu-latest
    timeout-minutes: 90
    permissions:
      contents: 'read'
      id-token: 'write'
    steps:
      - name: Checkout
        uses: actions/checkout@v2

      - id: auth
        uses: google-github-actions/auth@v1
        with:
          token_format: "access_token"
          create_credentials_file: true
          activate_credentials_file: true
          workload_identity_provider: 'projects/9876543210/locations/global/workloadIdentityPools/github-wif-pool/providers/githubwif'
          service_account: 'test-wif@myanthosproject2.iam.gserviceaccount.com'
          access_token_lifetime: '100s'
      - name: Set up Cloud SDK
        uses: google-github-actions/setup-gcloud@v0.3.0
      - name: set credential_file
        run: gcloud auth login --cred-file=$
      - name: Run gcloud
        run: gcloud secrets list --project=myanthosproject2
      - name: 'Access secret'
        run: |-
          set -x
          # Try and fetch a secret
          curl https://secretmanager.googleapis.com/v1/projects/9876543210/secrets/mytestsecret/versions/1:access \
            --header "Authorization: Bearer $"
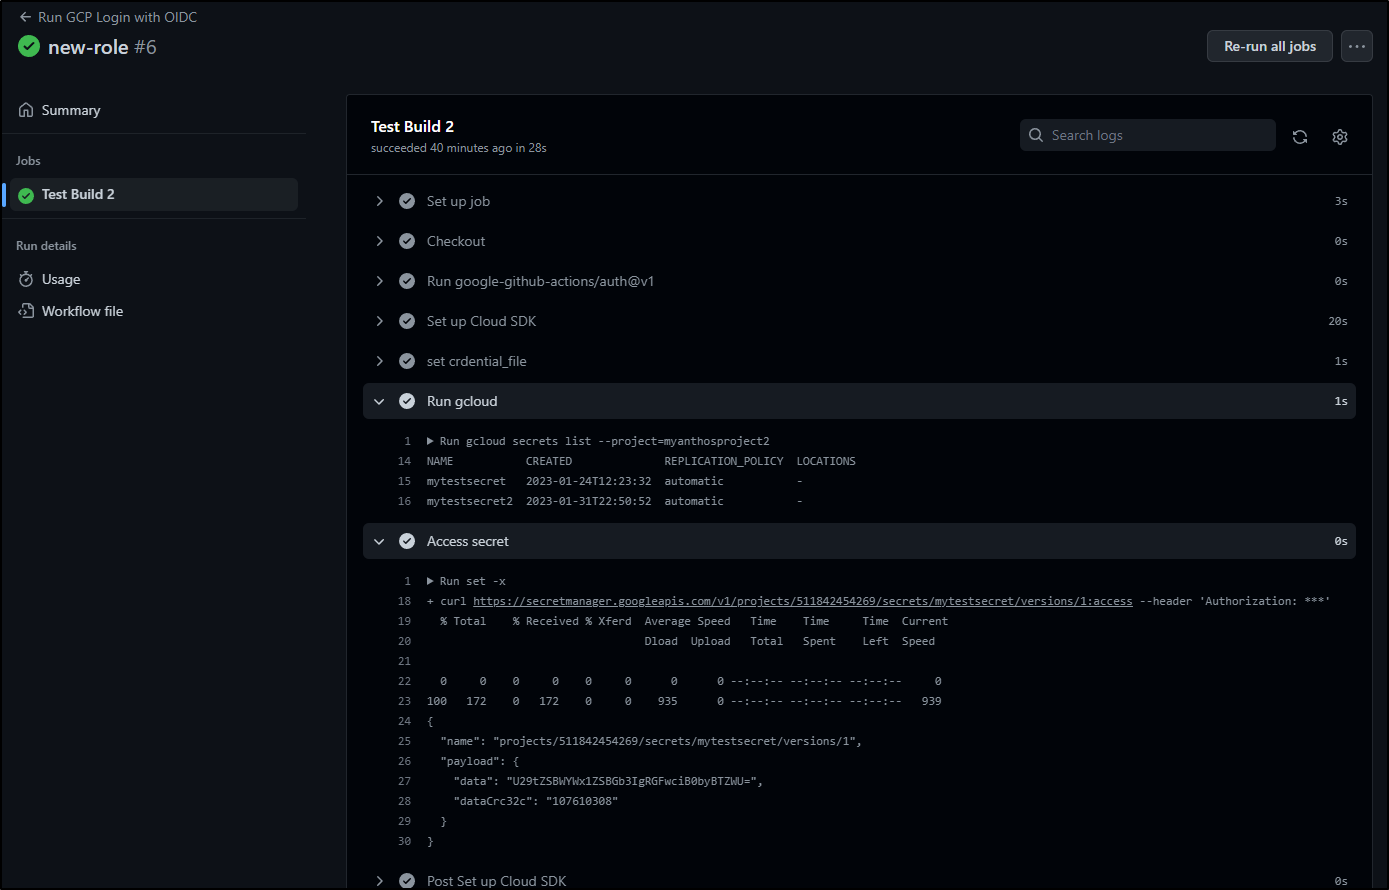
You’ll see we are doing two things here:
- Listing the secrets in this project using
gcloud secrets list - Using the REST API to view the value of one particular secret with
curl
They both leverage the auth step.
I should point out that the more normal approach on the workload_identity_provider and service_account would be to use secrets (but I left them plain text for readability).
    workload_identity_provider: $
    service_account: $
When run, we can see listed the secrets and the secret value without issue
And we can decode the value
$ echo U29tZSBWYWx1ZSBGb3IgRGFwciB0byBTZWU= | base64 --decode
Some Value For Dapr to See
AWS
In AWS, the OpenID Connect Provider is in a special “Identity Providers” area of AWS IAM. There, we will create an OpenID Connect provider with a URL and Audience, and a thumbprint (which is a calculated checksum on part of the SSL). This adds some extra security, but it pushed me into using the AWS Console. This provider is then tied to a Role which in turn is tied to Policies that grant access and actions in our AWS account.
Steps
This would work, if we had the Thumbprint list
aws iam create-open-id-connect-provider --url https://token.actions.githubusercontent.com --client-id-list ["sts.amazonaws.com"]
One can go through a lot of steps to get that (see guide).
However, from this guide I discovered the value is 6938fd4d98bab03faadb97b34396831e3780aea1.
However, that too, however, gave an error
$ aws iam create-open-id-connect-provider --url https://token.actions.githubusercontent.com --client-id-list ["sts.amazonaws.com"] --thumbprint-list ["6938fd4d98bab03faadb97b34396831e3780aea1"]

Expecting value: line 1 column 2 (char 1)
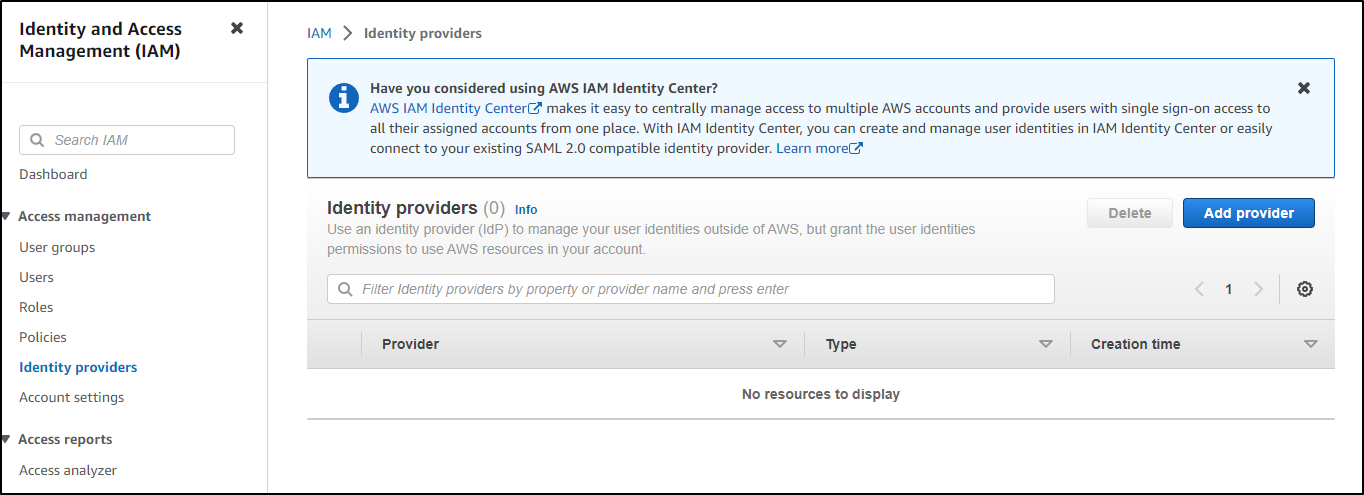
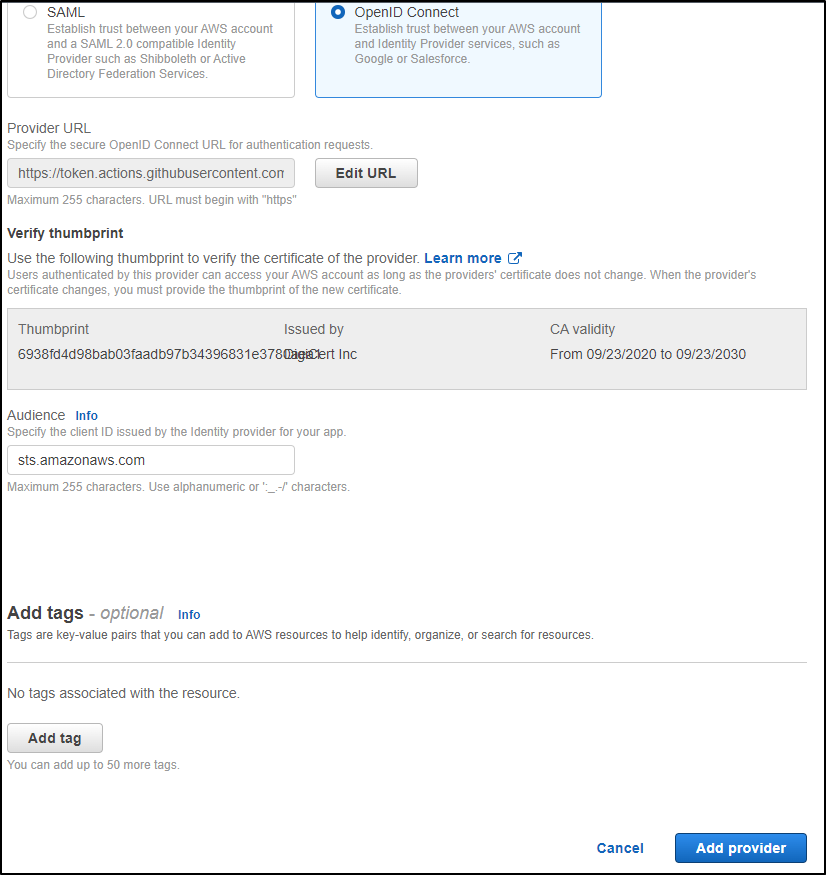
I’ll just use the Console to get it done. In IAM, go to “Identity Providers” and click “Add Provider”
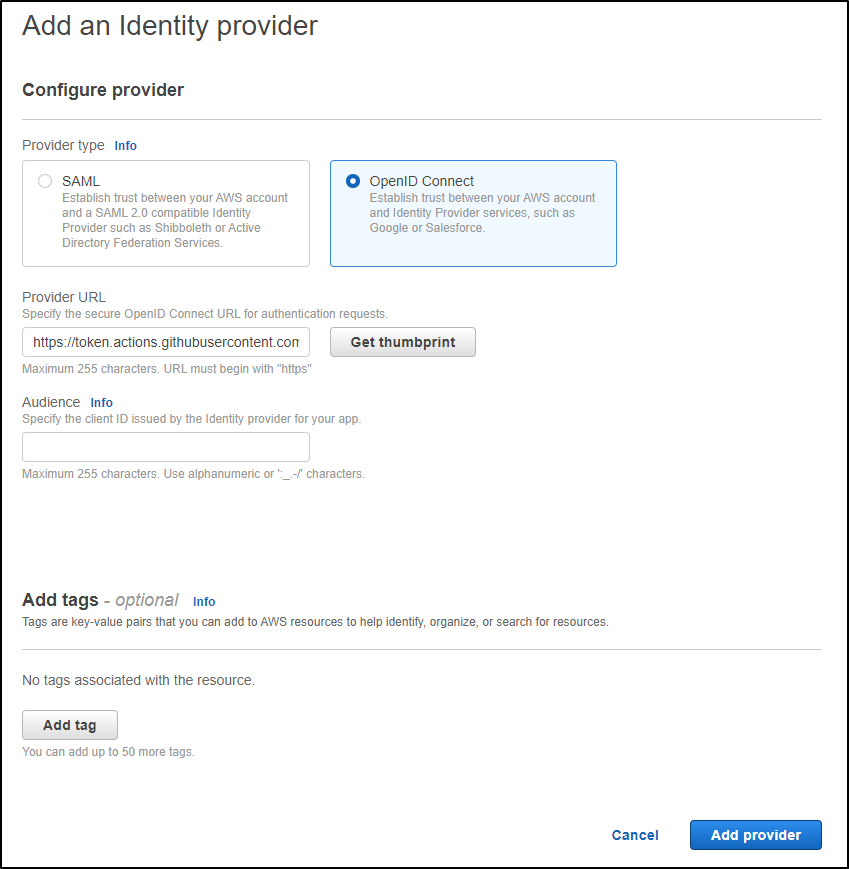
Pick “OpenID Connect” and paste the value “https://token.actions.githubusercontent.com” into the Provider URL
Clicking “Get Thumbprint shows use the Current one (which matched what I tried above): 6938fd4d98bab03faadb97b34396831e3780aea1
Lastly, we set the audience to “sts.amazonaws.com” and click “Add Provider”
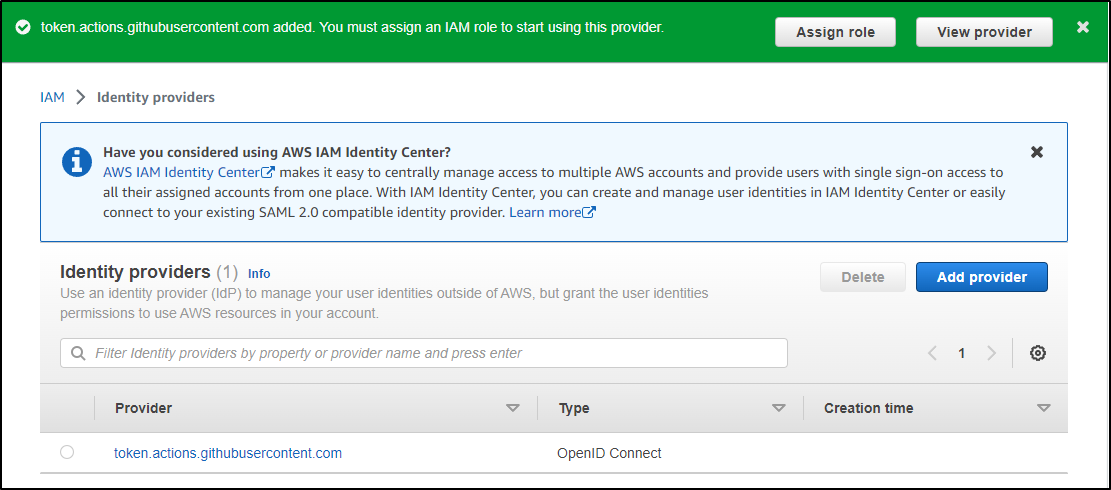
We should now see an OpenID Connect provider setup for Github
Inline Role Creation
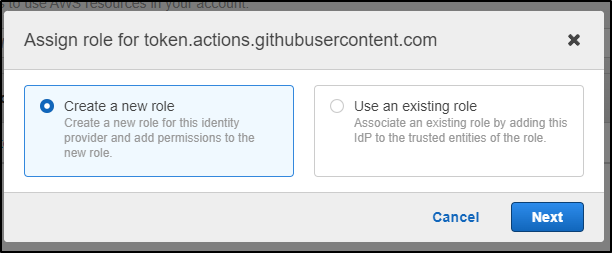
At first, I figured I would try and assign the role inline
We’ll click “Assign role” in the Green bar which will let us create a new role
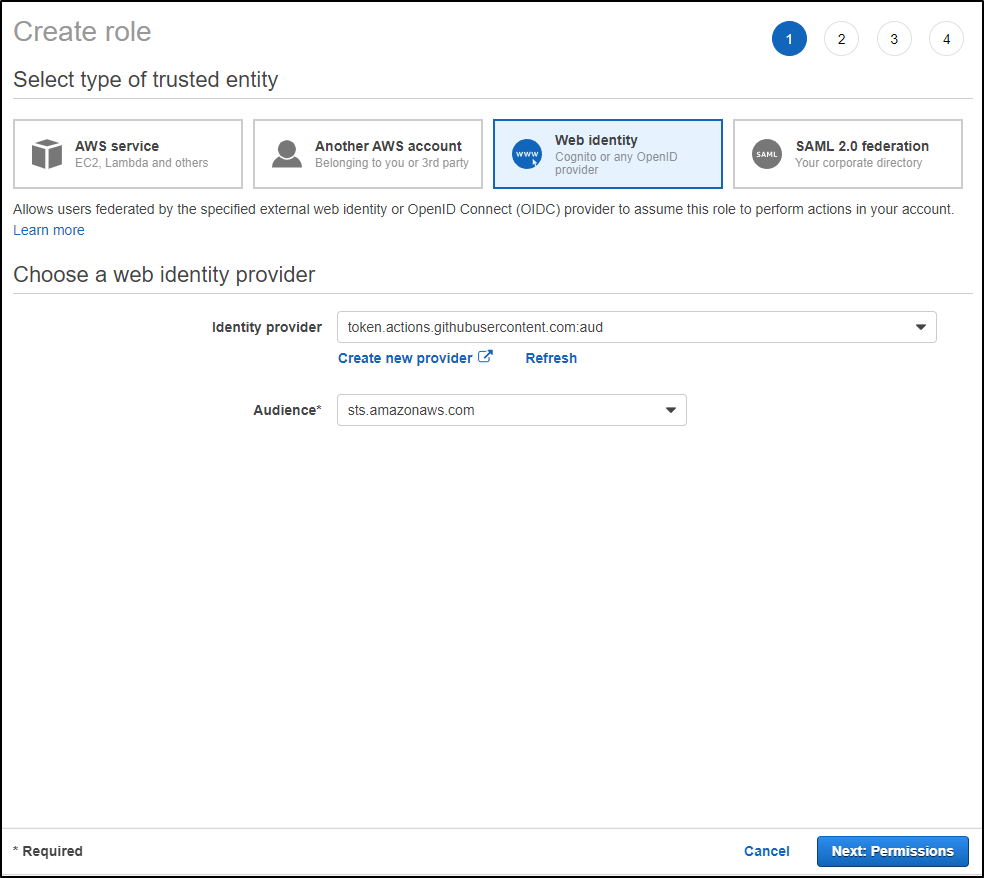
The “Web Identity” and “Identity Provider” was already set. We just need to pick the “Audience” we used prior. We’ll click “Next: Permissions”
I stopped here. I knew the specific permissions I wanted to add and found the predefined role picker a challenge.
Using CLI
I decided to create the role using the CLI.
Here, 1234567890 is my AWS account id and idjohnson/secretAccessor is my Github repo
$ cat githubactionawstrustpolicy2.json
{
  "Version": "2012-10-17",
  "Statement": [
    {
      "Effect": "Allow",
      "Principal": {
        "Federated": "arn:aws:iam::1234567890:oidc-provider/token.actions.githubusercontent.com"
      },
      "Action": "sts:AssumeRoleWithWebIdentity",
      "Condition": {
        "StringEquals": {
          "token.actions.githubusercontent.com:sub": "repo:idjohnson/secretAccessor",
          "token.actions.githubusercontent.com:aud": "sts.amazonaws.com"
        }
      }
    }
  ]
}
We could limit to main branch and PRs as well if we desired
    "token.actions.githubusercontent.com:sub": [
      "repo:idjohnson/secretAccessor:pull_request",
      "repo:idjohnson/secretAccessor:ref:refs/heads/main"
    ],
Next, I want to be able to get at any secrets in Parameter store
$ cat permissionsforgithubactions.json
{
    "Version": "2012-10-17",
    "Statement": [
        {
            "Effect": "Allow",
            "Action": [
                "ssm:DescribeParameters"
            ],
            "Resource": "*"
        },
        {
            "Effect": "Allow",
            "Action": [
                "ssm:GetParameters"
            ],
            "Resource": "*"
        }
    ]
}
Like before, I could restrict this to just dev secrets if I desired
"Resource": "arn:aws:ssm:us-east-2:1234567890:parameter/dev-*"
And apply it
$ aws iam put-role-policy --role-name GitHub-Action-Role --policy-name Perms-Policy-For-GitHub-Actions --policy-document file://permissionsforgithubactions.json
Github action
I’ll use the new role I made to get and list the parameters than view a parameter
(i was testing a few things so i moved on to role3)
name: OIDC from AWS
on:
  push:
permissions:
  id-token: write
  contents: read
jobs:
  greeting:
    runs-on: ubuntu-latest
    steps:
    - name: Checkout
      uses: actions/checkout@v3
    - name: Configure AWS credentials
      uses: aws-actions/configure-aws-credentials@v1
      with:
        aws-region: us-east-1
        role-to-assume: arn:aws:iam::1234567890:role/GitHub-Action-Role3
        role-session-name: OIDCSession
    - name: Print assumed role
      run: aws sts get-caller-identity
    - name: list parameters
      run: aws ssm get-parameters-by-path --path '/'
    - name: show a value
      run: aws ssm get-parameter --name TestingAWSParam --with-decryption
The error points out a flaw in my permission policy
I added the missing permission (and corrected the errant “GetParameters” to “ssm:GetParameter”)
$ cat permissionsforgithubactions.json
{
    "Version": "2012-10-17",
    "Statement": [
        {
            "Effect": "Allow",
            "Action": [
                "ssm:DescribeParameters"
            ],
            "Resource": "*"
        },
        {
            "Effect": "Allow",
            "Action": [
                "ssm:GetParameter"
            ],
            "Resource": "*"
        },
        {
            "Effect": "Allow",
            "Action": [
                "ssm:GetParametersByPath"
            ],
            "Resource": "*"
        }
    ]
}
I then reapplied
$ aws iam put-role-policy --role-name GitHub-Action-Role3 --policy-name Perms-Policy-For-GitHub-Actions --policy-document file://permissionsforgithubactions.json
Then re-ran the failed step. Now it works just fine
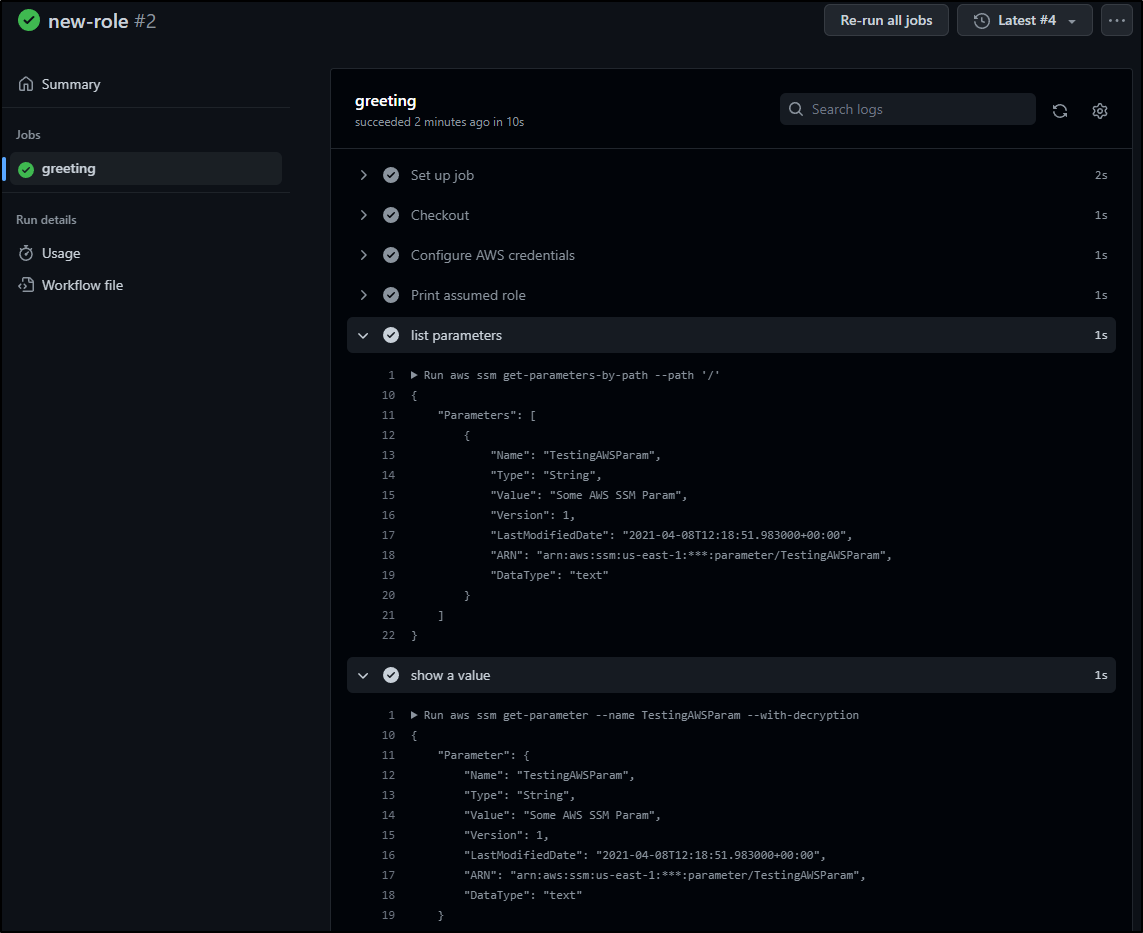
You can see both the listing of Params (which is just 1) and the decrypted value.
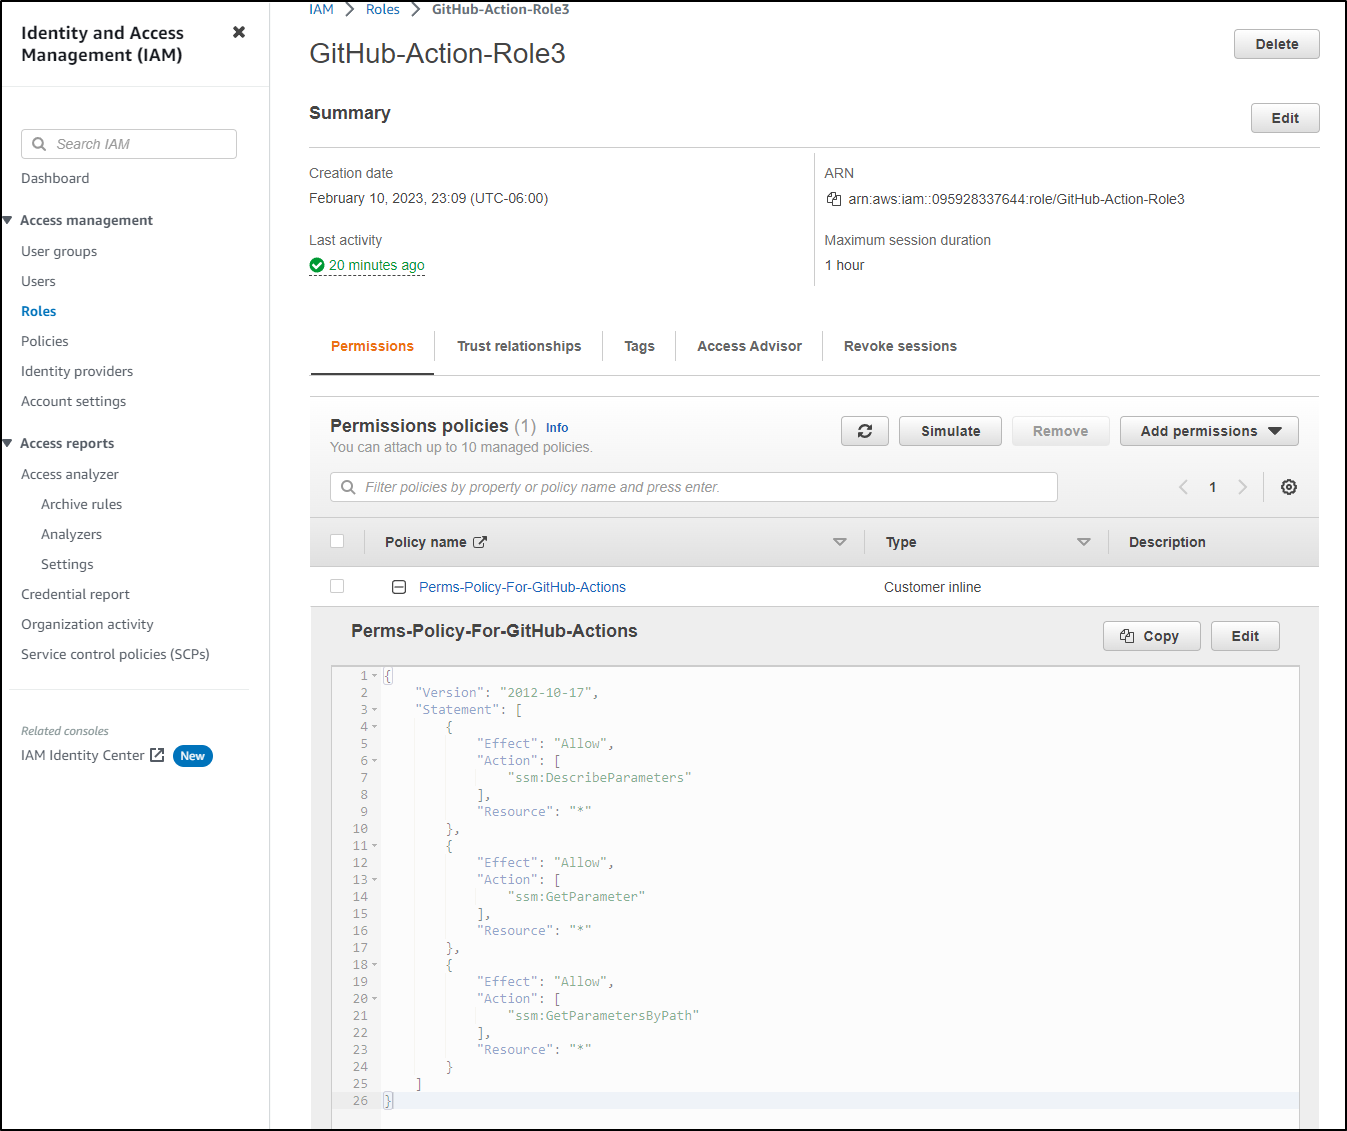
We can always change the policy on the command line. However, we can also just edit in the Console if needed
As an aside, I found a couple of times the changes I made on the Command Line, while not giving any error or feedback, did not take effect in AWS. If you have some troubles, double check your settings in the AWS Console, especially if changing after you already created things.
Summary
We explored OpenID Connect (OIDC) over three most popular clouds; AWS, Azure an GCP. We essentially bind the OIDC connection to a specific identity; an App Registration in Azure, a Service Account in GCP, and in AWS a Federated Identity. Each cloud provider then used the IAM system that made the most sense; Roles and Policies for AWS, IAM permissions for Azure and APIs and policy bindings in GCP.
All three worked quite well. In each case, we could spin out a JSON File (GCP) or Env Vars (AWS, Azure) that would be easy to use elsewhere for cloud tooling. It’s perhaps not quite fair to compare Azure to the rest as Microsoft owns both Azure and Github, but as one might expect, the binding was easiest to setup in Azure. There I could easily setup a branch and repo in my Certificates area of the App Registration.
It wasn’t too hard to find examples of multiple limiters in AWS, but GCP proved the hardest in that I could find example code of a repo and branch, but nothing really seemed to work for me and all documentation I could find (officially) showed a flow with just one attribute. The few that did anything more complicated were demonstrating the full OIDC flow without tooling.
I focused on Github, but there are good docs on OIDC and Giblab using AWS, GCP and Azure and Hashi Vault.
Thinking about the challenges of managing secrets had me thinking about Setec Astronomy.


