Published: Oct 25, 2022 by Isaac Johnson
I did something dumb. I bumped a power cord. As I left for a camping trip, I must have inadvertently bumped the magsafe connector on the Macbook Air that serves as the primary node on the cluster. When that host eventually ran out of power, it went down.
When it came up, K3s wouldn’t start. It would fail and fail and fail. And I was certain I had corrupted something. I tried upgrades, reinstalls, etc. I went ahead and began upgrading the whole cluster to the latest 1.24… when I realized the problem. I neglected to remove the k3s-agent from when that Macbook air actually was a worker/agent for a different cluster. It had rejoined it’s parent cluster and blocked 6443.
I uninstalled the agent, but it was too late. The cluster at this point was half upgraded to 1.24.3. The Ingresses had stopped working. The lack of dockershim (yanked out in 1.24) might have been causing troubles with some charts. The end result was my cluster was pretty much hosed. And If I couldn’t get the Ingress to serve traffic, I really couldn’t use it.
azure-vote-front                                           LoadBalancer   10.43.251.119   <pending>     80:31761/TCP                                                                                                45h
react-form                                                 LoadBalancer   10.43.48.31     <pending>     80:31267/TCP                                                                                                45h
nginx-ingress-release-nginx-ingress                        LoadBalancer   10.43.245.118   <pending>     80:30466/TCP,443:31716/TCP                                                                                  44h
So I decided I must rebuild. I did this by taking what was the “old” cluster and turning it into the new. Like some sort of poor man’s Blue Green, I began the overhaul of rebuilding the cluster, yet again.
Each time I do this, I get it a little better. So in the effort of “showing my work” and perhaps helping others build back their k3s clusters, let’s, together, build a fresh 1.23.9 K3s cluster.
Getting some backups
First, I got backups of old data. This was my oldest cluster (which will become the new)
$ kubectl get nodes
NAME                          STATUS     ROLES                  AGE    VERSION
hp-hp-elitebook-850-g2        NotReady   <none>                 290d   v1.23.3+k3s1
builder-macbookpro2           NotReady   <none>                 203d   v1.23.3+k3s1
builder-hp-elitebook-850-g2   NotReady   <none>                 265d   v1.23.3+k3s1
builder-hp-elitebook-850-g1   NotReady   <none>                 270d   v1.23.3+k3s1
isaac-macbookpro              NotReady   <none>                 575d   v1.23.3+k3s1
anna-macbookair               NotReady   <none>                 463d   v1.24.3+k3s1
isaac-macbookair              Ready      control-plane,master   576d   v1.23.3+k3s1
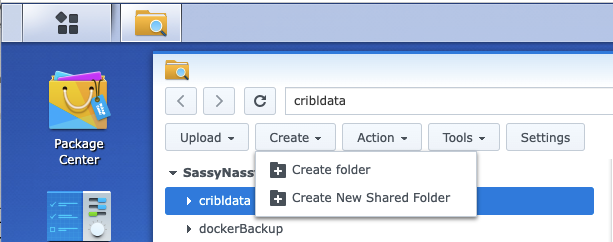
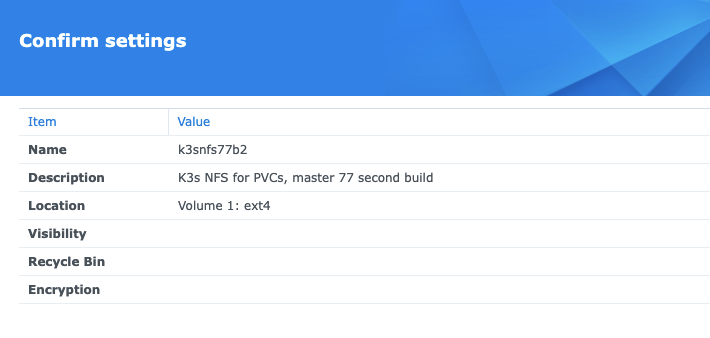
I’ll make a brand new NFS storage location
I’ll use a more meaningful name k3snfs77b2. I will not be using the Recycyle bin or access controls internally
Also, this time i’ll expand the CIDR from 192.168.10.0/24 to 192.16.0.0/16 (so i can use all my network range)
Next I did a standard Ubuntu upgrade of packages. I find brining up k8s clusters to be a good time to upgrade the underlying OS of nodes
$ sudo apt-get update
$ supo apt-get upgrade
We can the uninstall what is there
$ /usr/local/bin/k3s-uninstall.sh
Pro-tip: If you get stuck with the uninstall hanging, perhaps on broken PVCs.. you can use the background “&” and then use ps -ef to find the hung umount command and kill it.. then let the script finish. Doing this and rebooting a couple times generally does the trick of removing the old
Now we can install K3s on the master. Note: I’m picking a specific version, the latest (as of writing) of 1.23 (v1.23.9+k3s1)
Quick Note: If you plan to expose this externally, add your external IP with INSTALL_K3S_EXEC=”–tls-san x.x.x.x”
$ curl -sfL https://get.k3s.io | INSTALL_K3S_VERSION=v1.23.9+k3s1 INSTALL_K3S_EXEC="server --disable traefik" sh -
[INFO]  Using v1.23.9+k3s1 as release
[INFO]  Downloading hash https://github.com/k3s-io/k3s/releases/download/v1.23.9+k3s1/sha256sum-amd64.txt
[INFO]  Downloading binary https://github.com/k3s-io/k3s/releases/download/v1.23.9+k3s1/k3s
[INFO]  Verifying binary download
[INFO]  Installing k3s to /usr/local/bin/k3s
[INFO]  Skipping installation of SELinux RPM
[INFO]  Creating /usr/local/bin/kubectl symlink to k3s
[INFO]  Creating /usr/local/bin/crictl symlink to k3s
[INFO]  Skipping /usr/local/bin/ctr symlink to k3s, command exists in PATH at /usr/bin/ctr
[INFO]  Creating killall script /usr/local/bin/k3s-killall.sh
[INFO]  Creating uninstall script /usr/local/bin/k3s-uninstall.sh
[INFO]  env: Creating environment file /etc/systemd/system/k3s.service.env
[INFO]  systemd: Creating service file /etc/systemd/system/k3s.service
[INFO]  systemd: Enabling k3s unit
Created symlink /etc/systemd/system/multi-user.target.wants/k3s.service → /etc/systemd/system/k3s.service.
[INFO]  systemd: Starting k3s
Ingress
We need to setup an ingress controller, Here I’ll use Nginx
builder@DESKTOP-72D2D9T:~/Workspaces$ git clone https://github.com/nginxinc/kubernetes-ingress.git
builder@DESKTOP-72D2D9T:~/Workspaces$ cd kubernetes-ingress
builder@DESKTOP-72D2D9T:~/Workspaces/kubernetes-ingress$ git checkout v2.2.2
builder@DESKTOP-72D2D9T:~/Workspaces/kubernetes-ingress$ cd deployments/helm-chart
builder@DESKTOP-72D2D9T:~/Workspaces/kubernetes-ingress/deployments/helm-chart$ helm install nginx-ingress-release .
NAME: nginx-ingress-release
LAST DEPLOYED: Mon Jul 25 21:14:56 2022
NAMESPACE: default
STATUS: deployed
REVISION: 1
TEST SUITE: None
NOTES:
The NGINX Ingress Controller has been installed.
You’ll want to patch the ingress class to be default
$ kubectl get ingressclass
NAME    CONTROLLER                     PARAMETERS   AGE
nginx   nginx.org/ingress-controller   <none>       10h

$ kubectl get ingressclass -o yaml > ingress.class.yaml
$ vi ingress.class.yaml
$ kubectl get ingressclass -o yaml > ingress.class.yaml.bak
builder@DESKTOP-QADGF36:~/Workspaces/jekyll-blog$ diff ingress.class.yaml ingress.class.yaml.bak
9d8
<       ngressclass.kubernetes.io/is-default-class: "true"
builder@DESKTOP-QADGF36:~/Workspaces/jekyll-blog$ kubectl apply -f ingress.class.yaml
Warning: resource ingressclasses/nginx is missing the kubectl.kubernetes.io/last-applied-configuration annotation which is required by kubectl apply. kubectl apply should only be used on resources created declaratively by either kubectl create --save-config or kubectl apply. The missing annotation will be patched automatically.
ingressclass.networking.k8s.io/nginx configured
Cert Manager
Apply the Cert Manager
$ kubectl apply -f https://github.com/cert-manager/cert-manager/releases/download/v1.8.0/cert-manager.yaml
Add the Issuers
builder@DESKTOP-72D2D9T:~/Workspaces/jekyll-blog$ cat cm-issuer.yml
---
apiVersion: cert-manager.io/v1
kind: ClusterIssuer
metadata:
  name: letsencrypt-staging
spec:
  acme:
    email: isaac.johnson@gmail.com
    server: https://acme-staging-v02.api.letsencrypt.org/directory
    privateKeySecretRef:
      name: letsencrypt-staging
    solvers:
    - http01:
        ingress:
          class: nginx
---
apiVersion: cert-manager.io/v1
kind: ClusterIssuer
metadata:
  name: letsencrypt-prod-old
spec:
  acme:
    server: https://acme-v02.api.letsencrypt.org/directory
    email: isaac.johnson@gmail.com
    privateKeySecretRef:
      name: letsencrypt-prod
    solvers:
    - http01:
        ingress:
          class: nginx
Now apply
builder@DESKTOP-72D2D9T:~/Workspaces/jekyll-blog$ kubectl apply -f cm-issuer.yml
clusterissuer.cert-manager.io/letsencrypt-staging created
clusterissuer.cert-manager.io/letsencrypt-prod-old created
I went to test an Ingress.
I’ll add the Azure Vote sample app as a good sample test
$ helm repo add azure-samples https://azure-samples.github.io/helm-charts/
"azure-samples" already exists with the same configuration, skipping
$ helm repo update
Hang tight while we grab the latest from your chart repositories...
...Successfully got an update from the "confluentinc" chart repository
...Successfully got an update from the "myharbor" chart repository
...Successfully got an update from the "kuma" chart repository
...Successfully got an update from the "azure-samples" chart repository
...Successfully got an update from the "adwerx" chart repository
...Successfully got an update from the "rhcharts" chart repository
...Successfully got an update from the "uptime-kuma" chart repository
...Successfully got an update from the "actions-runner-controller" chart repository
...Successfully got an update from the "novum-rgi-helm" chart repository
...Successfully got an update from the "sonarqube" chart repository
...Successfully got an update from the "dapr" chart repository
...Successfully got an update from the "epsagon" chart repository
...Successfully got an update from the "kubecost" chart repository
...Successfully got an update from the "sumologic" chart repository
...Successfully got an update from the "nginx-stable" chart repository
...Successfully got an update from the "lifen-charts" chart repository
...Successfully got an update from the "harbor" chart repository
...Successfully got an update from the "datadog" chart repository
...Successfully got an update from the "argo-cd" chart repository
...Successfully got an update from the "incubator" chart repository
...Successfully got an update from the "rancher-latest" chart repository
...Successfully got an update from the "newrelic" chart repository
...Successfully got an update from the "crossplane-stable" chart repository
...Successfully got an update from the "gitlab" chart repository
...Successfully got an update from the "bitnami" chart repository
Update Complete. ⎈Happy Helming!⎈
$ helm install azure-vote azure-samples/azure-vote
NAME: azure-vote
LAST DEPLOYED: Wed Jul 27 06:14:33 2022
NAMESPACE: default
STATUS: deployed
REVISION: 1
TEST SUITE: None
NOTES:
The Azure Vote application has been started on your Kubernetes cluster.

Title: Azure Vote App
Vote 1 value: Cats
Vote 2 value: Dogs

The externally accessible IP address can take a minute or so to provision. Run the following command to monitor the provisioning status. Once an External IP address has been provisioned, brows to this IP address to access the Azure Vote application.

kubectl get service -l name=azure-vote-front -w
I’ll add the ingress to Azure Vote as I did before. That one used basic Auth so first I’ll copy over the secret
builder@DESKTOP-QADGF36:~/Workspaces/kubernetes-ingress$ kubectx default
Switched to context "default".
builder@DESKTOP-QADGF36:~/Workspaces/kubernetes-ingress$ kubectl get secret basic-auth
NAME         TYPE     DATA   AGE
basic-auth   Opaque   1      15d
builder@DESKTOP-QADGF36:~/Workspaces/kubernetes-ingress$ kubectl get secret basic-auth -o yaml > basic-auth-secret.yaml
builder@DESKTOP-QADGF36:~/Workspaces/kubernetes-ingress$ kubectx oldmaccluster
Switched to context "oldmaccluster".
builder@DESKTOP-QADGF36:~/Workspaces/kubernetes-ingress$ kubectl apply -f basic-auth-secret.yaml
secret/basic-auth created
$ cat Ingress-Azure.yaml
apiVersion: networking.k8s.io/v1
kind: Ingress
metadata:
  annotations:
    cert-manager.io/cluster-issuer: letsencrypt-prod
    ingress.kubernetes.io/auth-realm: Authentication Required - ok
    ingress.kubernetes.io/auth-secret: basic-auth
    ingress.kubernetes.io/auth-type: basic
    nginx.ingress.kubernetes.io/auth-realm: Authentication Required - foo
    nginx.ingress.kubernetes.io/auth-secret: basic-auth
    nginx.ingress.kubernetes.io/auth-type: basic
    nginx.ingress.kubernetes.io/proxy-body-size: "0"
    nginx.ingress.kubernetes.io/ssl-redirect: "true"
  labels:
    app: azurevote
    release: azurevoterelease
  name: azurevote-ingress
  namespace: default
spec:
  ingressClassName: nginx
  rules:
  - host: azurevote.freshbrewed.science
    http:
      paths:
      - backend:
          service:
            name: azure-vote-front
            port:
              number: 80
        path: /
        pathType: Prefix
  tls:
  - hosts:
    - azurevote.freshbrewed.science
    secretName: azurevote-tls
Note, I could do it without basic auth as well
builder@DESKTOP-72D2D9T:~/Workspaces/jekyll-blog$ cat Ingress-Azure.yaml
apiVersion: networking.k8s.io/v1
kind: Ingress
metadata:
  annotations:
    cert-manager.io/cluster-issuer: letsencrypt-prod
    ingress.kubernetes.io/proxy-body-size: 2048m
    ingress.kubernetes.io/ssl-redirect: "true"
    nginx.ingress.kubernetes.io/proxy-body-size: 2048m
    nginx.ingress.kubernetes.io/proxy-read-timeout: "900"
    nginx.ingress.kubernetes.io/proxy-send-timeout: "900"
    nginx.ingress.kubernetes.io/ssl-redirect: "true"
    nginx.org/client-max-body-size: 2048m
  labels:
    app: azurevote
    release: azurevoterelease
  name: azurevote-ingress
  namespace: default
spec:
  ingressClassName: nginx
  rules:
  - host: azurevote.freshbrewed.science
    http:
      paths:
      - backend:
          service:
            name: azurevote-ui
            port:
              number: 80
        path: /
        pathType: Prefix
  tls:
  - hosts:
    - azurevote.freshbrewed.science
    secretName: azurevote-tls
Now Apply
$ kubectl apply -f Ingress-Azure.yaml
ingress.networking.k8s.io/azurevote-ingress created
Note: I already setup Route53 routing on the azurevote CNAME. You can refer to prior docs on how to do that
We can check the cert
$ kubectl get cert
NAME                              READY   SECRET                            AGE
notary-fb-science                 True    notary.freshbrewed.science-cert   32h
harbor-fb-science                 True    harbor.freshbrewed.science-cert   32h
harbor.freshbrewed.science-cert   True    harbor.freshbrewed.science-cert   32h
notary.freshbrewed.science-cert   True    notary.freshbrewed.science-cert   32h
azurevote-tls                     True    azurevote-tls                     11s
Exposing the cluster
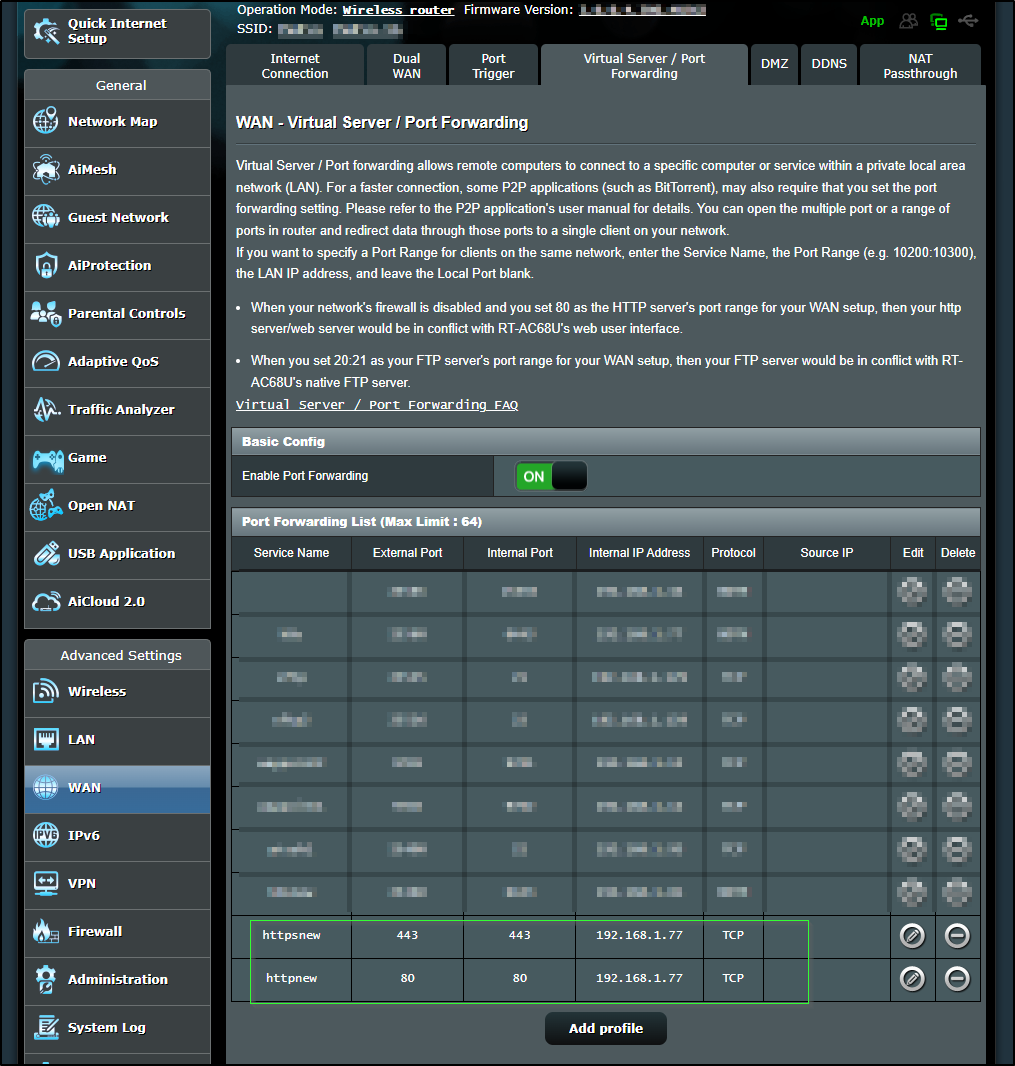
Obviously, Once I cared to start testing ingress traffic, I needed to swap my exposed cluster. The new master (192.168.1.77) is now the exposed 80 and 443 host
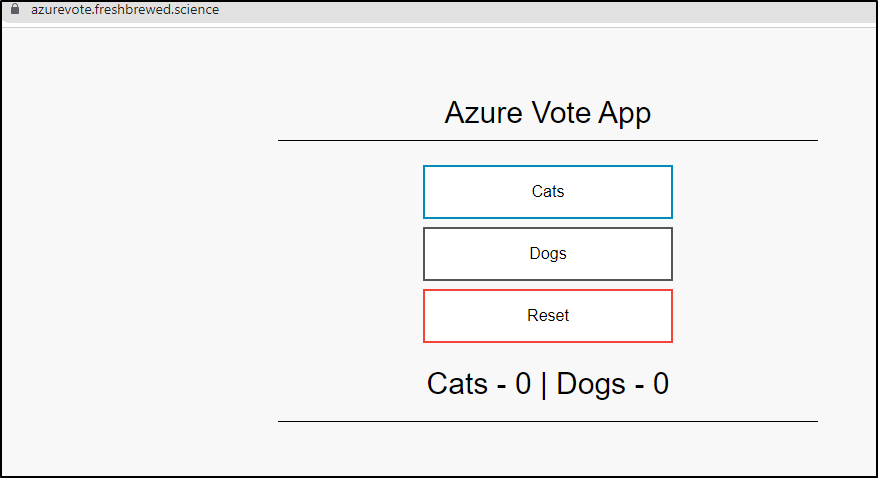
Testing Azure Vote
We can now see the Azure Vote app is working
Route53 credentials
For doing DNS challenge, we’ll need to setup Route53 credentials
$ cat prod-route53-credentials-secret.yaml
apiVersion: v1
data:
  secret-access-key: adsfasdfasdfasdfasdfasdfasdfasdfasdfasdfasdf==
kind: Secret
metadata:
  name: prod-route53-credentials-secret
  namespace: default
type: Opaque

builder@DESKTOP-72D2D9T:~/Workspaces/jekyll-blog$ kubectl apply -f prod-route53-credentials-secret-cert-manager.yaml -n cert-manager
secret/prod-route53-credentials-secret created
We can then use it for our new LE Prod ClusterIssuer
$ cat le-prod-new.yml
apiVersion: cert-manager.io/v1
kind: ClusterIssuer
metadata:
  name: letsencrypt-prod
spec:
  acme:
    server: https://acme-v02.api.letsencrypt.org/directory
    email: isaac.johnson@gmail.com
    privateKeySecretRef:
      name: letsencrypt-prod
    solvers:
    - selector:
        dnsZones:
          - "freshbrewed.science"
      dns01:
        route53:
          region: us-east-1
          accessKeyID: AKIARMVOGITWIUAKR45K
          secretAccessKeySecretRef:
            name: prod-route53-credentials-secret
            key: secret-access-key
          # you can also assume a role with these credentials
          role: arn:aws:iam::095928337644:role/MyACMERole


$ kubectl apply -f le-prod-new.yml
clusterissuer.cert-manager.io/letsencrypt-prod created
NFS
First, I tried the standard NFS provisioner
Now add the NFS SC
$ helm install stable/nfs-server-provisioner --set persistence.enabled=true,persistence.size=5Gi --set nfs.server=192.168.1.129 --set nfs.path=/volume1/k3snfs77b2 --generate-name
WARNING: This chart is deprecated
NAME: nfs-server-provisioner-1658802767
LAST DEPLOYED: Mon Jul 25 21:32:50 2022
NAMESPACE: default
STATUS: deployed
REVISION: 1
TEST SUITE: None
NOTES:
The NFS Provisioner service has now been installed.

A storage class named 'nfs' has now been created
and is available to provision dynamic volumes.

You can use this storageclass by creating a `PersistentVolumeClaim` with the
correct storageClassName attribute. For example:

    ---
    kind: PersistentVolumeClaim
    apiVersion: v1
    metadata:
      name: test-dynamic-volume-claim
    spec:
      storageClassName: "nfs"
      accessModes:
        - ReadWriteOnce
      resources:
        requests:
          storage: 100Mi
then patched it in as default
$ kubectl patch storageclass local-path -p '{"metadata":{"annotations":{"storageclass.kubernetes.io/is-default-class":"false"}}}' && kubectl patch storageclass nfs -p '{"metadata": {"annotations":{"storageclass.kubernetes.io/is-default-class":"true"}}}'
storageclass.storage.k8s.io/local-path patched
storageclass.storage.k8s.io/nfs patched
validate
$ kubectl get sc
NAME            PROVISIONER                                       RECLAIMPOLICY   VOLUMEBINDINGMODE      ALLOWVOLUMEEXPANSION   AGE
local-path      rancher.io/local-path                             Delete          WaitForFirstConsumer   false                  28m
nfs (default)   cluster.local/nfs-server-provisioner-1658802767   Delete          Immediate              true                   2m55s
However, I found it kept failing me on certain activities. While building out the pubsub demo I reworked it.
NFS that works
Two things needed to be done, first, setup the RBAC ClusterRole and ClusterRoleBinding as well as Role and RoleBinding.
$ cat k3s-prenfs.yaml
apiVersion: v1
kind: ServiceAccount
metadata:
  name: nfs-client-provisioner
  # replace with namespace where provisioner is deployed
  namespace: default
---
kind: ClusterRole
apiVersion: rbac.authorization.k8s.io/v1
metadata:
  name: nfs-client-provisioner-runner
rules:
  - apiGroups: [""]
    resources: ["persistentvolumes"]
    verbs: ["get", "list", "watch", "create", "delete"]
  - apiGroups: [""]
    resources: ["persistentvolumeclaims"]
    verbs: ["get", "list", "watch", "update"]
  - apiGroups: ["storage.k8s.io"]
    resources: ["storageclasses"]
    verbs: ["get", "list", "watch"]
  - apiGroups: [""]
    resources: ["events"]
    verbs: ["create", "update", "patch"]
---
kind: ClusterRoleBinding
apiVersion: rbac.authorization.k8s.io/v1
metadata:
  name: run-nfs-client-provisioner
subjects:
  - kind: ServiceAccount
    name: nfs-client-provisioner
    # replace with namespace where provisioner is deployed
    namespace: default
roleRef:
  kind: ClusterRole
  name: nfs-client-provisioner-runner
  apiGroup: rbac.authorization.k8s.io
---
kind: Role
apiVersion: rbac.authorization.k8s.io/v1
metadata:
  name: leader-locking-nfs-client-provisioner
  # replace with namespace where provisioner is deployed
  namespace: default
rules:
  - apiGroups: [""]
    resources: ["endpoints"]
    verbs: ["get", "list", "watch", "create", "update", "patch"]
---
kind: RoleBinding
apiVersion: rbac.authorization.k8s.io/v1
metadata:
  name: leader-locking-nfs-client-provisioner
  # replace with namespace where provisioner is deployed
  namespace: default
subjects:
  - kind: ServiceAccount
    name: nfs-client-provisioner
    # replace with namespace where provisioner is deployed
    namespace: default
roleRef:
  kind: Role
  name: leader-locking-nfs-client-provisioner
  apiGroup: rbac.authorization.k8s.io
---
apiVersion: storage.k8s.io/v1
kind: StorageClass
metadata:
  name: managed-nfs-storage
provisioner: fuseim.pri/ifs # or choose another name, must match deployment's env PROVISIONER_NAME'
parameters:
  archiveOnDelete: "false"
  allowVolumeExpansion: "true"
  reclaimPolicy: "Delete"
allowVolumeExpansion: true
and then using the deployment. I started by following my own guide from 2020, but in K8s version 1.20 and beyond, there is actually an issue with selfLink being deprecated.
Therefore, the manifest that worked used a new container image (gcr.io/k8s-staging-sig-storage/nfs-subdir-external-provisioner:v4.0.0)
apiVersion: apps/v1
kind: Deployment
metadata:
  name: nfs-client-provisioner
  labels:
    app: nfs-client-provisioner
  # replace with namespace where provisioner is deployed
  namespace: default
spec:
  replicas: 1
  strategy:
    type: Recreate
  selector:
    matchLabels:
      app: nfs-client-provisioner
  template:
    metadata:
      labels:
        app: nfs-client-provisioner
    spec:
      serviceAccountName: nfs-client-provisioner
      containers:
        - name: nfs-client-provisioner
          image: gcr.io/k8s-staging-sig-storage/nfs-subdir-external-provisioner:v4.0.0
          volumeMounts:
            - name: nfs-client-root
              mountPath: /persistentvolumes
          env:
            - name: PROVISIONER_NAME
              value: fuseim.pri/ifs
            - name: NFS_SERVER
              value: 192.168.1.129
            - name: NFS_PATH
              value: /volume1/k3snfs77b2
      volumes:
        - name: nfs-client-root
          nfs:
            server: 192.168.1.129
            path: /volume1/k3snfs77b2
Then I swapped SC defaults
$ kubectl patch storageclass nfs -p '{"metadata": {"annotations":{"storageclass.kubernetes.io/is-default-class":"false"}}}' && kubectl patch storageclass local-path -p '{"metadata": {"annotations":{"storageclass.kubernetes.io/is-default-class":"false"}}}' && kubectl patch storageclass managed-nfs-storage -p '{"metadata": {"annotations":{"storageclass.kubernetes.io/is-default-class":"true"}}}'
Redis
I wanted to add Redis, both to tests my PVCs and to have an in-cluster memorystore
$ helm install my-redis-release bitnami/redis-cluster
NAME: my-redis-release
LAST DEPLOYED: Mon Jul 25 21:44:20 2022
NAMESPACE: default
STATUS: deployed
REVISION: 1
TEST SUITE: None
NOTES:
CHART NAME: redis-cluster
CHART VERSION: 8.1.1
APP VERSION: 7.0.4** Please be patient while the chart is being deployed **


To get your password run:
    export REDIS_PASSWORD=$(kubectl get secret --namespace "default" my-redis-release-redis-cluster -o jsonpath="{.data.redis-password}" | base64 -d)

You have deployed a Redis® Cluster accessible only from within you Kubernetes Cluster.INFO: The Job to create the cluster will be created.To connect to your Redis® cluster:

1. Run a Redis® pod that you can use as a client:
kubectl run --namespace default my-redis-release-redis-cluster-client --rm --tty -i --restart='Never' \
 --env REDIS_PASSWORD=$REDIS_PASSWORD \
--image docker.io/bitnami/redis-cluster:7.0.4-debian-11-r1 -- bash

2. Connect using the Redis® CLI:

redis-cli -c -h my-redis-release-redis-cluster -a $REDIS_PASSWORD
We can see it used the NFS (I did this before the NFS swap)
$ kubectl get pvc
NAME                                          STATUS   VOLUME                                     CAPACITY   ACCESS MODES   STORAGECLASS   AGE
data-nfs-server-provisioner-1658802767-0      Bound    pvc-59b7fc05-c885-4f7d-858c-d851a428106c   5Gi        RWO            local-path     12m
redis-data-my-redis-release-redis-cluster-0   Bound    pvc-cdb18a0f-fe61-4e7d-90ec-301199cebb41   8Gi        RWO            nfs            30s
redis-data-my-redis-release-redis-cluster-1   Bound    pvc-e05afe1f-1ed3-48ca-b74d-1529c0ec2902   8Gi        RWO            nfs            30s
redis-data-my-redis-release-redis-cluster-2   Bound    pvc-a501783c-2469-47ce-904d-76320807016b   8Gi        RWO            nfs            30s
redis-data-my-redis-release-redis-cluster-3   Bound    pvc-c97ee855-356c-4284-b5b7-304ee201dd8c   8Gi        RWO            nfs            30s
redis-data-my-redis-release-redis-cluster-4   Bound    pvc-32a0afbd-0e38-4d8a-b6c0-305adaf0f4c5   8Gi        RWO            nfs            30s
redis-data-my-redis-release-redis-cluster-5   Bound    pvc-5a782f79-444e-467e-8305-05cab72c6522   8Gi        RWO            nfs            30s
Harbor
To setup Harbor again, we need to explicitly request the certs
builder@DESKTOP-72D2D9T:~/Workspaces/jekyll-blog$ cat create-secrets-harbor.yaml
---
apiVersion: cert-manager.io/v1
kind: Certificate
metadata:
  name: harbor-fb-science
  namespace: default
spec:
  commonName: harbor.freshbrewed.science
  dnsNames:
  - harbor.freshbrewed.science
  issuerRef:
    kind: ClusterIssuer
    name: letsencrypt-prod
  secretName: harbor.freshbrewed.science-cert
---
apiVersion: cert-manager.io/v1
kind: Certificate
metadata:
  name: notary-fb-science
  namespace: default
spec:
  commonName: notary.freshbrewed.science
  dnsNames:
  - notary.freshbrewed.science
  issuerRef:
    kind: ClusterIssuer
    name: letsencrypt-prod
  secretName: notary.freshbrewed.science-cert
builder@DESKTOP-72D2D9T:~/Workspaces/jekyll-blog$ kubectl apply -f create-secrets-harbor.yaml
certificate.cert-manager.io/harbor-fb-science created
certificate.cert-manager.io/notary-fb-science created
Now applied, we can watch for when they are satisfied
$ kubectl get cert
NAME                READY   SECRET                            AGE
azurevote-tls       True    azurevote-tls                     21m
notary-fb-science   True    notary.freshbrewed.science-cert   107s
harbor-fb-science   True    harbor.freshbrewed.science-cert   107s
Now we can use them in our deploy
$ cat harbor-registry.values.yaml
expose:
  ingress:
    annotations:
      cert-manager.io/cluster-issuer: letsencrypt-production
    className: nginx
    hosts:
      core: harbor.freshbrewed.science
      notary: notary.freshbrewed.science
  tls:
    certSource: secret
    secret:
      notarySecretName: notary.freshbrewed.science-cert
      secretName: harbor.freshbrewed.science-cert
  type: ingress
externalURL: https://harbor.freshbrewed.science
harborAdminPassword: Tm90TXlQYXNzd29yZAo=
metrics:
  enabled: true
notary:
  enabled: true
secretKey: 8d10dlskeit8fhtg

$ helm upgrade --install harbor-registry harbor/harbor --values ./harbor-registry.values.yaml
Release "harbor-registry" does not exist. Installing it now.
NAME: harbor-registry
LAST DEPLOYED: Mon Jul 25 21:48:33 2022
NAMESPACE: default
STATUS: deployed
REVISION: 1
TEST SUITE: None
NOTES:
Please wait for several minutes for Harbor deployment to complete.
Then you should be able to visit the Harbor portal at https://harbor.freshbrewed.science
For more details, please visit https://github.com/goharbor/harbor
Add a K3s Worker Node (Agent)
You will want to uninstall old agents. They leave a lot of junk around and this was a step I neglected to do before
$ sudo /usr/local/bin/k3s-agent-uninstall.sh
+ id -u
+ [ 0 -eq 0 ]
+ command -v systemctl
/bin/systemctl
+ systemctl disable k3s-agent
Failed to disable unit: Unit file k3s-agent.service does not exist.
+ systemctl reset-failed k3s-agent
Failed to reset failed state of unit k3s-agent.service: Unit k3s-agent.service not loaded.
+ systemctl daemon-reload
+ command -v rc-update
+ rm -f /etc/systemd/system/k3s-agent.service
+ rm -f /etc/systemd/system/k3s-agent.service.env
+ trap remove_uninstall EXIT
+ [ -L /usr/local/bin/kubectl ]
+ [ -L /usr/local/bin/crictl ]
+ [ -L /usr/local/bin/ctr ]
+ rm -rf /etc/rancher/k3s
+ rm -rf /run/k3s
+ rm -rf /run/flannel
+ rm -rf /var/lib/rancher/k3s
+ rm -rf /var/lib/kubelet
+ rm -f /usr/local/bin/k3s
+ rm -f /usr/local/bin/k3s-killall.sh
+ type yum
+ type zypper
+ remove_uninstall
+ rm -f /usr/local/bin/k3s-agent-uninstall.sh
because it calls /usr/local/bin/k3s-killall.sh and that is failing on PVCs, I commented out that line
To add agents, I’ll need the token from the master
isaac@isaac-MacBookAir:~$ !163
sudo cat /var/lib/rancher/k3s/server/node-token
[sudo] password for isaac:
K107d8e80976d8e1258a502cc802d2ad6c4c35cc2f16a36161e32417e87738014a8::server:581be6c9da1c56ea3d8d5d776979585a
I’ll need the new kubeconfig, I can grab that at the same time
isaac@isaac-MacBookAir:~$ sudo cat /etc/rancher/k3s/k3s.yaml | base64 -w 0
YXBpVmVyc2lvbjogdjEKY2x1c3RlcnM6Ci0gY2x1c3RlcjoKICAgIGNlcnRpZmljYXRlLWF1dGhvcml0eS1kYXRhOiBMUzB0TFMxQ1JVZEpUaUJEUlZKVVNVWkpRMEZVUlMwdExTMHRDazFKU1VKbFJFTkRRVkl5WjBGM1NVSkJaMGxDUVVSQlMwSm5aM0ZvYTJwUFVGRlJSRUZxUVdwTlUwVjNTSGRaUkZ....
And I can just echo it back to create a local config
echo YXBpVmVyc2lvbjogdjEKY2x1c3RlcnM6Ci0gY2x1c3RlcjoKICAgIGNlcnRpZmljYXRlLWF1dGhvcml0eS1kYXRhOiBMUzB0TFMxQ1JVZEpUaUJEUlZKVVNVWkpRMEZVUlMwdExTMHRDazFKU1VKbFJFTkRRVkl5WjBGM1NVSkJaMGxDUVVSQlMwSm5aM0ZvYT... | base64 --decode | sed 's/127.0.0.1/192.168.1.77/g' > ~/.kube/New-mac77-internal-config
For convenance, I went and merged that into my main kube config so i could use kubectx to change clusters
builder@DESKTOP-QADGF36:~$ kubectx
default
docker-desktop
loft-vcluster_my-super-qc1_vcluster-my-super-qc1-pdsjy_loft-cluster
oldmaccluster
builder@DESKTOP-QADGF36:~$ kubectx oldmaccluster
Switched to context "oldmaccluster".
builder@DESKTOP-QADGF36:~$ kubectl get nodes
NAME               STATUS   ROLES                  AGE   VERSION
isaac-macbookair   Ready    control-plane,master   9h    v1.23.9+k3s1
Agent steps
If you haven’t already, you’ll want to stop the existing agents (we’ve done this)
$ sudo /usr/local/bin/k3s-killall.sh
$ sudo systemctl stop k3s-agent.service
$ sudo service k3s-agent stop
To be thorough, we also do the remove all
$ sudo /usr/local/bin/k3s-agent-uninstall.sh
The key things are k3s should be gone and no running k3s processes
hp@hp-HP-EliteBook-850-G2:~$ which k3s
hp@hp-HP-EliteBook-850-G2:~$ ps -ef | grep k3s
hp          4936    4926  0 07:13 pts/0    00:00:00 grep --color=auto k3s
Now we can add the node. Note that I’m specifically picking the k3s version of v1.23.9+k3s1 as the latest really trashed the primary cluster.
hp@hp-HP-EliteBook-850-G2:~$ curl -sfL https://get.k3s.io | INSTALL_K3S_VERSION=v1.23.9+k3s1 K3S_URL=https://192.168.1.77:6443 K3S_TOKEN=K107d8e80976d8e1258a502cc802d2ad6c4c35cc2f16a36161e32417e87738014a8::server:581be6c9da1c56ea3d8d5d776979585a sh -
[sudo] password for hp:
[INFO]  Using v1.23.9+k3s1 as release
[INFO]  Downloading hash https://github.com/k3s-io/k3s/releases/download/v1.23.9+k3s1/sha256sum-amd64.txt
[INFO]  Downloading binary https://github.com/k3s-io/k3s/releases/download/v1.23.9+k3s1/k3s
[INFO]  Verifying binary download
[INFO]  Installing k3s to /usr/local/bin/k3s
[INFO]  Skipping installation of SELinux RPM
[INFO]  Creating /usr/local/bin/kubectl symlink to k3s
[INFO]  Creating /usr/local/bin/crictl symlink to k3s
[INFO]  Creating /usr/local/bin/ctr symlink to k3s
[INFO]  Creating killall script /usr/local/bin/k3s-killall.sh
[INFO]  Creating uninstall script /usr/local/bin/k3s-agent-uninstall.sh
[INFO]  env: Creating environment file /etc/systemd/system/k3s-agent.service.env
[INFO]  systemd: Creating service file /etc/systemd/system/k3s-agent.service
[INFO]  systemd: Enabling k3s-agent unit
Created symlink /etc/systemd/system/multi-user.target.wants/k3s-agent.service → /etc/systemd/system/k3s-agent.service.
[INFO]  systemd: Starting k3s-agent
And now we see our new node
builder@DESKTOP-QADGF36:~$ kubectl get nodes
NAME                     STATUS   ROLES                  AGE   VERSION
isaac-macbookair         Ready    control-plane,master   9h    v1.23.9+k3s1
hp-hp-elitebook-850-g2   Ready    <none>                 58s   v1.23.9+k3s1
If we have no issues, the process should go fast
builder@builder-HP-EliteBook-850-G1:~$ sudo /usr/local/bin/k3s-killall.sh
+ [ -s /etc/systemd/system/k3s*.service ]
+ [ -x /etc/init.d/k3s* ]
+ killtree
+ kill -9
+ do_unmount_and_remove /run/k3s
+ set +x
+ do_unmount_and_remove /var/lib/rancher/k3s
+ set +x
+ do_unmount_and_remove /var/lib/kubelet/pods
+ set +x
+ do_unmount_and_remove /var/lib/kubelet/plugins
+ set +x
+ do_unmount_and_remove /run/netns/cni-
+ set +x
+ ip netns show
+ grep cni-
+ xargs -r -t -n 1 ip netns delete
+ ip link show
+ grep master cni0
+ read ignore iface ignore
+ ip link delete cni0
Cannot find device "cni0"
+ ip link delete flannel.1
Cannot find device "flannel.1"
+ ip link delete flannel-v6.1
Cannot find device "flannel-v6.1"
+ ip link delete kube-ipvs0
Cannot find device "kube-ipvs0"
+ rm -rf /var/lib/cni/
+ iptables-save
+ grep -v KUBE-
+ + grep -v flannel
+ iptables-restore
grep -v CNI-
+ ip6tables-save
+ grep -v KUBE-
+ grep+ grep -v flannel
 -v CNI-
+ ip6tables-restore
builder@builder-HP-EliteBook-850-G1:~$ sudo systemctl stop k3s-agent.service
Failed to stop k3s-agent.service: Unit k3s-agent.service not loaded.
builder@builder-HP-EliteBook-850-G1:~$ sudo service k3s-agent stop
Failed to stop k3s-agent.service: Unit k3s-agent.service not loaded.
builder@builder-HP-EliteBook-850-G1:~$ sudo /usr/local/bin/k3s-agent-uninstall.sh
+ id -u
+ [ 0 -eq 0 ]
+ command -v systemctl
/usr/bin/systemctl
+ systemctl disable k3s-agent
Failed to disable unit: Unit file k3s-agent.service does not exist.
+ systemctl reset-failed k3s-agent
Failed to reset failed state of unit k3s-agent.service: Unit k3s-agent.service not loaded.
+ systemctl daemon-reload
+ command -v rc-update
+ rm -f /etc/systemd/system/k3s-agent.service
+ rm -f /etc/systemd/system/k3s-agent.service.env
+ trap remove_uninstall EXIT
+ [ -L /usr/local/bin/kubectl ]
+ [ -L /usr/local/bin/crictl ]
+ [ -L /usr/local/bin/ctr ]
+ rm -rf /etc/rancher/k3s
+ rm -rf /run/k3s
+ rm -rf /run/flannel
+ rm -rf /var/lib/rancher/k3s
+ rm -rf /var/lib/kubelet
+ rm -f /usr/local/bin/k3s
+ rm -f /usr/local/bin/k3s-killall.sh
+ type yum
+ type zypper
+ remove_uninstall
+ rm -f /usr/local/bin/k3s-agent-uninstall.sh
builder@builder-HP-EliteBook-850-G1:~$ curl -sfL https://get.k3s.io | INSTALL_K3S_VERSION=v1.23.9+k3s1 K3S_URL=https://192.168.1.77:6443 K3S_TOKEN=K107d8e80976d8e1258a502cc802d2ad6c4c35cc2f16a36161e32417e87738014a8::server:581be6c9da1c56ea3d8d5d776979585a sh -
[INFO]  Using v1.23.9+k3s1 as release
[INFO]  Downloading hash https://github.com/k3s-io/k3s/releases/download/v1.23.9+k3s1/sha256sum-amd64.txt
[INFO]  Downloading binary https://github.com/k3s-io/k3s/releases/download/v1.23.9+k3s1/k3s
[INFO]  Verifying binary download
[INFO]  Installing k3s to /usr/local/bin/k3s
[INFO]  Skipping installation of SELinux RPM
[INFO]  Creating /usr/local/bin/kubectl symlink to k3s
[INFO]  Creating /usr/local/bin/crictl symlink to k3s
[INFO]  Creating /usr/local/bin/ctr symlink to k3s
[INFO]  Creating killall script /usr/local/bin/k3s-killall.sh
[INFO]  Creating uninstall script /usr/local/bin/k3s-agent-uninstall.sh
[INFO]  env: Creating environment file /etc/systemd/system/k3s-agent.service.env
[INFO]  systemd: Creating service file /etc/systemd/system/k3s-agent.service
[INFO]  systemd: Enabling k3s-agent unit
Created symlink /etc/systemd/system/multi-user.target.wants/k3s-agent.service → /etc/systemd/system/k3s-agent.service.
[INFO]  systemd: Starting k3s-agent
Harbor
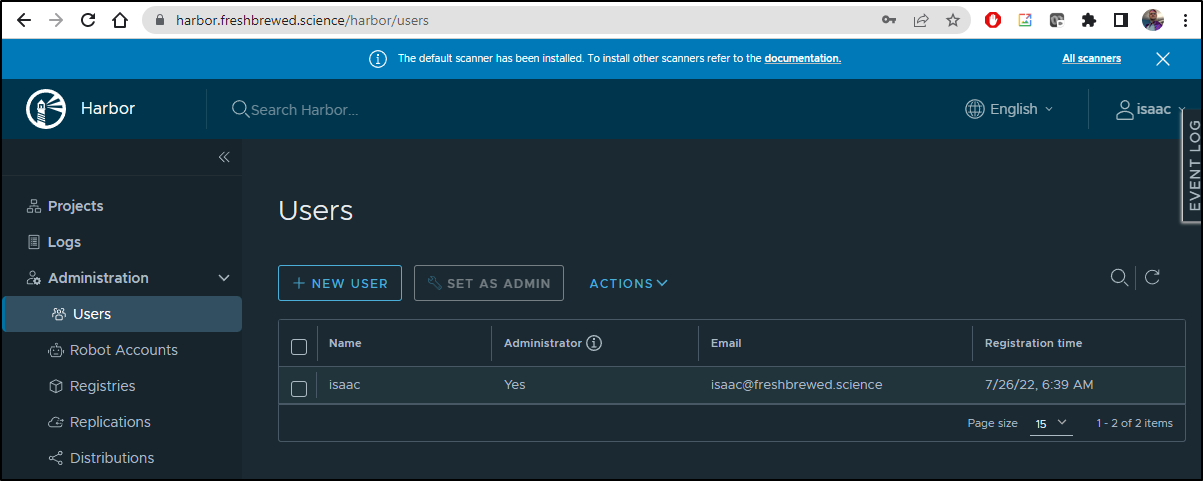
Now that Harbor is up, I’ll login as admin and then create a local “Isaac” admin user. I much prefer to use a unique admin user as opposed to the default admin.
Datadog
Add the Helm Repo if missing
builder@DESKTOP-QADGF36:~$ helm repo add datadog https://helm.datadoghq.com
"datadog" already exists with the same configuration, skipping
builder@DESKTOP-QADGF36:~$ helm repo update
Hang tight while we grab the latest from your chart repositories...
...Successfully got an update from the "kuma" chart repository
...Successfully got an update from the "myharbor" chart repository
...Successfully got an update from the "azure-samples" chart repository
...Successfully got an update from the "actions-runner-controller" chart repository
...Successfully got an update from the "novum-rgi-helm" chart repository
...Successfully got an update from the "uptime-kuma" chart repository
...Successfully got an update from the "lifen-charts" chart repository
...Successfully got an update from the "epsagon" chart repository
...Successfully got an update from the "sumologic" chart repository
...Successfully got an update from the "argo-cd" chart repository
...Successfully got an update from the "sonarqube" chart repository
...Successfully got an update from the "kubecost" chart repository
...Successfully got an update from the "dapr" chart repository
...Successfully got an update from the "nginx-stable" chart repository
...Successfully got an update from the "datadog" chart repository
...Successfully got an update from the "harbor" chart repository
...Successfully got an update from the "rancher-latest" chart repository
...Successfully got an update from the "incubator" chart repository
...Successfully got an update from the "newrelic" chart repository
...Successfully got an update from the "crossplane-stable" chart repository
...Successfully got an update from the "gitlab" chart repository
...Successfully got an update from the "bitnami" chart repository
Update Complete. ⎈Happy Helming!⎈
I need to pull over my DD Token from the former cluster
builder@DESKTOP-QADGF36:~/Workspaces/jekyll-blog$ kubectx default
Switched to context "default".
builder@DESKTOP-QADGF36:~/Workspaces/jekyll-blog$ kubectl get secret dd-secret
NAME        TYPE     DATA   AGE
dd-secret   Opaque   1      41d
builder@DESKTOP-QADGF36:~/Workspaces/jekyll-blog$ kubectl get secret dd-secret -o yaml > dd-secret.yaml
builder@DESKTOP-QADGF36:~/Workspaces/jekyll-blog$ kubectx oldmaccluster
Switched to context "oldmaccluster".
builder@DESKTOP-QADGF36:~/Workspaces/jekyll-blog$ kubectl apply -f dd-secret.yaml
secret/dd-secret created
I’ll create a fresh values file, this time calling the cluster k3s77b02
$ cat datadog.release.values.yml
targetSystem: "linux"
datadog:
  # apiKey: <DATADOG_API_KEY>
  # appKey: <DATADOG_APP_KEY>
  # If not using secrets, then use apiKey and appKey instead
  apiKeyExistingSecret: dd-secret
  clusterName: k3s77b02
  tags: []
  orchestratorExplorer:
    enabled: true
  appKey: 51bbf169c11305711e4944b9e74cd918838efbb2
  apm:
    enabled: true
    port: 8126
    portEnabled: true
  logs:
    containerCollectAll: true
    enabled: true
  networkMonitoring:
    enabled: true
  processAgent:
    enabled: true
    processCollection: true
clusterAgent:
  replicas: 2
  rbac:
    create: true
    serviceAccountName: default
  metricsProvider:
    enabled: true
    createReaderRbac: true
    useDatadogMetrics: true
    service:
      type: ClusterIP
      port: 8443
agents:
  rbac:
    create: true
    serviceAccountName: default
clusterChecksRunner:
  enabled: true
  rbac:
    create: true
    serviceAccountName: default
  replicas: 2
Then I just install
$ helm install my-dd-release -f datadog.release.values.yml datadog/datadog
W0726 06:45:47.415196    4816 warnings.go:70] spec.template.metadata.annotations[container.seccomp.security.alpha.kubernetes.io/system-probe]: deprecated since v1.19, non-functional in v1.25+; use the "seccompProfile" field instead
NAME: my-dd-release
LAST DEPLOYED: Tue Jul 26 06:45:46 2022
NAMESPACE: default
STATUS: deployed
REVISION: 1
TEST SUITE: None
NOTES:
Datadog agents are spinning up on each node in your cluster. After a few
minutes, you should see your agents starting in your event stream:
    https://app.datadoghq.com/event/explorer
You disabled creation of Secret containing API key, therefore it is expected
that you create Secret named 'dd-secret' which includes a key called 'api-key' containing the API key.

The Datadog Agent is listening on port 8126 for APM service.

#################################################################
####               WARNING: Deprecation notice               ####
#################################################################

The option `datadog.apm.enabled` is deprecated, please use `datadog.apm.portEnabled` to enable TCP communication to the trace-agent.
The option `datadog.apm.socketEnabled` is enabled by default and can be used to rely on unix socket or name-pipe communication.

###################################################################################
####   WARNING: Cluster-Agent should be deployed in high availability mode     ####
###################################################################################

The Cluster-Agent should be in high availability mode because the following features
are enabled:
* Admission Controller
* External Metrics Provider

To run in high availability mode, our recommandation is to update the chart
configuration with:
* set `clusterAgent.replicas` value to `2` replicas .
* set `clusterAgent.createPodDisruptionBudget` to `true`.
GH Actions Runner
Much the same, let me add the GH Actions Runner charts
builder@DESKTOP-QADGF36:~/Workspaces/jekyll-blog$ helm repo add actions-runner-controller https://actions-runner-controller.github.io/actions-runner-controller
"actions-runner-controller" already exists with the same configuration, skipping
builder@DESKTOP-QADGF36:~/Workspaces/jekyll-blog$ helm repo update
Hang tight while we grab the latest from your chart repositories...
...Successfully got an update from the "azure-samples" chart repository
...Successfully got an update from the "epsagon" chart repository
...Successfully got an update from the "kuma" chart repository
...Successfully got an update from the "dapr" chart repository
...Successfully got an update from the "uptime-kuma" chart repository
...Successfully got an update from the "novum-rgi-helm" chart repository
...Successfully got an update from the "nginx-stable" chart repository
...Successfully got an update from the "actions-runner-controller" chart repository
...Successfully got an update from the "sonarqube" chart repository
...Successfully got an update from the "lifen-charts" chart repository
...Successfully got an update from the "kubecost" chart repository
...Successfully got an update from the "harbor" chart repository
...Successfully got an update from the "sumologic" chart repository
...Successfully got an update from the "datadog" chart repository
...Successfully got an update from the "newrelic" chart repository
...Successfully got an update from the "crossplane-stable" chart repository
...Successfully got an update from the "argo-cd" chart repository
...Successfully got an update from the "gitlab" chart repository
...Successfully got an update from the "rancher-latest" chart repository
...Successfully got an update from the "bitnami" chart repository
...Successfully got an update from the "incubator" chart repository
...Successfully got an update from the "myharbor" chart repository
Update Complete. ⎈Happy Helming!⎈
I’ll snage three CMs from the former cluster then apply 2 of them right away
builder@DESKTOP-QADGF36:~/Workspaces/jekyll-blog$ kubectx default
Switched to context "default".
builder@DESKTOP-QADGF36:~/Workspaces/jekyll-blog$ kubectl get secret -n actions-runner-system controller-manager -o yaml > cm.ars.secret.yaml
builder@DESKTOP-QADGF36:~/Workspaces/jekyll-blog$ kubectl get secret awsjekyll -o yaml > aws.key.yaml
builder@DESKTOP-QADGF36:~/Workspaces/jekyll-blog$ kubectl get secret ddjekyll -o yaml > dd.key.yaml

builder@DESKTOP-QADGF36:~/Workspaces/jekyll-blog$ kubectx oldmaccluster
Switched to context "oldmaccluster".
builder@DESKTOP-QADGF36:~/Workspaces/jekyll-blog$ kubectl apply -f dd.key.yaml
secret/ddjekyll created
builder@DESKTOP-QADGF36:~/Workspaces/jekyll-blog$ kubectl apply -f aws.key.yaml
secret/awsjekyll created
Create a namespace, then apply the third
$ kubectl create ns actions-runner-system
namespace/actions-runner-system created
$ kubectl apply -f cm.ars.secret.yaml -n actions-runner-system
secret/controller-manager created
Now installed
$ helm upgrade --install --namespace actions-runner-system --wait actions-runner-controller actions-runner-controller/actions-runner-controller --set authSecret.name=controller-manager
Release "actions-runner-controller" does not exist. Installing it now.
NAME: actions-runner-controller
LAST DEPLOYED: Tue Jul 26 06:51:04 2022
NAMESPACE: actions-runner-system
STATUS: deployed
REVISION: 1
TEST SUITE: None
NOTES:
1. Get the application URL by running these commands:
  export POD_NAME=$(kubectl get pods --namespace actions-runner-system -l "app.kubernetes.io/name=actions-runner-controller,app.kubernetes.io/instance=actions-runner-controller" -o jsonpath="{.items[0].metadata.name}")
  export CONTAINER_PORT=$(kubectl get pod --namespace actions-runner-system $POD_NAME -o jsonpath="{.spec.containers[0].ports[0].containerPort}")
  echo "Visit http://127.0.0.1:8080 to use your application"
  kubectl --namespace actions-runner-system port-forward $POD_NAME 8080:$CONTAINER_PORT
My Next step is to build and push the Dockerfile which is our base image
builder@DESKTOP-QADGF36:~/Workspaces/jekyll-blog/ghRunnerImage$ cat Dockerfile
FROM summerwind/actions-runner:latest

RUN sudo apt update -y \
  && umask 0002 \
  && sudo apt install -y ca-certificates curl apt-transport-https lsb-release gnupg

# Install MS Key
RUN curl -sL https://packages.microsoft.com/keys/microsoft.asc | gpg --dearmor | sudo tee /etc/apt/trusted.gpg.d/microsoft.gpg > /dev/null

# Add MS Apt repo
RUN umask 0002 && echo "deb [arch=amd64] https://packages.microsoft.com/repos/azure-cli/ focal main" | sudo tee /etc/apt/sources.list.d/azure-cli.list

# Install Azure CLI
RUN sudo apt update -y \
  && umask 0002 \
  && sudo apt install -y azure-cli awscli ruby-full

RUN sudo chown runner /usr/local/bin

RUN sudo chmod 777 /var/lib/gems/2.7.0

RUN sudo chown runner /var/lib/gems/2.7.0

# Install Expect and SSHPass

RUN sudo apt update -y \
  && umask 0002 \
  && sudo apt install -y sshpass expect

# save time per build
RUN umask 0002 \
  && gem install jekyll bundler

RUN sudo rm -rf /var/lib/apt/lists/*

#harbor.freshbrewed.science/freshbrewedprivate/myghrunner:1.1.13
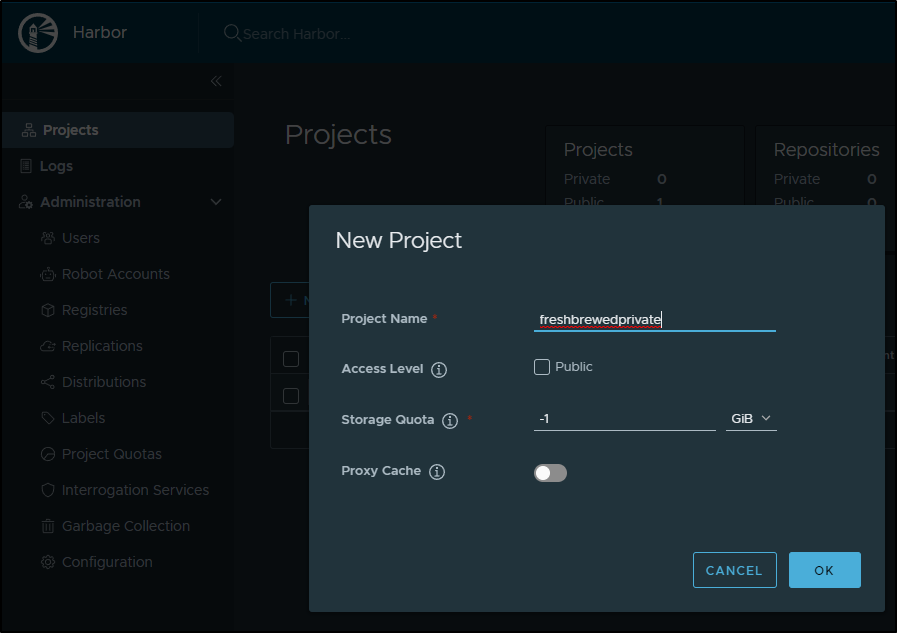
I’ll first create the private Harbor project
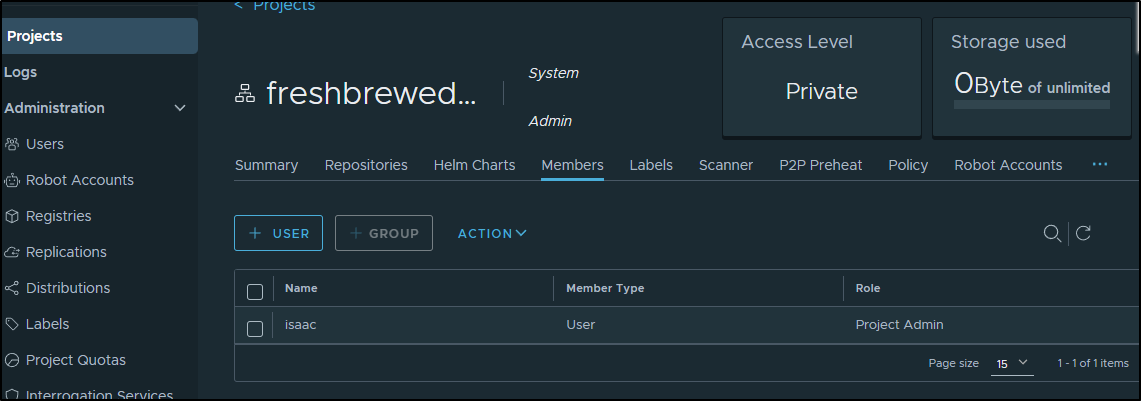
I can see I’m admin there
But I’ll likely want to create a docker puller user
builder@DESKTOP-QADGF36:~$ kubectx default
Switched to context "default".
builder@DESKTOP-QADGF36:~$ kubectl get secret myharborreg -o yaml
apiVersion: v1
data:
  .dockerconfigjson: eyJhdXRocyI6eyJoYXJib3IuZnJlc2hicmV3ZWQuc2NpZW5jZSI6eyJ1c2VybmFtZSI6ImltYWdlcHVsbGVyIiwicGFzc3dvcmQiOiJub3RoZXJlYWxwYXNzd29yZCIsImVtYWlsIjoiaXNhYWMuam9obnNvbkBnbWFpbC5jb20iLCJhdXRoIjoiYVdhc2RmYXNkZmFzZGZhc2ZkZENFPSJ9fX0=
kind: Secret
metadata:
  creationTimestamp: "2022-06-17T14:24:31Z"
  name: myharborreg
  namespace: default
  resourceVersion: "731133"
  uid: 24928f04-cb8a-483e-b44f-aeaa72ef27f2
type: kubernetes.io/dockerconfigjson
The password will be in that base64 string (so I needn’t modify anything else)
builder@DESKTOP-QADGF36:~$ echo eyJhdXRocyI6eyJoYXJib3IuZnJlc2hicmV3ZWQuc2NpZW5jZSI6eyJ1c2VybmFtZSI6ImltYWdlcHVsbGVyIiwicGFzc3dvcmQiOiJub3RoZXJlYWxwYXNzd29yZCIsImVtYWlsIjoiaXNhYWMuam9obnNvbkBnbWFpbC5jb20iLCJhdXRoIjoiYVdhc2RmYXNkZmFzZGZhc2ZkZENFPSJ9fX0= | base64 --decode
{"auths":{"harbor.freshbrewed.science":{"username":"imagepuller","password":"notherealpassword","email":"isaac.johnson@gmail.com","auth":"aWasdfasdfasdfasfddCE="}}}
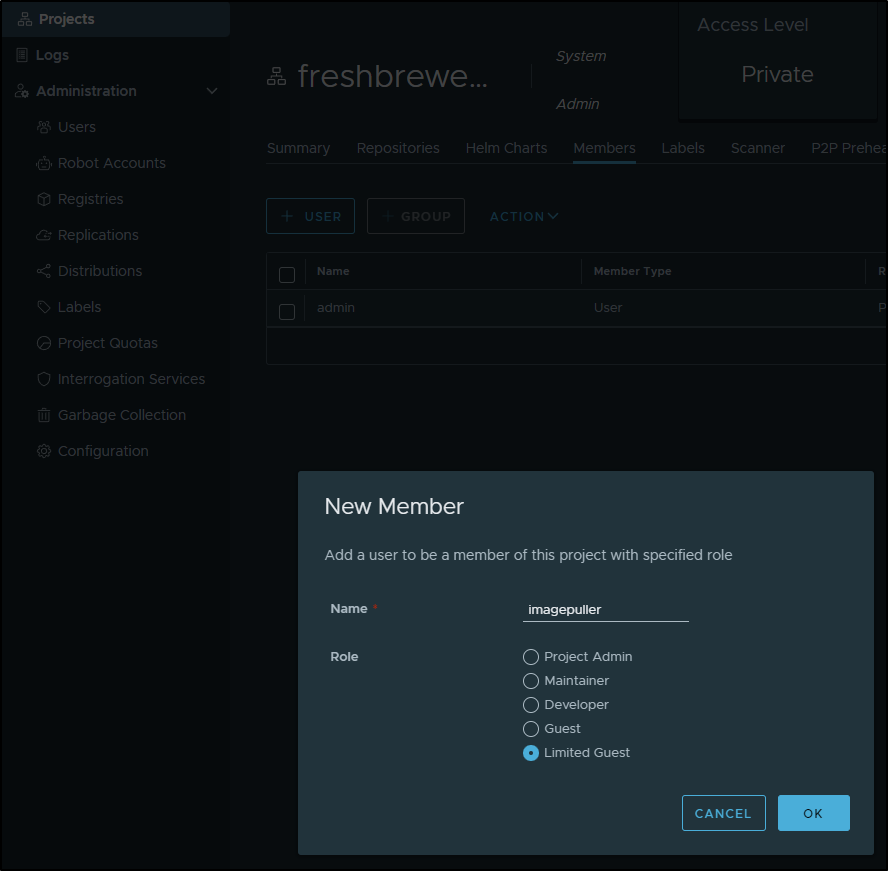
Then I create the new user
And add to the project
Unlike before where we just created manually
kubectl create secret docker-registry myharborreg --docker-server=harbor.freshbrewed.science --docker-username=imagepuller --docker-password=adsfasdfasdfsadf --docker-email=isaac.johnson@gmail.com
we can instead just copy over the harbor reg cred as we are keeping the same password
builder@DESKTOP-QADGF36:~$ kubectx default
Switched to context "default".
builder@DESKTOP-QADGF36:~$ kubectl get secret myharborreg -o yaml > myharborreg.yaml
builder@DESKTOP-QADGF36:~$ kubectx oldmaccluster
Switched to context "oldmaccluster".
builder@DESKTOP-QADGF36:~$ kubectl apply -f myharborreg.yaml
secret/myharborreg created
I’ll first build the Dockerfile
builder@DESKTOP-QADGF36:~/Workspaces/jekyll-blog/ghRunnerImage$ docker build -t harbor.freshbrewed.science/freshbrewedprivate/myghrunner:1.1.13 .
[+] Building 304.3s (16/16) FINISHED
=> [internal] load build definition from Dockerfile 0.0s
=> => transferring dockerfile: 38B 0.0s
=> [internal] load .dockerignore 0.0s
=> => transferring context: 2B 0.0s
=> [internal] load metadata for docker.io/summerwind/actions-runner:latest 6.9s
=> [auth] summerwind/actions-runner:pull token for registry-1.docker.io 0.0s
=> [ 1/11] FROM docker.io/summerwind/actions-runner:latest@sha256:ba38ccf99a0b626225400cbdb02bf03ed02306dd93dc32b7fa38e3a5664d5c84 17.6s
=> => resolve docker.io/summerwind/actions-runner:latest@sha256:ba38ccf99a0b626225400cbdb02bf03ed02306dd93dc32b7fa38e3a5664d5c84 0.0s
=> => sha256:fb14bfaadaa744617d2b17a1f1e950ef8d24fd9807a8c943d48ed157de181a15 31.79kB / 31.79kB 0.3s
=> => sha256:ba38ccf99a0b626225400cbdb02bf03ed02306dd93dc32b7fa38e3a5664d5c84 743B / 743B 0.0s
=> => sha256:7157fe1aecd18c9d2071dd2124ae94a1d5ea4b676d3ad65c736dd9b7334852b7 9.99kB / 9.99kB 0.0s
=> => sha256:bb7e5d3bc76f059f46cd03ba2e9e26bf759c9fea6d1702f3eab3c2d607231639 157.09MB / 157.09MB 6.1s
=> => sha256:8c091102bb39364f69e664736303cd802b148670300986ea9f85a82c3f6ac0f4 2.62kB / 2.62kB 0.0s
=> => sha256:50f97b5ddefbeea1b4a80a7c4a7b8154d17344eb4442af6140bd8fa739997206 14.22MB / 14.22MB 1.1s
=> => sha256:ff0fde0a40102cc48d6a34285fffc68fe6a03b31a3d1368b9cfef5dfbbc79b94 146.04MB / 146.04MB 6.0s
=> => sha256:3a8a039ec84fcd3a5b01b0b91192ad5cfbd6284fe86f0a353ed122a0a209071f 930.18kB / 930.18kB 1.3s
=> => sha256:23c64a59cb0f1c796be3c9dcd3a6042b5951026b62f33333f660a17ed8acf821 142B / 142B 1.4s
=> => sha256:9d20c9f4af9cb3d46d2c2afc9ed1c87a40e3e4c3a8b34688d711cb59d0658fd6 4.26kB / 4.26kB 1.6s
=> => sha256:fa1de483441ae449b38f20049c62a7409e0cf47aaa2cc54d251fdd92ab6c64fd 520B / 520B 1.7s
=> => sha256:5300f0bd34b2b93906ac4840d047d275dbd4d6dc11d100e904f94bb611ada590 209B / 209B 1.9s
=> => extracting sha256:bb7e5d3bc76f059f46cd03ba2e9e26bf759c9fea6d1702f3eab3c2d607231639 5.7s
=> => extracting sha256:fb14bfaadaa744617d2b17a1f1e950ef8d24fd9807a8c943d48ed157de181a15 0.0s
=> => extracting sha256:50f97b5ddefbeea1b4a80a7c4a7b8154d17344eb4442af6140bd8fa739997206 0.4s
=> => extracting sha256:ff0fde0a40102cc48d6a34285fffc68fe6a03b31a3d1368b9cfef5dfbbc79b94 4.6s
=> => extracting sha256:3a8a039ec84fcd3a5b01b0b91192ad5cfbd6284fe86f0a353ed122a0a209071f 0.1s
=> => extracting sha256:23c64a59cb0f1c796be3c9dcd3a6042b5951026b62f33333f660a17ed8acf821 0.0s
=> => extracting sha256:9d20c9f4af9cb3d46d2c2afc9ed1c87a40e3e4c3a8b34688d711cb59d0658fd6 0.0s
=> => extracting sha256:fa1de483441ae449b38f20049c62a7409e0cf47aaa2cc54d251fdd92ab6c64fd 0.0s
=> => extracting sha256:5300f0bd34b2b93906ac4840d047d275dbd4d6dc11d100e904f94bb611ada590 0.0s
=> [ 2/11] RUN sudo apt update -y && umask 0002 && sudo apt install -y ca-certificates curl apt-transport-https lsb-release gnupg 18.6s
=> [ 3/11] RUN curl -sL https://packages.microsoft.com/keys/microsoft.asc | gpg --dearmor | sudo tee /etc/apt/trusted.gpg.d/microsoft.gpg > /dev/null 0.9s
=> [ 4/11] RUN umask 0002 && echo "deb [arch=amd64] https://packages.microsoft.com/repos/azure-cli/ focal main" | sudo tee /etc/apt/sources.list.d/azure-cli.list 0.6s
=> [ 5/11] RUN sudo apt update -y && umask 0002 && sudo apt install -y azure-cli awscli ruby-full 65.3s
=> [ 6/11] RUN sudo chown runner /usr/local/bin 0.7s
=> [ 7/11] RUN sudo chmod 777 /var/lib/gems/2.7.0 0.7s
=> [ 8/11] RUN sudo chown runner /var/lib/gems/2.7.0 0.5s
=> [ 9/11] RUN sudo apt update -y && umask 0002 && sudo apt install -y sshpass expect 14.8s
=> [10/11] RUN umask 0002 && gem install jekyll bundler 168.3s
=> [11/11] RUN sudo rm -rf /var/lib/apt/lists/* 0.6s
=> exporting to image 8.8s
=> => exporting layers 8.8s
=> => writing image sha256:466dfe32665a1e94ea97cf56abe3c30c57d093b6a359bef3a099e694d42e797a 0.0s
=> => naming to harbor.freshbrewed.science/freshbrewedprivate/myghrunner:1.1.13
And then login and push
 builder@DESKTOP-QADGF36:~/Workspaces/jekyll-blog/ghRunnerImage$ docker login  harbor.freshbrewed.science
Authenticating with existing credentials...
Stored credentials invalid or expired
Username (isaac): isaac
Password:
Login Succeeded

builder@DESKTOP-QADGF36:~/Workspaces/jekyll-blog/ghRunnerImage$ docker push harbor.freshbrewed.science/freshbrewedprivate/myghrunner:1.1.13
The push refers to repository [harbor.freshbrewed.science/freshbrewedprivate/myghrunner]
a33d122f3977: Pushed
68b56db10bdc: Pushing [==================================================>]    212MB/212MB
5a9222026ef2: Pushing [==================================================>]   7.39MB/7.39MB
c8dfdc7d2fb5: Pushed
e973243a29c2: Pushed
8d0297bc8b39: Pushing   2.56kB
8771c6c56621: Pushing [==================================================>]  1.297GB
85c59e493d06: Waiting
878effb98dc5: Waiting
990c7a57091d: Waiting
4c6b8ffb915c: Waiting
f3f684c6acef: Waiting
dce00df87545: Waiting
73fa2e572ed0: Waiting
f3372f2cdb03: Waiting
f76bedf4e7f1: Waiting
5b7c28041470: Waiting
c10c0f95e7b4: Waiting
72d1612031b6: Waiting
5f70bf18a086: Waiting
af7ed92504ae: Waiting
error parsing HTTP 413 response body: invalid character '<' looking for beginning of value: "<html>\r\n<head><title>413 Request Entity Too Large</title></head>\r\n<body>\r\n<center><h1>413 Request Entity Too Large</h1></center>\r\n<hr><center>nginx/1.21.6</center>\r\n</body>\r\n</html>\r\n"
Ahh! the old Entity too large error. The forever changing annotations of Nginx.
We can see the “new” Ingress looks like this:
builder@DESKTOP-QADGF36:~$ kubectl get ingress harbor-registry-ingress -o yaml
apiVersion: networking.k8s.io/v1
kind: Ingress
metadata:
  annotations:
    cert-manager.io/cluster-issuer: letsencrypt-production
    ingress.kubernetes.io/proxy-body-size: "0"
    ingress.kubernetes.io/ssl-redirect: "true"
    meta.helm.sh/release-name: harbor-registry
    meta.helm.sh/release-namespace: default
    nginx.ingress.kubernetes.io/proxy-body-size: "0"
    nginx.ingress.kubernetes.io/ssl-redirect: "true"
  creationTimestamp: "2022-07-26T02:48:40Z"
  generation: 1
  labels:
    app: harbor
    app.kubernetes.io/managed-by: Helm
    chart: harbor
    heritage: Helm
    release: harbor-registry
  name: harbor-registry-ingress
  namespace: default
  resourceVersion: "33018"
  uid: 04392320-159c-4c39-9cf2-2fb8b388fa29
and the former (working) as
apiVersion: networking.k8s.io/v1
kind: Ingress
metadata:
  annotations:
    cert-manager.io/cluster-issuer: letsencrypt-production
    ingress.kubernetes.io/proxy-body-size: "0"
    ingress.kubernetes.io/ssl-redirect: "true"
    kubectl.kubernetes.io/last-applied-configuration: |
      {"apiVersion":"networking.k8s.io/v1","kind":"Ingress","metadata":{"annotations":{"cert-manager.io/cluster-issuer":"letsencrypt-production","ingress.kubernetes.io/proxy-body-size":"0","ingress.kubernetes.io/ssl-redirect":"true","meta.helm.sh/release-name":"harbor-registry","meta.helm.sh/release-namespace":"default","nginx.ingress.kubernetes.io/proxy-body-size":"0","nginx.ingress.kubernetes.io/proxy-read-timeout":"600","nginx.ingress.kubernetes.io/proxy-send-timeout":"600","nginx.ingress.kubernetes.io/ssl-redirect":"true","nginx.org/client-max-body-size":"0","nginx.org/proxy-connect-timeout":"600","nginx.org/proxy-read-timeout":"600"},"creationTimestamp":"2022-06-13T00:35:26Z","generation":2,"labels":{"app":"harbor","app.kubernetes.io/managed-by":"Helm","chart":"harbor","heritage":"Helm","release":"harbor-registry"},"name":"harbor-registry-ingress","namespace":"default","resourceVersion":"206326","uid":"f16adda2-1a47-4486-af4d-c8ab7d9c75c3"},"spec":{"ingressClassName":"nginx","rules":[{"host":"harbor.freshbrewed.science","http":{"paths":[{"backend":{"service":{"name":"harbor-registry-core","port":{"number":80}}},"path":"/api/","pathType":"Prefix"},{"backend":{"service":{"name":"harbor-registry-core","port":{"number":80}}},"path":"/service/","pathType":"Prefix"},{"backend":{"service":{"name":"harbor-registry-core","port":{"number":80}}},"path":"/v2","pathType":"Prefix"},{"backend":{"service":{"name":"harbor-registry-core","port":{"number":80}}},"path":"/chartrepo/","pathType":"Prefix"},{"backend":{"service":{"name":"harbor-registry-core","port":{"number":80}}},"path":"/c/","pathType":"Prefix"},{"backend":{"service":{"name":"harbor-registry-portal","port":{"number":80}}},"path":"/","pathType":"Prefix"}]}}],"tls":[{"hosts":["harbor.freshbrewed.science"],"secretName":"harbor.freshbrewed.science-cert"}]},"status":{"loadBalancer":{"ingress":[{"ip":"192.168.10.0"}]}}}
    meta.helm.sh/release-name: harbor-registry
    meta.helm.sh/release-namespace: default
    nginx.ingress.kubernetes.io/proxy-body-size: "0"
    nginx.ingress.kubernetes.io/proxy-read-timeout: "600"
    nginx.ingress.kubernetes.io/proxy-send-timeout: "600"
    nginx.ingress.kubernetes.io/ssl-redirect: "true"
    nginx.org/client-max-body-size: "0"
    nginx.org/proxy-connect-timeout: "600"
    nginx.org/proxy-read-timeout: "600"
  creationTimestamp: "2022-06-13T00:35:26Z"
  generation: 2
  labels:
    app: harbor
    app.kubernetes.io/managed-by: Helm
    chart: harbor
    heritage: Helm
    release: harbor-registry
  name: harbor-registry-ingress
  namespace: default
  resourceVersion: "16992267"
  uid: f16adda2-1a47-4486-af4d-c8ab7d9c75c3
I’ll add the missing values
builder@DESKTOP-QADGF36:~$ kubectl get ingress harbor-registry-ingress -o yaml > harbor-registry-ingress.yaml
builder@DESKTOP-QADGF36:~$ kubectl get ingress harbor-registry-ingress -o yaml > harbor-registry-ingress.yaml.bak
builder@DESKTOP-QADGF36:~$ vi harbor-registry-ingress.yaml
builder@DESKTOP-QADGF36:~$ diff harbor-registry-ingress.yaml harbor-registry-ingress.yaml.bak
11,12d10
<     nginx.ingress.kubernetes.io/proxy-read-timeout: "600"
<     nginx.ingress.kubernetes.io/proxy-send-timeout: "600"
14,16d11
<     nginx.org/client-max-body-size: "0"
<     nginx.org/proxy-connect-timeout: "600"
<     nginx.org/proxy-read-timeout: "600"

builder@DESKTOP-QADGF36:~$ kubectl apply -f harbor-registry-ingress.yaml
Warning: resource ingresses/harbor-registry-ingress is missing the kubectl.kubernetes.io/last-applied-configuration annotation which is required by kubectl apply. kubectl apply should only be used on resources created declaratively by either kubectl create --save-config or kubectl apply. The missing annotation will be patched automatically.
ingress.networking.k8s.io/harbor-registry-ingress configured
And now the push works
builder@DESKTOP-QADGF36:~/Workspaces/jekyll-blog/ghRunnerImage$ docker push harbor.freshbrewed.science/freshbrewedprivate/myghrunner:1.1.13
The push refers to repository [harbor.freshbrewed.science/freshbrewedprivate/myghrunner]
a33d122f3977: Layer already exists
68b56db10bdc: Pushed
5a9222026ef2: Pushed
c8dfdc7d2fb5: Layer already exists
e973243a29c2: Layer already exists
8d0297bc8b39: Layer already exists
8771c6c56621: Pushed
85c59e493d06: Pushed
878effb98dc5: Pushed
990c7a57091d: Pushed
4c6b8ffb915c: Pushed
f3f684c6acef: Pushed
dce00df87545: Pushed
73fa2e572ed0: Pushed
f3372f2cdb03: Pushed
f76bedf4e7f1: Pushed
5b7c28041470: Pushed
c10c0f95e7b4: Pushed
72d1612031b6: Pushed
5f70bf18a086: Pushed
af7ed92504ae: Pushed
1.1.13: digest: sha256:90841318bc60e5cc87e8f388da6adb5e458a449c21f9534aec7e8fe59a83ee64 size: 4712
We can now apply the runner deployment
builder@DESKTOP-QADGF36:~/Workspaces/jekyll-blog/ghRunnerImage$ cat newRunnerDeployment.yml
apiVersion: actions.summerwind.dev/v1alpha1
kind: RunnerDeployment
metadata:
  name: new-jekyllrunner-deployment
  namespace: default
spec:
  replicas: 1
  selector: null
  template:
    metadata: {}
    spec:
      dockerEnabled: true
      dockerdContainerResources: {}
      env:
      - name: AWS_DEFAULT_REGION
        value: us-east-1
      - name: AWS_ACCESS_KEY_ID
        valueFrom:
          secretKeyRef:
            key: USER_NAME
            name: awsjekyll
      - name: AWS_SECRET_ACCESS_KEY
        valueFrom:
          secretKeyRef:
            key: PASSWORD
            name: awsjekyll
      - name: DATADOG_API_KEY
        valueFrom:
          secretKeyRef:
            key: DDAPIKEY
            name: ddjekyll
      image: harbor.freshbrewed.science/freshbrewedprivate/myghrunner:1.1.13
      imagePullPolicy: IfNotPresent
      imagePullSecrets:
      - name: myharborreg
      #- name: alicloud
      labels:
      - new-jekyllrunner-deployment
      repository: idjohnson/jekyll-blog
      resources: {}

$ kubectl apply -f newRunnerDeployment.yml
runnerdeployment.actions.summerwind.dev/new-jekyllrunner-deployment created
A reminder, the GH token used came from cm.ars.secret.yaml. So if it has expired, that is where to update
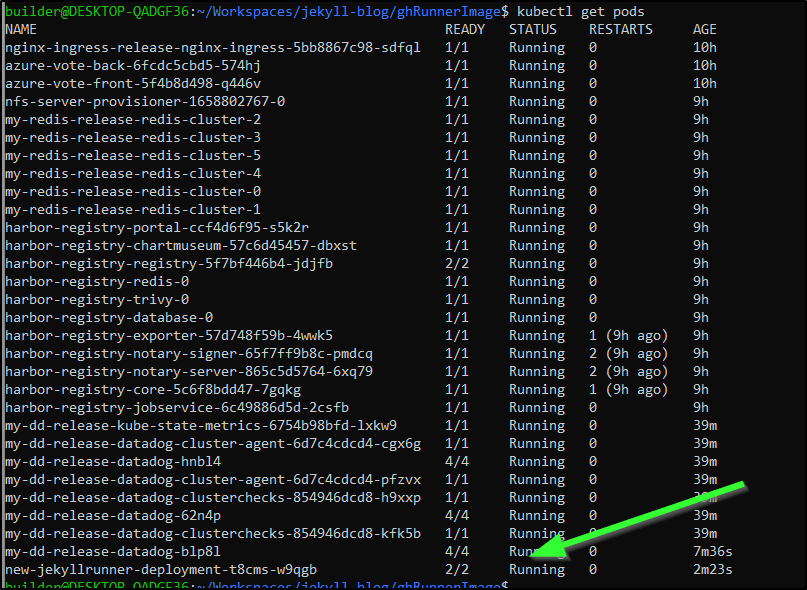
We can see it is working by looking at the running pods
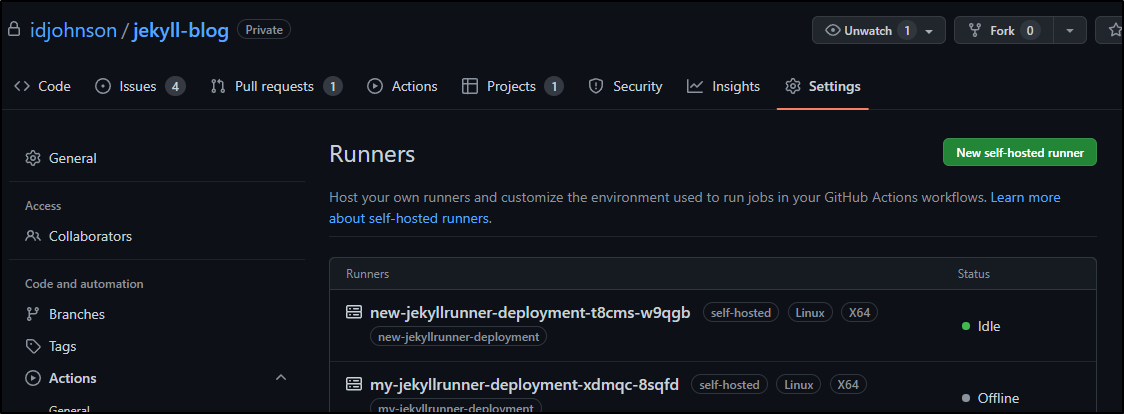
and then checking the active runners in GH
Dapr
We already have the latest binary from our recent blog so we can just re-install it
$ dapr -v
CLI version: 1.8.0
Runtime version: n/a

$ dapr init -k
⌛  Making the jump to hyperspace...
ℹ️  Note: To install Dapr using Helm, see here: https://docs.dapr.io/getting-started/install-dapr-kubernetes/#install-with-helm-advanced

ℹ️  Container images will be pulled from Docker Hub
✅  Deploying the Dapr control plane to your cluster...
✅  Success! Dapr has been installed to namespace dapr-system. To verify, run `dapr status -k' in your terminal. To get started, go here: https://aka.ms/dapr-getting-started
Loft
as with Dapr, we have the latest binary, so we can just install loft.sh
builder@DESKTOP-QADGF36:~/Workspaces/jekyll-blog/ghRunnerImage$ loft -v
loft version 2.2.0
builder@DESKTOP-QADGF36:~/Workspaces/jekyll-blog/ghRunnerImage$ loft start --host=loft.freshbrewed.science
[warn]   There is a newer version of Loft: v2.2.1. Run `loft upgrade` to upgrade to the newest version.


? Seems like you try to use 'loft start' with a different kubernetes context than before. Please choose which kubernetes context you want to use
 oldmaccluster

[info]   Welcome to Loft!
[info]   This installer will help you configure and deploy Loft.

? Enter your email address to create the login for your admin user isaac.johnson@gmail.com

[info]   Executing command: helm upgrade loft loft --install --reuse-values --create-namespace --repository-config='' --kube-context oldmaccluster --namespace loft --repo https://charts.loft.sh/ --set admin.email=isaac.johnson@gmail.com --set admin.password=4d5140b3-asdf-asdf-asdf-asdfasdf --set ingress.enabled=true --set ingress.host=loft.freshbrewed.science --reuse-values

[done] √ Loft has been deployed to your cluster!
[done] √ Loft pod successfully started

? Unable to reach Loft at https://loft.freshbrewed.science. Do you want to start port-forwarding instead?
 No, please re-run the DNS check


###################################     DNS CONFIGURATION REQUIRED     ##################################

Create a DNS A-record for loft.freshbrewed.science with the EXTERNAL-IP of your nginx-ingress controller.
To find this EXTERNAL-IP, run the following command and look at the output:

> kubectl get services -n ingress-nginx
                                                     |---------------|
NAME                       TYPE           CLUSTER-IP | EXTERNAL-IP   |  PORT(S)                      AGE
ingress-nginx-controller   LoadBalancer   10.0.0.244 | XX.XXX.XXX.XX |  80:30984/TCP,443:31758/TCP   19m
                                                     |^^^^^^^^^^^^^^^|

EXTERNAL-IP may be 'pending' for a while until your cloud provider has created a new load balancer.

#########################################################################################################

The command will wait until loft is reachable under the host. You can also abort and use port-forwarding instead
by running 'loft start' again.

[done] √ Loft is reachable at https://loft.freshbrewed.science


##########################   LOGIN   ############################

Username: admin
Password: 4d5140b3-asdf-asdf-asdf-asdfasdfasdfasdf  # Change via UI or via: loft reset password

Login via UI:  https://loft.freshbrewed.science
Login via CLI: loft login --insecure https://loft.freshbrewed.science

!!! You must accept the untrusted certificate in your browser !!!

Follow this guide to add a valid certificate: https://loft.sh/docs/administration/ssl

#################################################################

Loft was successfully installed and can now be reached at: https://loft.freshbrewed.science
I did use the Ingress definition from the old. Namely it set the class and the cert provider
$ kubectl get ingress -n loft -o yaml
apiVersion: v1
items:
- apiVersion: networking.k8s.io/v1
  kind: Ingress
  metadata:
    annotations:
      cert-manager.io/cluster-issuer: letsencrypt-prod
      ingress.kubernetes.io/proxy-body-size: "0"
      kubectl.kubernetes.io/last-applied-configuration: |
        {"apiVersion":"networking.k8s.io/v1","kind":"Ingress","metadata":{"annotations":{"cert-manager.io/cluster-issuer":"letsencrypt-prod","ingress.kubernetes.io/proxy-body-size":"0","meta.helm.sh/release-name":"loft","meta.helm.sh/release-namespace":"loft","nginx.ingress.kubernetes.io/proxy-body-size":"0","nginx.ingress.kubernetes.io/proxy-buffer-size":"32k","nginx.ingress.kubernetes.io/proxy-buffers-number":"8 32k","nginx.ingress.kubernetes.io/proxy-read-timeout":"43200","nginx.ingress.kubernetes.io/proxy-send-timeout":"43200","nginx.org/websocket-services":"loft"},"creationTimestamp":"2022-06-21T17:02:53Z","generation":1,"labels":{"app":"loft","app.kubernetes.io/managed-by":"Helm","chart":"loft-2.2.0","heritage":"Helm","release":"loft"},"name":"loft-ingress","namespace":"loft","resourceVersion":"1583518","uid":"87125ded-906a-4e03-8458-eb6207258fe8"},"spec":{"ingressClassName":"nginx","rules":[{"host":"loft.freshbrewed.science","http":{"paths":[{"backend":{"service":{"name":"loft","port":{"number":80}}},"path":"/","pathType":"ImplementationSpecific"}]}}],"tls":[{"hosts":["loft.freshbrewed.science"],"secretName":"tls-loft"}]},"status":{"loadBalancer":{"ingress":[{"ip":"192.168.1.159"}]}}}
      meta.helm.sh/release-name: loft
      meta.helm.sh/release-namespace: loft
      nginx.ingress.kubernetes.io/proxy-body-size: "0"
      nginx.ingress.kubernetes.io/proxy-buffer-size: 32k
      nginx.ingress.kubernetes.io/proxy-buffers-number: 8 32k
      nginx.ingress.kubernetes.io/proxy-read-timeout: "43200"
      nginx.ingress.kubernetes.io/proxy-send-timeout: "43200"
      nginx.org/websocket-services: loft
    creationTimestamp: "2022-06-21T18:04:46Z"
    generation: 1
    labels:
      app: loft
      app.kubernetes.io/managed-by: Helm
      chart: loft-2.2.0
      heritage: Helm
      release: loft
    name: loft-ingress
    namespace: loft
    resourceVersion: "16992274"
    uid: 13b35ddf-9bf8-4313-8650-d062cfb508eb
  spec:
    ingressClassName: nginx
    rules:
    - host: loft.freshbrewed.science
      http:
        paths:
        - backend:
            service:
              name: loft
              port:
                number: 80
          path: /
          pathType: ImplementationSpecific
    tls:
    - hosts:
      - loft.freshbrewed.science
      secretName: tls-loft
  status:
    loadBalancer: {}
kind: List
metadata:
  resourceVersion: ""
Recreating the Original Cluster
Now that we have a running Primary (mac77)
builder@DESKTOP-QADGF36:~$ kubectx mac77
Switched to context "mac77".
builder@DESKTOP-QADGF36:~$ kubectl get nodes
NAME                          STATUS   ROLES                  AGE   VERSION
isaac-macbookair              Ready    control-plane,master   30d   v1.23.9+k3s1
builder-hp-elitebook-850-g1   Ready    <none>                 30d   v1.23.9+k3s1
hp-hp-elitebook-850-g2        Ready    <none>                 30d   v1.23.9+k3s1
builder-hp-elitebook-850-g2   Ready    <none>                 22d   v1.23.9+k3s1

# Show IPs
$ kubectl get nodes -o yaml | grep 192 | grep internal-ip
      k3s.io/internal-ip: 192.168.1.214
      k3s.io/internal-ip: 192.168.1.77
      k3s.io/internal-ip: 192.168.1.38
      k3s.io/internal-ip: 192.168.1.57
Additionally, at this time, the former cluster is dead
builder@DESKTOP-QADGF36:~$ kubectx mac81
Switched to context "mac81".
builder@DESKTOP-QADGF36:~$ kubectl get nodes
The connection to the server 192.168.1.81:6443 was refused - did you specify the right host or port?

# check locally too
uilder@anna-MacBookAir:~$ kubectl get nodes
WARN[0000] Unable to read /etc/rancher/k3s/k3s.yaml, please start server with --write-kubeconfig-mode to modify kube config permissions
error: error loading config file "/etc/rancher/k3s/k3s.yaml": open /etc/rancher/k3s/k3s.yaml: permission denied
builder@anna-MacBookAir:~$ sudo kubectl get nodes
[sudo] password for builder:
The connection to the server 127.0.0.1:6443 was refused - did you specify the right host or port?
And my bash history shows I removed it already
  270  /usr/local/bin/k3s-uninstall.sh
  271  /usr/local/bin/k3s-uninstall.sh &
  272  ps -ef | grep umount
  273  /usr/local/bin/k3s-uninstall.sh
  274  ps -ef | grep umount
This means for this mac81 cluster, which I’ll spin fresh, I can also use an unused node from the old builder-macbookpro2
I plan to try using MetalLB again with this cluster. It’s also a good time to update the OS
Upgrades
builder@anna-MacBookAir:~$ sudo apt-get upgrade
Reading package lists... Done
Building dependency tree
Reading state information... Done
Calculating upgrade... Done
The following packages were automatically installed and are no longer required:
  libfprint-2-tod1 libllvm10 libllvm11 shim
Use 'sudo apt autoremove' to remove them.
The following packages have been kept back:
  fwupd
The following packages will be upgraded:
  apt apt-utils firefox firefox-locale-en isc-dhcp-client isc-dhcp-common libapt-pkg6.0 libfprint-2-2 libfprint-2-tod1 libkeyutils1 libmbim-glib4
  libmbim-proxy libmm-glib0 libnetplan0 libqmi-glib5 libqmi-proxy libsnmp-base libsnmp35 linux-firmware linux-libc-dev modemmanager netplan.io
  python-apt-common python3-apt python3-distupgrade snapd tracker-extract tracker-miner-fs ubuntu-advantage-tools ubuntu-release-upgrader-core
  ubuntu-release-upgrader-gtk unattended-upgrades update-notifier update-notifier-common xdg-desktop-portal xdg-desktop-portal-gtk
36 upgraded, 0 newly installed, 0 to remove and 1 not upgraded.
2 standard security updates
Need to get 170 MB/229 MB of archives.
After this operation, 5,897 kB of additional disk space will be used.
Do you want to continue? [Y/n]
...

# Double Check NFS-Common
$ sudo apt-get install nfs-common
Reading package lists... Done
Building dependency tree
Reading state information... Done
nfs-common is already the newest version (1:1.3.4-2.5ubuntu3.4).
The following packages were automatically installed and are no longer required:
  libfprint-2-tod1 libllvm10 libllvm11 shim
Use 'sudo apt autoremove' to remove them.
0 upgraded, 0 newly installed, 0 to remove and 1 not upgraded.

builder@anna-MacBookAir:~$ sudo reboot now
Connection to 192.168.1.81 closed by remote host.
Connection to 192.168.1.81 closed.

builder@anna-MacBookAir:~$ uptime
 09:15:51 up 4 min,  2 users,  load average: 5.37, 5.54, 2.46

 $ sudo kubectl get nodes
[sudo] password for builder:
NAME                          STATUS     ROLES                  AGE   VERSION
builder-macbookpro2           Ready      <none>                 73d   v1.23.9+k3s1
hp-hp-elitebook-850-g2        NotReady   <none>                 68d   v1.23.9+k3s1
builder-hp-elitebook-850-g2   NotReady   <none>                 48d   v1.24.3+k3s1
builder-hp-elitebook-850-g1   NotReady   <none>                 48d   v1.24.3+k3s1
isaac-macbookpro              NotReady   <none>                 48d   v1.23.9+k3s1
anna-macbookair               Ready      control-plane,master   80d   v1.23.9+k3s1
Seems a reboot proved it was already running… I did many steps to remove it, until such time i rebooted and there was no k3s running.
builder@anna-MacBookAir:~$ ps -ef | grep k3s
builder     1664    1628  0 09:37 pts/0    00:00:00 grep --color=auto k3s
Now install on Primary
Now I’ll install the latest (again, this will be the “test” cluster)
builder@anna-MacBookAir:~$ curl -sfL https://get.k3s.io  | INSTALL_K3S_CHANNEL=latest K3S_KUBECONFIG_MODE="644" INSTALL_K3S_EXEC="--tls-san 73.242.50.46" sh -
[sudo] password for builder:
[INFO]  Finding release for channel latest
[INFO]  Using v1.24.4+k3s1 as release
[INFO]  Downloading hash https://github.com/k3s-io/k3s/releases/download/v1.24.4+k3s1/sha256sum-amd64.txt
[INFO]  Downloading binary https://github.com/k3s-io/k3s/releases/download/v1.24.4+k3s1/k3s
[INFO]  Verifying binary download
[INFO]  Installing k3s to /usr/local/bin/k3s
[INFO]  Skipping installation of SELinux RPM
[INFO]  Creating /usr/local/bin/kubectl symlink to k3s
[INFO]  Creating /usr/local/bin/crictl symlink to k3s
[INFO]  Creating /usr/local/bin/ctr symlink to k3s
[INFO]  Creating killall script /usr/local/bin/k3s-killall.sh
[INFO]  Creating uninstall script /usr/local/bin/k3s-uninstall.sh
[INFO]  env: Creating environment file /etc/systemd/system/k3s.service.env
[INFO]  systemd: Creating service file /etc/systemd/system/k3s.service
[INFO]  systemd: Enabling k3s unit
Created symlink /etc/systemd/system/multi-user.target.wants/k3s.service → /etc/systemd/system/k3s.service.
[INFO]  systemd: Starting k3s
I need the token to allow other hosts to join
builder@anna-MacBookAir:~$ sudo cat /var/lib/rancher/k3s/server/node-token
K1032cb4dbe0c58624c76bfaab7268757d96ad07e677ef332d6a25e3661a3651c7d::server:e869d829fbfb2adc24448296f1fd5d37
I now have the worker node cleaned out and ready to go
builder@builder-MacBookPro2:~$ ps -ef | grep k3s
builder     2784    2776  0 09:40 pts/0    00:00:00 grep --color=auto k3s
We now have a running “test” cluster on mac81
builder@anna-MacBookAir:~$ kubectl get nodes
NAME                  STATUS   ROLES                  AGE     VERSION
anna-macbookair       Ready    control-plane,master   4m34s   v1.24.4+k3s1
builder-macbookpro2   Ready    <none>                 57s     v1.24.4+k3s1
Lastly, to get the new kubconfig
$ sudo cat /etc/rancher/k3s/k3s.yaml | base64 -w 0
YXBpVmVyc2lvbjogdjEKY2x1c3RlcnM6Ci0gY2x1c3RlcjoKICAgIGNlcnRpZmljYXRlLWF1dGh.....
On my workstation, i can then decode
echo YXBpVmVyc2lvbjogdjEKY2x1c3RlcnM6Ci0gY2x1c3RlcjoKICAgIGNlcnRpZmljYXRlLWF1dGh... | base64 --decode | sed 's/127.0.0.1/192.168.1.81/g' | sed 's/default/mac81/g' > ~/.kube/mac81-int
I then merged it with the main kubeconfig We can now test it
builder@DESKTOP-QADGF36:~$ kubectx mac81
Switched to context "mac81".
builder@DESKTOP-QADGF36:~$ kubectl get nodes
NAME                  STATUS   ROLES                  AGE   VERSION
anna-macbookair       Ready    control-plane,master   13m   v1.24.4+k3s1
builder-macbookpro2   Ready    <none>                 65s   v1.24.4+k3s1

builder@DESKTOP-QADGF36:~$ kubectx ext81
Switched to context "ext81".
builder@DESKTOP-QADGF36:~$ kubectl get nodes
NAME                  STATUS   ROLES                  AGE    VERSION
anna-macbookair       Ready    control-plane,master   14m    v1.24.4+k3s1
builder-macbookpro2   Ready    <none>                 2m6s   v1.24.4+k3s1
One thing I’ve started doing is saving my Kubeconfig in AKV for safe keeping
builder@DESKTOP-QADGF36:~$ az keyvault secret set -n k3sremoteconfig --vault-name idjakv --file ~/.kube/config
Cert Manager
We’ll try keeping Traefik and now add the latest Cert-Manager
$ kubectl apply -f https://github.com/cert-manager/cert-manager/releases/download/v1.9.1/cert-manager.yaml
namespace/cert-manager created
customresourcedefinition.apiextensions.k8s.io/certificaterequests.cert-manager.io created
customresourcedefinition.apiextensions.k8s.io/certificates.cert-manager.io created
customresourcedefinition.apiextensions.k8s.io/challenges.acme.cert-manager.io created
customresourcedefinition.apiextensions.k8s.io/clusterissuers.cert-manager.io created
customresourcedefinition.apiextensions.k8s.io/issuers.cert-manager.io created
customresourcedefinition.apiextensions.k8s.io/orders.acme.cert-manager.io created
serviceaccount/cert-manager-cainjector created
serviceaccount/cert-manager created
serviceaccount/cert-manager-webhook created
configmap/cert-manager-webhook created
clusterrole.rbac.authorization.k8s.io/cert-manager-cainjector created
clusterrole.rbac.authorization.k8s.io/cert-manager-controller-issuers created
clusterrole.rbac.authorization.k8s.io/cert-manager-controller-clusterissuers created
clusterrole.rbac.authorization.k8s.io/cert-manager-controller-certificates created
clusterrole.rbac.authorization.k8s.io/cert-manager-controller-orders created
clusterrole.rbac.authorization.k8s.io/cert-manager-controller-challenges created
clusterrole.rbac.authorization.k8s.io/cert-manager-controller-ingress-shim created
clusterrole.rbac.authorization.k8s.io/cert-manager-view created
clusterrole.rbac.authorization.k8s.io/cert-manager-edit created
clusterrole.rbac.authorization.k8s.io/cert-manager-controller-approve:cert-manager-io created
clusterrole.rbac.authorization.k8s.io/cert-manager-controller-certificatesigningrequests created
clusterrole.rbac.authorization.k8s.io/cert-manager-webhook:subjectaccessreviews created
clusterrolebinding.rbac.authorization.k8s.io/cert-manager-cainjector created
clusterrolebinding.rbac.authorization.k8s.io/cert-manager-controller-issuers created
clusterrolebinding.rbac.authorization.k8s.io/cert-manager-controller-clusterissuers created
clusterrolebinding.rbac.authorization.k8s.io/cert-manager-controller-certificates created
clusterrolebinding.rbac.authorization.k8s.io/cert-manager-controller-orders created
clusterrolebinding.rbac.authorization.k8s.io/cert-manager-controller-challenges created
clusterrolebinding.rbac.authorization.k8s.io/cert-manager-controller-ingress-shim created
clusterrolebinding.rbac.authorization.k8s.io/cert-manager-controller-approve:cert-manager-io created
clusterrolebinding.rbac.authorization.k8s.io/cert-manager-controller-certificatesigningrequests created
clusterrolebinding.rbac.authorization.k8s.io/cert-manager-webhook:subjectaccessreviews created
role.rbac.authorization.k8s.io/cert-manager-cainjector:leaderelection created
role.rbac.authorization.k8s.io/cert-manager:leaderelection created
role.rbac.authorization.k8s.io/cert-manager-webhook:dynamic-serving created
rolebinding.rbac.authorization.k8s.io/cert-manager-cainjector:leaderelection created
rolebinding.rbac.authorization.k8s.io/cert-manager:leaderelection created
rolebinding.rbac.authorization.k8s.io/cert-manager-webhook:dynamic-serving created
service/cert-manager created
service/cert-manager-webhook created
deployment.apps/cert-manager-cainjector created
deployment.apps/cert-manager created
deployment.apps/cert-manager-webhook created
mutatingwebhookconfiguration.admissionregistration.k8s.io/cert-manager-webhook created
validatingwebhookconfiguration.admissionregistration.k8s.io/cert-manager-webhook created
Then I’ll add the Secret and Cluster Issuer
$ kubectl apply -f mac77.secret.prod-route53-credentials-secret.yaml
secret/prod-route53-credentials-secret created
$ kubectl apply -f mac77.clusterissuer.yaml
clusterissuer.cert-manager.io/letsencrypt-staging created
clusterissuer.cert-manager.io/letsencrypt-prod-old created
clusterissuer.cert-manager.io/letsencrypt-prod created
Getting the Kubeconfig quickly
I’ve had to respin clusters so often, I find the process of fetching a new kubeconfig rather tiresome.
First, on your known master, setup passwordless login
builder@DESKTOP-QADGF36:~/Workspaces/jekyll-blog$ cat ~/.ssh/id_rsa.pub
ssh-rsa AAAAB3NzaC1yc2EAAAADAQABAAABAQCztCsq2pg/asdfasdfasdfasdfasdfasdfasfdasfasdfasdfasdfasdfasdfasdfasdfasdfasdfasdfasdfasdfasdfasdfasdfasdfasdfasdfasdfasdfasdfasdf+FJmJ4dY2ydPxQ6RoxOLxWx6IDk9ysDK8MoSIUoD9nvD/asdfasdfasdfasdfasdfasdfasdfasdfasdfasdfasdfasdfasdfasdfasdfasdfasdfa+dqqqjUptwJUPq87h

builder@DESKTOP-QADGF36:~/Workspaces/jekyll-blog$ ssh builder@192.168.1.81
builder@192.168.1.81's password:
Welcome to Ubuntu 20.04.4 LTS (GNU/Linux 5.15.0-46-generic x86_64)

 * Documentation:  https://help.ubuntu.com
 * Management:     https://landscape.canonical.com
 * Support:        https://ubuntu.com/advantage

7 updates can be applied immediately.
To see these additional updates run: apt list --upgradable

New release '22.04.1 LTS' available.
Run 'do-release-upgrade' to upgrade to it.

Your Hardware Enablement Stack (HWE) is supported until April 2025.
Last login: Fri Sep  2 06:27:57 2022 from 192.168.1.160
builder@anna-MacBookAir:~$ echo "ssh-rsa AAAAB3NzaC1yc2EAAAADAQABAAABAQCztCsq2pg/asdfasdfasdfasdfasdfasdfasfdasfasdfasdfasdfasdfasdfasdfasdfasdfasdfasdfasdfasdfasdfasdfasdfasdfasdfasdfasdfasdfasdfasdf+FJmJ4dY2ydPxQ6RoxOLxWx6IDk9ysDK8MoSIUoD9nvD/asdfasdfasdfasdfasdfasdfasdfasdfasdfasdfasdfasdfasdfasdfasdfasdfasdfa+dqqqjUptwJUPq87h" >> ~/.ssh/authorized_keys
builder@anna-MacBookAir:~$ exit
logout
Connection to 192.168.1.81 closed.
builder@DESKTOP-QADGF36:~/Workspaces/jekyll-blog$ ssh builder@192.168.1.81
Welcome to Ubuntu 20.04.4 LTS (GNU/Linux 5.15.0-46-generic x86_64)

 * Documentation:  https://help.ubuntu.com
 * Management:     https://landscape.canonical.com
 * Support:        https://ubuntu.com/advantage

7 updates can be applied immediately.
To see these additional updates run: apt list --upgradable

New release '22.04.1 LTS' available.
Run 'do-release-upgrade' to upgrade to it.

Your Hardware Enablement Stack (HWE) is supported until April 2025.
Last login: Fri Sep  2 06:29:52 2022 from 192.168.1.160
builder@anna-MacBookAir:~$
Next, since I don’t need to base64 it to bring it back, i can just echo and fix the 127.0.0.1 address to match the host
$ ssh builder@192.168.1.81 'cat /etc/rancher/k3s/k3s.yaml' | sed 's/127.0.0.1/192.168.1.81/g' > ~/.kube/mac81-int
should work, doesnt: https://www.oueta.com/kubernetes/using-multiple-kubeconfig-files-and-how-to-merge-to-a-single/
Bring it together in Ansible
We now flash forward a month later.
I’ve been using AWX in Kubernetes quite successfully. Occasionally the postgres backend loses its mind and requires a thumb to come back, but it’s temporary and the data is all there so I haven’t given it much thought.
It was during this time I’ve developed a comprehensive playbook to handle this. You can find this, and others, on my public playbooks repo.
We’ll first cover the scrub (needed just once) and the reload (can be used any time after).
Scrub K3s
This first playbook we’ll discuss is scrubek3s.
- name: Scrub K3s
  hosts: all

  tasks:
  - name: Uninstall previous k3s
    ansible.builtin.shell: |
      /usr/local/bin/k3s-uninstall.sh &
      /usr/local/bin/k3s-agent-uninstall.sh &
      sleep 10
    become: true
    ignore_errors: True
    args:
      chdir: /tmp

  - name: reboot
    ansible.builtin.shell: |
      reboot now
    become: true
    ignore_errors: True
    args:
      chdir: /tmp
This is pretty straightfoward. It just heads out to the hosts and uninstalls things, then reboots.
I found for some hosts, the uninstall would hang due to stuck pvc mounts or containerd containers that just wouldn’t die.
Rather than loop through kill -9 a lot, i found the easier solution was to uninstall, wait about 10s then force a reboot.
This really cleared up any stuck systems.
Also, if you have been in a mixed environment, you.. okay… I, tend to forget which were primary and which were secondary hosts. This just nukes ‘em all.
K3s Reload
The Playbook I’ve been more active in updating is my K3S reload.
Just today I worked out a perl script that completes the last mile (and what lead me to decide to finally post this article).
The reloadk3s.yaml playbook has 3 phases.
The first, which applies to all, is to setup any required dependencies. This assumes Ubuntu (or a linux with aptitude package manager) and will add Python, GCSFuse, the AWS CLI and s3fs, and lastly CIFS needed for NFS PVCs.
---
- name: Reload K3s
  hosts: all

  tasks:
  - name: Install Python3
    ansible.builtin.shell: |
      whoami
      pwd
    args:
      chdir: /tmp

  - name: Install Python3
    ansible.builtin.shell: |
      apt-get install -y python3 python3-venv python3-pip
    become: true
    args:
      chdir: /tmp

  - name: Install Cifs and iscsi
    ansible.builtin.shell: |
      apt-get install -y cifs-utils open-iscsi
    become: true
    args:
      chdir: /tmp

  - name: Install GCP Fuse
    ansible.builtin.shell: |
      export GCSFUSE_REPO=gcsfuse-`lsb_release -c -s`
      rm -f /etc/apt/sources.list.d/gcsfuse.list || true
      echo "deb http://packages.cloud.google.com/apt $GCSFUSE_REPO main" | sudo tee /etc/apt/sources.list.d/gcsfuse.list
      curl https://packages.cloud.google.com/apt/doc/apt-key.gpg | sudo apt-key add -
      apt-get update
      apt-get install -y gcsfuse
    become: true
    args:
      chdir: /tmp

  - name: Add AWS CLI
    ansible.builtin.shell: |
      apt-get install -y awscli s3fs
    become: true
    args:
      chdir: /tmp
The next Phase updates just the Primary host which will service as the k3s main.
You’ll note that I pin it to a version (1.23.10). You’ll also note that for just that release, the K3s team fat fingered the release label so there is a funny “%2B” which is the UTF-8 escape character for “+”. Any other release is usually vx.xx.x+k3s1.
I’ll be using that specific version with the INSTALL_K3S_VERSION parameter here and in the last phase where we add agents.
While I could mask it, I’m not going to since I’ll just have the playbooks updated anyhow. You’ll see that my mac81 cluster serves traffic locally on 192.168.1.81 as well as externally on 73.242.50.46:25460.
This is important. It’s possible, but a real pain in the rump, to try and fix the TLS certs later. Adding in that extra SAN at creation with INSTALL_K3S_EXEC="--tls-san 73.242.50.46" will save you headaches later. This is also true if you expose your K3s externally via NAT to other hosts (e.g. VirtualBox, Hyper-V etc). To add multiple, I believe you just add more in the EXEC (e.g. INSTALL_K3S_EXEC="--tls-san 73.242.50.46 --tls-san 10.10.1.123").
- name: Update Primary
  hosts: AnnaMacbook

  tasks:
  - name: Uninstall previous k3s
    ansible.builtin.shell: |
      /usr/local/bin/k3s-uninstall.sh || true
      /usr/local/bin/k3s-agent-uninstall.sh || true
    become: true
    args:
      chdir: /tmp

  - name: Install K3s
    ansible.builtin.shell: |
      curl -sfL https://get.k3s.io | INSTALL_K3S_VERSION="v1.23.10%2Bk3s1" K3S_KUBECONFIG_MODE="644" INSTALL_K3S_EXEC="--tls-san 73.242.50.46" sh -
    become: true
    args:
      chdir: /tmp

  - name: Test host
    ansible.builtin.shell: |
      cat /var/lib/rancher/k3s/server/node-token | tr -d '\n'
    register: nodetokenresult
    become: true
    args:
      chdir: /tmp

  - name: Output Kubeconfig
    ansible.builtin.shell: |
      cat /etc/rancher/k3s/k3s.yaml | sed 's/127.0.0.1/192.168.1.81/g' | base64 -w 0
    register: kubeconfig
    become: true
    args:
      chdir: /tmp

  - name: Clean prior kubeconfigs
    ansible.builtin.shell: |
      rm -f /tmp/mac81-* || true
    become: true
    args:
      chdir: /tmp

  - name: Prep Config
    ansible.builtin.shell: |
      cat /etc/rancher/k3s/k3s.yaml | sed 's/127.0.0.1:[0-9]*/73.242.50.46:25460/g' > /tmp/mac81-ext
      cat /etc/rancher/k3s/k3s.yaml | sed 's/127.0.0.1/192.168.1.81/g' > /tmp/mac81-int
    register: kubeconfig
    args:
      chdir: /tmp

  - name: Set Config in Azure KV
    ansible.builtin.shell: |
      az keyvault secret set --vault-name idjakv --name mac81-int --file /tmp/mac81-int || true
      az keyvault secret set --vault-name idjakv --name mac81-ext --file /tmp/mac81-ext || true
    register: kubeconfig
    become: true
    args:
      chdir: /tmp

  - name: copy perl script
    ansible.builtin.copy:
      src: updateKConfigs.pl
      dest: /tmp/updateKConfigs.pl
      owner: builder
      mode: '0755'

  - name: Update Combined
    ansible.builtin.shell: |
      az keyvault secret show --vault-name idjakv --name k3sremoteconfig | jq -r .value > /tmp/existing.yaml
      perl /tmp/updateKConfigs.pl /tmp/existing.yaml /tmp/mac81-int /tmp/updated.yaml
      az keyvault secret set --vault-name idjakv --name k3sremoteconfig --file /tmp/updated.yaml || true
    register: kubeconfigall
    become: true
    args:
      chdir: /tmp
We should address those last three blocks as well.
At the tail end of the Primary host update, I stash the “internal” kubeconfig as mac81-int in my AAzure Key Vault.
This does assume, at some point, I’ve gone on that host and installed the Azure CLI and logged in as myself.
At a future point, adding in the Azure CLI install and automated login will be part of this script. For now, should i log out, Ansible will stop there and I’ll have to go fix that.
The last two parts leverage a quick Perl script (had to dust off those skills)
The updateKConfigs.pl was my solution to the fact that my larger combined Kubeconfig that has auth for local Docker and other cloud-based Kubernetes is a real pain to update.
Up till today, I would complete this work, then download the ‘int’ config, open my ~/.kube/config, then replace the key bits; certificate-authority-data, client-certificate-data and client-key-data.
Since I blast this ‘mac81’ cluster fairly often, it’s a real hassle. And having that combined kubeconfig with kubectx to switch is really really handy.
Thus, this script will take in the
- existing (downloaded) combined kubeconfig
- the new “internal” config
- the output file to write.
For anyone else to use it, there are just a couple regexp lines you would need to update to address your own cluster. I had tried for some time to use just straight bash, but some lines come after a match (client cert and key data) and some before (cert auth data).
You can also run this on itself (e.g. perl updateKConfigs.pl /home/you/.kube/config /tmp/my-new-kubeconfig.yaml /home/you/.kube/config)
#!/bin/perl
#

my ($combined,$newint,$output) = @ARGV;

open(FILEH,"$combined");
@filec = <FILEH>;
close(FILEH);

my $newcad=`cat $newint | grep 'certificate-authority-data' | sed 's/^.*: //'`;
my $clientcertdata=`cat $newint | grep 'client-certificate-data' | sed 's/^.*: //'`;
my $clientkeydata=`cat $newint | grep 'client-key-data' | sed 's/^.*: //'`;

for (my $i = 0; $i < scalar(@filec); $i += 1)
{
	#	print "$i\n";

	#  certificate-authority-data
	if (($filec[$i] =~ /server: https:\/\/73.242.50.46:25460/)||($filec[$i] =~ /server: https:\/\/192.168.1.81:6443/))
	{
		#print $filec[($i - 1)];
		$filec[($i - 1)] =~ s/^(.*)data: .*/\1data: /;
		chomp($filec[($i - 1)]);
		#	print $filec[($i - 1)] . $newcad;
	        $filec[($i - 1)] .= $newcad;
	}
	# client cert and key data
	if ($filec[$i] =~ /^- name: mac81/) {
	    $filec[$i+2] =~ s/^(.*)data: .*/\1data: /;
	    chomp($filec[$i+2]);
	    $filec[$i+2] .= $clientcertdata;
	    $filec[$i+3] =~ s/^(.*)data: .*/\1data: /;
	    chomp($filec[$i+3]);
	    $filec[$i+3] .= $clientkeydata;
        }
}

# print updated file
open(FILEO,">$output");
foreach my $line (@filec)
{
   print FILEO $line;
}
close(FILEO);

exit 0;
So running in practice now takes just over 2 minutes total
And pulling a fresh ‘combined’ kubeconfig lets me use kubectx just fine
builder@DESKTOP-QADGF36:~/Workspaces/ansible-playbooks$ az keyvault secret show --vault-name idjakv --name k3sremoteconfig | jq -r .value > ~/.kube/config
builder@DESKTOP-QADGF36:~/Workspaces/ansible-playbooks$ kubectx mac81
Switched to context "mac81".
builder@DESKTOP-QADGF36:~/Workspaces/ansible-playbooks$ kubectl get nodes
NAME                  STATUS   ROLES                  AGE   VERSION
anna-macbookair       Ready    control-plane,master   24m   v1.23.10+k3s1
builder-macbookpro2   Ready    <none>                 23m   v1.23.10+k3s1
isaac-macbookpro      Ready    <none>                 23m   v1.23.10+k3s1
builder@DESKTOP-QADGF36:~/Workspaces/ansible-playbooks$ kubectx mac77
Switched to context "mac77".
builder@DESKTOP-QADGF36:~/Workspaces/ansible-playbooks$ kubectl get nodes
NAME                          STATUS   ROLES                  AGE   VERSION
hp-hp-elitebook-850-g2        Ready    <none>                 88d   v1.23.9+k3s1
builder-hp-elitebook-850-g1   Ready    <none>                 88d   v1.23.9+k3s1
isaac-macbookair              Ready    control-plane,master   88d   v1.23.9+k3s1
builder-hp-elitebook-850-g2   Ready    <none>                 80d   v1.23.9+k3s1
The Template in AWX takes no parameters so it’s pretty simple to add
Summary
We covered backing up old data, setting up NFS, and adding an Ingress Controller. We loaded in the Cert Manager and tested with the Azure Vote App. We configured Route53 as a ClusterIssuer and added an NFS StorageClass.
We added some key applications including Redis and Harbor as our Container Registry. We added a few Worker Nodes then added Datadog as our Kubernetes monitoring suite. We added Github Runners including rebuilding and publishing our own Github runner container. We added Dapr.io and Loft.sh and setup a second test cluster.
Finally, we used Ansible on AWS to automate the full rebuilds of k3s and saving a combined kubeconfig to Azure Key Vault.


