Published: Sep 6, 2022 by Isaac Johnson
Today we’ll dig into some ways we can leverage Cloud Storage to back our on-prem Kubernetes Persistant Volumes (and Persistant Volume Claims). I’ll cover AWS, Azure and Linode using a few different methods including Longhorn.io and S3Proxy.
Let’s start with what could be the easiest, the aws-s3.io provisioner.
aws-s3.io/bucket Provisioner
For our first attempt we will try and use the aws-s3.io bucket approach.
Let’s create a bucket first
$ aws s3 mb s3://k8scsistorage
make_bucket: k8scsistorage
Then we can set our AWS access Key and Secret
builder@DESKTOP-72D2D9T:~/Workspaces/jekyll-blog$ echo theawssecretkeywhichisaitlonger | tr -d '\n' | base64 -w
 0 && echo
dGhlYXdzc2VjcmV0a2V5d2hpY2hpc2FpdGxvbmdlcg==
builder@DESKTOP-72D2D9T:~/Workspaces/jekyll-blog$ echo THEAWSACCESSKEYUSUALLYINCAPS | tr -d '\n' | base64
VEhFQVdTQUNDRVNTS0VZVVNVQUxMWUlOQ0FQUw==
Save these to a k8s secret and apply
$ cat s3-operator-secret.yaml
apiVersion: v1
kind: Secret
metadata:
  name: s3-bucket-owner
  namespace: s3-provisioner
type: Opaque
data:
  AWS_ACCESS_KEY_ID: VEhFQVdTQUNDRVNTS0VZVVNVQUxMWUlOQ0FQUw==
  AWS_SECRET_ACCESS_KEY: dGhlYXdzc2VjcmV0a2V5d2hpY2hpc2FpdGxvbmdlcg==

builder@DESKTOP-72D2D9T:~/Workspaces/jekyll-blog$ kubectl create ns s3-provisioner
namespace/s3-provisioner created
builder@DESKTOP-72D2D9T:~/Workspaces/jekyll-blog$ kubectl apply -f s3-operator-secret.yaml
secret/s3-bucket-owner created
Create an S3 Storage Class provisioner
This is a “Greenfield” example in which a bucket is dynamically created on request
$ cat aws-sc.yaml
kind: StorageClass
apiVersion: storage.k8s.io/v1
metadata:
  name: s3-buckets
provisioner: aws-s3.io/bucket
parameters:
  region: us-west-1
  secretName: s3-bucket-owner
  secretNamespace: s3-provisioner
reclaimPolicy: Delete

$ kubectl apply -f aws-sc.yaml
storageclass.storage.k8s.io/s3-buckets created
And we can see the SC now available
$ kubectl get sc
NAME                   PROVISIONER                        RECLAIMPOLICY   VOLUMEBINDINGMODE      ALLOWVOLUMEEXPANSION   AGE
local-path (default)   rancher.io/local-path              Delete          WaitForFirstConsumer   false                  37h
rook-nfs-share1        nfs.rook.io/rook-nfs-provisioner   Delete          Immediate              false                  23h
s3-buckets             aws-s3.io/bucket                   Delete          Immediate              false                  55s
A “Brownfield” SC specifies the bucket to use
$ cat aws-sc-brown.yaml
kind: StorageClass
apiVersion: storage.k8s.io/v1
metadata:
  name: s3-existing-buckets
provisioner: aws-s3.io/bucket
parameters:
  bucketName: k8scsistorage
  region: us-west-1
  secretName: s3-bucket-owner
  secretNamespace: s3-provisioner

$ kubectl apply -f aws-sc-brown.yaml
storageclass.storage.k8s.io/s3-existing-buckets created
Now let’s test them
$ cat pvc-aws-green-pvc.yaml
apiVersion: v1
kind: PersistentVolumeClaim
metadata:
  name: aws-green-pv-claim
spec:
  storageClassName: "s3-buckets"
  accessModes:
    - ReadWriteMany
  resources:
    requests:
      storage: 1Mi
$ kubectl apply -f pvc-aws-green-pvc.yaml
persistentvolumeclaim/aws-green-pv-claim created


$ cat pvc-aws-brown-pvc.yaml
apiVersion: v1
kind: PersistentVolumeClaim
metadata:
  name: aws-brown-pv-claim
spec:
  storageClassName: "s3-existing-buckets"
  accessModes:
    - ReadWriteMany
  resources:
    requests:
      storage: 1Mi
$ kubectl apply -f pvc-aws-brown-pvc.yaml
persistentvolumeclaim/aws-brown-pv-claim created
Neither seem to create the volume
$ kubectl get pvc
NAME                 STATUS    VOLUME                                     CAPACITY   ACCESS MODES   STORAGECLASS          AGE
rook-nfs-pv-claim    Bound     pvc-ec2b3bbb-a5dd-4811-af90-38fef3a39a5e   1Mi        RWX            rook-nfs-share1       23h
aws-green-pv-claim   Pending                                                                        s3-buckets            2m39s
aws-brown-pv-claim   Pending                                                                        s3-existing-buckets   56s
The seem hung waiting on a volume
builder@DESKTOP-QADGF36:~/Workspaces/rook$ kubectl describe pvc aws-green-pv-claim
Name:          aws-green-pv-claim
Namespace:     default
StorageClass:  s3-buckets
Status:        Pending
Volume:
Labels:        <none>
Annotations:   volume.beta.kubernetes.io/storage-provisioner: aws-s3.io/bucket
               volume.kubernetes.io/storage-provisioner: aws-s3.io/bucket
Finalizers:    [kubernetes.io/pvc-protection]
Capacity:
Access Modes:
VolumeMode:    Filesystem
Used By:       <none>
Events:
  Type    Reason                Age                       From                         Message
  ----    ------                ----                      ----                         -------
  Normal  ExternalProvisioning  107s (x31332 over 5d10h)  persistentvolume-controller  waiting for a volume to be created, either by external provisioner "aws-s3.io/bucket" or manually created by system administrator
There are no volumes for s3
$ kubectl get volumes --all-namespaces
NAMESPACE         NAME               STATE      ROBUSTNESS   SCHEDULED   SIZE          NODE   AGE
longhorn-system   mylinodebasedpvc   detached   unknown                  21474836480          13m

$ kubectl get pv --all-namespaces
NAME                                       CAPACITY   ACCESS MODES   RECLAIM POLICY   STATUS   CLAIM                        STORAGECLASS      REASON   AGE
pvc-52eae943-32fa-4899-bf1e-6ffa8351b428   1Gi        RWO            Delete           Bound    rook-nfs/nfs-default-claim   local-path                 6d9h
pvc-ec2b3bbb-a5dd-4811-af90-38fef3a39a5e   1Mi        RWX            Delete           Bound    default/rook-nfs-pv-claim    rook-nfs-share1            6d9h
And for days i could see empty requests in /var/log/syslog
Sep  6 07:20:25 anna-MacBookAir k3s[1853]: I0906 07:20:25.032489    1853 event.go:294] "Event occurred" object="default/aws-brown-pv-claim2" kind="PersistentVolumeClaim" apiVersion="v1" type="Normal" reason="ExternalProvisioning" message="waiting for a volume to be created, either by external provisioner \"aws-s3.io/bucket\" or manually created by system administrator"
Sep  6 07:20:25 anna-MacBookAir k3s[1853]: I0906 07:20:25.032532    1853 event.go:294] "Event occurred" object="default/aws-green-pv-claim" kind="PersistentVolumeClaim" apiVersion="v1" type="Normal" reason="ExternalProvisioning" message="waiting for a volume to be created, either by external provisioner \"aws-s3.io/bucket\" or manually created by system administrator"
Sep  6 07:20:25 anna-MacBookAir k3s[1853]: I0906 07:20:25.032554    1853 event.go:294] "Event occurred" object="default/aws-brown-pv-claim" kind="PersistentVolumeClaim" apiVersion="v1" type="Normal" reason="ExternalProvisioning" message="waiting for a volume to be created, either by external provisioner \"aws-s3.io/bucket\" or manually created by system administrator"
And the events show the requests are waiting
 kubectl get events
LAST SEEN   TYPE     REASON                 OBJECT                                      MESSAGE
3m48s       Normal   ExternalProvisioning   persistentvolumeclaim/aws-brown-pv-claim    waiting for a volume to be created, either by external provisioner "aws-s3.io/bucket" or manually created by system administrator
33s         Normal   ExternalProvisioning   persistentvolumeclaim/aws-green-pv-claim    waiting for a volume to be created, either by external provisioner "aws-s3.io/bucket" or manually created by system administrator
3s          Normal   ExternalProvisioning   persistentvolumeclaim/aws-brown-pv-claim2   waiting for a volume to be created, either by external provisioner "aws-s3.io/bucket" or manually created by system administrator
I’m just going to double check on the namespace. Another guide I saw suggested string data.
$ cat s3provisioner.secret.yaml
apiVersion: v1
kind: Secret
metadata:
  namespace: kube-system
  name: csi-s3-secret
stringData:
  accessKeyID: AKASDFASDFASDFASDFASDF
  secretAccessKey: nU7397893970d873904780d873847309374
  endpoint: https://s3.us-east-1.amazonaws.com
  region: us-east-1

$ kubectl apply -f s3provisioner.secret.yaml
secret/csi-s3-secret created
Now I’ll try that
$ cat aws-sc-brown3.yaml
kind: StorageClass
apiVersion: storage.k8s.io/v1
metadata:
  name: s3-existing-buckets3
provisioner: aws-s3.io/bucket
parameters:
  bucketName: k8scsistorage
  region: us-east-1
  secretName: csi-s3-secret
  secretNamespace: kube-system
$ kubectl apply -f aws-sc-brown3.yaml
storageclass.storage.k8s.io/s3-existing-buckets3 created
Lastly, I’ll create a PVC to test (and one in the same namespace to rule out namespace issues)
$ cat pvc-aws-brown3.yaml
apiVersion: v1
kind: PersistentVolumeClaim
metadata:
  name: aws-brown-pv-claim3
spec:
  storageClassName: "s3-existing-buckets3"
  accessModes:
    - ReadWriteMany
  resources:
    requests:
      storage: 1Mi
$ kubectl apply -f pvc-aws-brown3.yaml
persistentvolumeclaim/aws-brown-pv-claim3 created

$ cat pvc-aws-brown4.yaml
apiVersion: v1
kind: PersistentVolumeClaim
metadata:
  name: aws-brown-pv-claim4
  namespace: kube-system
spec:
  storageClassName: "s3-existing-buckets3"
  accessModes:
    - ReadWriteMany
  resources:
    requests:
      storage: 1Mi
$ kubectl apply -f pvc-aws-brown4.yaml
persistentvolumeclaim/aws-brown-pv-claim4 created
And similarily, it seems stuck
$ kubectl get pvc --all-namespaces
NAMESPACE     NAME                  STATUS    VOLUME                                     CAPACITY   ACCESS MODES   STORAGECLASS           AGE
rook-nfs      nfs-default-claim     Bound     pvc-52eae943-32fa-4899-bf1e-6ffa8351b428   1Gi        RWO            local-path             6d10h
default       rook-nfs-pv-claim     Bound     pvc-ec2b3bbb-a5dd-4811-af90-38fef3a39a5e   1Mi        RWX            rook-nfs-share1        6d10h
default       aws-green-pv-claim    Pending                                                                        s3-buckets             5d10h
default       aws-brown-pv-claim    Pending                                                                        s3-existing-buckets    5d10h
default       aws-brown-pv-claim2   Pending                                                                        s3-existing-buckets2   5d10h
default       aws-brown-pv-claim3   Pending                                                                        s3-existing-buckets3   3m17s
kube-system   aws-brown-pv-claim4   Pending                                                                        s3-existing-buckets3   51s
Similar in events
$ kubectl get events --all-namespaces | tail -n5
default           3m33s       Normal    ExternalProvisioning     persistentvolumeclaim/aws-green-pv-claim               waiting for a volume to be created, either by external provisioner "aws-s3.io/bucket" or manually created by system administrator
default           3m3s        Normal    ExternalProvisioning     persistentvolumeclaim/aws-brown-pv-claim2              waiting for a volume to be created, either by external provisioner "aws-s3.io/bucket" or manually created by system administrator
default           108s        Normal    ExternalProvisioning     persistentvolumeclaim/aws-brown-pv-claim               waiting for a volume to be created, either by external provisioner "aws-s3.io/bucket" or manually created by system administrator
kube-system       3s          Normal    ExternalProvisioning     persistentvolumeclaim/aws-brown-pv-claim4              waiting for a volume to be created, either by external provisioner "aws-s3.io/bucket" or manually created by system administrator
default           3s          Normal    ExternalProvisioning     persistentvolumeclaim/aws-brown-pv-claim3              waiting for a volume to be created, either by external provisioner "aws-s3.io/bucket" or manually created by system administrator
I also tried removing endpoint and region alltogether as some suggsted
$ cat aws-sc-brown4.yaml
kind: StorageClass
apiVersion: storage.k8s.io/v1
metadata:
  name: s3-existing-buckets4
provisioner: aws-s3.io/bucket
parameters:
  bucketName: k8scsistorage
  secretName: csi-s3-secret
  secretNamespace: kube-system
$ kubectl apply -f aws-sc-brown4.yaml
storageclass.storage.k8s.io/s3-existing-buckets4 created
$ cat pvc-aws-brown5.yamlaws-s3.io/bucket
apiVersion: v1
kind: PersistentVolumeClaim
metadata:
  name: aws-brown-pv-claim5
  namespace: kube-system
spec:
  storageClassName: "s3-existing-buckets4"
  accessModes:
    - ReadWriteMany
  resources:
    requests:
      storage: 1Mi
$ kubectl apply -f pvc-aws-brown5.yaml
persistentvolumeclaim/aws-brown-pv-claim5 created

$ kubectl get pvc -n kube-system
NAME                  STATUS    VOLUME   CAPACITY   ACCESS MODES   STORAGECLASS           AGE
aws-brown-pv-claim4   Pending                                      s3-existing-buckets3   5m5s
aws-brown-pv-claim5   Pending                                      s3-existing-buckets4   73s
At this point, I decided there must be a better way and moved on.
Azure File Storage
The best approach would be to use NFS or SMB
Let’s ensure we have cifs-utils
builder@anna-MacBookAir:~$ sudo apt update && sudo apt install -y cifs-utils
[sudo] password for builder:
Hit:1 http://us.archive.ubuntu.com/ubuntu focal InRelease
Get:2 http://us.archive.ubuntu.com/ubuntu focal-updates InRelease [114 kB]
Get:3 http://us.archive.ubuntu.com/ubuntu focal-backports InRelease [108 kB]
Get:4 http://security.ubuntu.com/ubuntu focal-security InRelease [114 kB]
Get:5 http://us.archive.ubuntu.com/ubuntu focal-updates/main amd64 Packages [2,072 kB]
Get:6 http://us.archive.ubuntu.com/ubuntu focal-updates/main i386 Packages [712 kB]
Get:7 http://us.archive.ubuntu.com/ubuntu focal-updates/main amd64 DEP-11 Metadata [277 kB]
Get:8 http://us.archive.ubuntu.com/ubuntu focal-updates/main amd64 c-n-f Metadata [15.8 kB]
Get:9 http://us.archive.ubuntu.com/ubuntu focal-updates/universe amd64 DEP-11 Metadata [391 kB]
Get:10 http://us.archive.ubuntu.com/ubuntu focal-updates/multiverse amd64 DEP-11 Metadata [940 B]
Get:11 http://us.archive.ubuntu.com/ubuntu focal-backports/main amd64 DEP-11 Metadata [7,948 B]
Get:12 http://us.archive.ubuntu.com/ubuntu focal-backports/universe amd64 DEP-11 Metadata [30.5 kB]
Get:13 http://security.ubuntu.com/ubuntu focal-security/main amd64 Packages [1,705 kB]
Get:14 http://security.ubuntu.com/ubuntu focal-security/main i386 Packages [485 kB]
Get:15 http://security.ubuntu.com/ubuntu focal-security/main amd64 DEP-11 Metadata [40.7 kB]
Get:16 http://security.ubuntu.com/ubuntu focal-security/main amd64 c-n-f Metadata [11.0 kB]
Get:17 http://security.ubuntu.com/ubuntu focal-security/universe amd64 DEP-11 Metadata [77.1 kB]
Get:18 http://security.ubuntu.com/ubuntu focal-security/multiverse amd64 DEP-11 Metadata [2,464 B]
Fetched 6,166 kB in 2s (3,346 kB/s)
Reading package lists... Done
Building dependency tree
Reading state information... Done
11 packages can be upgraded. Run 'apt list --upgradable' to see them.
Reading package lists... Done
Building dependency tree
Reading state information... Done
The following packages were automatically installed and are no longer required:
  libfprint-2-tod1 libfwupdplugin1 libllvm10 libllvm11 shim
Use 'sudo apt autoremove' to remove them.
Suggested packages:
  smbclient winbind
The following NEW packages will be installed:
  cifs-utils
0 upgraded, 1 newly installed, 0 to remove and 11 not upgraded.
Need to get 84.0 kB of archives.
After this operation, 314 kB of additional disk space will be used.
Get:1 http://us.archive.ubuntu.com/ubuntu focal-updates/main amd64 cifs-utils amd64 2:6.9-1ubuntu0.2 [84.0 kB]
Fetched 84.0 kB in 0s (316 kB/s)
Selecting previously unselected package cifs-utils.
(Reading database ... 307990 files and directories currently installed.)
Preparing to unpack .../cifs-utils_2%3a6.9-1ubuntu0.2_amd64.deb ...
Unpacking cifs-utils (2:6.9-1ubuntu0.2) ...
Setting up cifs-utils (2:6.9-1ubuntu0.2) ...
update-alternatives: using /usr/lib/x86_64-linux-gnu/cifs-utils/idmapwb.so to provide /etc/cifs-utils/idmap-plugin (idmap-plugin) in auto mode
Processing triggers for man-db (2.9.1-1) ...
Then, ensure we have latest Azure CLI
builder@anna-MacBookAir:~$ curl -sL https://aka.ms/InstallAzureCLIDeb | sudo bash
Hit:1 http://us.archive.ubuntu.com/ubuntu focal InRelease
Hit:2 http://us.archive.ubuntu.com/ubuntu focal-updates InRelease
Hit:3 http://us.archive.ubuntu.com/ubuntu focal-backports InRelease
Hit:4 http://security.ubuntu.com/ubuntu focal-security InRelease
Reading package lists... Done
Reading package lists... Done
Building dependency tree
Reading state information... Done
lsb-release is already the newest version (11.1.0ubuntu2).
lsb-release set to manually installed.
gnupg is already the newest version (2.2.19-3ubuntu2.2).
gnupg set to manually installed.
The following packages were automatically installed and are no longer required:
  libfprint-2-tod1 libfwupdplugin1 libllvm10 libllvm11 shim
Use 'sudo apt autoremove' to remove them.
The following additional packages will be installed:
  libcurl4
The following NEW packages will be installed:
  apt-transport-https
The following packages will be upgraded:
  curl libcurl4
2 upgraded, 1 newly installed, 0 to remove and 9 not upgraded.
Need to get 398 kB of archives.
After this operation, 162 kB of additional disk space will be used.
Get:1 http://us.archive.ubuntu.com/ubuntu focal-updates/universe amd64 apt-transport-https all 2.0.9 [1,704 B]
Get:2 http://us.archive.ubuntu.com/ubuntu focal-updates/main amd64 curl amd64 7.68.0-1ubuntu2.13 [161 kB]
Get:3 http://us.archive.ubuntu.com/ubuntu focal-updates/main amd64 libcurl4 amd64 7.68.0-1ubuntu2.13 [235 kB]
Fetched 398 kB in 0s (1,050 kB/s)
Selecting previously unselected package apt-transport-https.
(Reading database ... 308017 files and directories currently installed.)
Preparing to unpack .../apt-transport-https_2.0.9_all.deb ...
Unpacking apt-transport-https (2.0.9) ...
Preparing to unpack .../curl_7.68.0-1ubuntu2.13_amd64.deb ...
Unpacking curl (7.68.0-1ubuntu2.13) over (7.68.0-1ubuntu2.12) ...
Preparing to unpack .../libcurl4_7.68.0-1ubuntu2.13_amd64.deb ...
Unpacking libcurl4:amd64 (7.68.0-1ubuntu2.13) over (7.68.0-1ubuntu2.12) ...
Setting up apt-transport-https (2.0.9) ...
Setting up libcurl4:amd64 (7.68.0-1ubuntu2.13) ...
Setting up curl (7.68.0-1ubuntu2.13) ...
Processing triggers for man-db (2.9.1-1) ...
Processing triggers for libc-bin (2.31-0ubuntu9.9) ...
Hit:1 http://us.archive.ubuntu.com/ubuntu focal InRelease
Hit:2 http://us.archive.ubuntu.com/ubuntu focal-updates InRelease
Hit:3 http://us.archive.ubuntu.com/ubuntu focal-backports InRelease
Hit:4 http://security.ubuntu.com/ubuntu focal-security InRelease
Get:5 https://packages.microsoft.com/repos/azure-cli focal InRelease [10.4 kB]
Get:6 https://packages.microsoft.com/repos/azure-cli focal/main amd64 Packages [9,297 B]
Fetched 19.7 kB in 1s (19.4 kB/s)
Reading package lists... Done
Reading package lists... Done
Building dependency tree
Reading state information... Done
The following packages were automatically installed and are no longer required:
  libfprint-2-tod1 libfwupdplugin1 libllvm10 libllvm11 shim
Use 'sudo apt autoremove' to remove them.
The following NEW packages will be installed:
  azure-cli
0 upgraded, 1 newly installed, 0 to remove and 9 not upgraded.
Need to get 79.0 MB of archives.
After this operation, 1,104 MB of additional disk space will be used.
Get:1 https://packages.microsoft.com/repos/azure-cli focal/main amd64 azure-cli all 2.39.0-1~focal [79.0 MB]
Fetched 79.0 MB in 4s (19.1 MB/s)
Selecting previously unselected package azure-cli.
(Reading database ... 308021 files and directories currently installed.)
Preparing to unpack .../azure-cli_2.39.0-1~focal_all.deb ...
Unpacking azure-cli (2.39.0-1~focal) ...
Setting up azure-cli (2.39.0-1~focal) ...
builder@anna-MacBookAir:~$ az version
{
  "azure-cli": "2.39.0",
  "azure-cli-core": "2.39.0",
  "azure-cli-telemetry": "1.0.6",
  "extensions": {}
}
Make sure to login to your Azure account
builder@anna-MacBookAir:~$ az login
To sign in, use a web browser to open the page https://microsoft.com/devicelogin and enter the code FASDFASDF2 to authenticate.
...
We need a storage account to use. Here we will create one
# Create RG
$ az group create --name Mac81AzStorageCSIRG --location centralus
{
  "id": "/subscriptions/d955c0ba-13dc-44cf-a29a-8fed74cbb22d/resourceGroups/Mac81AzStorageCSIRG",
  "location": "centralus",
  "managedBy": null,
  "name": "Mac81AzStorageCSIRG",
  "properties": {
    "provisioningState": "Succeeded"
  },
  "tags": null,
  "type": "Microsoft.Resources/resourceGroups"
}

# Create Storage Account
$ az storage account create --name mac81azstoragecsi --location centralus -g Mac81AzStorageCSIRG --sku Standard_LRS
{
  "accessTier": "Hot",
  "allowBlobPublicAccess": true,
  "allowCrossTenantReplication": null,
  "allowSharedKeyAccess": null,
  "allowedCopyScope": null,
  "azureFilesIdentityBasedAuthentication": null,
  "blobRestoreStatus": null,
  "creationTime": "2022-09-02T12:12:25.340304+00:00",
  "customDomain": null,
  "defaultToOAuthAuthentication": null,
  "dnsEndpointType": null,
  "enableHttpsTrafficOnly": true,
  "enableNfsV3": null,
  "encryption": {
    "encryptionIdentity": null,
    "keySource": "Microsoft.Storage",
    "keyVaultProperties": null,
    "requireInfrastructureEncryption": null,
    "services": {
      "blob": {
        "enabled": true,
        "keyType": "Account",
        "lastEnabledTime": "2022-09-02T12:12:25.496584+00:00"
      },
      "file": {
        "enabled": true,
        "keyType": "Account",
        "lastEnabledTime": "2022-09-02T12:12:25.496584+00:00"
      },
      "queue": null,
      "table": null
    }
  },
  "extendedLocation": null,
  "failoverInProgress": null,
  "geoReplicationStats": null,
  "id": "/subscriptions/d955c0ba-13dc-44cf-a29a-8fed74cbb22d/resourceGroups/Mac81AzStorageCSIRG/providers/Microsoft.Storage/storageAccounts/mac81azstoragecsi",
  "identity": null,
  "immutableStorageWithVersioning": null,
  "isHnsEnabled": null,
  "isLocalUserEnabled": null,
  "isSftpEnabled": null,
  "keyCreationTime": {
    "key1": "2022-09-02T12:12:25.480962+00:00",
    "key2": "2022-09-02T12:12:25.480962+00:00"
  },
  "keyPolicy": null,
  "kind": "StorageV2",
  "largeFileSharesState": null,
  "lastGeoFailoverTime": null,
  "location": "centralus",
  "minimumTlsVersion": "TLS1_0",
  "name": "mac81azstoragecsi",
  "networkRuleSet": {
    "bypass": "AzureServices",
    "defaultAction": "Allow",
    "ipRules": [],
    "resourceAccessRules": null,
    "virtualNetworkRules": []
  },
  "primaryEndpoints": {
    "blob": "https://mac81azstoragecsi.blob.core.windows.net/",
    "dfs": "https://mac81azstoragecsi.dfs.core.windows.net/",
    "file": "https://mac81azstoragecsi.file.core.windows.net/",
    "internetEndpoints": null,
    "microsoftEndpoints": null,
    "queue": "https://mac81azstoragecsi.queue.core.windows.net/",
    "table": "https://mac81azstoragecsi.table.core.windows.net/",
    "web": "https://mac81azstoragecsi.z19.web.core.windows.net/"
  },
  "primaryLocation": "centralus",
  "privateEndpointConnections": [],
  "provisioningState": "Succeeded",
  "publicNetworkAccess": null,
  "resourceGroup": "Mac81AzStorageCSIRG",
  "routingPreference": null,
  "sasPolicy": null,
  "secondaryEndpoints": null,
  "secondaryLocation": null,
  "sku": {
    "name": "Standard_LRS",
    "tier": "Standard"
  },
  "statusOfPrimary": "available",
  "statusOfSecondary": null,
  "storageAccountSkuConversionStatus": null,
  "tags": {},
  "type": "Microsoft.Storage/storageAccounts"
}
Now let’s get some variables we need;
$ resourceGroupName="Mac81AzStorageCSIRG"
$ storageAccountName="mac81azstoragecsi"
$ az storage account show -g $resourceGroupName -n $storageAccountName --query "primaryEndpoints.file" --output tsv | tr -d '"'
https://mac81azstoragecsi.file.core.windows.net/
$ httpEndpoint=`az storage account show -g $resourceGroupName -n $storageAccountName --query "primaryEndpoints.file" --output tsv | tr -d '"' | tr -d '\n'`
$ echo $httpEndpoint | cut -c7-${#httpEndpoint}
//mac81azstoragecsi.file.core.windows.net/
$ smbPath=`echo $httpEndpoint | cut -c7-${#httpEndpoint}`
$ fileHost=`echo $smbPath | tr -d "/"`
It was at this point I started to get block on port 445.
Let’s try SMB
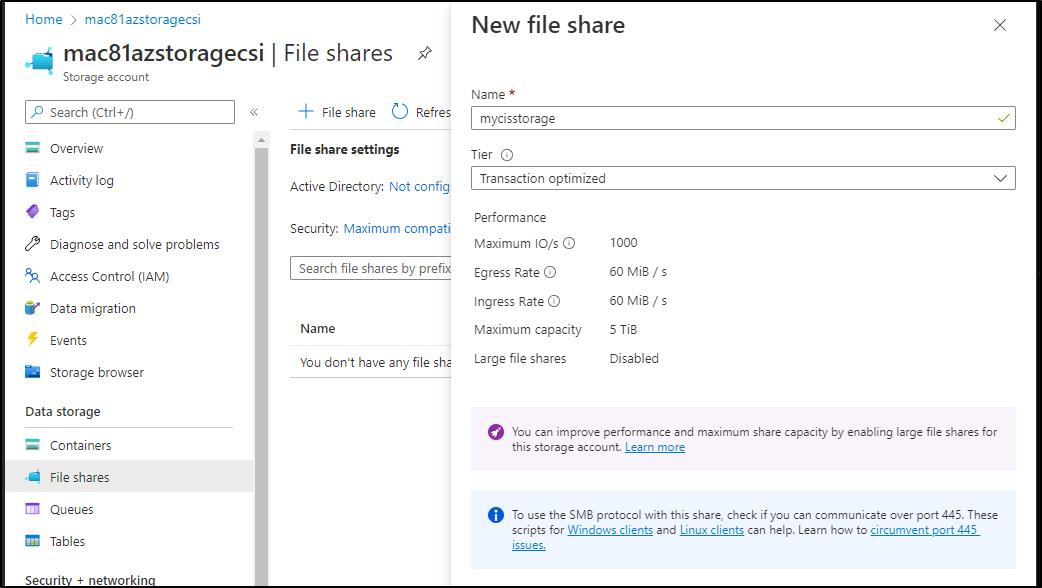
Create a share
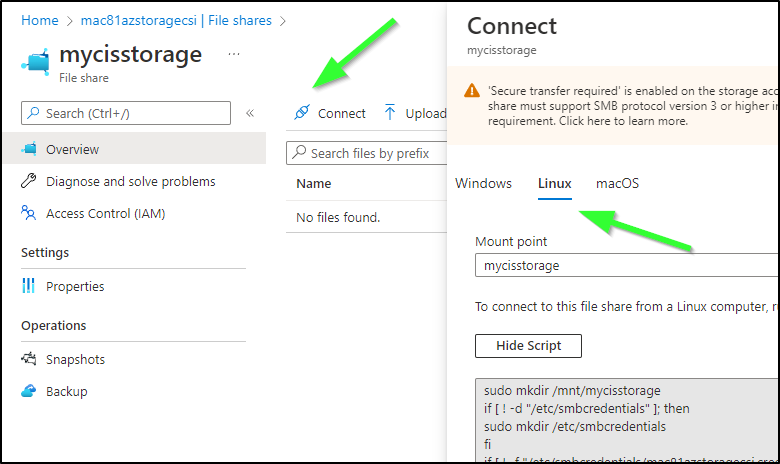
Then go to Connect to see a script to run
Now run (password masked of course)
sudo mkdir /mnt/mycisstorage
if [ ! -d "/etc/smbcredentials" ]; then
sudo mkdir /etc/smbcredentials
fi
if [ ! -f "/etc/smbcredentials/mac81azstoragecsi.cred" ]; then
    sudo bash -c 'echo "username=mac81azstoragecsi" >> /etc/smbcredentials/mac81azstoragecsi.cred'
    sudo bash -c 'echo "password=Sasdfasdfasdfasdfasdfasdfasdfasdfasdfasfasdasdfasdf==" >> /etc/smbcredentials/mac81azstoragecsi.cred'
fi
sudo chmod 600 /etc/smbcredentials/mac81azstoragecsi.cred

sudo bash -c 'echo "//mac81azstoragecsi.file.core.windows.net/mycisstorage /mnt/mycisstorage cifs nofail,credentials=/etc/smbcredentials/mac81azstoragecsi.cred,dir_mode=0777,file_mode=0777,serverino,nosharesock,actimeo=30" >> /etc/fstab'
sudo mount -t cifs //mac81azstoragecsi.file.core.windows.net/mycisstorage /mnt/mycisstorage -o credentials=/etc/smbcredentials/mac81azstoragecsi.cred,dir_mode=0777,file_mode=0777,serverino,nosharesock,actimeo=30
There appears to be no way to use 445 from my location
PS C:\WINDOWS\system32> Test-NetConnection -ComputerName mac81azstoragepremcsi.file.core.windows.net -Port 445
WARNING: TCP connect to (20.60.241.37 : 445) failed
WARNING: Ping to 20.60.241.37 failed with status: TimedOut


ComputerName           : mac81azstoragepremcsi.file.core.windows.net
RemoteAddress          : 20.60.241.37
RemotePort             : 445
InterfaceAlias         : Ethernet
SourceAddress          : 192.168.1.160
PingSucceeded          : False
PingReplyDetails (RTT) : 0 ms
TcpTestSucceeded       : False
Xfinity blocks it at the core and there is no way around; https://social.technet.microsoft.com/wiki/contents/articles/32346.azure-summary-of-isps-that-allow-disallow-access-from-port-445.aspx
Debugging
I had to know if I was screwing up the steps or indeed, it was my data-cap loving home ISP…
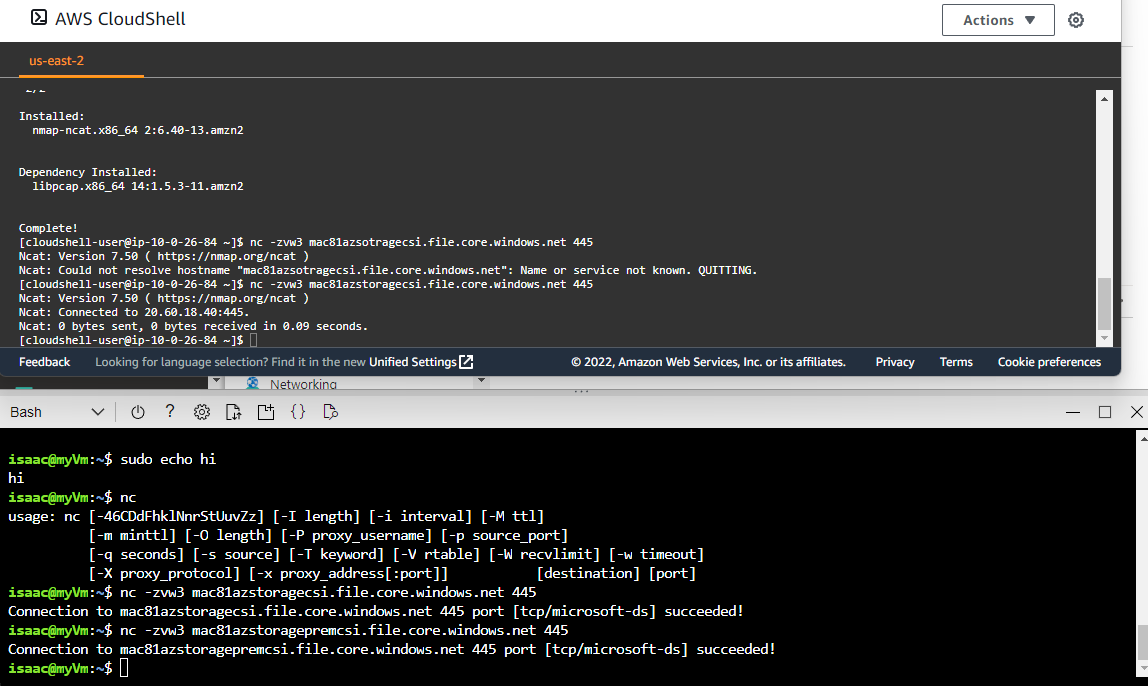
Here we see using a VM in AWS and Azure, both could use the port 445 endpoint in Azure without issue
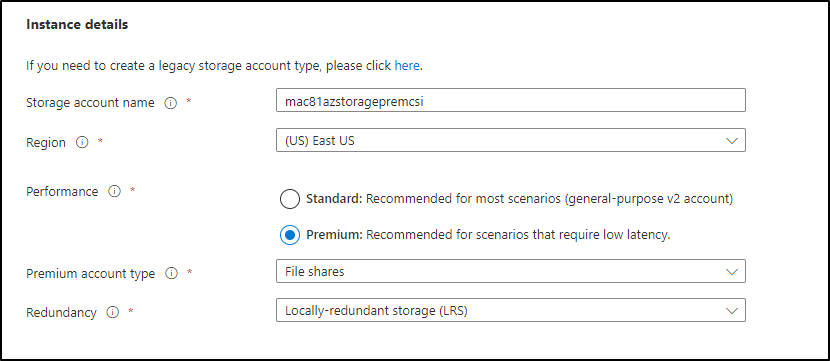
I then tried using a premium storage endpoint, maybe that would have some options I was missing
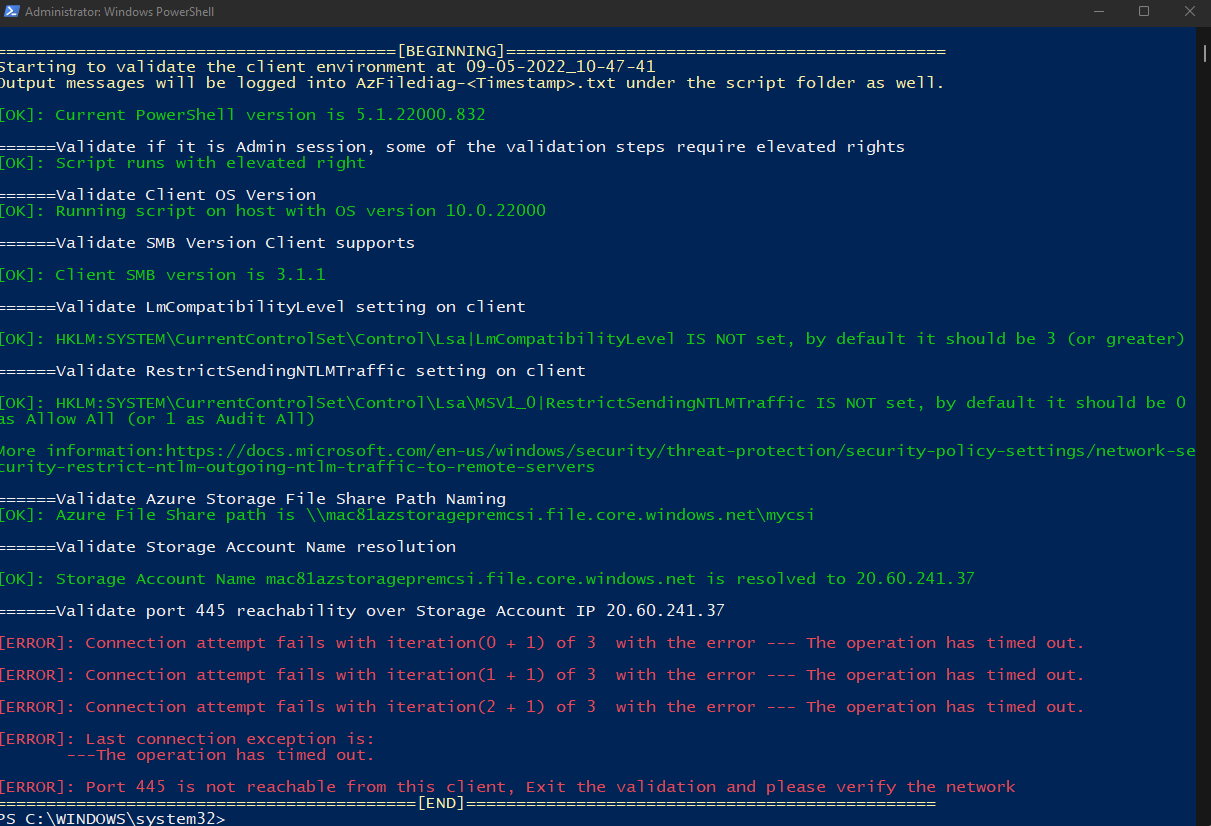
But regardless, port 445 (and 111 for SMB) were simply blocked at my ISP level. Even my Windows desktop failed on the connectivity test
We will circle back to Azure Storage later, but for now, let’s try AWS once again, but using S3FS
AWS
Install the AWS CLI and S3FS packages
$ sudo apt install awscli
[sudo] password for builder:
Sorry, try again.
[sudo] password for builder:
Reading package lists... Done
Building dependency tree
Reading state information... Done
The following packages were automatically installed and are no longer required:
  libfprint-2-tod1 libfwupdplugin1 libllvm10 libllvm11 shim
Use 'sudo apt autoremove' to remove them.
The following additional packages will be installed:
  docutils-common groff gsfonts imagemagick imagemagick-6-common imagemagick-6.q16 libfftw3-double3 libilmbase24 liblqr-1-0 libmagickcore-6.q16-6
  libmagickcore-6.q16-6-extra libmagickwand-6.q16-6 libnetpbm10 libopenexr24 netpbm psutils python3-botocore python3-docutils python3-jmespath python3-pyasn1
  python3-pygments python3-roman python3-rsa python3-s3transfer
  ....

$ sudo apt install s3fs
Reading package lists... Done
Building dependency tree
Reading state information... Done
The following packages were automatically installed and are no longer required:
  libfprint-2-tod1 libfwupdplugin1 libllvm10 libllvm11 shim
Use 'sudo apt autoremove' to remove them.
The following NEW packages will be installed:
  s3fs
0 upgraded, 1 newly installed, 0 to remove and 12 not upgraded.
Need to get 234 kB of archives.
After this operation, 678 kB of additional disk space will be used.
Get:1 http://us.archive.ubuntu.com/ubuntu focal/universe amd64 s3fs amd64 1.86-1 [234 kB]
Fetched 234 kB in 0s (497 kB/s)
Selecting previously unselected package s3fs.
(Reading database ... 363451 files and directories currently installed.)
Preparing to unpack .../archives/s3fs_1.86-1_amd64.deb ...
Unpacking s3fs (1.86-1) ...
Setting up s3fs (1.86-1) ...
Processing triggers for man-db (2.9.1-1) ...
I’ll use aws configure to test
I can take the default creds I used to create the s3ps file
$ echo `cat ~/.aws/credentials | grep aws_access_key_id | head -n1 | sed 's/^.* = //' | tr -d '\n'`:`cat ~/.aws/credentials | grep aws_secret_access_key | head -n1 | sed 's/^.* = //'` > ~/.passwd-s3fs
$ chmod 600 ~/.passwd-s3fs
Next we need to make a bucket to store our files then mount it
$ aws s3 mb s3://myk8s3mount
make_bucket: myk8s3mount
$ sudo s3fs myk8ss3mount /mnt/s3test -o passwd_file=/home/builder/.passwd-s3fs
sudo: s3fs: command not found
I realized s3fs wasn’t installed, I installed it then tried again
builder@anna-MacBookAir:~$ sudo s3fs -d myk8s3mount /mnt/s3test -o passwd_file=/home/builder/.passwd-s3fs
Tailing the var/log/systlog, i can see it was created
Sep  5 11:56:22 anna-MacBookAir PackageKit: daemon quit
Sep  5 11:56:22 anna-MacBookAir systemd[1]: packagekit.service: Succeeded.
Sep  5 11:56:27 anna-MacBookAir s3fs[195349]: s3fs.cpp:set_s3fs_log_level(297): change debug level from [CRT] to [INF]
Sep  5 11:56:27 anna-MacBookAir s3fs[195349]:     PROC(uid=0, gid=0) - MountPoint(uid=0, gid=0, mode=40755)
Sep  5 11:56:27 anna-MacBookAir s3fs[195351]: init v1.86(commit:unknown) with GnuTLS(gcrypt)
Sep  5 11:56:27 anna-MacBookAir s3fs[195351]: check services.
Sep  5 11:56:27 anna-MacBookAir s3fs[195351]:       check a bucket.
Sep  5 11:56:27 anna-MacBookAir s3fs[195351]:       URL is https://s3.amazonaws.com/myk8s3mount/
Sep  5 11:56:27 anna-MacBookAir s3fs[195351]:       URL changed is https://myk8s3mount.s3.amazonaws.com/
Sep  5 11:56:27 anna-MacBookAir s3fs[195351]:       computing signature [GET] [/] [] []
Sep  5 11:56:27 anna-MacBookAir s3fs[195351]:       url is https://s3.amazonaws.com
Sep  5 11:56:28 anna-MacBookAir s3fs[195351]:       HTTP response code 200
Sep  5 11:56:28 anna-MacBookAir s3fs[195351]: Pool full: destroy the oldest handler
If I touch a file
builder@anna-MacBookAir:~$ sudo touch /mnt/s3test/asdf
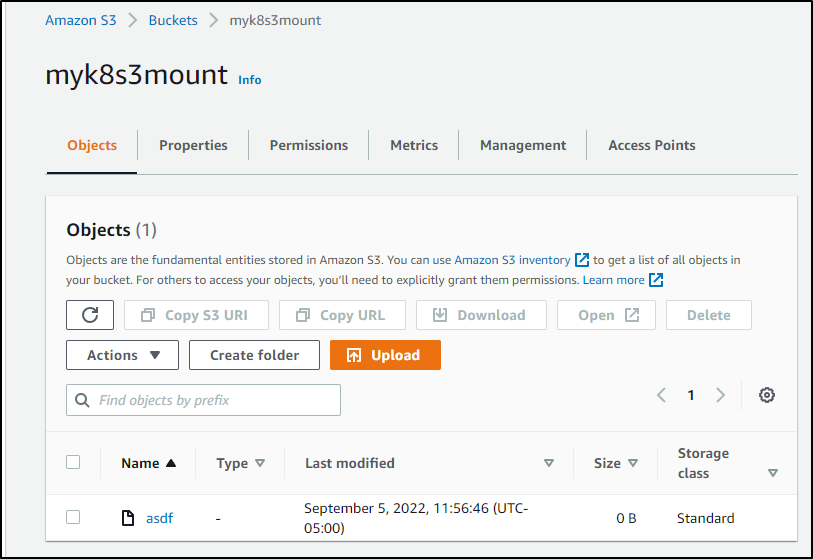
I see it reflected in S3
I did the same things on the other nodes as well showing they had the files
builder@builder-MacBookPro2:~$ sudo ls -l /mnt/s3test
total 1
-rw-r--r-- 1 root root 0 Sep  5 11:56 asdf
Now I’ll add Longhorn
$ helm repo add longhorn https://charts.longhorn.io
"longhorn" has been added to your repositories
builder@DESKTOP-72D2D9T:~/Workspaces/jekyll-blog$ helm install longhorn longhorn/longhorn --namespace longhorn-system --create-namespace --set defaultSettings.defaultDataPath="/mnt/s3test"
W0905 18:33:53.398178    1607 warnings.go:70] policy/v1beta1 PodSecurityPolicy is deprecated in v1.21+, unavailable in v1.25+
W0905 18:33:54.070576    1607 warnings.go:70] policy/v1beta1 PodSecurityPolicy is deprecated in v1.21+, unavailable in v1.25+
NAME: longhorn
LAST DEPLOYED: Mon Sep  5 18:33:52 2022
NAMESPACE: longhorn-system
STATUS: deployed
REVISION: 1
TEST SUITE: None
NOTES:
Longhorn is now installed on the cluster!

Please wait a few minutes for other Longhorn components such as CSI deployments, Engine Images, and Instance Managers to be initialized.

Visit our documentation at https://longhorn.io/docs/
And we can see it is running
$ kubectl get svc -n longhorn-system
NAME                          TYPE        CLUSTER-IP      EXTERNAL-IP   PORT(S)     AGE
longhorn-replica-manager      ClusterIP   None            <none>        <none>      3m31s
longhorn-engine-manager       ClusterIP   None            <none>        <none>      3m31s
longhorn-frontend             ClusterIP   10.43.81.71     <none>        80/TCP      3m31s
longhorn-admission-webhook    ClusterIP   10.43.204.151   <none>        9443/TCP    3m31s
longhorn-conversion-webhook   ClusterIP   10.43.107.250   <none>        9443/TCP    3m31s
longhorn-backend              ClusterIP   10.43.125.150   <none>        9500/TCP    3m31s
csi-attacher                  ClusterIP   10.43.231.238   <none>        12345/TCP   74s
csi-provisioner               ClusterIP   10.43.103.228   <none>        12345/TCP   74s
csi-resizer                   ClusterIP   10.43.78.108    <none>        12345/TCP   74s
csi-snapshotter               ClusterIP   10.43.72.43     <none>        12345/TCP   73s
Create a service to forward traffic
$ cat longhornsvc.yaml
apiVersion: v1
kind: Service
metadata:
  name: longhorn-ingress-lb
  namespace: longhorn-system
spec:
  selector:
    app: longhorn-ui
  type: LoadBalancer
  ports:
    - name: http
      protocol: TCP
      port: 80
      targetPort: http

$ kubectl apply -f ./longhornsvc.yaml
service/longhorn-ingress-lb created
I did a quick check and realized one of my nodes was missing a dependency
$ curl -sSfL https://raw.githubusercontent.com/longhorn/longhorn/master/scripts/environment_check.sh | bash
[INFO]  Required dependencies are installed.
[INFO]  Waiting for longhorn-environment-check pods to become ready (0/3)...
[INFO]  Waiting for longhorn-environment-check pods to become ready (1/3)...
[INFO]  Waiting for longhorn-environment-check pods to become ready (2/3)...
[INFO]  All longhorn-environment-check pods are ready (3/3).
[ERROR] open-iscsi is not found in isaac-macbookpro.
[ERROR] Please install missing packages.
[INFO]  Cleaning up longhorn-environment-check pods...
[INFO]  Cleanup completed.
I quick installed
isaac@isaac-MacBookPro:~$ sudo apt-get install open-iscsi
[sudo] password for isaac:
Reading package lists... Done
Building dependency tree
Reading state information... Done
The following packages were automatically installed and are no longer required:
  libfprint-2-tod1 libllvm10 libllvm11
Use 'sudo apt autoremove' to remove them.
The following additional packages will be installed:
  finalrd libisns0
The following NEW packages will be installed:
  finalrd libisns0 open-iscsi
0 upgraded, 3 newly installed, 0 to remove and 149 not upgraded.
Need to get 400 kB of archives.
After this operation, 2,507 kB of additional disk space will be used.
Do you want to continue? [Y/n] Y
Get:1 http://us.archive.ubuntu.com/ubuntu focal/main amd64 libisns0 amd64 0.97-3 [110 kB]
Get:2 http://us.archive.ubuntu.com/ubuntu focal-updates/main amd64 open-iscsi amd64 2.0.874-7.1ubuntu6.2 [283 kB]
Get:3 http://us.archive.ubuntu.com/ubuntu focal-updates/main amd64 finalrd all 6~ubuntu20.04.1 [6,852 B]
Fetched 400 kB in 1s (274 kB/s)
Preconfiguring packages ...
Selecting previously unselected package libisns0:amd64.
(Reading database ... 371591 files and directories currently installed.)
Preparing to unpack .../libisns0_0.97-3_amd64.deb ...
Unpacking libisns0:amd64 (0.97-3) ...
Selecting previously unselected package open-iscsi.
Preparing to unpack .../open-iscsi_2.0.874-7.1ubuntu6.2_amd64.deb ...
Unpacking open-iscsi (2.0.874-7.1ubuntu6.2) ...
And now it passed
$ curl -sSfL https://raw.githubusercontent.com/longhorn/longhorn/master/scripts/environment_check.sh | bash
[INFO]  Required dependencies are installed.
[INFO]  Waiting for longhorn-environment-check pods to become ready (0/3)...
[INFO]  All longhorn-environment-check pods are ready (3/3).
[INFO]  Required packages are installed.
[INFO]  Cleaning up longhorn-environment-check pods...
[INFO]  Cleanup completed.
And i can see Longhorn now listed
$ kubectl get sc
NAME                   PROVISIONER                        RECLAIMPOLICY   VOLUMEBINDINGMODE      ALLOWVOLUMEEXPANSION   AGE
local-path (default)   rancher.io/local-path              Delete          WaitForFirstConsumer   false
6d11h
rook-nfs-share1        nfs.rook.io/rook-nfs-provisioner   Delete          Immediate              false
5d21h
s3-buckets             aws-s3.io/bucket                   Delete          Immediate              false
4d22h
s3-existing-buckets    aws-s3.io/bucket                   Delete          Immediate              false
4d22h
s3-existing-buckets2   aws-s3.io/bucket                   Delete          Immediate              false
4d21h
longhorn (default)     driver.longhorn.io                 Delete          Immediate              true
10m
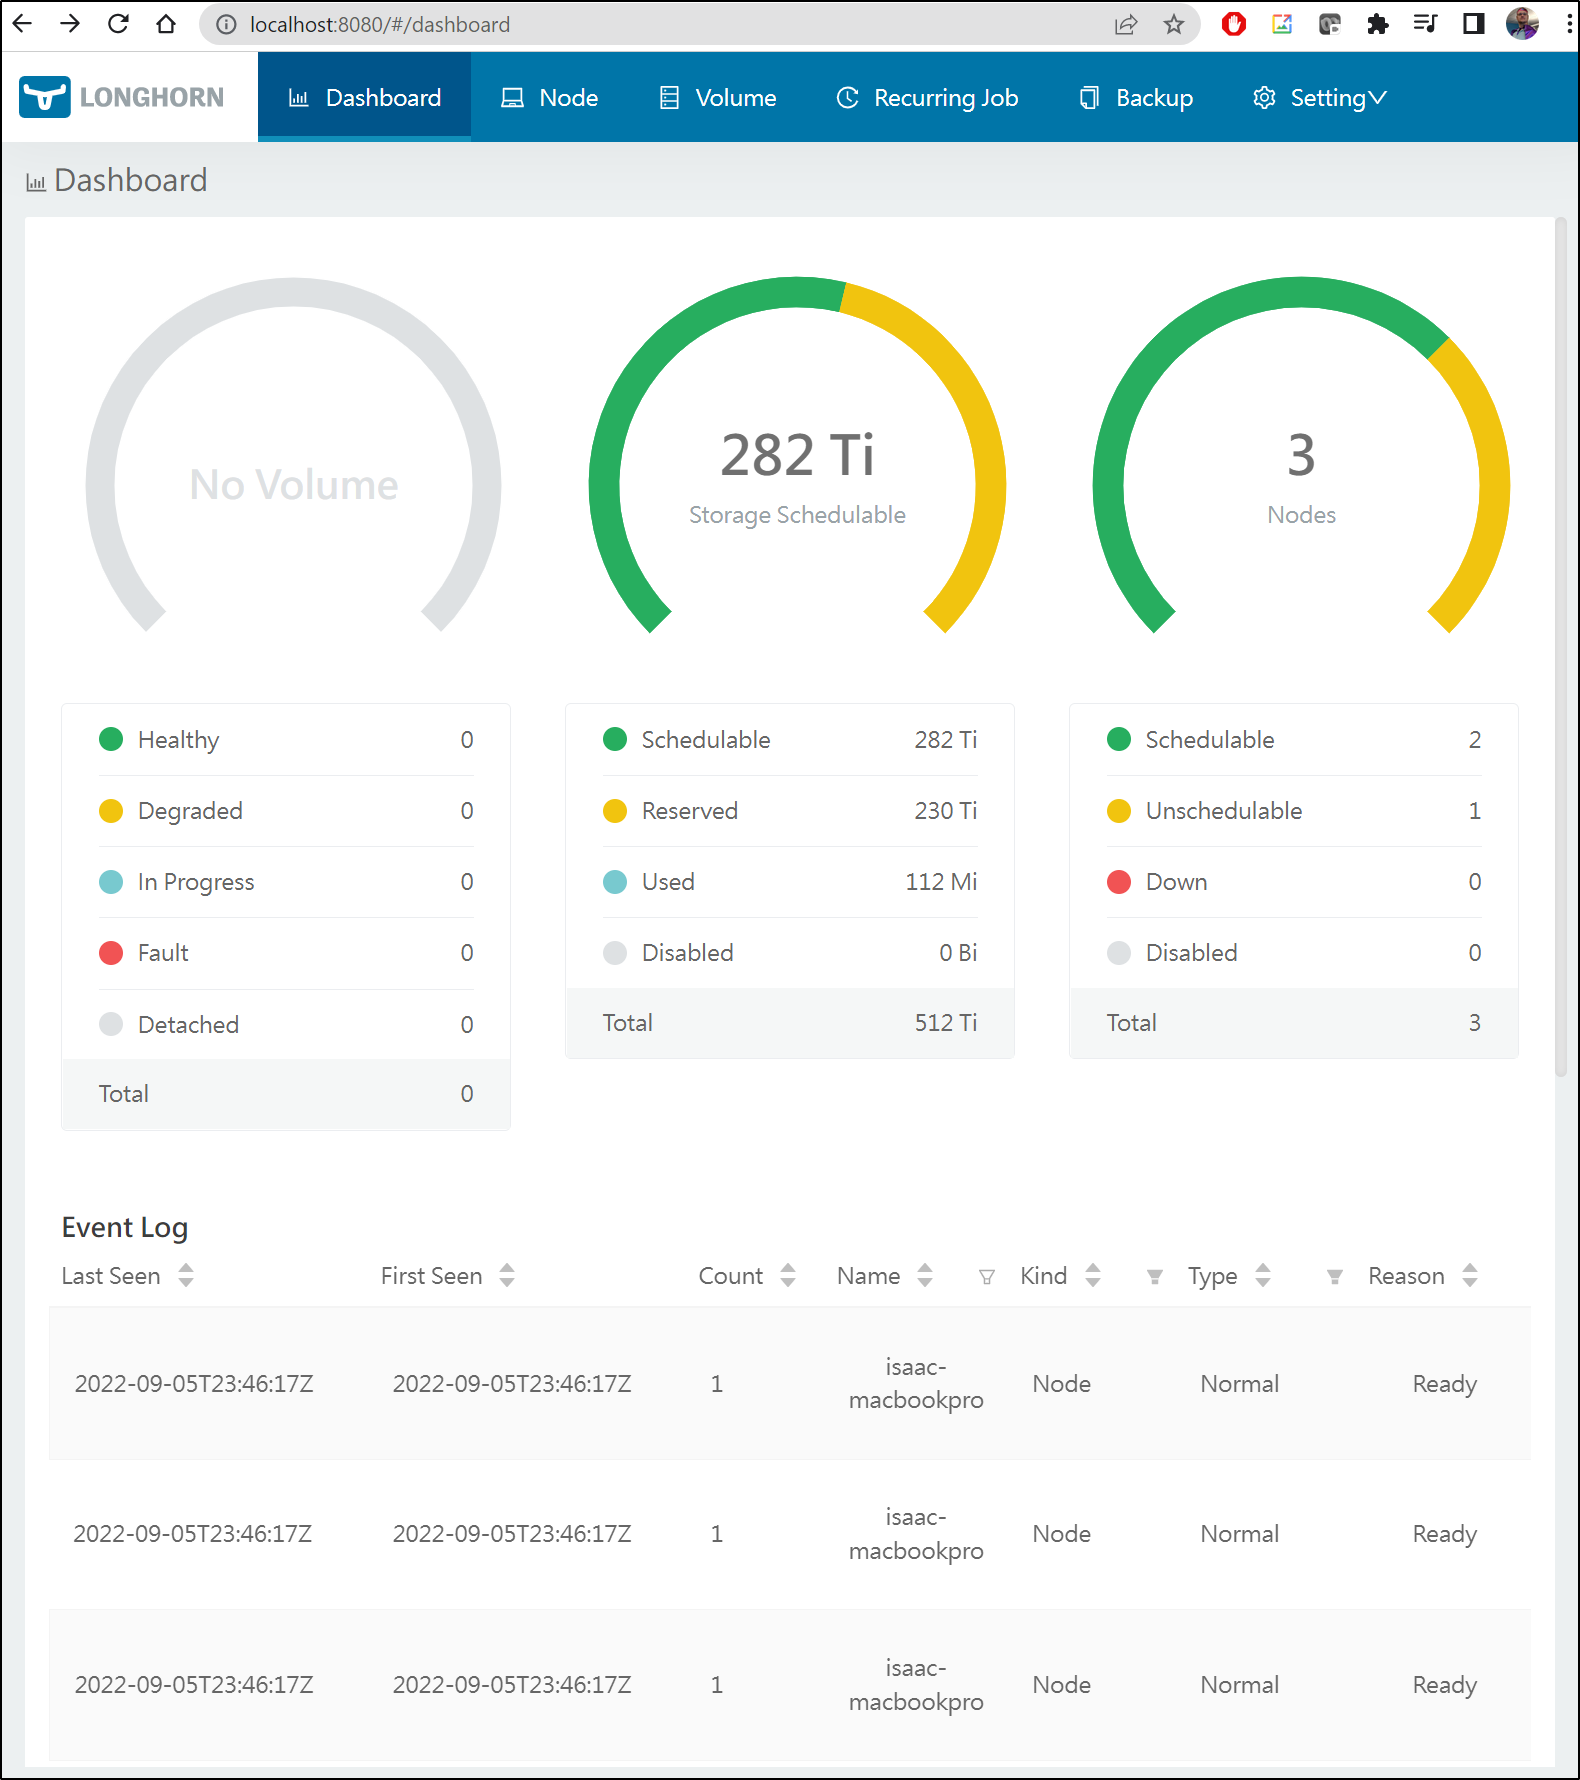
And I can port-forward to the UI
g$ kubectl port-forward -n longhorn-system svc/longhorn-ingress-lb 8080:80
Forwarding from 127.0.0.1:8080 -> 8000
Forwarding from [::1]:8080 -> 8000
Then i’ll try making a single volume
Checking a host, i see the files were created
builder@anna-MacBookAir:~$ sudo ls /mnt/s3test
[sudo] password for builder:
asdf  longhorn-disk.cfg  replicas
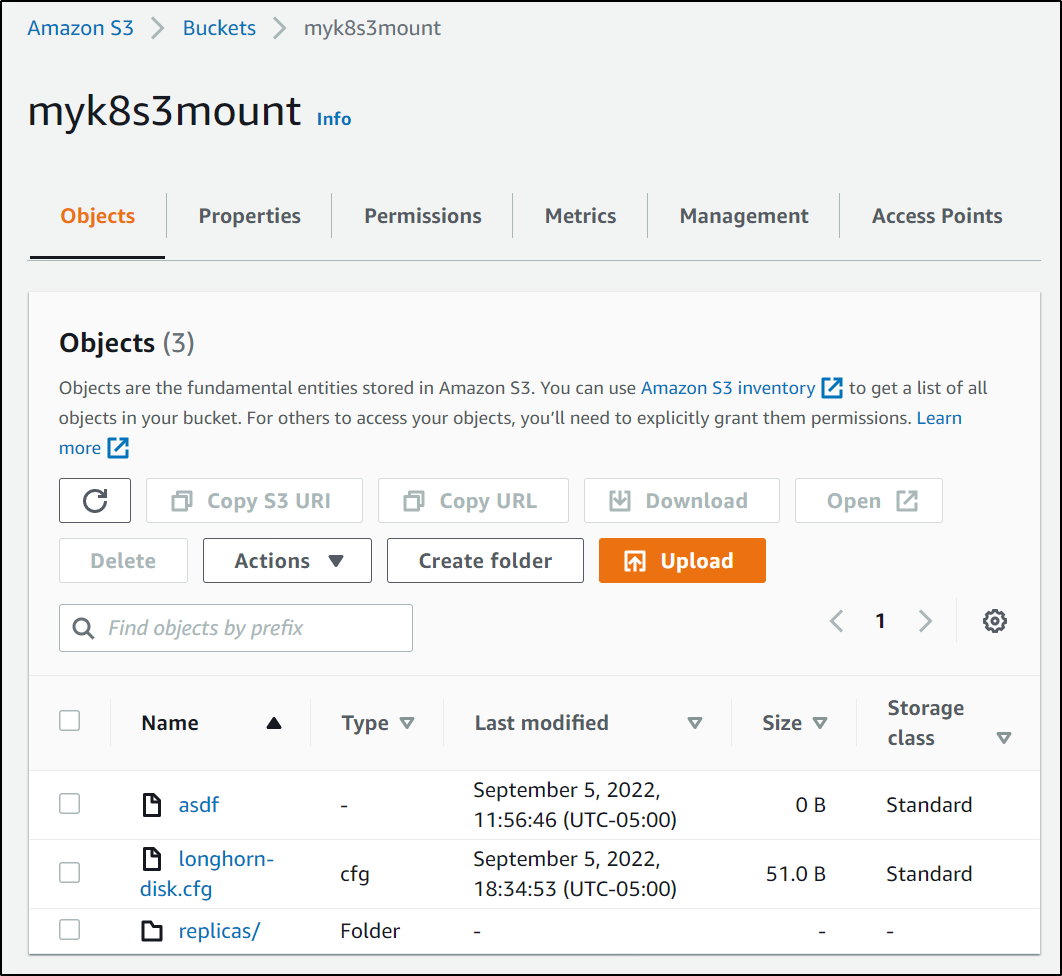
And I can also see the files in s3
We can also see we have 256Tb free
builder@anna-MacBookAir:~$ sudo df -h | head -n1 && sudo df -h | grep ^s3fs
Filesystem                                                                                           Size  Used Avail Use% Mounted on
s3fs                                                                                                 256T     0  256T   0% /mnt/s3test
Longhorn with Azure: S3 Proxy
We have AWS now supported, but can we use S3Proxy, which makes an S3 compatible front-end to any standard cloud storage, to expose Azure (and circumvent my terrible ISP)?
Create the S3 Proxy, using your own storage account values of course:
$ cat azStorageS3Proxy.yaml
apiVersion: v1
kind: Namespace
metadata:
  name: s3proxy
---
apiVersion: v1
kind: Service
metadata:
  name: s3proxy
  namespace: s3proxy
spec:
  selector:
    app: s3proxy
  ports:
  - protocol: TCP
    port: 80
    targetPort: 80
---
apiVersion: apps/v1
kind: Deployment
metadata:
  name: s3proxy
  namespace: s3proxy
spec:
  replicas: 1
  selector:
    matchLabels:
      app: s3proxy
  template:
    metadata:
      labels:
        app: s3proxy
    spec:
      containers:
      - name: s3proxy
        image: andrewgaul/s3proxy:latest
        imagePullPolicy: Always
        ports:
        - containerPort: 80
        env:
        - name: JCLOUDS_PROVIDER
          value: azureblob
        - name: JCLOUDS_IDENTITY
          value: mac81azstoragepremcsi
        - name: JCLOUDS_CREDENTIAL
          value: S3l1wzS52sY4qbilPv8SrRKTTZEw1AbVljNnspxeaHvw8JpZdlW8A6og8ck5KF+6Wp2GYoF1i0Yn+AStjJJH4w==
        - name: S3PROXY_IDENTITY
          value: mac81azstoragepremcsi
        - name: S3PROXY_CREDENTIAL
          value: S3l1wzS52sY4qbilPv8SrRKTTZEw1AbVljNnspxeaHvw8JpZdlW8A6og8ck5KF+6Wp2GYoF1i0Yn+AStjJJH4w==
        - name: JCLOUDS_ENDPOINT
          value: https://mac81azstoragepremcsi.blob.core.windows.net/
$ kubectl apply -f azStorageS3Proxy.yaml
namespace/s3proxy created
service/s3proxy created
deployment.apps/s3proxy created
Then to expose it back out the cluster, I’ll create a port 80 traefik ingress
$ cat s3proxy.ingress.yaml
apiVersion: networking.k8s.io/v1
kind: Ingress
metadata:
  labels:
    app: s3proxy
  name: s3proxy-ingress
  namespace: s3proxy
spec:
  rules:
  - http:
      paths:
      - backend:
          service:
            name: s3proxy
            port:
              number: 80
        path: /
        pathType: Prefix
builder@DESKTOP-72D2D9T:~/Workspaces/jekyll-blog$ kubectl apply -f s3proxy.ingress.yaml
ingress.networking.k8s.io/s3proxy-ingress created
Here we can see it worked
$ kubectl get ingress --all-namespaces
NAMESPACE   NAME              CLASS    HOSTS   ADDRESS                                    PORTS   AGE
s3proxy     s3proxy-ingress   <none>   *       192.168.1.159,192.168.1.205,192.168.1.81   80      20s
Switching to the prior storage credentials, i could see the bucket
$ aws s3 ls --endpoint-url http://192.168.1.81/
1969-12-31 18:00:00 mybackups
I can then make a backup bucket (which really makes a container in Azure storage)
$ aws s3 mb s3://localk3svolume --endpoint-url http://192.168.1.81/
make_bucket: localk3svolume
And now we can see it in action. We mount an s3fs share to the proxy service now exposed via Traefik
builder@anna-MacBookAir:~$ sudo s3fs localk3svolume /mnt/azproxyvolume3 -o nocopyapi -o use_path_request_style -o nomultipart -o sigv2 -o url=http://192.168.1.81/ -d -of2 -o allow_other -o passwd_file=/home/builder/.passwd-s3fs-proxy
builder@anna-MacBookAir:~$ sudo touch /mnt/azproxyvolume3/test9988
And I can see it reflected in Azure
I can now apply to the other hosts
builder@builder-MacBookPro2:~$ echo 'longhornstorage:asdfasdfasdfasdfasdfasdfasdfasdfasdfasdfasdfasdfasdfasdfasdfasdfasdfasdfasdf==' > ~/.passwd-s3fs-p
roxy
builder@builder-MacBookPro2:~$ sudo mkdir /mnt/azproxyvolume3
[sudo] password for builder:
builder@builder-MacBookPro2:~$ sudo chmod 600 ~/.passwd-s3fs-proxy
builder@builder-MacBookPro2:~$ sudo s3fs localk3svolume /mnt/azproxyvolume3 -o nocopyapi -o use_path_request_style -o nomultipart -o sigv2 -o url=http://192.168.1.81/ -d -of2 -o allow_other -o passwd_file=/home/builder/.passwd-s3fs-proxy
builder@builder-MacBookPro2:~$ sudo ls /mnt/azproxyvolume3/
test9988
and the file
isaac@isaac-MacBookPro:~$ echo 'longhornstorage:asdfasdfasdfasdfasdfasdfasdfasdfasdfasdfasdfasdfasdfasdfasdfasdfasdfasdfasdf==' > ~/.passwd-s3fs-proxy
isaac@isaac-MacBookPro:~$ chmod 600  ~/.passwd-s3fs-proxy
isaac@isaac-MacBookPro:~$ sudo mkdir /mnt/azproxyvolume3
[sudo] password for isaac:
isaac@isaac-MacBookPro:~$ sudo s3fs localk3svolume /mnt/azproxyvolume3 -o nocopyapi -o use_path_request_style -o nomultipart -o sigv2 -o url=http://192.168.1.81/ -d -of2 -o allow_other -o passwd_file=/home/builder/.passwd-s3fs-proxy
s3fs: specified passwd_file is not readable.
isaac@isaac-MacBookPro:~$ sudo s3fs localk3svolume /mnt/azproxyvolume3 -o nocopyapi -o use_path_request_style -o nomultipart -o sigv2 -o url=http://192.168.1.81/ -d -of2 -o allow_other -o passwd_file=/home/isaac/.passwd-s3fs-proxy
isaac@isaac-MacBookPro:~$ sudo ls -l /mnt/azproxyvolume3/
total 1
-rw-r--r-- 1 root root 0 Sep  5 20:45 test9988
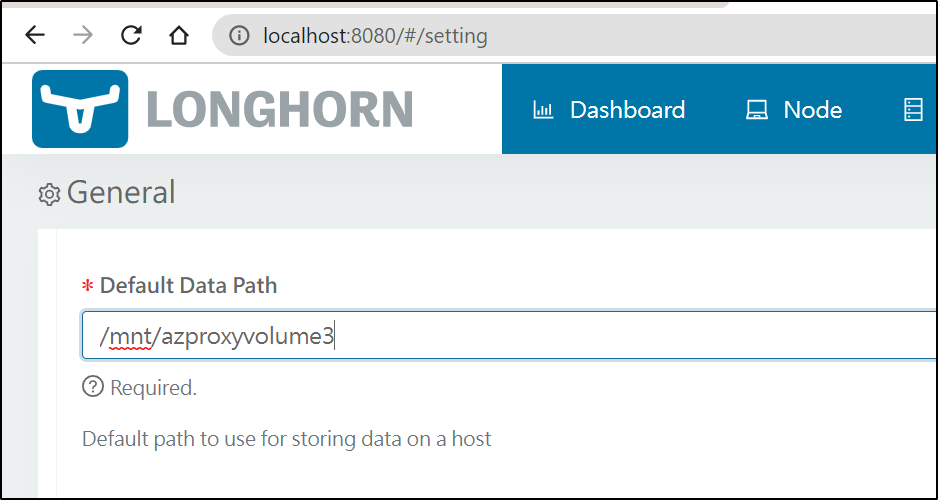
I can change our storage backing in Longhorn
Then create a new volume
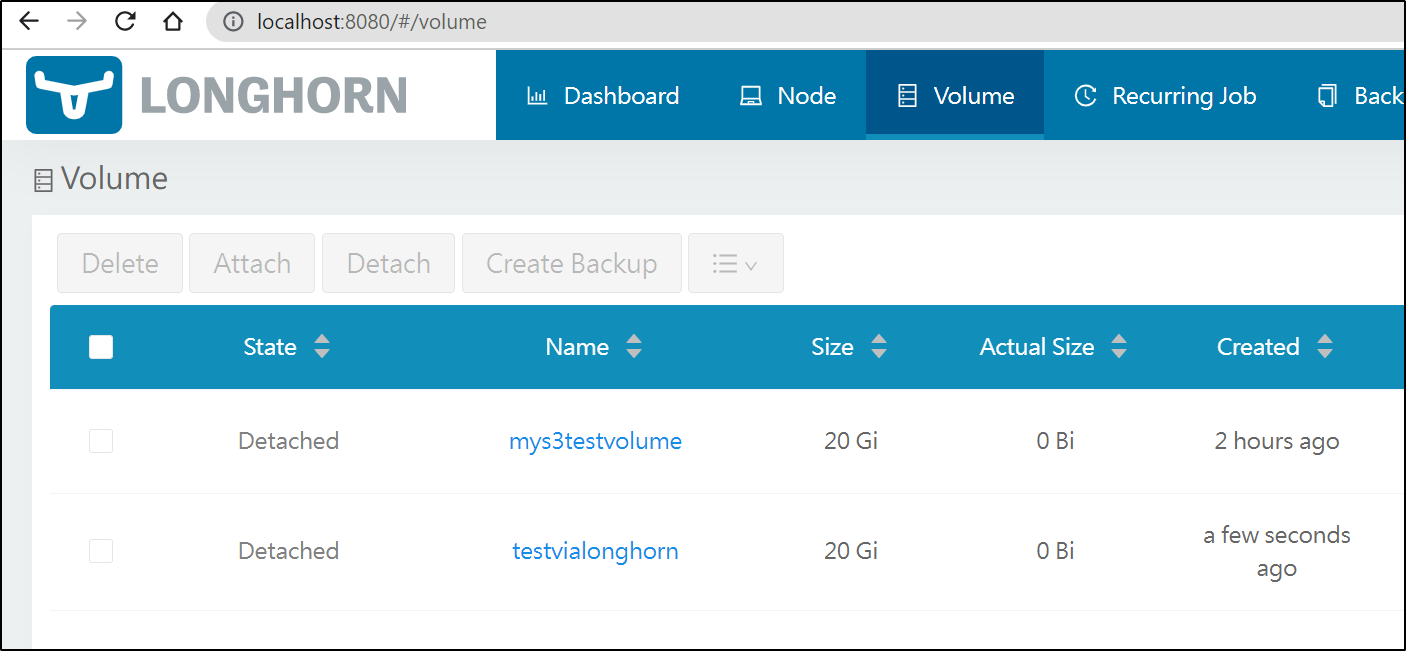
and I see the volume is created
Upgrade Helm values
$ helm upgrade longhorn -n longhorn-system --set defaultSettings.defaultDataPath="/mnt/azproxyvolume3" longhorn/longhorn
W0905 21:11:25.363984    3057 warnings.go:70] policy/v1beta1 PodSecurityPolicy is deprecated in v1.21+, unavailable in v1.25+
W0905 21:11:25.379711    3057 warnings.go:70] policy/v1beta1 PodSecurityPolicy is deprecated in v1.21+, unavailable in v1.25+
W0905 21:11:25.438430    3057 warnings.go:70] policy/v1beta1 PodSecurityPolicy is deprecated in v1.21+, unavailable in v1.25+
Release "longhorn" has been upgraded. Happy Helming!
NAME: longhorn
LAST DEPLOYED: Mon Sep  5 21:11:24 2022
NAMESPACE: longhorn-system
STATUS: deployed
REVISION: 2
TEST SUITE: None
NOTES:
Longhorn is now installed on the cluster!

Please wait a few minutes for other Longhorn components such as CSI deployments, Engine Images, and Instance Managers to be initialized.

Visit our documentation at https://longhorn.io/docs/
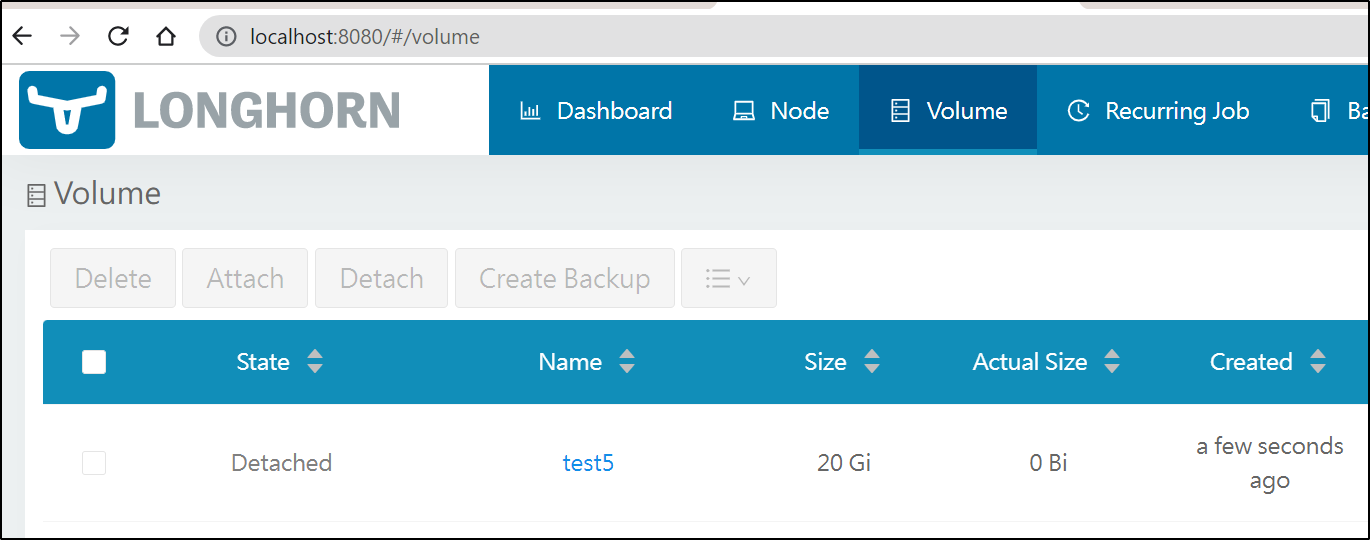
Note: While the upgrade failed to modify the backing setting (as did the UI). Once I removed the Longhorn system and re-installed with helm, I could create a volume with a new setting
To which I see reflected in Azure
I would have prefered to use direct SMB or NFS mounting instead of having to fake it through an s3proxy service. This puts an extra burden on a service in my cluster as well as holding the port 80 in traefik.
$ sudo df -h | grep mnt\/az
s3fs                                                                                                 256T     0  256T   0% /mnt/azproxyvolume3
builder@anna-MacBookAir:~$
Linode
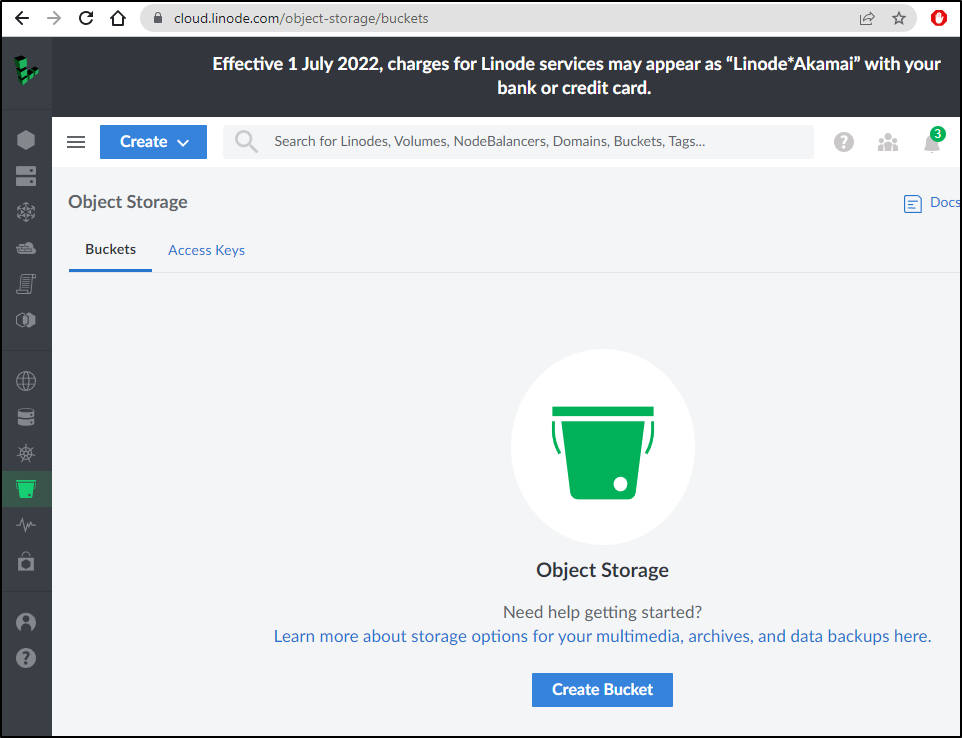
Let’s login to Linode and go to our Buckets page
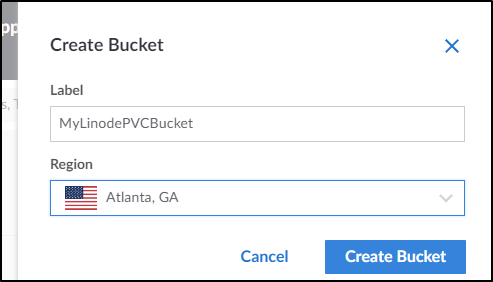
I’ll create a new Linode Buckets and pick a region
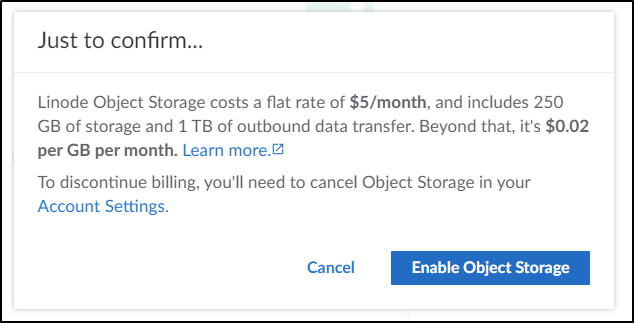
Heads up, Object Storage - just to enable - now costs US$5 a month. So regardless of what we do next, we’ll get a $5 charge
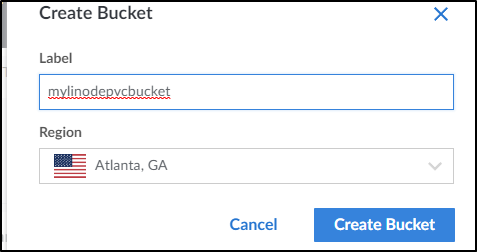
I had to rename as it requires all lowercase
I don’t really have memorized the region to name mappings, so after I used the REST API with my API token to get the region
$ curl -H "Authorization: Bearer 12340871234870128347098712348971234" https://api.linode.com/v4/object-storage/buckets | jq
  % Total    % Received % Xferd  Average Speed   Time    Time     Time  Current
                                 Dload  Upload   Total   Spent    Left  Speed
100   233  100   233    0     0     54      0  0:00:04  0:00:04 --:--:--    54
{
  "page": 1,
  "pages": 1,
  "results": 1,
  "data": [
    {
      "hostname": "mylinodepvcbucket.us-southeast-1.linodeobjects.com",
      "label": "mylinodepvcbucket",
      "created": "2022-09-06T11:30:47",
      "cluster": "us-southeast-1",
      "size": 0,
      "objects": 0
    }
  ]
}
I can also just see it in the Object Storage view as ‘us-southeast-1’
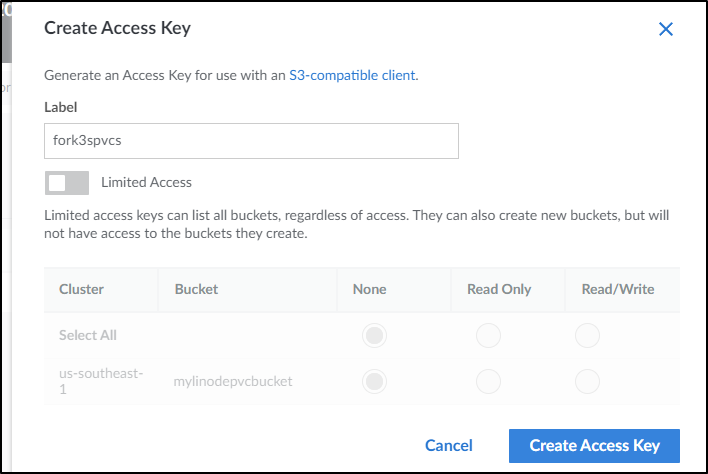
Next, we go to the access keys tab to create a new access key
and I’ll create one for k3s
It will then show you (just once) the keys and secret. Save those aside
Much like before, we will save the value of key:secret into a file and set 600 perms on it
builder@anna-MacBookAir:~$ vi ~/.passwd-s3fs-linode
builder@anna-MacBookAir:~$ chmod 600 ~/.passwd-s3fs-linode
Now let’s mount and test
$ sudo s3fs mylinodepvcbucket /mnt/linodevolume -o allow_other -o use_path_request_style -o url=https://us-southeast-1.linodeobjects.com -o _netdev -o passwd_file=/home/builder/.passwd-s3fs-linode
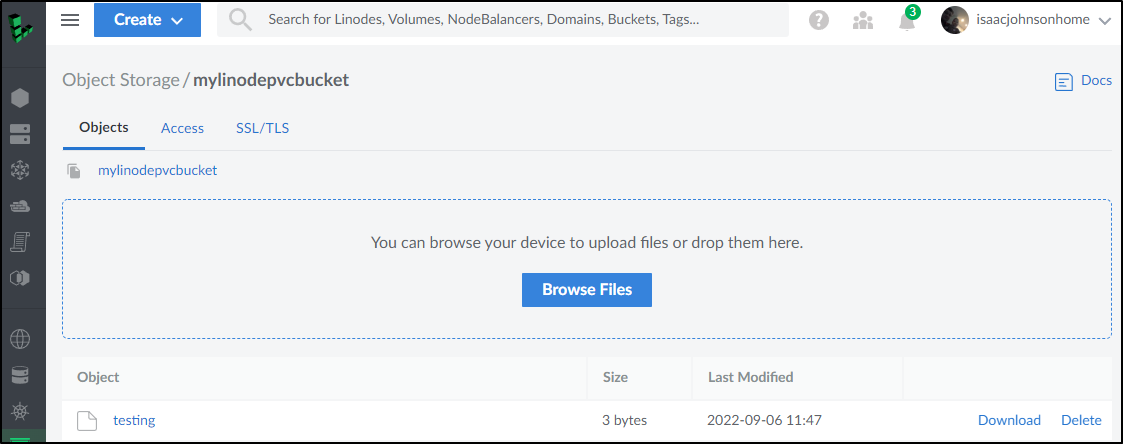
$ sudo echo hi > /mnt/linodevolume/testing
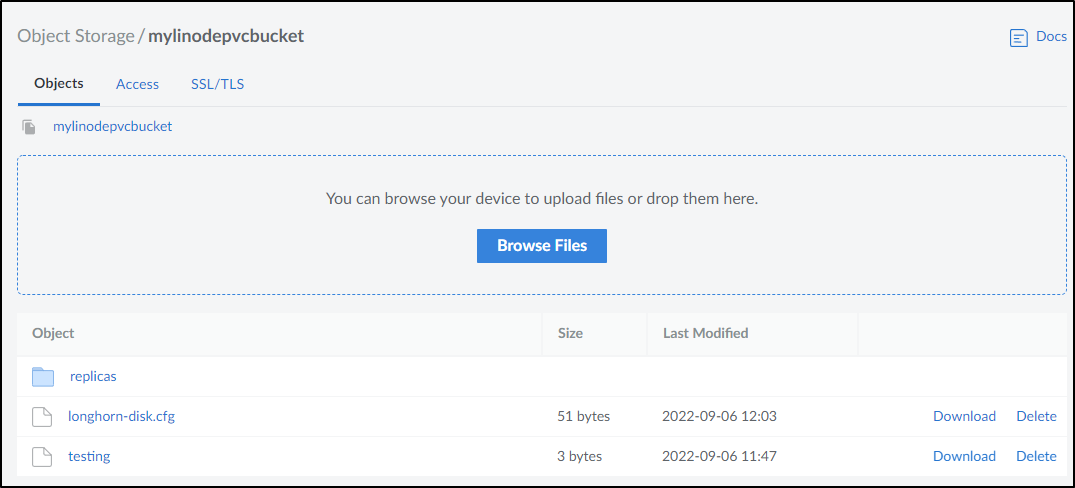
I can verify results on Linode
I hopped on the other nodes in the cluster and did similar
isaac@isaac-MacBookPro:~$ echo 'U****************7:u***********************************r' > ~/.passwd-s3fs-linode
isaac@isaac-MacBookPro:~$ sudo mkdir /mnt/linodevolume
[sudo] password for isaac:
isaac@isaac-MacBookPro:~$ sudo chmod 600 ~/.passwd-s3fs
isaac@isaac-MacBookPro:~$ sudo chmod 600 ~/.passwd-s3fs-linode
isaac@isaac-MacBookPro:~$ sudo s3fs mylinodepvcbucket /mnt/linodevolume -o allow_other -o use_path_request_style -o url=https://us-southeast-1.linodeobjec
ts.com -o _netdev -o passwd_file=/home/isaac/.passwd-s3fs-linode
isaac@isaac-MacBookPro:~$ sudo ls /mnt/linodevolume/
testing
I removed Longhorn and re-installed with helm, now choosing the linode mount as the default path
$ helm install longhorn -n longhorn-system --set defaultSettings.defaultDataPath="/mnt/linodevolume" longhorn/longhorn
WARNING: Kubernetes configuration file is group-readable. This is insecure. Location: /home/builder/.kube/config
WARNING: Kubernetes configuration file is world-readable. This is insecure. Location: /home/builder/.kube/config
W0906 07:02:43.956532   22620 warnings.go:70] policy/v1beta1 PodSecurityPolicy is deprecated in v1.21+, unavailable in v1.25+
W0906 07:02:44.261340   22620 warnings.go:70] policy/v1beta1 PodSecurityPolicy is deprecated in v1.21+, unavailable in v1.25+
NAME: longhorn
LAST DEPLOYED: Tue Sep  6 07:02:42 2022
NAMESPACE: longhorn-system
STATUS: deployed
REVISION: 1
TEST SUITE: None
NOTES:
Longhorn is now installed on the cluster!

Please wait a few minutes for other Longhorn components such as CSI deployments, Engine Images, and Instance Managers to be initialized.

Visit our documentation at https://longhorn.io/docs/
If you haven’t already, create the service (if you had created it earlier in this guide, it should still be there)
$ cat longhornsvc.yaml
apiVersion: v1
kind: Service
metadata:
  name: longhorn-ingress-lb
  namespace: longhorn-system
spec:
  selector:
    app: longhorn-ui
  type: LoadBalancer
  ports:
    - name: http
      protocol: TCP
      port: 80
      targetPort: http

$ kubectl apply -f ./longhornsvc.yaml
service/longhorn-ingress-lb created
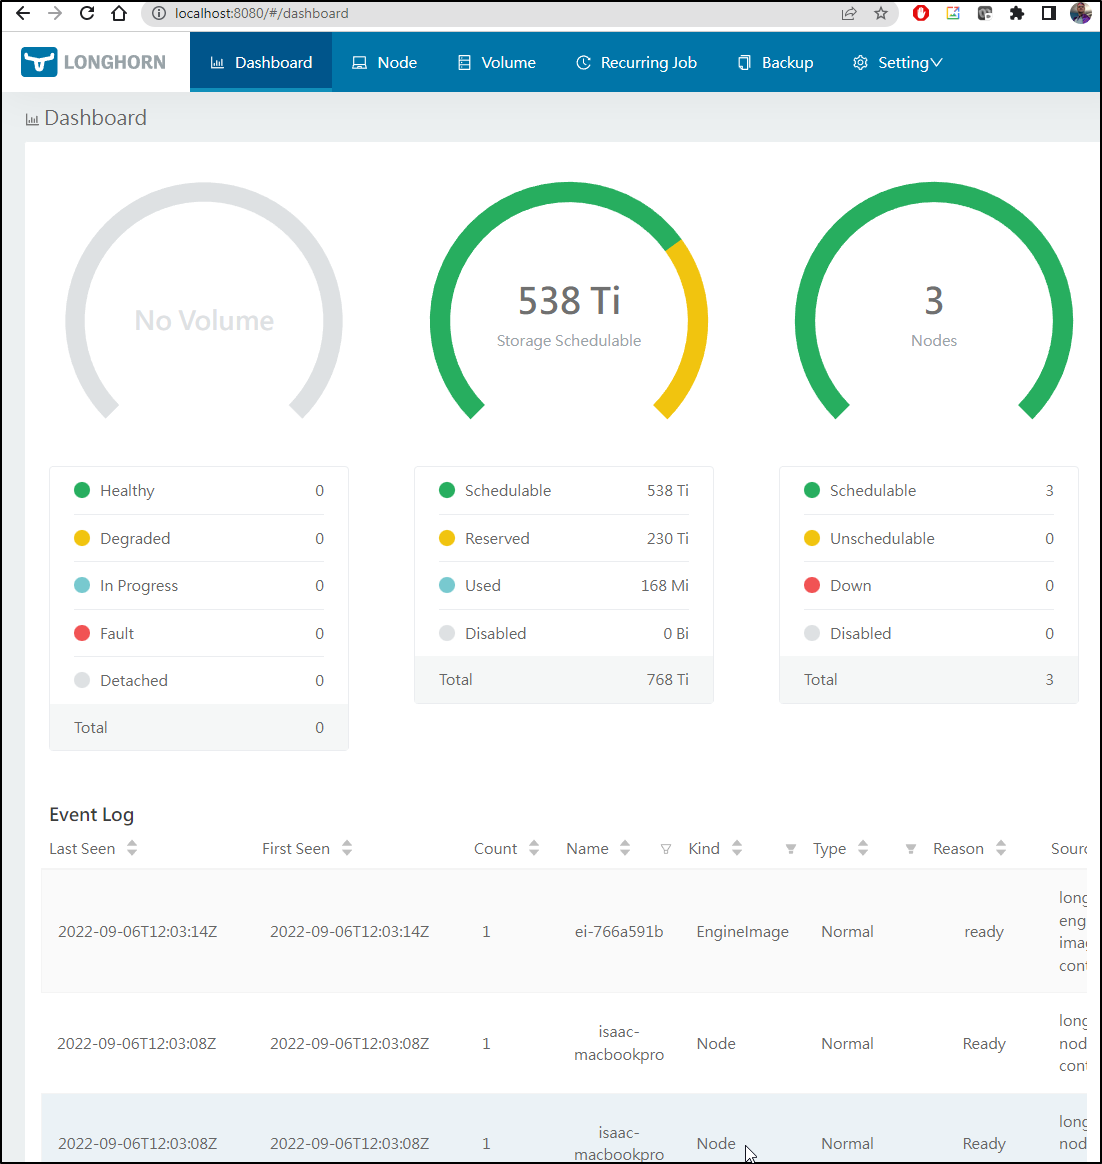
We can then port-forward to access the Longhorn UI
$ kubectl port-forward svc/longhorn-ingress-lb -n longhorn-system 8080:80
Forwarding from 127.0.0.1:8080 -> 8000
Forwarding from [::1]:8080 -> 8000
Handling connection for 8080
Handling connection for 8080
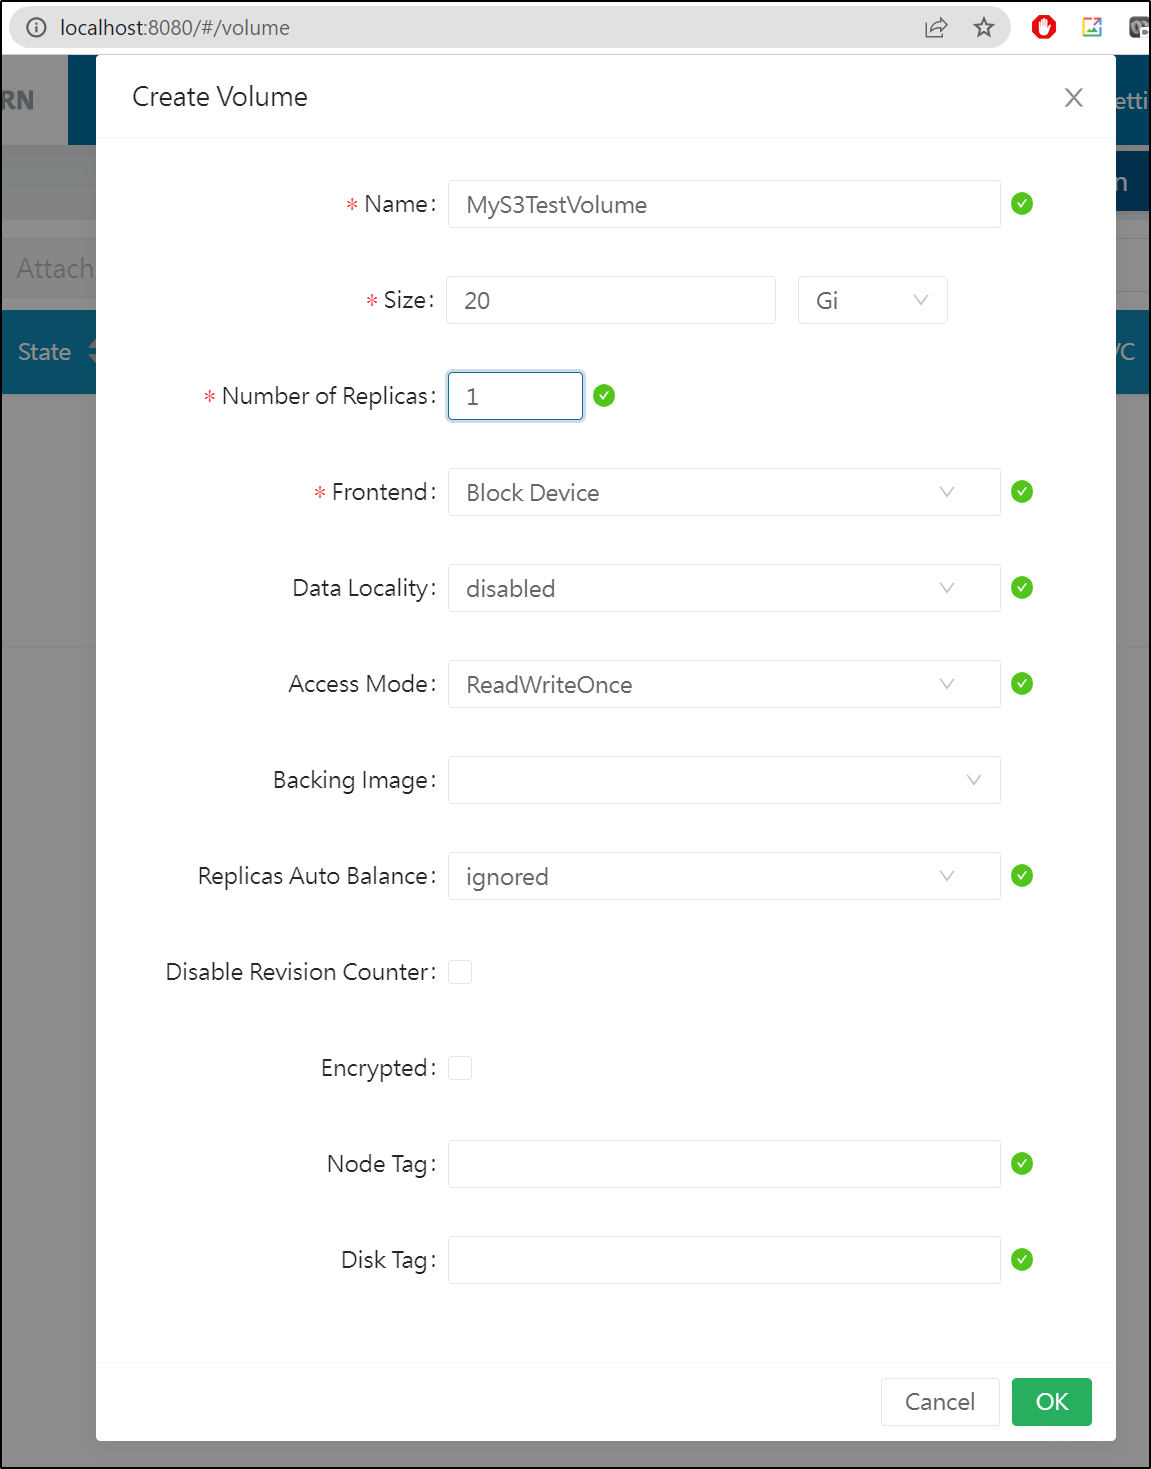
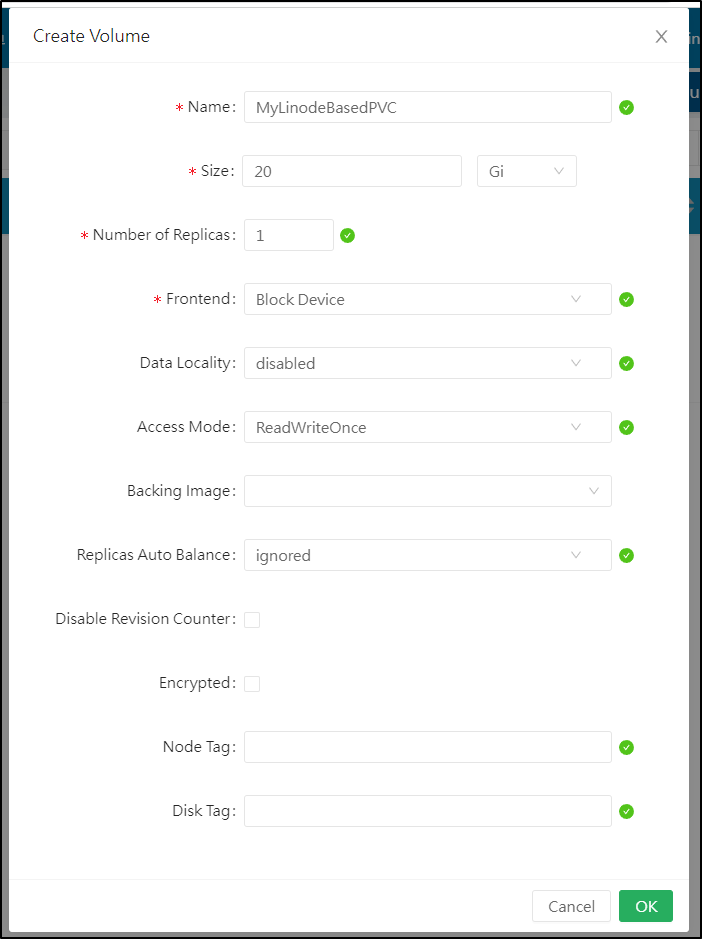
We’ll go to Volumes to “Create Volume”
Here I created a simple 20Gb volume. I always use 1 replica as it will sync to Linode regardless
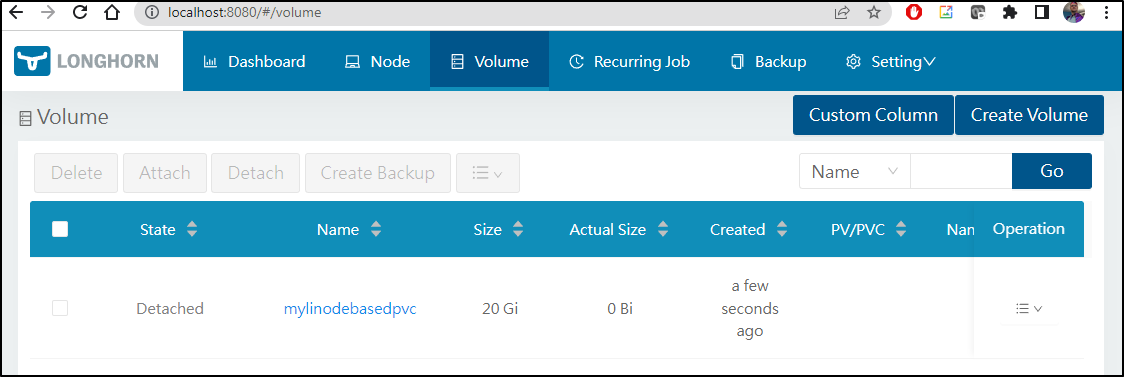
I can now see it show up in the UI
As well as in Kubernetes
$ kubectl get volume --all-namespaces
NAMESPACE         NAME               STATE      ROBUSTNESS   SCHEDULED   SIZE          NODE   AGE
longhorn-system   mylinodebasedpvc   detached   unknown                  21474836480          36s
Where longhorn, once again, is available as a storage class
$ kubectl get sc
NAME                   PROVISIONER                        RECLAIMPOLICY   VOLUMEBINDINGMODE      ALLOWVOLUMEEXPANSION   AGE
local-path (default)   rancher.io/local-path              Delete          WaitForFirstConsumer   false                  7d
rook-nfs-share1        nfs.rook.io/rook-nfs-provisioner   Delete          Immediate              false                  6d9h
s3-buckets             aws-s3.io/bucket                   Delete          Immediate              false                  5d10h
s3-existing-buckets    aws-s3.io/bucket                   Delete          Immediate              false                  5d10h
s3-existing-buckets2   aws-s3.io/bucket                   Delete          Immediate              false                  5d10h
longhorn (default)     driver.longhorn.io                 Delete          Immediate              true                   5m25s
Additionally, I can see the Longhorn storage in Linode
Summary
Today we focused on using Cloud Storage options to back our Persistant Volume Claims in Kubernetes. We showed working examples with AWS, Azure and Linode. In most cases, we leveraged Longhorn to leverage mounted volumes to our filesystem using S3FS. In the case of Azure, we worked around port 445 blocking by using the S3Proxy service. We could also use S3Proxy to handle Seagate Lyve Cloud storage (atmos), Rackspace Cloudfiles, and GCP Buckets to name a few.
I didn’t focus on performance, however, anictdotally, the Linode mounts were by far the fastest. I’m not sure if it’s a factor of partnering with Akamai or what, but they were nearly instant.
While using basic local-storage or replicas over node’s local storage with Longhorn is generally the easiest and fastest, knowing how to leverage cloud buckets gives your PVCs some durability you won’t get with off-the-shelf spinning platters.


