Published: May 11, 2022 by Isaac Johnson
We haven’t explored Arc recently. Azure Arc for Kubernetes lets us add any Kubernetes cluster into Azure to manage as if it was an AKS cluster. We can use policies, Open Service Mesh and GitOps among other features.
Today we will explore Azure Arc and load a fresh Linode LKE Cluster into Arc and setup GitOps (via Fluxv2 as provided by Arc).
Azure Arc for Kubernetes
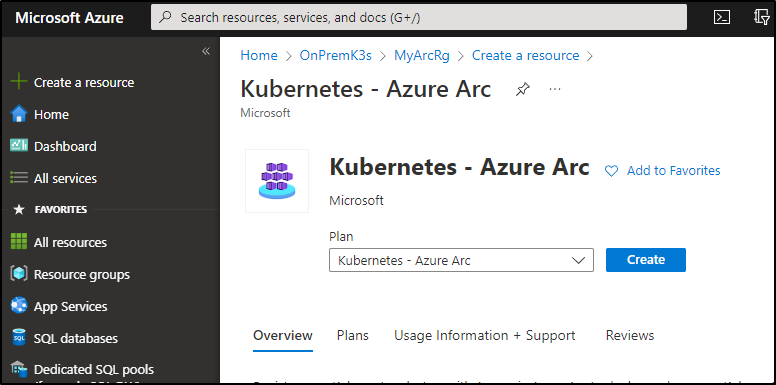
First we can start in the Azure portal.
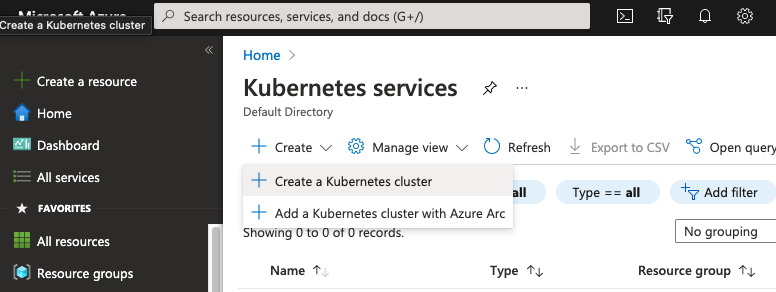
We will then need egress on 443 and 9418 on a cluster that is 1.13 or newer (which seems reasonable)
- A new or existing Kubernetes cluster The cluster must use Kubernetes version 1.13 or later (including OpenShift 4.2 or later and other Kubernetes derivatives). Learn how to create a Kubernetes cluster
- Access to ports 443 and 9418 Make sure the cluster has access to these ports, and the required outbound URLs
In order for us to use the k8s extensions later in this blog, we need to register the provider with the CLI
I set az to do dynamic extension installation and then registered the Kubernetes provider
$ az config set extension.use_dynamic_install=yes_without_prompt
Command group 'config' is experimental and under development. Reference and support levels: https://aka.ms/CLI_refstatus

$ az provider register -n 'Microsoft.Kubernetes'
Registering is still on-going. You can monitor using 'az provider show -n Microsoft.Kubernetes'

$ az provider show -n Microsoft.Kubernetes | jq '.registrationState'
"Registered"
Creating an LKE cluster
Let’s see if we have any clusters presently in Linode
$ linode-cli lke clusters-list
┌────┬───────┬────────┐
│ id │ label │ region │
└────┴───────┴────────┘
First, i’ll need to check node types as Linode keeps updating them. I think i’ll use something with 8gb of memory.
$ linode-cli linodes types | grep 8GB | head -n1
│ g6-standard-4    │ Linode 8GB                       │ standard  │ 163840  │ 8192   │ 4     │ 5000        │ 5000     │ 0.06   │ 40.0    │ 0    │
We can check which versions are available to us:
$ linode-cli lke versions-list
┌──────┐
│ id   │
├──────┤
│ 1.23 │
│ 1.22 │
└──────┘
Now let’s create the LKE cluster
$ linode-cli lke cluster-create --label dev --tags dev --node_pools.autoscaler.enabled false --node_pools.type g6-standard-4 --node_pools.count 3 --k8s_version 1.22
┌───────┬───────┬────────────┐
│ id    │ label │ region     │
├───────┼───────┼────────────┤
│ 60604 │ dev   │ us-central │
└───────┴───────┴────────────┘
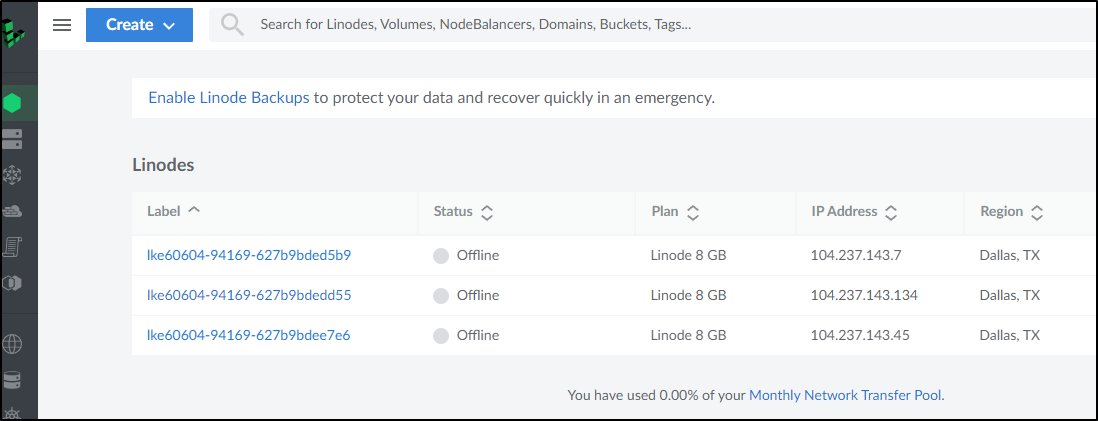
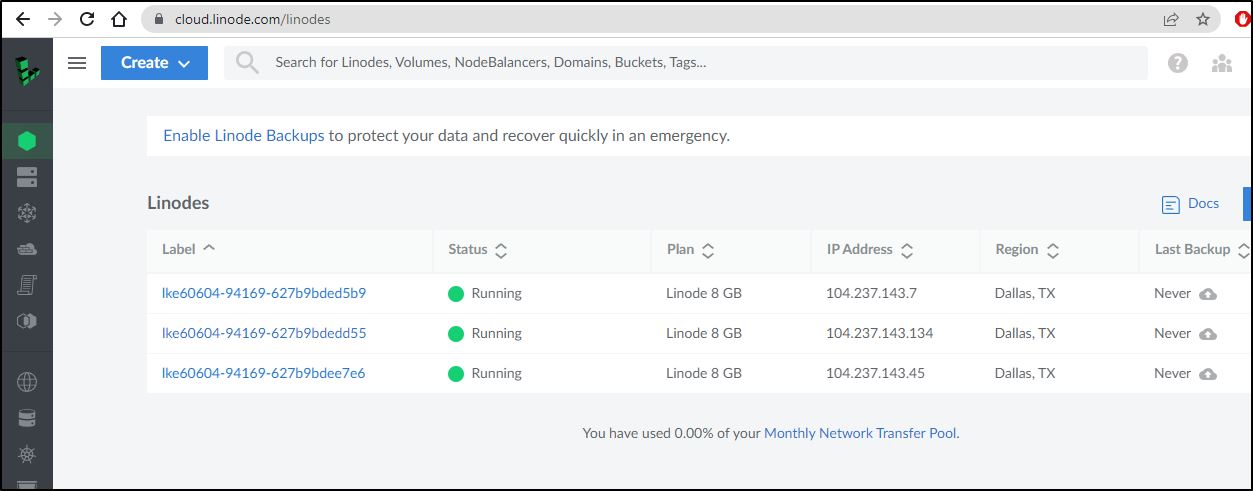
We can see the nodes coming up
and in less than a minute I see them online
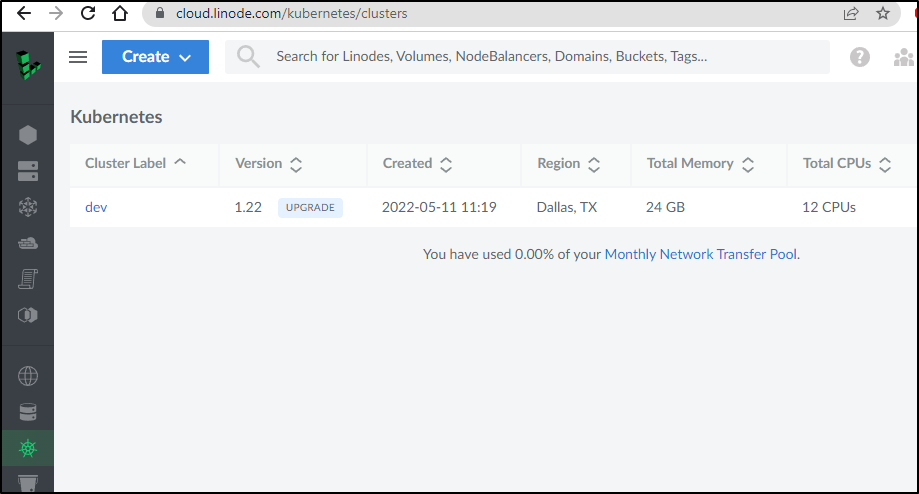
And we can download the kubeconfig from the Kubernetes pane
We can also get the kubeconfig for the cluster from the CLI
$ linode-cli lke kubeconfig-view 60604 | tail -n2 | head -n1 | sed 's/.\{8\}$//' | sed 's/^.\{8\}//' | base64 --decode > ~/.kube/config

$ kubectl get nodes
NAME                          STATUS   ROLES    AGE     VERSION
lke60604-94169-627b9bded5b9   Ready    <none>   4m      v1.22.9
lke60604-94169-627b9bdedd55   Ready    <none>   4m3s    v1.22.9
lke60604-94169-627b9bdee7e6   Ready    <none>   3m48s   v1.22.9
Adding LKE to Arc
Now let’s add to Azure Arc.
There are a few ways to go about it. Here, I’ll launch create from the Resource Group and pick “Kubernetes - Azure Arc”
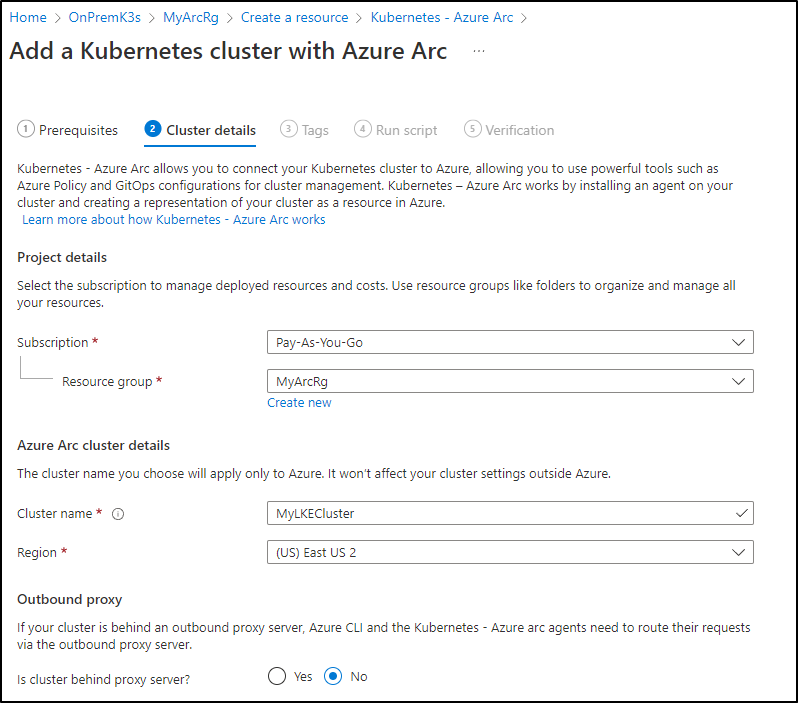
Fill in the cluster name
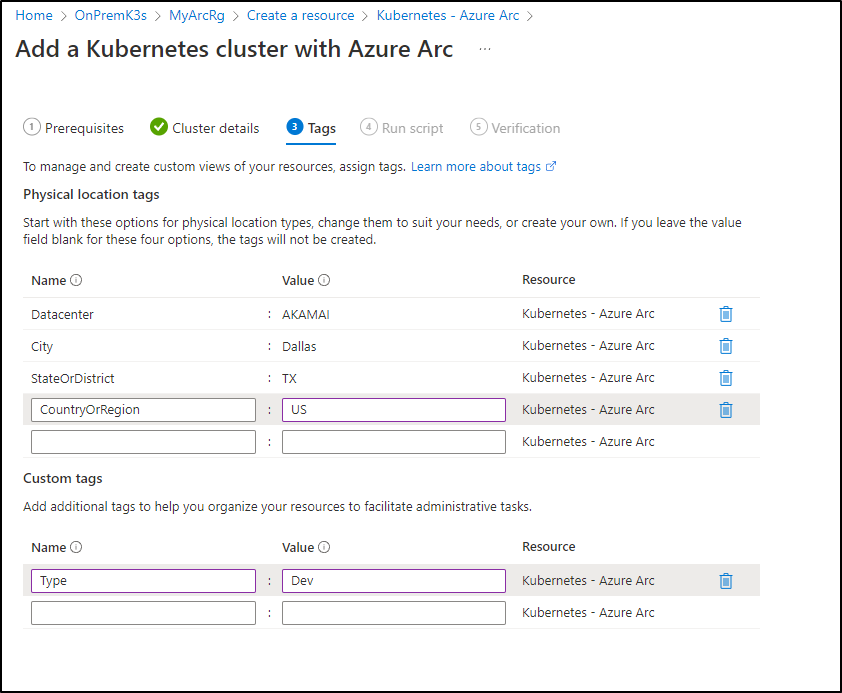
Then add any tags
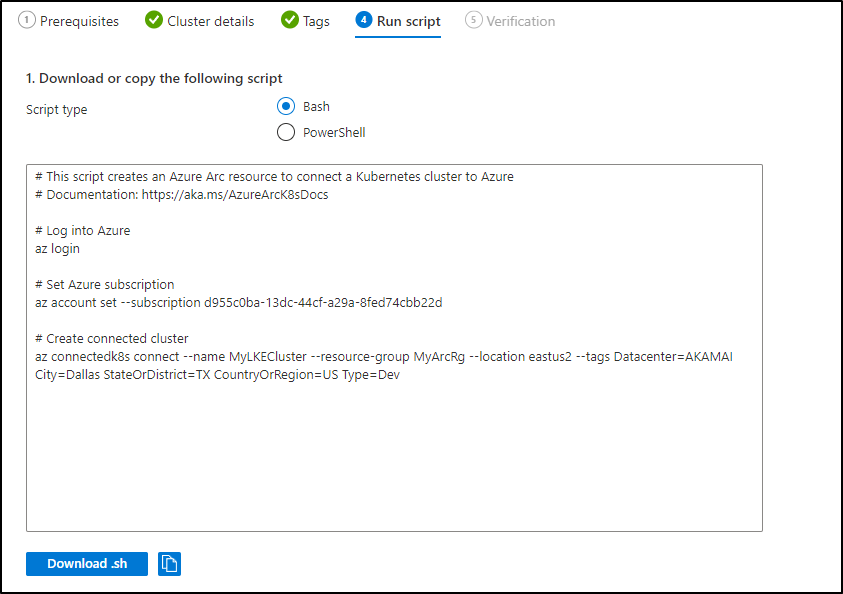
We will then see our onboarding steps:
I’ll just run directly (though I could download the download.sh)
Loading
$ az account set --subscription d955c0ba-13dc-44cf-a29a-8fed74cbb22d
$ az connectedk8s connect --name MyLKECluster --resource-group MyArcRg --location eastus2 --tags Datacenter=AKAMAI City=Dallas StateOrDistrict=TX CountryOrRegion=US Type=Dev
The command requires the extension connectedk8s. Do you want to install it now? The command will continue to run after the extension is installed. (Y/n): y
Run 'az config set extension.use_dynamic_install=yes_without_prompt' to allow installing extensions without prompt.
This operation might take a while...

Downloading helm client for first time. This can take few minutes...
{
  "agentPublicKeyCertificate": "MIICCgKCAgEAr4J16wDHftuCIZxXtYGeF+5DNEyOwQvqWl7uEFWT2s6IwucztnlHqGdstJ70kM4GzwGeta0OtVHge83hFjg6h5HjyjDsaoMysb/br+rjWjnPXbOxII8CzzbMRPmcs2lxxE/mObeWUy0KNfaBDx63bQFygTu/QbhQ3ERdUP57D8GO6X8eOkVn6tzQifVTOkjl/iztoFdHRzxXJKcocRlQoF+jLCdg3lkLzDCwHKEu8SmXIxRlEDF5ErU1vLGfvTZaDlUyw5z5D6KesfgjuZjnZUmGdwBWVnQkO7l/c3GU4lSDmLUfPZ15KavDwtM+horsEjJbQt8vND3RGb4JdIORxXU4RIYOHjofNyPpMlsfkOnGMUOxZNoJPlNci+P9qZOBcbLgD2pHFK5tbLzc9AEnXqGUMFwMXzEyktojtkrhJju7W6/HZi/FPbuIuXGq1ajbXeQR7PU6oRzXENe0W4Jne8unl43+YFS7bIs6+/uO6ZECIQ7fjjqjzn4n0bH8Cz1XgYVe40tdOq9q2faQZjcvGTLozLP0LfLie8/gqUonZsrDfYi2Y90ITuGhuOqnSGL+zhVD+uvLsdKLITP1kJh/c77QimE7KDKFpHR9Xm9/oisNy4/LJsaCtX4yMPXQ4aCnQnr5Vt3slIpb+H4f5iIHQ75trhMkpvA5JafQ5pT8m2UCAwEAAQ==",
  "agentVersion": null,
  "connectivityStatus": "Connecting",
  "distribution": "generic",
  "id": "/subscriptions/d955c0ba-13dc-44cf-a29a-8fed74cbb22d/resourceGroups/MyArcRg/providers/Microsoft.Kubernetes/connectedClusters/MyLKECluster",
  "identity": {
    "principalId": "39c38101-9bdf-42fc-a8d5-2dbd1731ad98",
    "tenantId": "28c575f6-ade1-4838-8e7c-7e6d1ba0eb4a",
    "type": "SystemAssigned"
  },
  "infrastructure": "generic",
  "kubernetesVersion": null,
  "lastConnectivityTime": null,
  "location": "eastus2",
  "managedIdentityCertificateExpirationTime": null,
  "name": "MyLKECluster",
  "offering": null,
  "provisioningState": "Succeeded",
  "resourceGroup": "MyArcRg",
  "systemData": {
    "createdAt": "2022-05-11T11:34:58.042060+00:00",
    "createdBy": "isaac.johnson@gmail.com",
    "createdByType": "User",
    "lastModifiedAt": "2022-05-11T11:34:58.042060+00:00",
    "lastModifiedBy": "isaac.johnson@gmail.com",
    "lastModifiedByType": "User"
  },
  "tags": {
    "City": "Dallas",
    "CountryOrRegion": "US",
    "Datacenter": "AKAMAI",
    "StateOrDistrict": "TX",
    "Type": "Dev"
  },
  "totalCoreCount": null,
  "totalNodeCount": null,
  "type": "microsoft.kubernetes/connectedclusters"
}
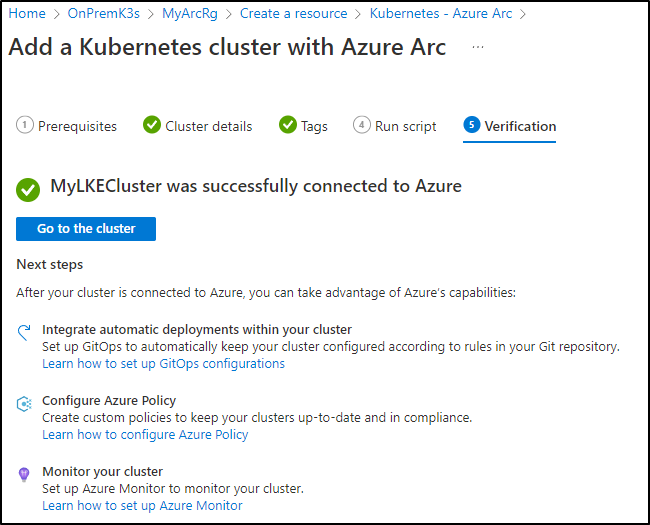
Next, we can verify it connected in the Azure Portal
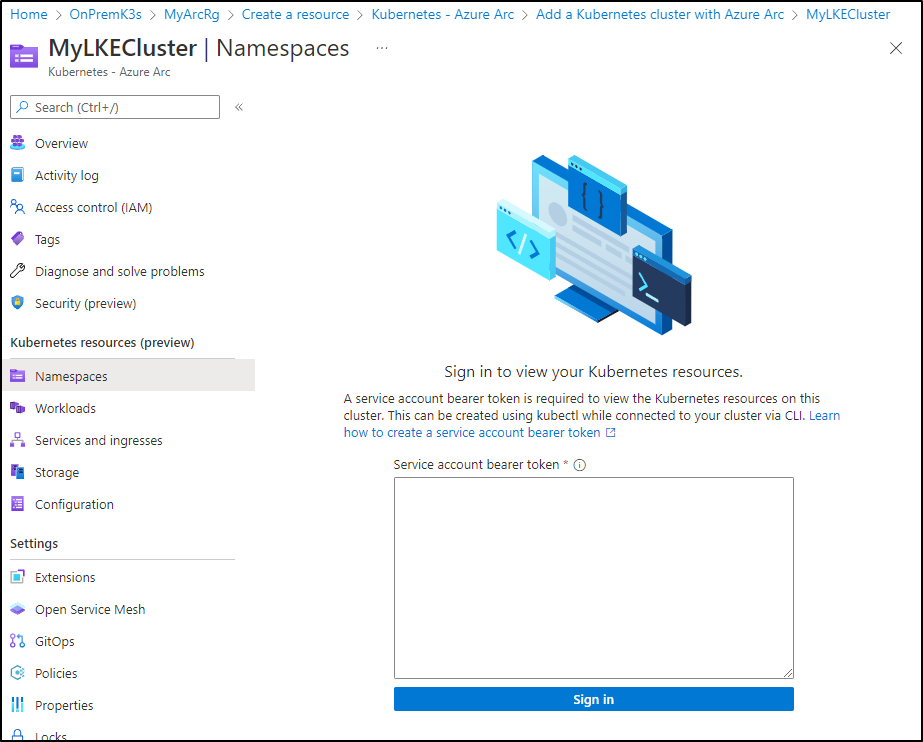
The first thing you’ll notice in browsing via the portal is that we need a bearer token to actually browse content
We’ll follow the steps to create an ‘admin-user’
$ kubectl create serviceaccount admin-user
serviceaccount/admin-user created
$ kubectl create clusterrolebinding admin-user-binding --clusterrole cluster-admin --serviceaccount default:admin-user
clusterrolebinding.rbac.authorization.k8s.io/admin-user-binding created
$ SECRET_NAME=$(kubectl get serviceaccount admin-user -o jsonpath='{$.secrets[0].name}')
$ TOKEN=$(kubectl get secret ${SECRET_NAME} -o jsonpath='{$.data.token}' | base64 -d | sed $'s/$/\\\n/g')
$ echo $TOKEN
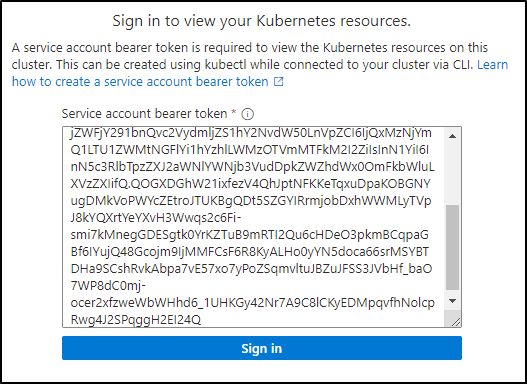
eyJhbGciOiJSUzI1NiIsImtpZCI6ImNOcDR2VE51akVMVVQ2Q3BialBtekxobng0alNNaUFVYUhVT3gtcW5XTDgifQ.eyJpc3MiOiJrdWJlcm5ldGVzL3NlcnZpY2VhY2NvdW50Iiwia3ViZXJuZXRlcy5pby9zZXJ2aWNlYWNjb3VudC9uYW1lc3BhY2UiOiJkZWZhdWx0Iiwia3ViZXJuZXRlcy5pby9zZXJ2aWNlYWNjb3VudC9zZWNyZXQubmFtZSI6ImFkbWluLXVzZXItdG9rZW4tbnQyOTQiLCJrdWJlcm5ldGVzLmlvL3NlcnZpY2VhY2NvdW50L3NlcnZpY2UtYWNjb3VudC5uYW1lIjoiYWRtaW4tdXNlciIsImt1YmVybmV0ZXMuaW8vc2VydmljZWFjY291bnQvc2VydmljZS1hY2NvdW50LnVpZCI6IjQxMzNjYmQ1LTU1ZWMtNGFlYi1hYzhlLWMzOTVmMTFkM2I2ZiIsInN1YiI6InN5c3RlbTpzZXJ2aWNlYWNjb3VudDpkZWZhdWx0OmFkbWluLXVzZXIifQ.QOGXDGhW21ixfezV4QhJptNFKKeTqxuDpaKOBGNYugDMkVoPWYcZEtroJTUKBgQDt5SZGYIRrmjobDxhWWMLyTVpJ8kYQXrtYeYXvH3Wwqs2c6Fi-smi7kMnegGDESgtk0YrKZTuB9mRTI2Qu6cHDeO3pkmBCqpaGBf6IYujQ48Gcojm9IjMMFCsF6R8KyALHo0yYN5doca66srMSYBTDHa9SCshRvkAbpa7vE57xo7yPoZSqmvltuJBZuJFSS3JVbHf_baO7WP8dC0mj-ocer2xfzweWbWHhd6_1UHKGy42Nr7A9C8lCKyEDMpqvfhNolcpRwg4J2SPqggH2EI24Q
I can now sign in with that in the portal
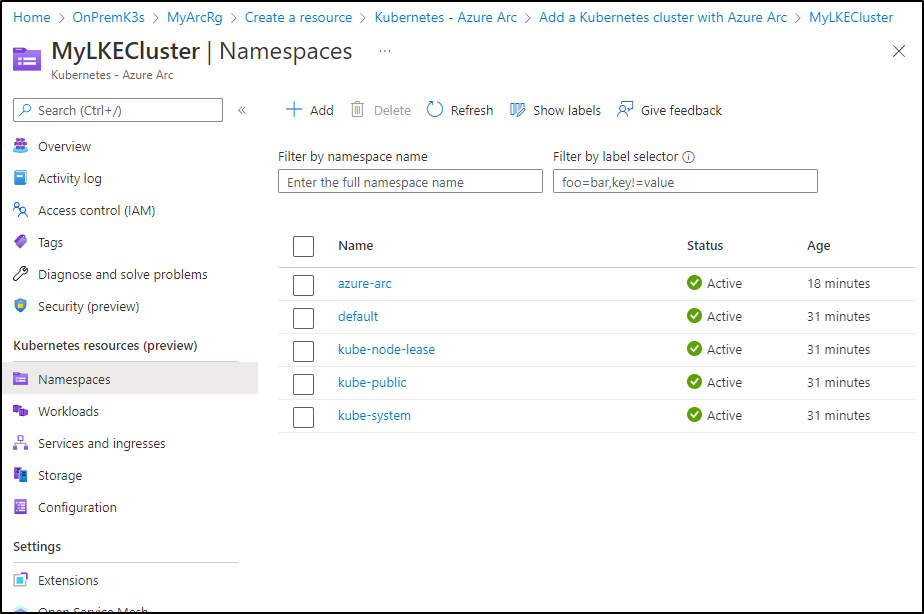
And we can view the details
GitOps via Arc
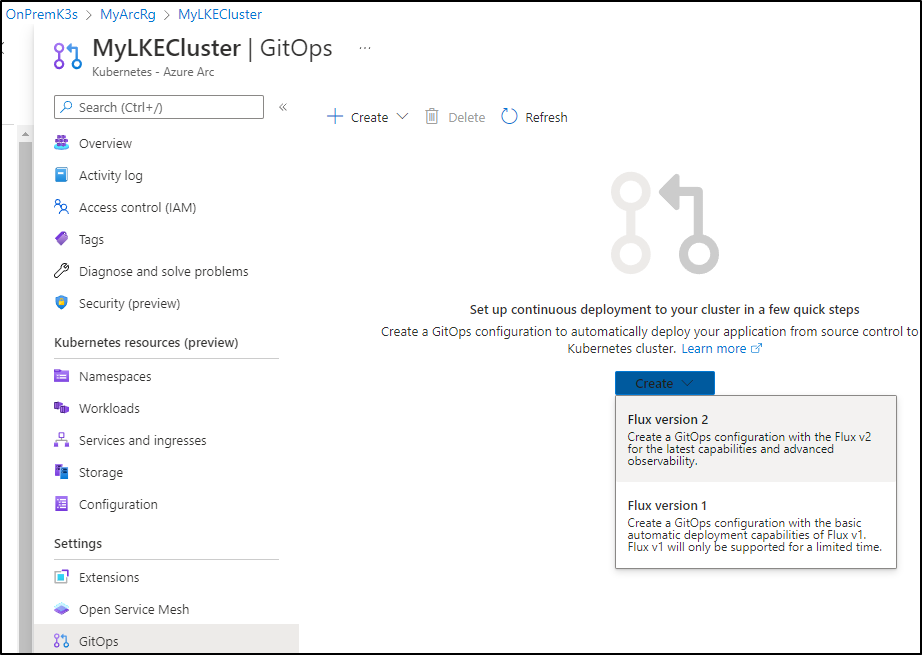
We can also use GitOps via Azure Arc
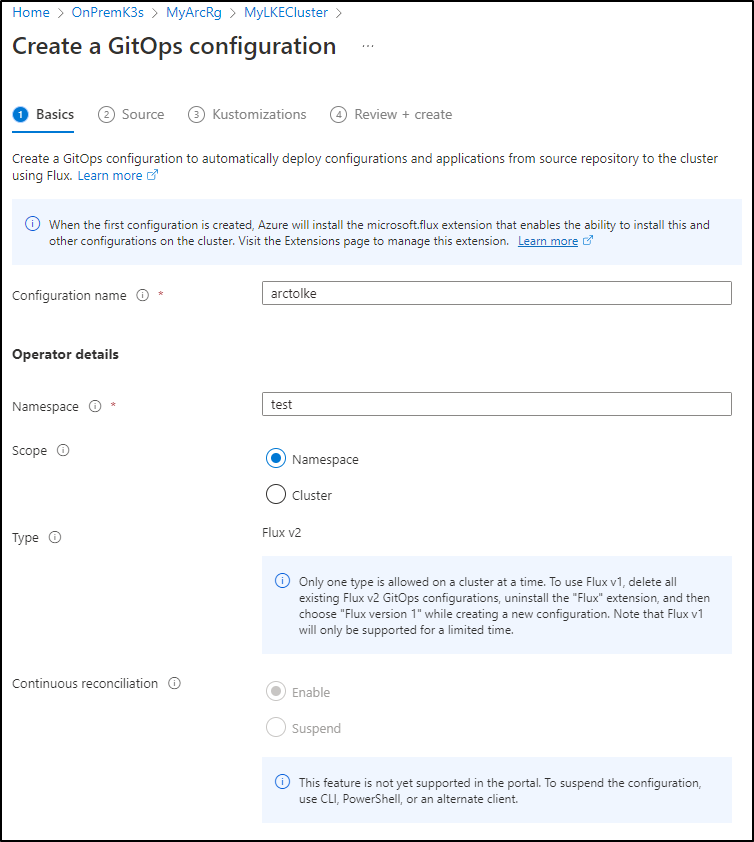
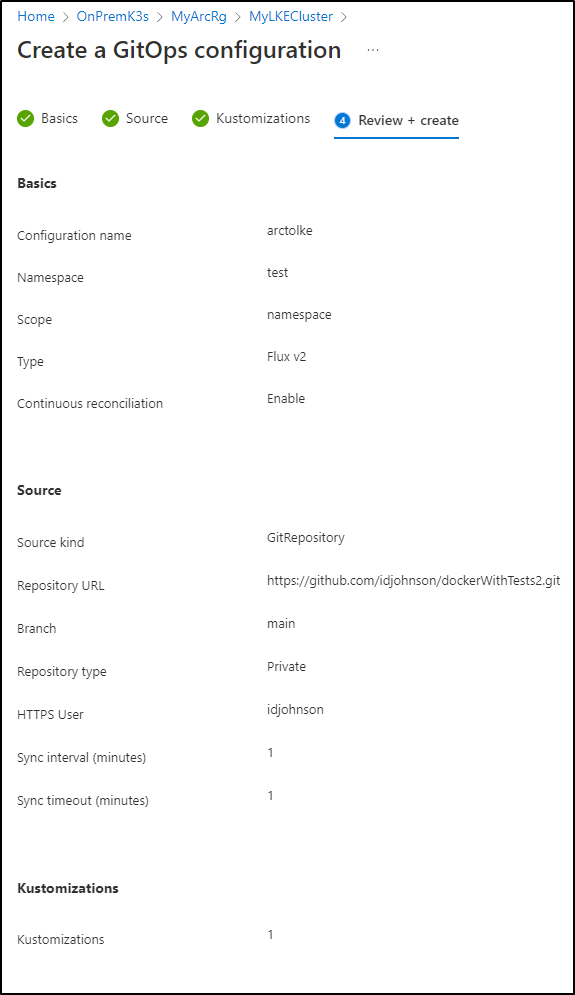
fill out the details
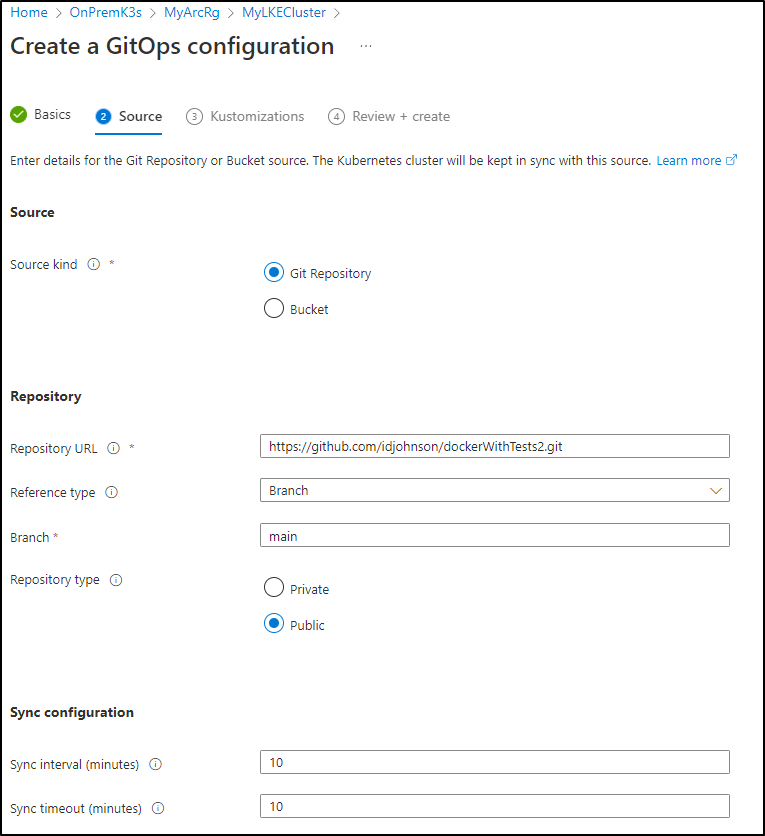
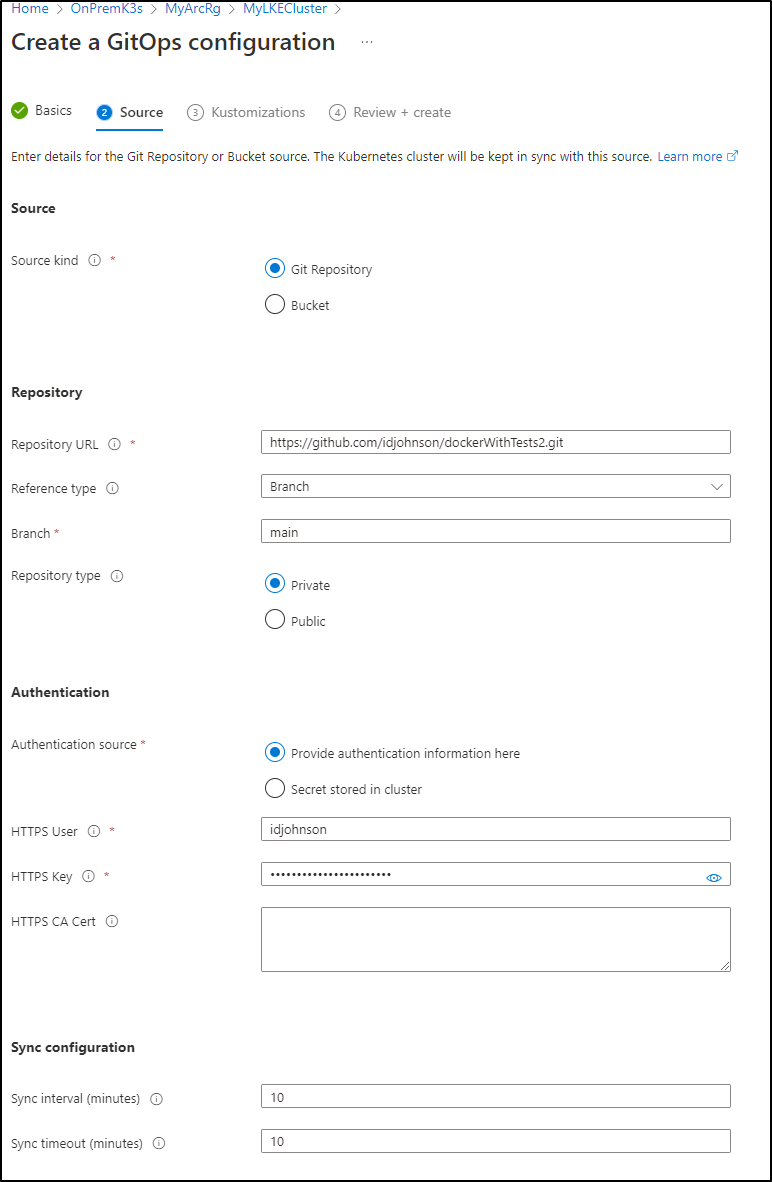
We’ll see in adding our Repo that if it is public, we need no auth.
But private repos would
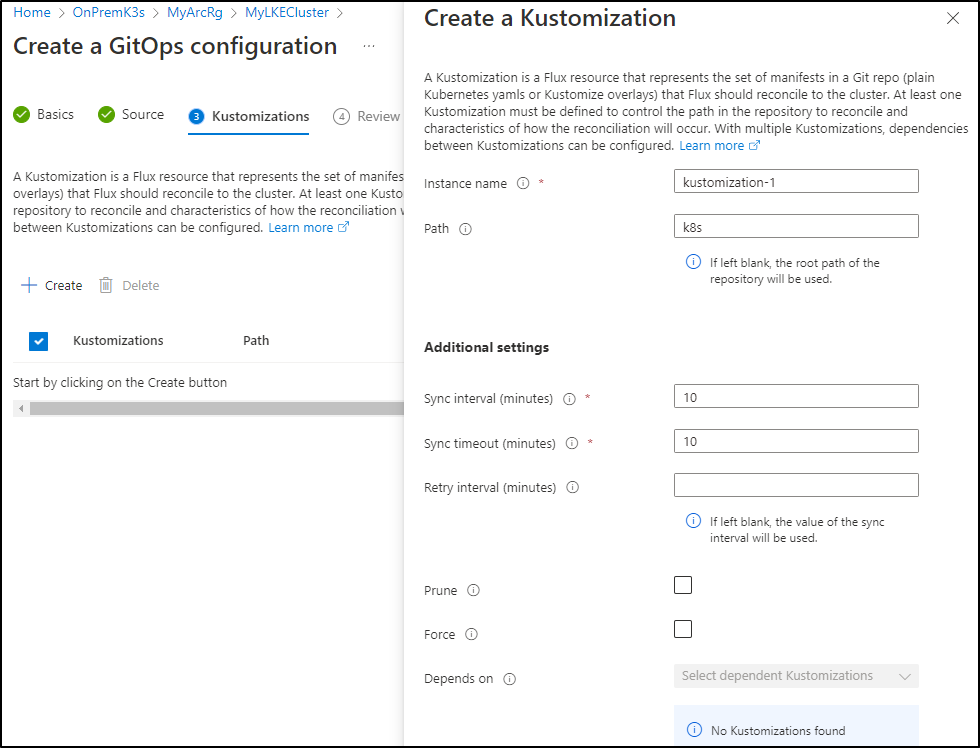
Next we add our kustomization path
Here I’ll set syncs to 1m and enable prune and force
We will now see a notification that Azure Arc is setting up GitOps via Flux v2
While that launches, we can see some of the deployments that have been launched into LKE
$ kubectl get deployments --all-namespaces
NAMESPACE     NAME                        READY   UP-TO-DATE   AVAILABLE   AGE
azure-arc     cluster-metadata-operator   1/1     1            1           34m
azure-arc     clusterconnect-agent        1/1     1            1           34m
azure-arc     clusteridentityoperator     1/1     1            1           34m
azure-arc     config-agent                1/1     1            1           34m
azure-arc     controller-manager          1/1     1            1           34m
azure-arc     extension-manager           1/1     1            1           34m
azure-arc     flux-logs-agent             1/1     1            1           34m
azure-arc     kube-aad-proxy              1/1     1            1           34m
azure-arc     metrics-agent               1/1     1            1           34m
azure-arc     resource-sync-agent         1/1     1            1           34m
flux-system   fluxconfig-agent            0/1     1            0           21s
flux-system   fluxconfig-controller       0/1     1            0           21s
flux-system   helm-controller             1/1     1            1           21s
flux-system   kustomize-controller        1/1     1            1           21s
flux-system   notification-controller     1/1     1            1           21s
flux-system   source-controller           1/1     1            1           21s
kube-system   calico-kube-controllers     1/1     1            1           47m
kube-system   coredns                     2/2     2            2           47m
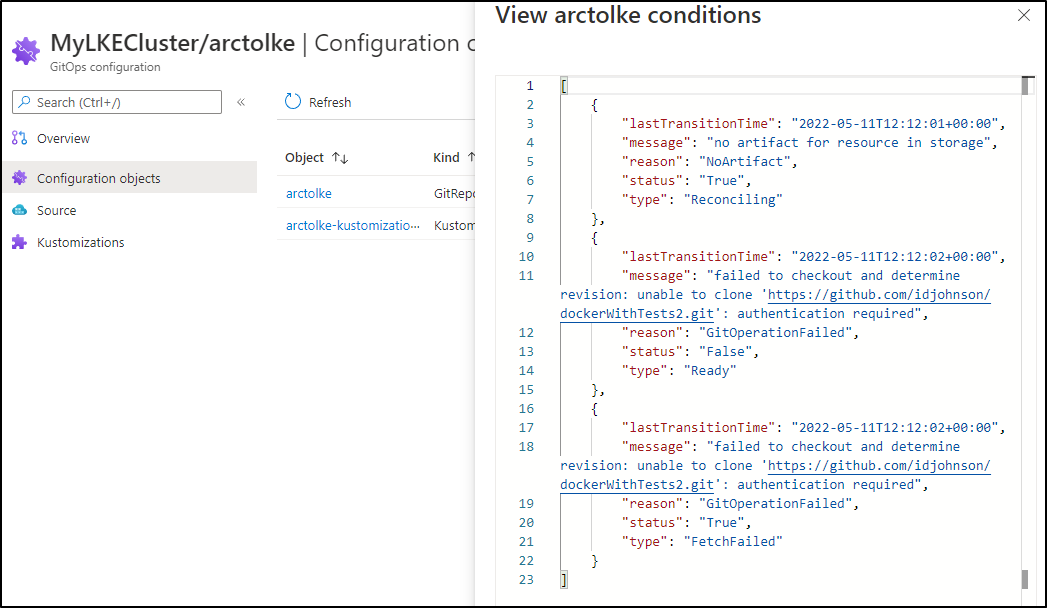
When done, I realized it failed. Digging into the GitOps configuration, I saw auth was missing.
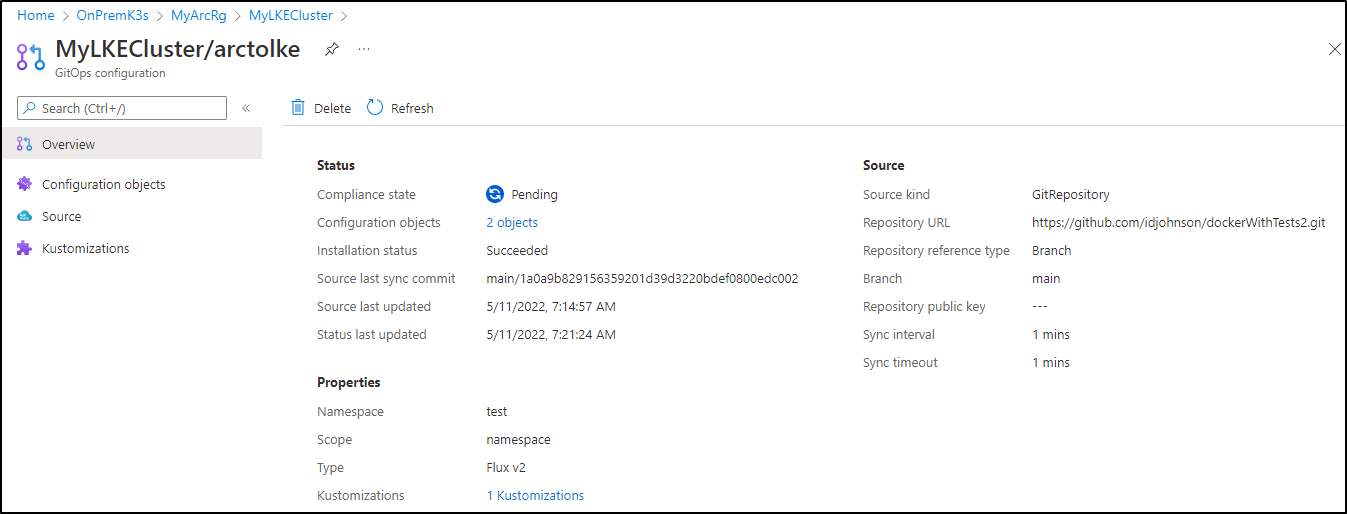
Checking my configuration I realized I errantly set it to private. Switching back to public and saving worked
However, my Kustomization has issues
[
    {
        "lastTransitionTime": "2022-05-11T12:16:21+00:00",
        "message": "Service/nginx-run-svc dry-run failed, reason: Forbidden, error: services \"nginx-run-svc\" is forbidden: User \"system:serviceaccount:test:flux-applier\" cannot patch resource \"services\" in API group \"\" at the cluster scope\n",
        "reason": "ReconciliationFailed",
        "status": "False",
        "type": "Ready"
    }
]
I’ll add a clusterRole to satisfy the RBAC condition
builder@DESKTOP-QADGF36:~/Workspaces/jekyll-blog$ cat clusterRole.yml
kind: ClusterRole
apiVersion: rbac.authorization.k8s.io/v1
metadata:
  namespace: test
  name: flux-applier
rules:
- apiGroups: [""] # "" indicates the core API group
  resources: ["services"]
  verbs: ["get", "watch", "list", "patch"]
builder@DESKTOP-QADGF36:~/Workspaces/jekyll-blog$ kubectl apply -f clusterRole.yml
clusterrole.rbac.authorization.k8s.io/flux-applier created

builder@DESKTOP-QADGF36:~/Workspaces/jekyll-blog$ cat clusterRoleBinding.yml
apiVersion: rbac.authorization.k8s.io/v1
kind: ClusterRoleBinding
metadata:
  name: flux-applier-binding
roleRef:
  apiGroup: rbac.authorization.k8s.io
  kind: ClusterRole
  name: flux-applier
subjects:
- kind: ServiceAccount
  name: flux-applier
  namespace: test
builder@DESKTOP-QADGF36:~/Workspaces/jekyll-blog$ kubectl apply -f clusterRoleBinding.yml
clusterrolebinding.rbac.authorization.k8s.io/flux-applier-binding created
Soon I see it try again:
However, in the end i needed to set the namespace in the YAML to get it to apply
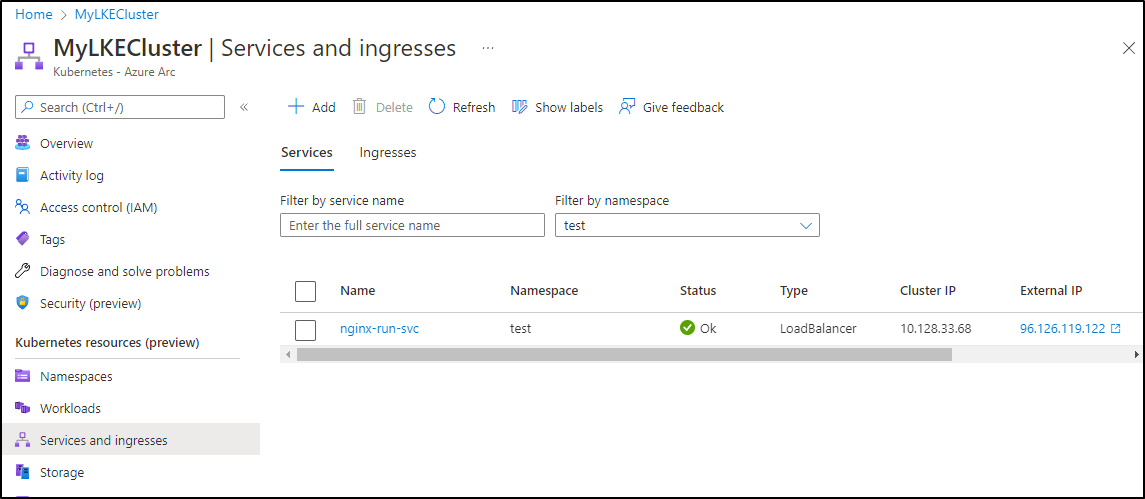
We can see the service now with an external IP
$ kubectl get svc -n test
NAME            TYPE           CLUSTER-IP     EXTERNAL-IP      PORT(S)        AGE
nginx-run-svc   LoadBalancer   10.128.33.68   96.126.119.122   80:30114/TCP   73s
However we wont be able to load the app until we sort out the imagePullSecret
$ kubectl get pods -n test
NAME                      READY   STATUS             RESTARTS   AGE
my-nginx-88bccf99-nzct7   0/1     ImagePullBackOff   0          102s
my-nginx-88bccf99-pg5pw   0/1     ErrImagePull       0          102s
my-nginx-88bccf99-zpzgw   0/1     ImagePullBackOff   0          102s
Let’s fix that
$ kubectl create secret docker-registry -n test regcred --docker-server="https://idjac
rdemo02.azurecr.io/v1/" --docker-username="idjacrdemo02" --docker-password="v15J/dLuGBI9LSe6LoWMlAu3OhLLVoR3" --docker-email="isaac.johnson@gmai
l.com" -n test
secret/regcred created
We can see presently the containers are still in a failed pull state
$ kubectl get pods -n test
NAME                      READY   STATUS             RESTARTS   AGE
my-nginx-88bccf99-nzct7   0/1     ImagePullBackOff   0          4m18s
my-nginx-88bccf99-pg5pw   0/1     ImagePullBackOff   0          4m18s
my-nginx-88bccf99-zpzgw   0/1     ImagePullBackOff   0          4m18s
I’ll delete and try again
$ kubectl delete pod my-nginx-88bccf99-nzct7 -n test
pod "my-nginx-88bccf99-nzct7" deleted
$ kubectl get pods -n test
NAME                      READY   STATUS             RESTARTS   AGE
my-nginx-88bccf99-pg5pw   0/1     ImagePullBackOff   0          5m29s
my-nginx-88bccf99-vbzks   1/1     Running            0          64s
my-nginx-88bccf99-zpzgw   0/1     ImagePullBackOff   0          5m29s
We can see the service in the Azure Portal
and we can view the details in Linode as well
Cleanup
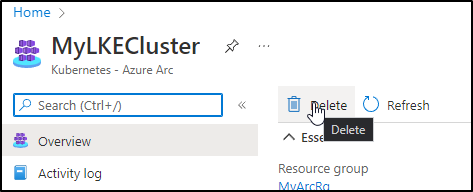
We can delete the configuration out of Azure directly
which will remove the configuration
We can remove our Linode LKE cluster just as easy
$ linode-cli lke  clusters-list
┌───────┬───────┬────────────┐
│ id    │ label │ region     │
├───────┼───────┼────────────┤
│ 60604 │ dev   │ us-central │
└───────┴───────┴────────────┘
$ linode-cli lke cluster-delete 60604
$ linode-cli lke  clusters-list
┌────┬───────┬────────┐
│ id │ label │ region │
└────┴───────┴────────┘
However, make sure to manually remove any volumes (PVCs) and NodeBalancers (LBs) that you might have created during the process as they will not be automatically removed
Summary
We created a Linode LKE cluster with the linode-cli. We then setup Azure Arc for Kubernetes to onboard it to Azure as an Arc cluster. We lastly enabled GitOps via Flux by setting the dockerwithtests repo we used in prior blogs to launch a containerized webapp via Gitops (that included ingress and a Kustomization).
I should point out that Arc control plane access is free. There are costs beyond 6 vCPUs for configuration. See Arc Pricing
| Azure Resource | Azure Arc Resource | |
|---|---|---|
| Azure control plane functionality | Free | Free |
| Kubernetes Configuration | Free | First 6 vCPUs are free, $2/vCPU/month thereafter |
Note: If the Arc enabled Kubernetes cluster is on Azure Stack Edge, AKS on Azure Stack HCI, or AKS on Windows Server 2019 Datacenter, then Kubernetes configuration is included at no charge. More information on this can be found on docs page.
Overall, this makes it easy to setup and configure GitOps via Arc and if your clusters are small, essentially free.


