

Published: Oct 28, 2019 by Isaac Johnson
I got permission. It was so much as a need as a want - to get a personal laptop again as my last, an i3 based chromebook had moved on to my eldest and I like having a laptop that isn’t from my employer.
Having looked at length, and given wide latitude on price, i actually settled on something more commonly known as a budget laptop. A Lenovo Flex 14 (current model, so Flex 6 14”). This is the model on Amazon presently fro $549 (81SS000DUS).
I’ve had a good experience with my Yogabook and this one came with either 8 or 12Gb RAM, 256Gb NVMe SSD and a 14in 1080p screen. They sell actually quite a few versions of this model, but I was dead set on getting a Ryzen 5 or 7 version of this model. I dug into performance comparisons and the Ryzen 7 2700U and Ryzen 5 3500U are really closely matched. And while i prefer the Vega 10 over 8, the idea of a really solid integrated graphics appealed to me.
It’s been my experience (most recently with the Acer V7 Nitro Black Edition), and an XPS laptop before that, that laptops with big separate GPUs (usually nVidia) are just a pain to manage in windows - one is always trying to tell the laptop which graphics card to use. Moreover, the standard intel integrated graphics just sucks with multiple displays. And while I may game a little, the idea of a performant integrated graphics chip that can drive lots of displays without murdering my battery is really quite nice.
The other concern I had (it was down to the XPS 13 and this laptop) was the lack of 4k. I love desktop real estate. However, having gotten a 15in 4k external display not that long ago, i have to own the fact that my 41yo eyes just don’t jive on microsize fonts. And beyond that, i never game at 4k on the built in display and lastly, universally, 4k laptop displays across the board mean much much worse battery life.
It felt quite sharp at 1080p on 14” but I wanted to compare to my existing setups at work. I cloned a git repo and fired up VS Code since i think a page of markdown can give a good idea of what working on it is like: https://github.com/otsuarez/vagrant-k3s-metallb

Here we see side-by-side of my 15” Dell Precision 3520 it’s native resolution (left top) to the Lenovo (right). Below we see my new Macbook Pro 15” next to the Lenovo (which i just don’t have the desktop space so i’m holding it and the phone - so the Lenovo is slightly closer). Visually from my eyes they are identical. I’ll grant you the Macbook can make things tinnier but i can’t read at that level so i wanted to keep it at the real world comparison.
That said, let’s dig into what we get for our $549:

We get a laptop that can go not only in traditional laptop mode, but tent, display and tablet modes.

It’s a bit heavy at 3.5lbs compared to say a kindle. But for walking between meetings, i don’t see an issue. The 15” Macbook Pro at work is just over 4lbs and the old dell/boat anchor is 5.2lbs. But if you wanted to compare, the Yogabook I typically carry between meetings is 1.5lbs and my wife’s Macbook Air is 2.8Lbs.

The Flex includes a pen and pen holder (careful when ordering as the model at Officemax/depot and other vendors like Microcenter/Frys often omit the pen). If you get one without, the pen is an extra $60. I did test the (battery-less) Lenovo Yogabook Wacom pen and it did nothing.
Specs:
- A 2.1Ghz AMD Ryzen 5 3500U CPU
- 256Gb nVME SSD HD (mine is a Samsung made MZ-VLB2560)
- 4Gb soldered on memory (2Gb dedicated to GPU) and an 8Gb module (Samsung)
- Fingerprint scanner for Windows Hello
- 45W \h 2865mAh battery (made in China)
- 1 usb-c (data only, rather useless)
- 2 USB A 3.1, SD Card reader and headphone ports
I really only wanted to upgrade one thing and that was the Memory.
I followed a youtube guide and it was easy to pop the cover with its clips and snap in a new SODIMM. I used a PC4-19200 260-Pin SODIM (Crucial 16GB Single DDR4 2400 MT/s (PC4-19200) DR x8 SODIMM 260-Pin Memory - CT16G4SFD824A) and had no issues booting it up after.

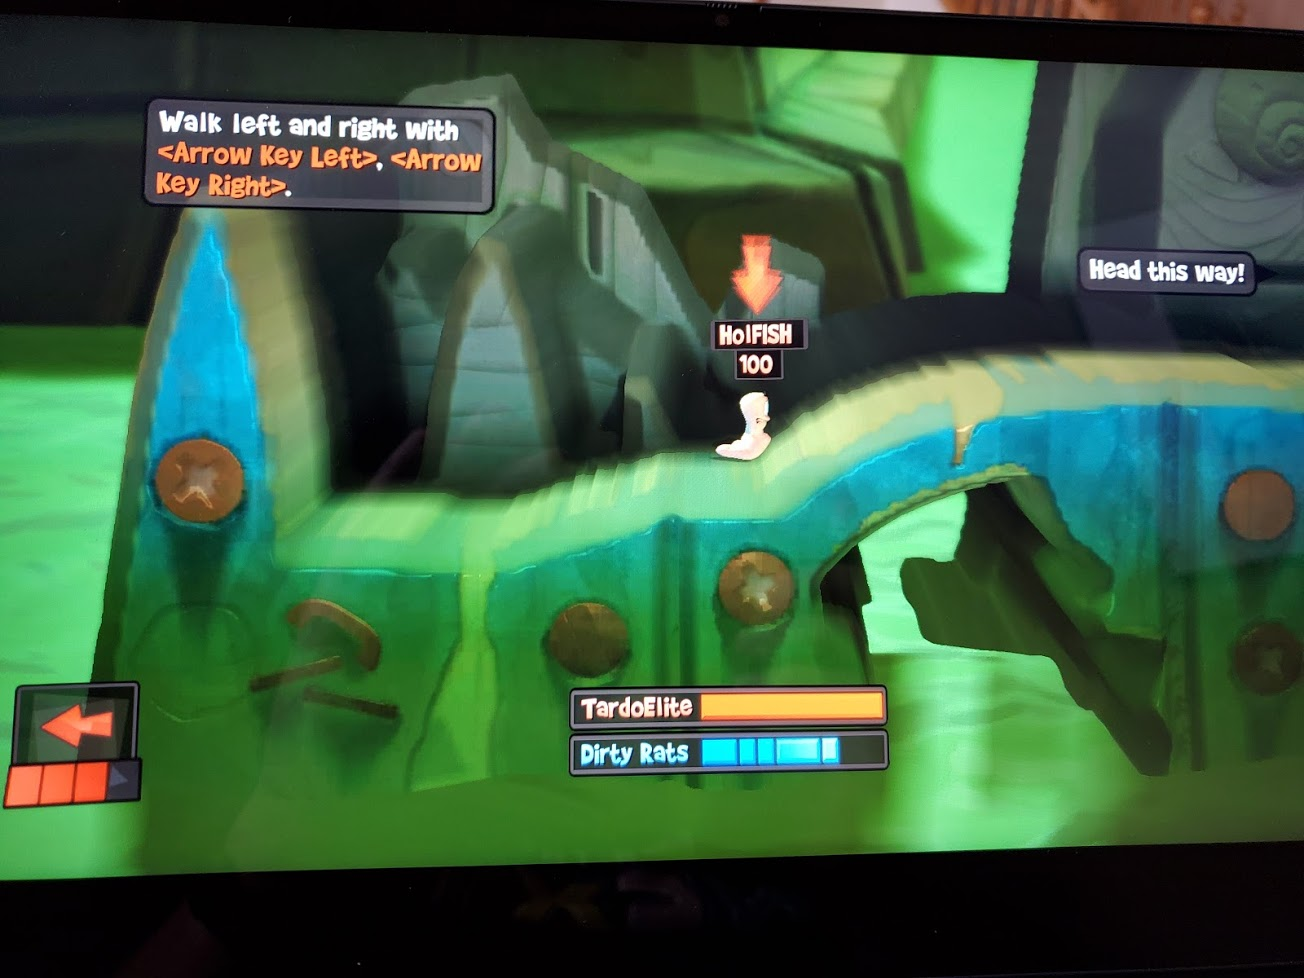
I installed Steam and loaded a few games. Things like Race the Sun and Worms Revolution were fine. I even put Worms Revolution on max settings (it’s a 2012 game) and it had only minor stutters (while i was creating many containers with a Vagrantfile in the background).
However, the question for me and laptops really isn’t about 3d gaming framerate scores or how well does it boot windows. I really care about this for development. And for me, that means, of course, how well does it handle containers.
I first started down the path of setting up fast ring support so i could use WSL2 to host containers. But you’ve seen that guide and frankly, for many developers, they don’t bother with Windows 10 Home.
So I upgraded to Windows 10 Enterprise (Pro would work as well) so i could get native Hyper-V support. I will say, anecdotally, that it now boots to windows a bit slower than home. Booting up and logging in with Win 10 Home matches all the other reviewers experience. Booting up to 10 Enterprise adds about 5-7 more seconds.
The other key issue for me is how many displays can I drive. I almost always want to at least be able to put two on a machine as that’s my usual development setup.

I got a RayCue USB 3.0 to HDMI adapter. I wasn’t sure it was going to work, but I can confirm i can use the 4k HDMI out while also doing 1080 on the USB 3.0 adapter (see above). Logically, i should be able to get and use a second if i so desire.
So let’s total this up: $550 for laptop and pen, $21.49 for the USB to HDMI and $63.99 for the memory (though i saw options as cheap as $53, i just like Crucial): $635.50 is not a bad price.
Setting up Canonical Multipass
Folllowing the guide from https://multipass.run/


Let’s create a quick cluster, however before we do so, while Bionic is a good distro for StorageOS, let’s check the default memory and CPU count:

As we can see, the default still lands us 1Gb of memory and 1 CPU. not nearly enough for a cluster.
I have to note, i am fairly impressed so far with this Ryzen 5 mobile CPU. It was a gamble to go with a Lenovo Flex 6 14 2-in-1 with a Ryzen 5 3500U.

I was most interested in having a laptop with a large battery (45Wh) and efficient CPU (the Ryzen 5 3500U, when compared with the Ryzen 7 was fairly on par) and the Vega integrated graphics improves life as i don’t need to power up a discrete graphics card.
I’ve now fired 3 decent multipass VMs and the laptop is still physically resting on my lap without baking my legs.
C:\Users\isaac>multipass launch -c 2 -m 2G -n mpc003
Launched: mpc003

C:\Users\isaac>multipass list
Name State IPv4 Image
mpc001 Running 172.31.107.91 Ubuntu 18.04 LTS
mpc002 Running 172.31.104.87 Ubuntu 18.04 LTS
mpc003 Running 172.31.99.28 Ubuntu 18.04 LTS
foowin Deleted -- Not Available
Now lets login and load k3s
C:\Users\isaac>multipass shell mpc001
Welcome to Ubuntu 18.04.3 LTS (GNU/Linux 4.15.0-66-generic x86_64)

 * Documentation: https://help.ubuntu.com
 * Management: https://landscape.canonical.com
 * Support: https://ubuntu.com/advantage

  System information as of Sat Oct 26 13:43:45 CDT 2019

  System load: 0.0 Processes: 100
  Usage of /: 20.8% of 4.67GB Users logged in: 0
  Memory usage: 77% IP address for eth0: 172.31.107.91
  Swap usage: 0%


0 packages can be updated.
0 updates are security updates.


To run a command as administrator (user "root"), use "sudo <command>".
See "man sudo_root" for details.

multipass@mpc001:~$ sudo su -
root@mpc001:~# curl -sfL https://get.k3s.io | sh -
[INFO] Finding latest release
[INFO] Using v0.10.0 as release
[INFO] Downloading hash https://github.com/rancher/k3s/releases/download/v0.10.0/sha256sum-amd64.txt
[INFO] Downloading binary https://github.com/rancher/k3s/releases/download/v0.10.0/k3s
[INFO] Verifying binary download
[INFO] Installing k3s to /usr/local/bin/k3s
[INFO] Creating /usr/local/bin/kubectl symlink to k3s
[INFO] Creating /usr/local/bin/crictl symlink to k3s
[INFO] Creating /usr/local/bin/ctr symlink to k3s
[INFO] Creating killall script /usr/local/bin/k3s-killall.sh
[INFO] Creating uninstall script /usr/local/bin/k3s-uninstall.sh
[INFO] env: Creating environment file /etc/systemd/system/k3s.service.env
[INFO] systemd: Creating service file /etc/systemd/system/k3s.service
[INFO] systemd: Enabling k3s unit
Created symlink /etc/systemd/system/multi-user.target.wants/k3s.service → /etc/systemd/system/k3s.service.
[INFO] systemd: Starting k3s
root@mpc001:~#

root@mpc001:~# cat /var/lib/rancher/k3s/server/node-token
K10e3b9ef23253c0b331165f5ca7b9b94d870721a099a62ced650225fd902ac50ea::node:5a1f069aa8aaeb16fd01ae0c1fb9233b
root@mpc001:~#
Now we can add the other nodes …
$ sudo su -
root@mpd002:~# curl -sfL https://get.k3s.io | K3S_URL=https://172.31.107.91:6443 K3S_TOKEN=K10e3b9ef23253c0b331165f5ca7b9b94d870721a099a62ced650225fd902ac50ea::node:5a1f069aa8aaeb16fd01ae0c1fb9233b sh -

Lastly, let’s get the kubeconfig from the master node:
multipass@mpc001:~$ sudo cat /etc/rancher/k3s/k3s.yaml
apiVersion: v1
clusters:
- cluster:
    certificate-authority-data: LS0tLS1CRUdJTiBDRVJUSUZJQ0FURS0tLS0tCk1JSUJXRENCL3FBREFnRUNBZ0VBTUFvR0NDcUdTTTQ5QkFNQ01DTXhJVEFmQmdOVkJBTU1HR3N6Y3kxelpYSjIKWlhJdFkyRkFNVFUzTWpFeE5UUTVOVEFlRncweE9URXdNall4T0RRME5UVmFGdzB5T1RFd01qTXhPRFEwTlRWYQpNQ014SVRBZkJnTlZCQU1NR0dzemN5MXpaWEoyWlhJdFkyRkFNVFUzTWpFeE5UUTVOVEJaTUJNR0J5cUdTTTQ5CkFnRUdDQ3FHU000OUF3RUhBMElBQkpIZWV4TTZhNjB2WUNJcHZlaUcxaFE2UVg0WTVhOEU1K1Nka0hBeFhGN0oKMERXZy85VEVZcmoreXVMa21nTmd1RG1IQ1dRZVRYMkJqYnpxa2RCcHNrbWpJekFoTUE0R0ExVWREd0VCL3dRRQpBd0lDcERBUEJnTlZIUk1CQWY4RUJUQURBUUgvTUFvR0NDcUdTTTQ5QkFNQ0Ewa0FNRVlDSVFEVlZSN0toaWp6Ci9Kb2NYT1MwUGkwTStTUkdOand6RnZPTHlvWW1jeDRkNGdJaEFKc1RqWXNkMy9VYitMWkovcHNzTlc1blZnUjEKLzFrdGUzMWlnV2U3cXJ6QQotLS0tLUVORCBDRVJUSUZJQ0FURS0tLS0tCg==
    server: https://127.0.0.1:6443
  name: default
contexts:
- context:
    cluster: default
    user: default
  name: default
current-context: default
kind: Config
preferences: {}
users:
- name: default
  user:
    password: 842a8d2d8bb6e8962bbdbda504be7b71
    username: admin
And we just need to change the server line from 127.0.0.1 to the IP of our first node (172.31.107.91)
Testing
A quick pause here. Since this is a fresh laptop, i’ll quick install vim and az cli.
Az CLI: https://docs.microsoft.com/en-us/cli/azure/install-azure-cli-windows?view=azure-cli-latest

Vim: (choco install vim)

Now i can install kubectl
C:\Users\isaac>az aks install-cli

Downloading client to "C:\Users\isaac\.azure-kubectl\kubectl.exe" from "https://storage.googleapis.com/kubernetes-release/release/v1.16.2/bin/windows/amd64/kubectl.exe"

Please add "C:\Users\isaac\.azure-kubectl" to your search PATH so the `kubectl.exe` can be found.
2 options:
   1. Run "set PATH=%PATH%;C:\Users\isaac\.azure-kubectl" or "$env:path += 'C:\Users\isaac\.azure-kubectl'" for PowerShell. This is good for the current command session.
   2. Update system PATH environment variable by following "Control Panel->System->Advanced->Environment Variables", and re-open the command window. You only need to do it once

C:\Users\isaac>set PATH=%PATH%;C:\Users\isaac\.azure-kubectl
And create the kubeconfig
C:\Users\isaac>mkdir .kube
C:\Users\isaac>vim C:\Users\isaac\.kube\config
Proof it is working:
C:\Users\isaac>kubectl get nodes
NAME STATUS ROLES AGE VERSION
mpc003 Ready <none> 24m v1.16.2-k3s.1
mpc002 Ready <none> 26m v1.16.2-k3s.1
mpc001 Ready master 30m v1.16.2-k3s.1
And unlike with WSL2, we can see our VMs running in Hyper-V manager:

Now let’s power down the cluster:
C:\Users\isaac>multipass stop --all
Stopping all instances /

Note: a problem I discovered is that after a reboot, they came back with new IPs:
Microsoft Windows [Version 10.0.19008.1000]
(c) 2019 Microsoft Corporation. All rights reserved.

C:\Users\isaac>multipass list
Name State IPv4 Image
mpc001 Running 172.20.213.225 Ubuntu 18.04 LTS
mpc002 Running 172.20.219.95 Ubuntu 18.04 LTS
mpc003 Running 172.20.210.237 Ubuntu 18.04 LTS
foowin Deleted -- Not Available
Kubectl obviously failed. Changing the IP in the kubeconfig didn’t fix it (though i can override this in a moment):
C:\Users\isaac>vim .kube/config
C:\Users\isaac>C:\Users\isaac\.azure-kubectl\kubectl.exe get nodes
Unable to connect to the server: x509: certificate is valid for 172.31.107.91, 10.43.0.1, 127.0.0.1, not 172.20.213.225
As i alluded to, you can get past this with a skip:
C:\Users\isaac>C:\Users\isaac\.azure-kubectl\kubectl.exe get nodes --insecure-skip-tls-verify
NAME STATUS ROLES AGE VERSION
mpc001 Ready master 7h1m v1.16.2-k3s.1
mpc002 NotReady <none> 6h58m v1.16.2-k3s.1
mpc003 NotReady <none> 6h55m v1.16.2-k3s.1
I was able to get the worker nodes back by just logging in and re-adding them with the new K3S_URL:
curl -sfL https://get.k3s.io | K3S_URL=https://172.20.213.225:6443 K3S_TOKEN=K10e3b9ef23253c0b331165f5ca7b9b94d870721a099a62ced650225fd902ac50ea::node:5a1f069aa8aaeb16fd01ae0c1fb9233b sh -
And now we can see them restored:
C:\Users\isaac>C:\Users\isaac\.azure-kubectl\kubectl.exe get nodes --insecure-skip-tls-verify
NAME STATUS ROLES AGE VERSION
mpc001 Ready master 7h13m v1.16.2-k3s.1
mpc003 Ready <none> 7h7m v1.16.2-k3s.1
mpc002 Ready <none> 7h10m v1.16.2-k3s.1
Lastly, we can confirm the pods are the same from earlier in the day (so it’s not a brand new cluster)
C:\Users\isaac>C:\Users\isaac\.azure-kubectl\kubectl.exe get pods --all-namespaces --insecure-skip-tls-verify
NAMESPACE NAME READY STATUS RESTARTS AGE
kube-system helm-install-traefik-gwnd5 0/1 Completed 0 7h13m
kube-system svclb-traefik-r9vvm 3/3 Running 6 7h13m
kube-system traefik-65bccdc4bd-2b526 1/1 Running 2 7h13m
kube-system local-path-provisioner-58fb86bdfd-pqq97 1/1 Running 2 7h13m
kube-system coredns-57d8bbb86-wj2p2 1/1 Running 2 7h13m
kube-system svclb-traefik-65mzt 3/3 Running 3 7h10m
kube-system svclb-traefik-jgxqh 3/3 Running 3 7h8m
My last check is to stop all the nodes and restart the machine, just to see if the Re-IP happened because I powered off the laptop without properly shutting down the instances.
Unfortunately, after a fresh reboot, i can confirm hyper-v seems to re-ip each time:
C:\Users\isaac>multipass list
Name State IPv4 Image
mpc001 Running UNKNOWN Ubuntu 18.04 LTS
mpc002 Stopped -- Ubuntu 18.04 LTS
mpc003 Stopped -- Ubuntu 18.04 LTS
foowin Deleted -- Not Available

C:\Users\isaac>multipass list
Name State IPv4 Image
mpc001 Running 172.18.253.117 Ubuntu 18.04 LTS
mpc002 Stopped -- Ubuntu 18.04 LTS
mpc003 Stopped -- Ubuntu 18.04 LTS
foowin Deleted -- Not Available
Hacking in WSL 2 (that didnt work)
For giggles, i really wanted to see if i could get multipass to run in WSL 2.
The lack of systemd support meant i needed to build from source (i couldn’t just snap install)

However, after following the GH page to build multipass, it seems i can’t launch it in WSL2:

Vagrant
Installing


However, I will stop here to say, after fixing the Vagrantfile to to use matching hyperv boxes, my grand hope of a quick k3s cluster with GH repo linked from the top was dashed as it has all sorts of errors. Perhaps they designed it for Virtualbox specifically. I can confirm Vagrant did launch 1 of the 5 VMs but that was it.
Summary
The Lenovo Flex 6 14” with AMD Ryzen 5 (3500U) is a fantastic portable development laptop. The two key things of which it is low on (RAM and Disk) are easily upgradable. (who knows, maybe by the time i get annoyed with the 256gb ssd, the2Tb optionwill be on sale).
Indeed the USB-C is rather worthless without displayport. Though i knew this going in, i still tried all my adapters:
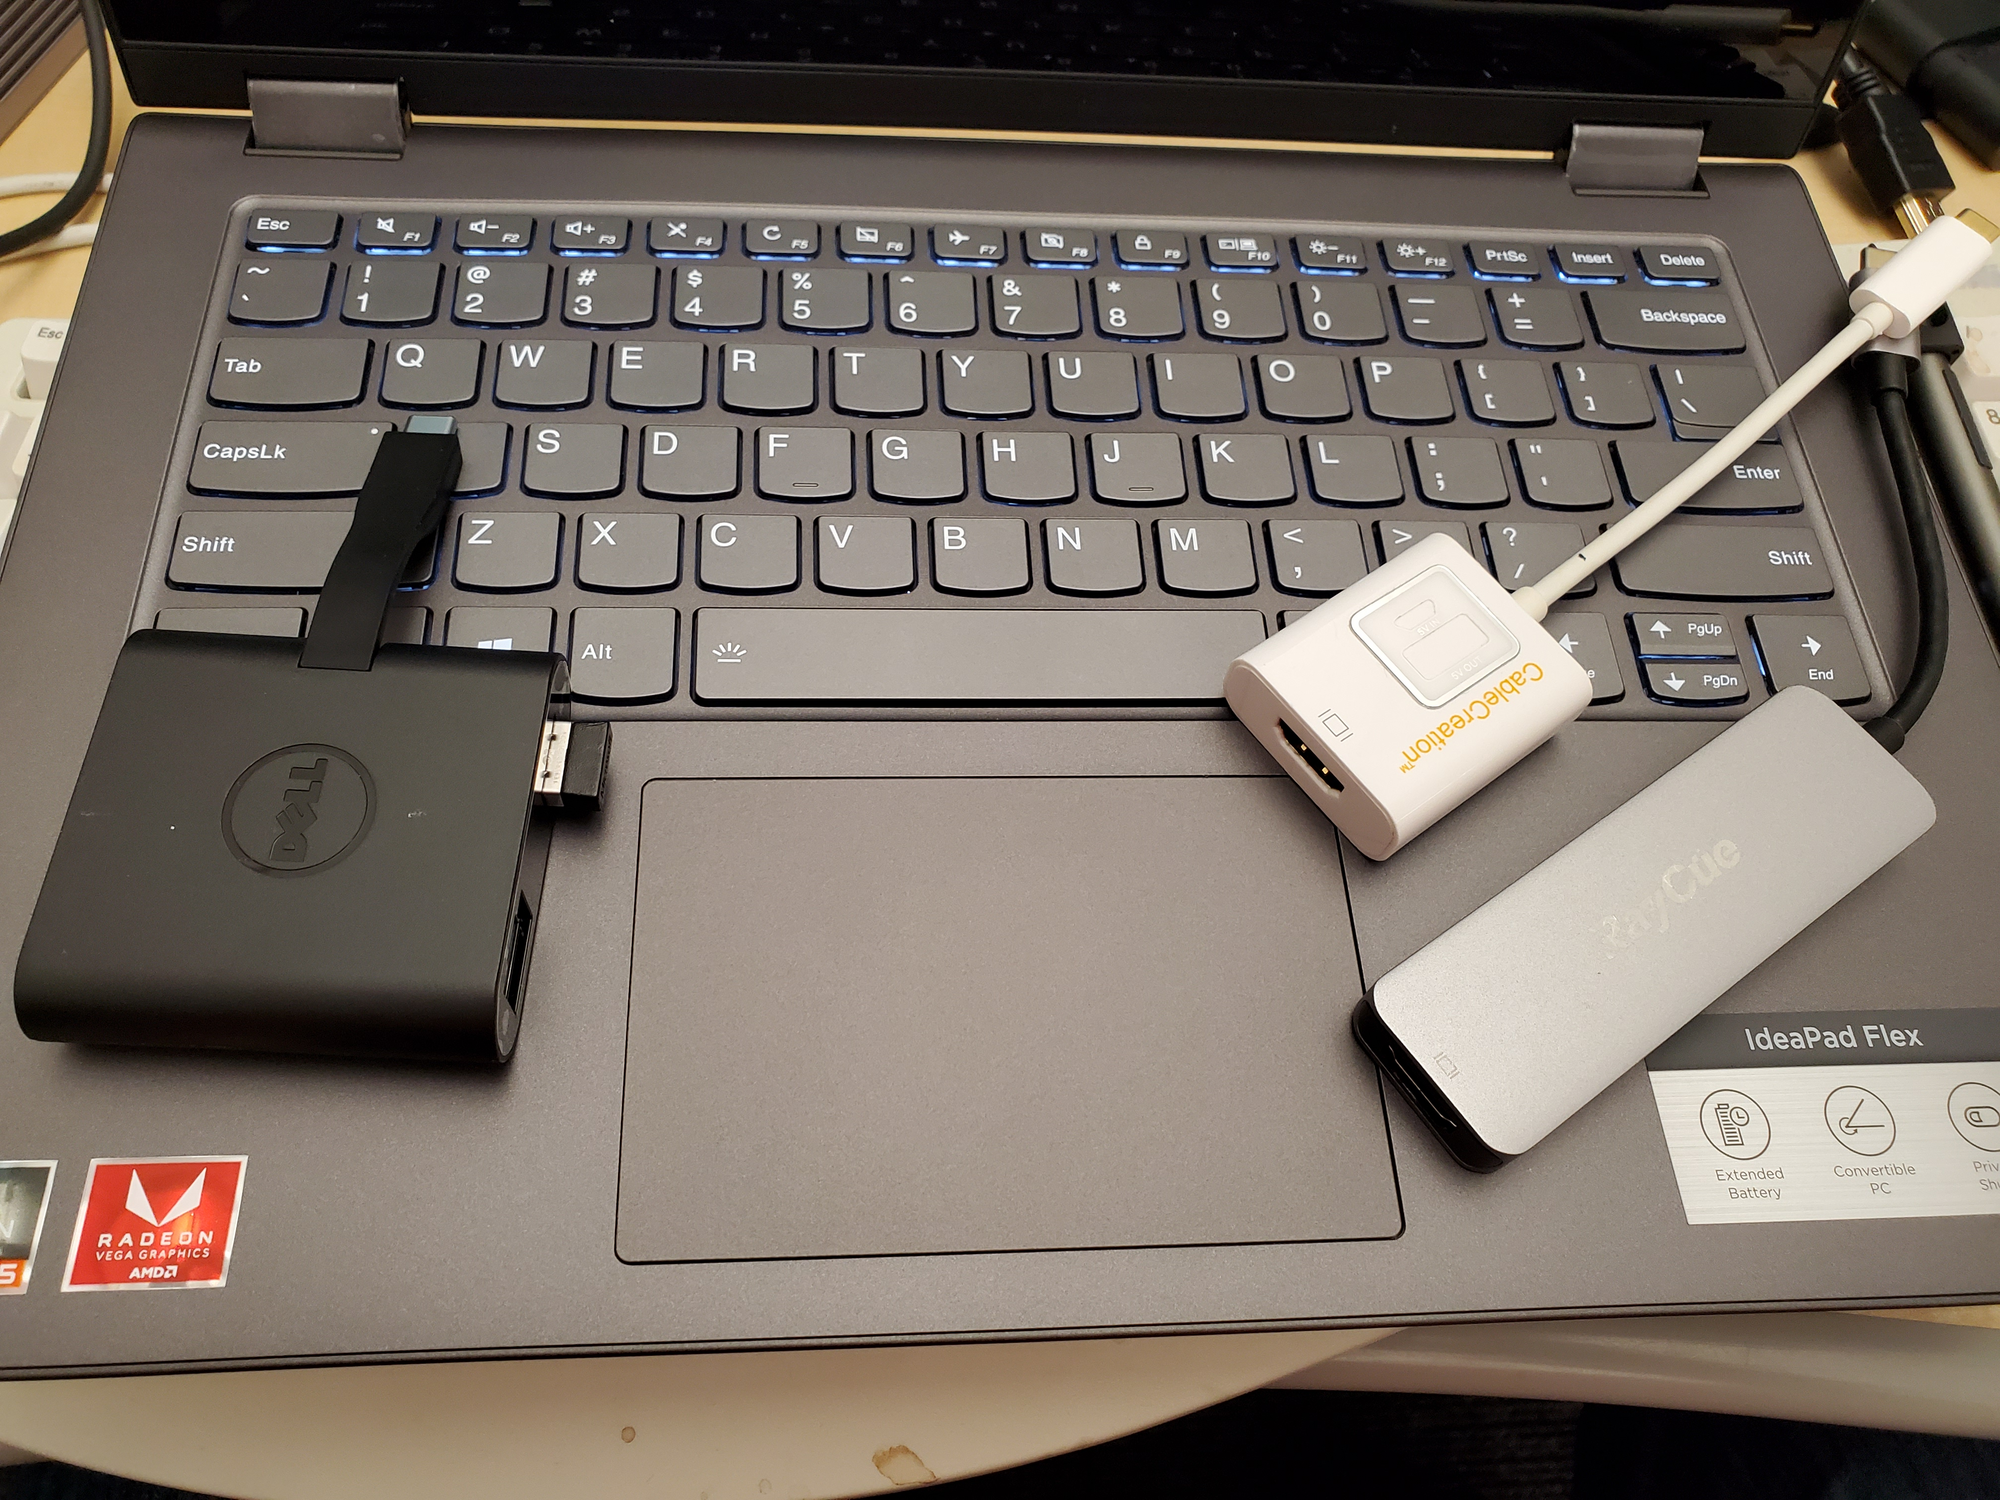
Also, one repeated criticism I saw in reviews was the fact the pen holder blocks all the ports. I find that to be such a minor issue.
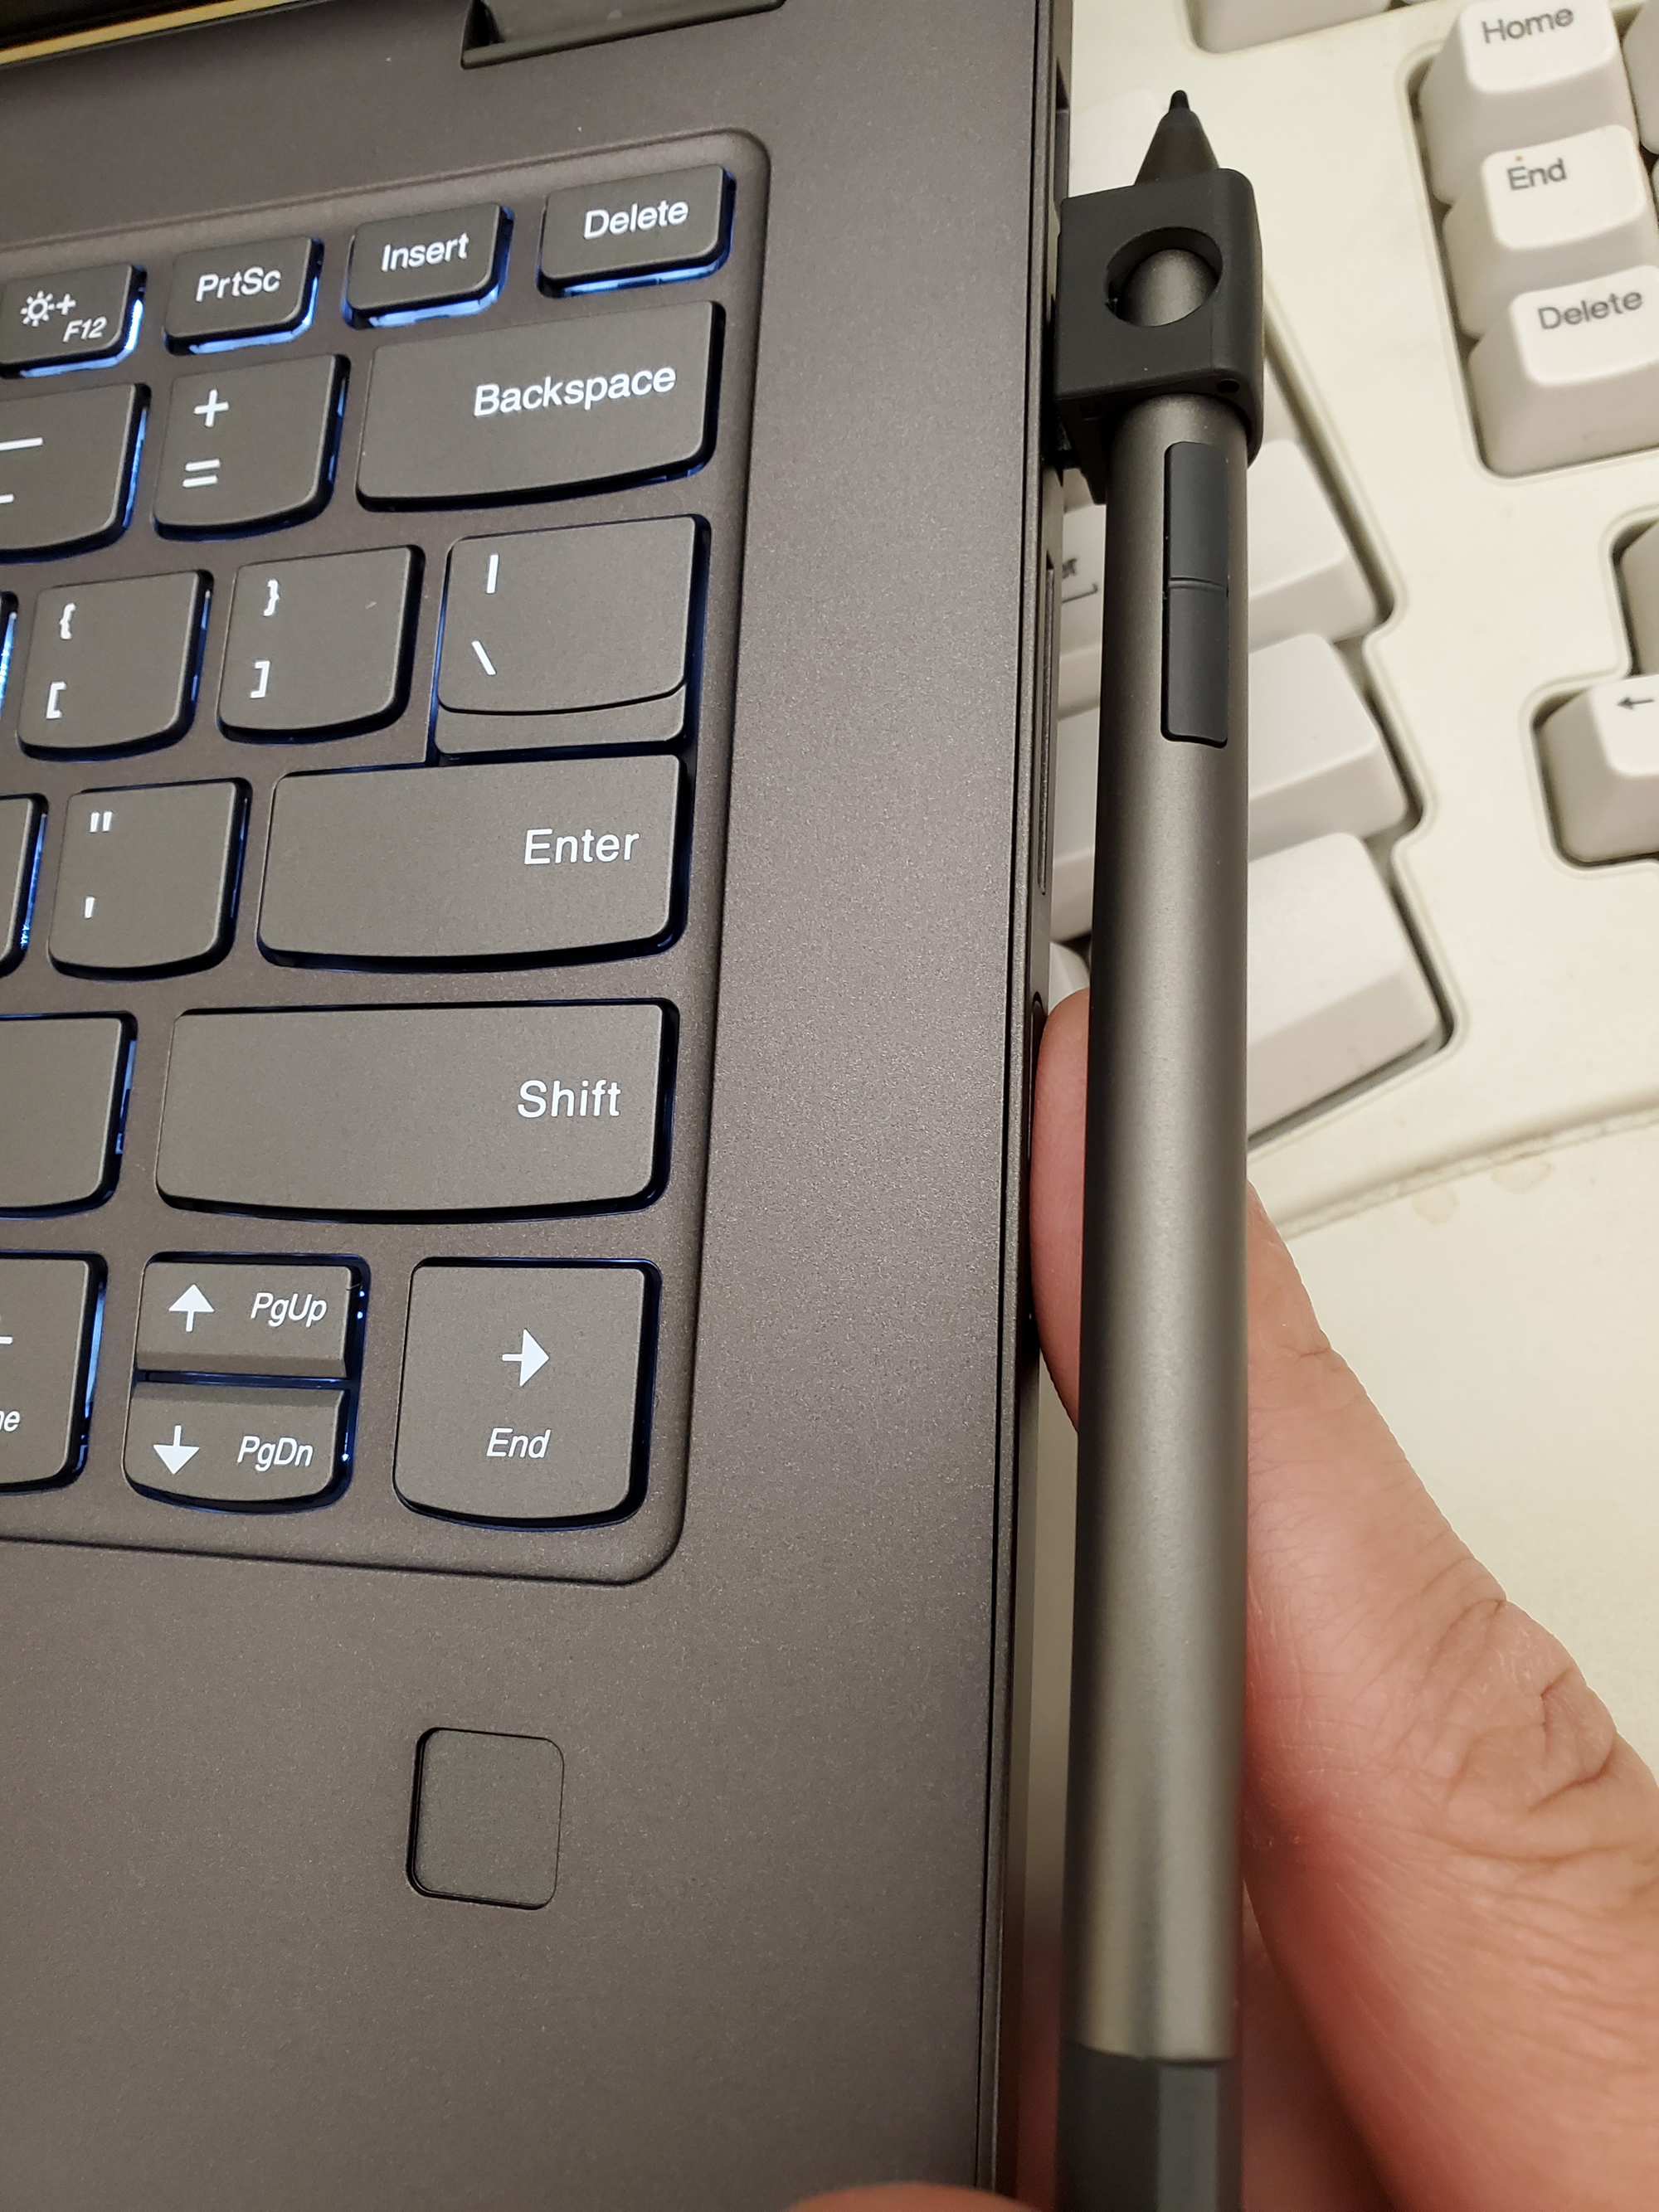
As you can see above, i can easily push the pin slightly aside to tap the powerbutton - the only thing i really need access two when going between meetings.
The pen is somewhat handy with the built-in whiteboard app (the bottom button serving as an eraser). And one quick note - I grabbed 2 rechargable AAAA batteries (6.99 on amazon) and charged them just fine overnight in a cheap 5.99 Harbor Freight NiMH charger. They’re sold at BestBuy so if you really run out, you can get them somewhere.