

Published: Apr 23, 2019 by Isaac Johnson
Let’s cover all the ways we can create clusters in AKS (and other providers as well): CLI, Kubespray, Terraform, and ARM Templates. We can start by comparing CLI and Kubespray.
Azure CLI
Let’s fire up a cluster the way we know. First, we need to create a resource group to contain all the resources:
$ az login
Note, we have launched a browser for you to login. For old experience with device code, use "az login --use-device-code"
You have logged in. Now let us find all the subscriptions to which you have access...
[
  {
    "cloudName": "AzureCloud",
    "id": "abcd1234-1234-1234-1234-abcdabcd12",
    "isDefault": true,
    "name": "AHEAD-Azure-Lab",
    "state": "Enabled",
    "tenantId": "abcd1234-abcd-abcd-abcd-987654321",
    "user": {
      "name": "Isaac.Johnson@thinkahead.com",
      "type": "user"
    }
  }
]
$ az group create --location eastus --name idj-aks-kubespray-rg
{
  "id": "/subscriptions/abcd1234-1234-1234-1234-abcdabcd12/resourceGroups/idj-aks-kubespray-rg",
  "location": "eastus",
  "managedBy": null,
  "name": "idj-aks-kubespray-rg",
  "properties": {
    "provisioningState": "Succeeded"
  },
  "tags": {
    "Exception": "no",
    "Owner": "missing",
    "StopResources": "yes"
  },
  "type": null
}
Now we create the cluster
$ az aks create --resource-group idj-aks-kubespray-rg --name idj-aks-kubespray --kubernetes-version 1.12.6 --node-count 1 --enable-vmss --enable-cluster-autoscaler --min-count 1 --max-count 3 --generate-ssh-keys
The behavior of this command has been altered by the following extension: aks-preview
Finished service principal creation[##################################] 100.0000%Operation failed with status: 'Bad Request'. Details: Virtual Machine Scale Set agent nodes are not allowed since feature "Microsoft.ContainerService/VMSSPreview" is not enabled.
ah! we forgot to enable auto-scaling. let’s take care of that.
$ az feature register --name VMSSPreview --namespace Microsoft.ContainerService
Once the feature 'VMSSPreview' is registered, invoking 'az provider register -n Microsoft.ContainerService' is required to get the change propagated
{
  "id": "/subscriptions/abcd1234-1234-1234-1234-abcdabcd12/providers/Microsoft.Features/providers/Microsoft.ContainerService/features/VMSSPreview",
  "name": "Microsoft.ContainerService/VMSSPreview",
  "properties": {
    "state": "Registering"
  },
  "type": "Microsoft.Features/providers/features"
}
$ az provider register --namespace Microsoft.ContainerService
Now the create command will work!
$ az aks create --resource-group idj-aks-kubespray-rg --name idj-aks-kubespray --kubernetes-version 1.12.6 --node-count 1 --enable-vmss --enable-cluster-autoscaler --min-count 1 --max-count 3 --generate-ssh-keys
The behavior of this command has been altered by the following extension: aks-preview
{
  "aadProfile": null,
  "addonProfiles": null,
  "agentPoolProfiles": [
    {
      "count": 1,
      "enableAutoScaling": true,
      "maxCount": 3,
      "maxPods": 110,
      "minCount": 1,
      "name": "nodepool1",
      "osDiskSizeGb": 100,
      "osType": "Linux",
      "type": "VirtualMachineScaleSets",
      "vmSize": "Standard_DS2_v2",
      "vnetSubnetId": null
    }
  ],
  "apiServerAuthorizedIpRanges": null,
  "dnsPrefix": "idj-aks-ku-idj-aks-kubespra-fefd67",
  "enableRbac": true,
  "fqdn": "idj-aks-ku-idj-aks-kubespra-fefd67-e28b5c85.hcp.eastus.azmk8s.io",
  "id": "/subscriptions/abcd1234-1234-1234-1234-abcdabcd12/resourcegroups/idj-aks-kubespray-rg/providers/Microsoft.ContainerService/managedClusters/idj-aks-kubespray",
  "kubernetesVersion": "1.12.6",
  "linuxProfile": {
    "adminUsername": "azureuser",
    "ssh": {
      "publicKeys": [
        {
          "keyData": "ssh-rsa AAAAB3NzaC1yc2EAAAADAQABAAABAQC8kZzEtk7J7Mvv4hJIE1jcQ0q6h41g5hUwPtOUPjNWPIKm4djmy4+C4+Gtsxxh5jUFooAbwl+DubFZogbU1Q5aLOGKSsD/K4XimTyOhr90DO47naCnaSS0Rg0XyZlvQsHKwcXGuGOleCMhB2gQ70QAK4X/N1dvGfqCDdKBbTORKQyz0WHWo7YGA6YAgtvzn1C5W0l7cT0AXgOfFEAGF31nqqTuRVBbBmosq1qhXJlVt+PO32MqmxZv44ZuCP1jWjyTz1rbQ1OLHCxP/+eDIlpOlkYop4XgwiHHMRn/rxHFTKOAxtFOccFw9KEnDM0j0M5FRBj5qU1BCa/6jhnu7LIz"
        }
      ]
    }
  },
  "location": "eastus",
  "name": "idj-aks-kubespray",
  "networkProfile": {
    "dnsServiceIp": "10.0.0.10",
    "dockerBridgeCidr": "172.17.0.1/16",
    "networkPlugin": "kubenet",
    "networkPolicy": null,
    "podCidr": "10.244.0.0/16",
    "serviceCidr": "10.0.0.0/16"
  },
  "nodeResourceGroup": "MC_idj-aks-kubespray-rg_idj-aks-kubespray_eastus",
  "provisioningState": "Succeeded",
  "resourceGroup": "idj-aks-kubespray-rg",
  "servicePrincipalProfile": {
    "clientId": "05ed2bfd-6340-4bae-85b4-f8e9a0ff5c76",
    "secret": null
  },
  "tags": null,
  "type": "Microsoft.ContainerService/ManagedClusters"
}
Now let’s connect to it and see that all is running
$ az aks get-credentials --name idj-aks-kubespray --resource-group idj-aks-kubespray-rg
Merged "idj-aks-kubespray" as current context in /Users/isaac.johnson/.kube/config

$ kubectl get pods --all-namespaces
NAMESPACE NAME READY STATUS RESTARTS AGE
kube-system coredns-754f947b4-66lm7 1/1 Running 0 15h
kube-system coredns-754f947b4-rnfnk 1/1 Running 0 15h
kube-system coredns-autoscaler-6fcdb7d64-6dg6c 1/1 Running 0 15h
kube-system heapster-5fb7488d97-rdrp4 2/2 Running 0 15h
kube-system kube-proxy-wdll4 1/1 Running 0 15h
kube-system kube-svc-redirect-zwxwd 2/2 Running 0 15h
kube-system kubernetes-dashboard-847bb4ddc6-zf2ks 1/1 Running 1 15h
kube-system metrics-server-7b97f9cd9-6t5vs 1/1 Running 0 15h
kube-system tunnelfront-578d84cf6b-8l2gm 1/1 Running 0 15h
Let’s look at the dashboard as well. Create the RBAC service and cluster role binding, then apply them first:
$ cat ~/dashboard-rbac.yaml
apiVersion: v1
kind: ServiceAccount
metadata:
  name: aks-dashboard-admin
  namespace: kube-system
---
apiVersion: rbac.authorization.k8s.io/v1
kind: ClusterRoleBinding
metadata:
  name: aks-dashboard-admin
roleRef:
  apiGroup: rbac.authorization.k8s.io
  kind: ClusterRole
  name: cluster-admin
subjects:
- kind: ServiceAccount
  name: aks-dashboard-admin
  namespace: kube-system
Next, apply it
$ kubectl apply -f ~/dashboard-rbac.yaml
serviceaccount/aks-dashboard-admin created
clusterrolebinding.rbac.authorization.k8s.io/aks-dashboard-admin created

$ kubectl create clusterrolebinding kubernetes-dashboard -n kube-system --clusterrole=cluster-admin --serviceaccount=kube-system:kubernetes-dashboard
clusterrolebinding.rbac.authorization.k8s.io/kubernetes-dashboard created
Now proxy the dashboard to view it:
$ az aks browse --name idj-aks-kubespray --resource-group idj-aks-kubespray-rg
Merged "idj-aks-kubespray" as current context in /var/folders/29/xf17b1xx3sd45m6dppl542lh97nr4x/T/tmpaor9wgco
Proxy running on http://127.0.0.1:8001/
Press CTRL+C to close the tunnel...

In the 15hours i had this running it cost a total of $0.12
KubeSpray
First let’s create a new resource group to contain the VMs
$ az group create --location eastus --name idj-aks-kubespray-2-rg
{
  "id": "/subscriptions/abcd1234-1234-1234-1234-abcdabcd12/resourceGroups/idj-aks-kubespray-2-rg",
  "location": "eastus",
  "managedBy": null,
  "name": "idj-aks-kubespray-2-rg",
  "properties": {
    "provisioningState": "Succeeded"
  },
  "tags": {
    "Exception": "no",
    "Owner": "missing",
    "StopResources": "yes"
  },
  "type": null
}
Then we create our first VM, the KubeMaster and make sure we can log in and run sudo commands (commands as root).
Here is where i pause to let you know I worked and worked to get UbuntuLTS (18.04) working. Bionic Beaver just fights and fights. The Kubespray playbooks and docker-ce just don’t seem to like each other.
$ az vm create --resource-group idj-aks-kubespray-2-rg --name KubeMaster --image UbuntuLTS --admin-username kubeadmin --generate-ssh-keys
{
  "fqdns": "",
  "id": "/subscriptions/abcd1234-1234-1234-1234-abcdabcd12/resourceGroups/idj-aks-kubespray-2-rg/providers/Microsoft.Compute/virtualMachines/KubeMaster",
  "location": "eastus",
  "macAddress": "00-0D-3A-12-48-EF",
  "powerState": "VM running",
  "privateIpAddress": "10.0.0.4",
  "publicIpAddress": "40.87.44.39",
  "resourceGroup": "idj-aks-kubespray-2-rg",
  "zones": ""
}
After a few days, I switched tactics and went with 16.04. I mean, that’s what Azure DevOps supports for their pipelines, can’t be that bad.
Create the kube nodes with a user and password and no public IP
$ az vm create --resource-group idj-aks-kubespray-2-rg --name KubeNode8 --image "Canonical:UbuntuServer:16.04.0-LTS:16.04.201903130" --admin-username kubenode --admin-password Kubepass1234$ --public-ip-address "" --generate-ssh-keys
{
  "fqdns": "",
  "id": "/subscriptions/fefd6730-7b26-49a2-8c24-ef54e13c9b1c/resourceGroups/idj-aks-kubespray-2-rg/providers/Microsoft.Compute/virtualMachines/KubeNode8",
  "location": "eastus",
  "macAddress": "00-0D-3A-1F-0D-57",
  "powerState": "VM running",
  "privateIpAddress": "10.0.0.12",
  "publicIpAddress": "",
  "resourceGroup": "idj-aks-kubespray-2-rg",
  "zones": ""
}
Kube master is similar but with a public IP and no password
$ az vm create --resource-group idj-aks-kubespray-2-rg --name KubeMaster2 --image "Canonical:UbuntuServer:16.04.0-LTS:16.04.201903130" --admin-username kubemaster --generate-ssh-keys
{
  "fqdns": "",
  "id": "/subscriptions/fefd6730-7b26-49a2-8c24-ef54e13c9b1c/resourceGroups/idj-aks-kubespray-2-rg/providers/Microsoft.Compute/virtualMachines/KubeMaster2",
  "location": "eastus",
  "macAddress": "00-0D-3A-1C-2C-21",
  "powerState": "VM running",
  "privateIpAddress": "10.0.0.13",
  "publicIpAddress": "137.135.69.133",
  "resourceGroup": "idj-aks-kubespray-2-rg",
  "zones": ""
}
Now SSH to the master and setup a key
$ ssh kubemaster@137.135.69.133
The authenticity of host '137.135.69.133 (137.135.69.133)' can't be established.
ECDSA key fingerprint is SHA256:IWe4r6Zgh401JGoanoatw2BOBNlGusr52l9qyZbz7JA.
Are you sure you want to continue connecting (yes/no)? yes
Warning: Permanently added '137.135.69.133' (ECDSA) to the list of known hosts.
Welcome to Ubuntu 16.04.6 LTS (GNU/Linux 4.15.0-1040-azure x86_64)

 * Documentation: https://help.ubuntu.com
 * Management: https://landscape.canonical.com
 * Support: https://ubuntu.com/advantage

  Get cloud support with Ubuntu Advantage Cloud Guest:
    http://www.ubuntu.com/business/services/cloud

0 packages can be updated.
0 updates are security updates.


The programs included with the Ubuntu system are free software;
the exact distribution terms for each program are described in the
individual files in /usr/share/doc/*/copyright.

Ubuntu comes with ABSOLUTELY NO WARRANTY, to the extent permitted by
applicable law.

To run a command as administrator (user "root"), use "sudo <command>".
See "man sudo_root" for details.

kubemaster@KubeMaster2:~$ sudo su -
root@KubeMaster2:~# ssh-keygen -t rsa
Generating public/private rsa key pair.
Enter file in which to save the key (/root/.ssh/id_rsa):
Enter passphrase (empty for no passphrase):
Enter same passphrase again:
Your identification has been saved in /root/.ssh/id_rsa.
Your public key has been saved in /root/.ssh/id_rsa.pub.
The key fingerprint is:
SHA256:aG8SuqAHLjodhGLFHn749xa7hWSu4mvuYO2q+lBEjzA root@KubeMaster2
The key's randomart image is:
+---[RSA 2048]----+
|E o |
| + * |
| .* + |
|oo.+ . . |
|o.. o + So |
|... .+ ++.. |
|oo.+..o +oo. |
|o++.o+ o.+. |
|B=o.B*o.... |
+----[SHA256]-----+
Next step is to do the following on each node
root@KubeMaster2:~# ssh-copy-id -i .ssh/id_rsa.pub kubenode@10.0.0.9

root@KubeMaster2:~# ssh kubenode@10.0.0.9
Welcome to Ubuntu 16.04.6 LTS (GNU/Linux 4.15.0-1040-azure x86_64)

 * Documentation: https://help.ubuntu.com
 * Management: https://landscape.canonical.com
 * Support: https://ubuntu.com/advantage

  Get cloud support with Ubuntu Advantage Cloud Guest:
    http://www.ubuntu.com/business/services/cloud

0 packages can be updated.
0 updates are security updates.

New release '18.04.2 LTS' available.
Run 'do-release-upgrade' to upgrade to it.


To run a command as administrator (user "root"), use "sudo <command>".
See "man sudo_root" for details.

kubenode@KubeNode5:~$ sudo cp .ssh/authorized_keys /root/.ssh/
On master, prep it to run our ansible steps for kubespray
apt-get update
apt-get install software-properties-common
apt-add-repository ppa:ansible/ansible
apt-get update
apt-get install ansible
apt-get update
apt-get -y upgrade
apt-get install python-pip
pip install jinja2
pip install netaddr
now clone kubespray and edit the ini file
root@KubeMaster:~# git clone https://github.com/xenonstack/kubespray.git
Cloning into 'kubespray'...

Then edit the ini file:

root@KubeMaster:~/kubespray/inventory# cat inventory.ini
# ## Configure 'ip' variable to bind kubernetes services on a
# ## different ip than the default iface
[all]
KubeMaster ansible_ssh_host=10.0.0.4
node1 ansible_ssh_host=10.0.0.5
node2 ansible_ssh_host=10.0.0.6
node3 ansible_ssh_host=10.0.0.7
node4 ansible_ssh_host=10.0.0.8

# ## configure a bastion host if your nodes are not directly reachable
# bastion ansible_ssh_host=x.x.x.x

[kube-master]
KubeMaster

[etcd]
KubeMaster

[kube-node]
node1
node2
node3
node4

[k8s-cluster:children]
kube-node
kube-master
Test that your connections are good with a ping
root@KubeMaster2:~/kubespray# ansible --inventory-file=inventory.ini -m ping all
 [WARNING]: Unable to parse /root/kubespray/inventory.ini as an inventory source

 [WARNING]: No inventory was parsed, only implicit localhost is available

 [WARNING]: provided hosts list is empty, only localhost is available. Note that the implicit localhost does
not match 'all'

root@KubeMaster2:~/kubespray# cd inventory/
root@KubeMaster2:~/kubespray/inventory# ansible --inventory-file=inventory.ini -m ping all
KubeMaster | SUCCESS => {
    "changed": false,
    "ping": "pong"
}
node4 | SUCCESS => {
    "changed": false,
    "ping": "pong"
}
node2 | SUCCESS => {
    "changed": false,
    "ping": "pong"
}
node3 | SUCCESS => {
    "changed": false,
    "ping": "pong"
}
node1 | SUCCESS => {
    "changed": false,
    "ping": "pong"
}
Then run the playbook
root@KubeMaster2:~/kubespray/inventory# cd ..
root@KubeMaster2:~/kubespray# ansible-playbook -i inventory/inventory.ini cluster.yml

PLAY [localhost] ***********************************************************************************************

TASK [download : Register docker images info] ******************************************************************
Tuesday 23 April 2019 01:55:26 +0000 (0:00:00.052) 0:00:00.052 *********

TASK [download : container_download | Create dest directory for saved/loaded container images] *****************
Tuesday 23 April 2019 01:55:26 +0000 (0:00:00.024) 0:00:00.077 *********

TASK [download : container_download | create local directory for saved/loaded container images] ****************
Tuesday 23 April 2019 01:55:26 +0000 (0:00:00.028) 0:00:00.105 *********

TASK [download : Download items] *******************************************************************************
Tuesday 23 April 2019 01:55:26 +0000 (0:00:00.023) 0:00:00.128 *********

TASK [download : Sync container] *******************************************************************************
Tuesday 23 April 2019 01:55:26 +0000 (0:00:00.093) 0:00:00.221 *********

TASK [kubespray-defaults : Configure defaults] *****************************************************************
Tuesday 23 April 2019 01:55:26 +0000 (0:00:00.096) 0:00:00.318 *********
ok: [localhost] => {
    "msg": "Check roles/kubespray-defaults/defaults/main.yml"
}

...

TASK [kubernetes-apps/istio : istio | apply manifests] *********************************************************
Tuesday 23 April 2019 02:13:28 +0000 (0:00:00.044) 0:18:02.072 *********

PLAY RECAP *****************************************************************************************************
KubeMaster : ok=316 changed=108 unreachable=0 failed=0
localhost : ok=2 changed=0 unreachable=0 failed=0
node1 : ok=251 changed=72 unreachable=0 failed=0
node2 : ok=222 changed=63 unreachable=0 failed=0
node3 : ok=222 changed=63 unreachable=0 failed=0
node4 : ok=223 changed=63 unreachable=0 failed=0

Tuesday 23 April 2019 02:13:28 +0000 (0:00:00.043) 0:18:02.116 *********
===============================================================================
bootstrap-os : Bootstrap | Install python 2.x and pip -------------------------------------------------- 82.46s
kubernetes/node : install | Compare host kubelet with hyperkube container ------------------------------ 63.80s
download : container_download | Download containers if pull is required or told to always pull --------- 57.10s
docker : ensure docker packages are installed ---------------------------------------------------------- 25.24s
kubernetes/secrets : Check certs | check if a cert already exists on node ------------------------------ 24.05s
download : container_download | Download containers if pull is required or told to always pull --------- 23.93s
kubernetes/node : install | Copy kubelet from hyperkube container -------------------------------------- 19.79s
kubernetes/master : Copy kubectl from hyperkube container ---------------------------------------------- 18.18s
kubernetes-apps/network_plugin/weave : Weave | wait for weave to become available ---------------------- 15.95s
kubernetes/master : Master | wait for the apiserver to be running -------------------------------------- 12.73s
kubernetes/preinstall : Install packages requirements -------------------------------------------------- 10.38s
docker : Docker | pause while Docker restarts ---------------------------------------------------------- 10.37s
network_plugin/weave : Weave | Copy cni plugins from hyperkube ------------------------------------------ 9.72s
download : container_download | Download containers if pull is required or told to always pull ---------- 9.54s
kubernetes/preinstall : Create kubernetes directories --------------------------------------------------- 9.23s
download : container_download | Download containers if pull is required or told to always pull ---------- 8.91s
docker : ensure docker repository is enabled ------------------------------------------------------------ 8.38s
download : container_download | Download containers if pull is required or told to always pull ---------- 8.15s
kubernetes/preinstall : Install latest version of python-apt for Debian distribs ------------------------ 8.05s
docker : Docker | reload docker ------------------------------------------------------------------------- 7.08s
root@KubeMaster2:~/kubespray#
Now that all is running we can test that the pods are working
root@KubeMaster2:~/kubespray# kubectl get nodes
NAME STATUS ROLES AGE VERSION
kubemaster Ready master 2m v1.8.3+coreos.0
node1 Ready node 2m v1.8.3+coreos.0
node2 Ready node 2m v1.8.3+coreos.0
node3 Ready node 2m v1.8.3+coreos.0
node4 Ready node 2m v1.8.3+coreos.0

root@KubeMaster2:~/kubespray# kubectl get pods --all-namespaces
NAMESPACE NAME READY STATUS RESTARTS AGE
kube-system heapster-5d67855584-nnb6j 1/1 Running 0 1m
kube-system kube-apiserver-kubemaster 1/1 Running 0 1m
kube-system kube-controller-manager-kubemaster 1/1 Running 0 3m
kube-system kube-dns-cf9d8c47-t9v79 3/3 Running 0 1m
kube-system kube-dns-cf9d8c47-xxmrz 3/3 Running 0 1m
kube-system kube-proxy-kubemaster 1/1 Running 0 2m
kube-system kube-proxy-node1 1/1 Running 0 2m
kube-system kube-proxy-node2 1/1 Running 0 2m
kube-system kube-proxy-node3 1/1 Running 0 2m
kube-system kube-proxy-node4 1/1 Running 0 2m
kube-system kube-scheduler-kubemaster 1/1 Running 0 3m
kube-system kubedns-autoscaler-86c47697df-nfgdc 1/1 Running 0 1m
kube-system kubernetes-dashboard-7fd45476f8-slmnz 1/1 Running 0 1m
kube-system monitoring-grafana-5bccc9f786-nvrrv 1/1 Running 0 1m
kube-system monitoring-influxdb-85cb4985d4-74vqb 1/1 Running 0 1m
kube-system nginx-proxy-node1 1/1 Running 0 2m
kube-system nginx-proxy-node2 1/1 Running 0 2m
kube-system nginx-proxy-node3 1/1 Running 0 2m
kube-system nginx-proxy-node4 1/1 Running 0 2m
kube-system weave-net-5295q 2/2 Running 0 2m
kube-system weave-net-d4krm 2/2 Running 0 2m
kube-system weave-net-ljx27 2/2 Running 0 2m
kube-system weave-net-p2r27 2/2 Running 0 2m
kube-system weave-net-t585c 2/2 Running 0 2m
kube-system weave-scope-agent-59zb7 1/1 Running 0 1m
kube-system weave-scope-agent-6kgtf 1/1 Running 0 1m
kube-system weave-scope-agent-6r6c7 1/1 Running 0 1m
kube-system weave-scope-agent-7vc4z 1/1 Running 0 1m
kube-system weave-scope-app-567cfdb6d5-6kv8r 1/1 Running 0 1m

root@KubeMaster2:~/kubespray# kubectl get svc --all-namespaces
NAMESPACE NAME TYPE CLUSTER-IP EXTERNAL-IP PORT(S) AGE
default kubernetes ClusterIP 10.233.0.1 <none> 443/TCP 7m
kube-system heapster ClusterIP 10.233.39.203 <none> 80/TCP 5m
kube-system kube-dns ClusterIP 10.233.0.3 <none> 53/UDP,53/TCP 5m
kube-system kubernetes-dashboard ClusterIP 10.233.23.223 <none> 80/TCP 5m
kube-system monitoring-grafana NodePort 10.233.18.200 <none> 80:32724/TCP 5m
kube-system monitoring-influxdb ClusterIP 10.233.49.167 <none> 8086/TCP 5m
kube-system weave-scope-app NodePort 10.233.33.194 <none> 80:31905/TCP 5m
A quick tip: you can find all the nodes you’ve created thus far by just querying the resource group.
$ az vm list --resource-group idj-aks-kubespray-2-rg -o table
Name ResourceGroup Location Zones
---------- ---------------------- ---------- -------
KubeMaster idj-aks-kubespray-2-rg eastus
KubeNode1 idj-aks-kubespray-2-rg eastus
KubeNode2 idj-aks-kubespray-2-rg eastus
KubeNode3 idj-aks-kubespray-2-rg eastus
KubeNode4 idj-aks-kubespray-2-rg eastus

$ az vm list-ip-addresses --resource-group idj-aks-kubespray-2-rg -o table
VirtualMachine PublicIPAddresses PrivateIPAddresses
---------------- ------------------- --------------------
KubeMaster 40.87.44.39 10.0.0.4
KubeNode1 10.0.0.5
KubeNode2 10.0.0.6
KubeNode3 10.0.0.7
KubeNode4 10.0.0.8
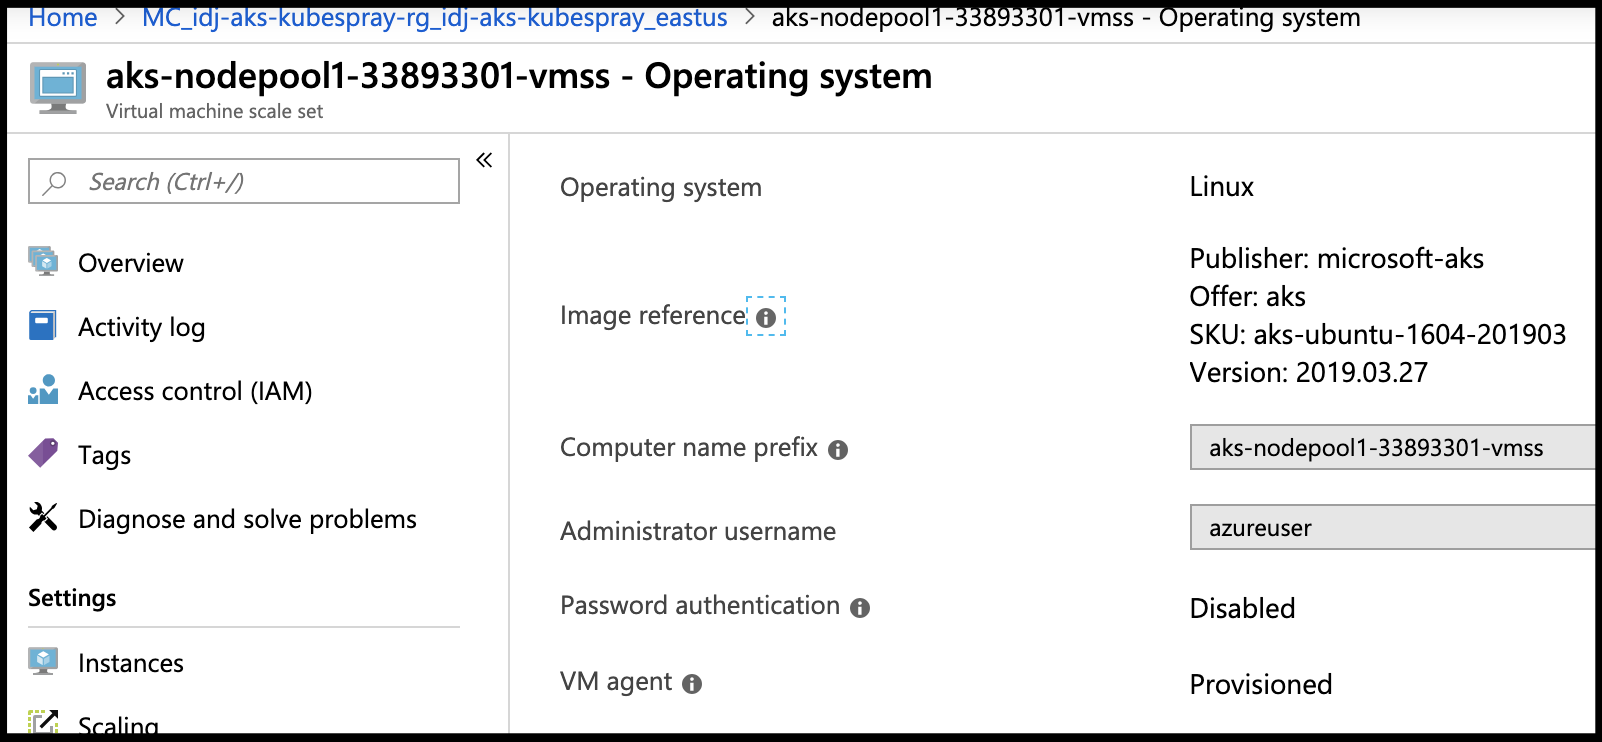
Also, if concerned over using 16.04 versus 18.04 (UbuntuLTS), know that the auto-scaling cluster we did at the start uses 16.04 still:
Summary:
We spun up an auto-scaling cluster quite rapidly using standard az cli commands and were able to view it’s dashboard with ease. While we only pay for the nodes (not the master), the cost of course is less control on how our cluster is set up. Kubespray allowed us to configure a cluster quite rapidly that while challenging to scale horizontally would be quite easy to scale vertically (just change machine class and reboot). Without adding an ingress, we were not able to view a graphical dashboard, but we did set up a 4 node cluster in a way that could be repeated quite easily. Additionally, we could powerdown these VMs and only pay for storage as well as snapshot the whole cluster (as they are just a pack of VMs).
In our next post we’ll get into ARM Templates and Terraform.