
Multipass is billed as a “mini-cloud” for Mac and Windows machines. . It’s ubuntu’s play at a small virtual machine environment akin to Docker. How well does it perform and can we run Rancher’s k3s or perhaps even a full Kubernetes on it?
Installing
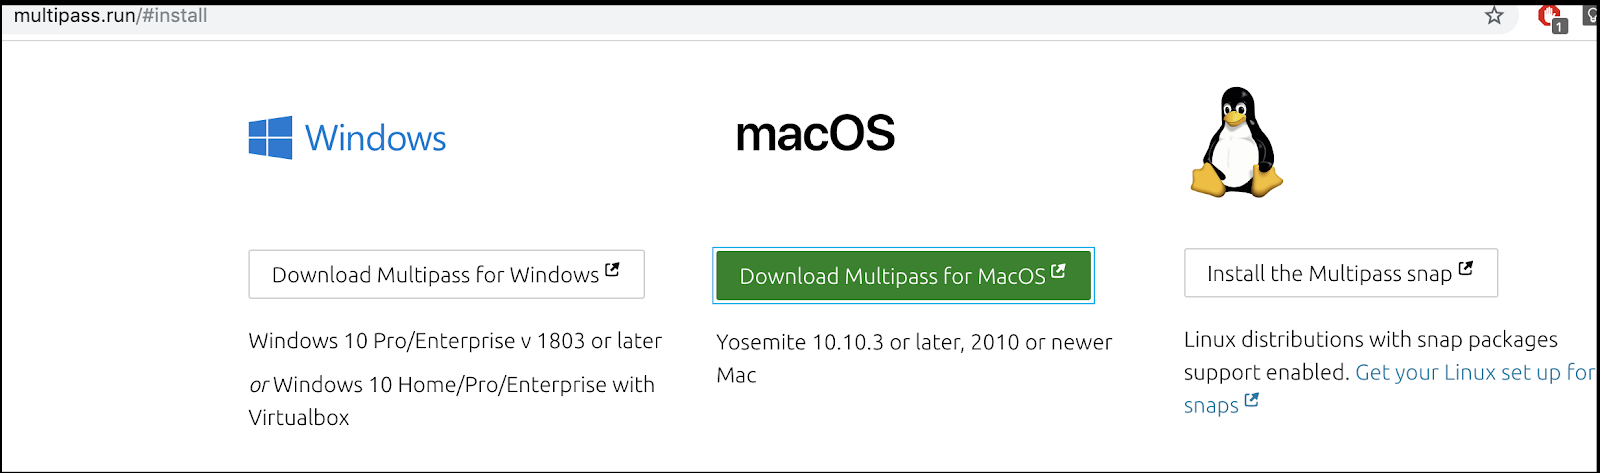
Download the binary from https://multipass.run/#install
In the case of macOS, it was a quick pkg install.
Running the basic “launch an instance” command took a bit (longer than docker)

I immediately tried to run commands in it, and also checked to see if it was really just running docker (does not appear to be).
JOHNSI10-M1:~ johnsi10$ multipass exec foo -- uname -a
Linux foo 4.15.0-65-generic #74-Ubuntu SMP Tue Sep 17 17:06:04 UTC 2019 x86_64 x86_64 x86_64 GNU/Linux
JOHNSI10-M1:~ johnsi10$ docker ps
CONTAINER ID        IMAGE               COMMAND             CREATED             STATUS              PORTS               NAMES
JOHNSI10-M1:~ johnsi10$
Getting a fresh shell was easy:
JOHNSI10-M1:~ johnsi10$ multipass shell
Launched: primary
Welcome to Ubuntu 18.04.3 LTS (GNU/Linux 4.15.0-65-generic x86_64)

 * Documentation:  https://help.ubuntu.com
 * Management:     https://landscape.canonical.com
 * Support:        https://ubuntu.com/advantage

  System information as of Sat Oct  5 10:04:13 CDT 2019

  System load:  0.45              Processes:             115
  Usage of /:   20.8% of 4.67GB   Users logged in:       0
  Memory usage: 13%               IP address for enp0s2: 192.168.64.3
  Swap usage:   0%


0 packages can be updated.
0 updates are security updates.


To run a command as administrator (user "root"), use "sudo <command>".
See "man sudo_root" for details.

multipass@primary:~$
However, doing so launched a fresh instance called primary (doing it again re-used primary so it must be a default name)
$ multipass list
Name                    State             IPv4             Image
primary                 Running           192.168.64.3     Ubuntu 18.04 LTS
foo                     Running           192.168.64.2     Ubuntu 18.04 LTS
The instances seem very fast.. I checked and they allocate about a Gb of memory by default:
multipass@primary:~$ free -m
              total        used        free      shared  buff/cache   available
Mem:            986          72         526           0         387         772
Swap:             0           0           0
multipass@primary:~$ cat /proc/meminfo
MemTotal:        1009716 kB
MemFree:          538700 kB
I thought it was cute under the ~root .ssh/authorized_keys they clearly don’t want you using root for things:
no-port-forwarding,no-agent-forwarding,no-X11-forwarding,command="echo 'Please login as the user \"multipass\" rather than the user \"root\".';echo;sleep 10" ssh-rsa A…
I added my ~/.ssh/id_rsa.pub to the end of ~root/.ssh/authorized_keys and tested root access with ssh…
JOHNSI10-M1:~ johnsi10$ multipass list
Name                    State             IPv4             Image
primary                 Running           192.168.64.3     Ubuntu 18.04 LTS
foo                     Running           192.168.64.2     Ubuntu 18.04 LTS
JOHNSI10-M1:~ johnsi10$ ssh root@192.168.64.3
Welcome to Ubuntu 18.04.3 LTS (GNU/Linux 4.15.0-65-generic x86_64)

 * Documentation:  https://help.ubuntu.com
 * Management:     https://landscape.canonical.com
 * Support:        https://ubuntu.com/advantage

  System information as of Sat Oct  5 10:11:50 CDT 2019

  System load:  0.07              Processes:             102
  Usage of /:   23.9% of 4.67GB   Users logged in:       0
  Memory usage: 12%               IP address for enp0s2: 192.168.64.3
  Swap usage:   0%


0 packages can be updated.
0 updates are security updates.


Last login: Sat Oct  5 10:11:40 2019 from 192.168.64.1
Installing k3s
Let’s try getting k3s on there:
multipass@primary:~$ sudo su -
root@primary:~# curl -sfL https://get.k3s.io | sh -
[INFO]  Finding latest release
[INFO]  Using v0.9.1 as release
[INFO]  Downloading hash https://github.com/rancher/k3s/releases/download/v0.9.1/sha256sum-amd64.txt
[INFO]  Downloading binary https://github.com/rancher/k3s/releases/download/v0.9.1/k3s
[INFO]  Verifying binary download
[INFO]  Installing k3s to /usr/local/bin/k3s
[INFO]  Creating /usr/local/bin/kubectl symlink to k3s
[INFO]  Creating /usr/local/bin/crictl symlink to k3s
[INFO]  Creating /usr/local/bin/ctr symlink to k3s
[INFO]  Creating killall script /usr/local/bin/k3s-killall.sh
[INFO]  Creating uninstall script /usr/local/bin/k3s-uninstall.sh
[INFO]  env: Creating environment file /etc/systemd/system/k3s.service.env
[INFO]  systemd: Creating service file /etc/systemd/system/k3s.service
[INFO]  systemd: Enabling k3s unit
Created symlink /etc/systemd/system/multi-user.target.wants/k3s.service → /etc/systemd/system/k3s.service.
[INFO]  systemd: Starting k3s
root@primary:~# sudo kubectl get nodes
NAME      STATUS   ROLES    AGE   VERSION
primary   Ready    master   24s   v1.15.4-k3s.1
Can we increase (scale) our cluster?
root@primary:~# cat /var/lib/rancher/k3s/server/node-token
K10963f9c0e7f6c56556ca580f91d880a6a649c17a0b29b4df4ad3d0cba5e8ec180::node:5401832f9196e979e457e6294003d0ef
Adding a new node…
root@foo:~# curl -sfL https://get.k3s.io | K3S_URL=https://192.168.64.3:6443 K3S_TOKEN=`cat token` sh -
[INFO]  Finding latest release
[INFO]  Using v0.9.1 as release
[INFO]  Downloading hash https://github.com/rancher/k3s/releases/download/v0.9.1/sha256sum-amd64.txt
[INFO]  Downloading binary https://github.com/rancher/k3s/releases/download/v0.9.1/k3s
[INFO]  Verifying binary download
[INFO]  Installing k3s to /usr/local/bin/k3s
[INFO]  Creating /usr/local/bin/kubectl symlink to k3s
[INFO]  Creating /usr/local/bin/crictl symlink to k3s
[INFO]  Creating /usr/local/bin/ctr symlink to k3s
[INFO]  Creating killall script /usr/local/bin/k3s-killall.sh
[INFO]  Creating uninstall script /usr/local/bin/k3s-agent-uninstall.sh
[INFO]  env: Creating environment file /etc/systemd/system/k3s-agent.service.env
[INFO]  systemd: Creating service file /etc/systemd/system/k3s-agent.service
[INFO]  systemd: Enabling k3s-agent unit
Created symlink /etc/systemd/system/multi-user.target.wants/k3s-agent.service → /etc/systemd/system/k3s-agent.service.
[INFO]  systemd: Starting k3s-agent
It worked!
multipass@primary:~$ sudo kubectl get nodes
NAME      STATUS   ROLES    AGE   VERSION
primary   Ready    master   31m   v1.15.4-k3s.1
foo       Ready    worker   43s   v1.15.4-k3s.1
Let’s get the kubeconfig
multipass@primary:~$ sudo cat /etc/rancher/k3s/k3s.yaml
apiVersion: v1
clusters:
- cluster:
    certificate-authority-data: LS0tLS1CRUdJTiBDRVJUSUZJQ0FURS0tLS0tCk1JSUJWakNCL3FBREFnRUNBZ0VBTUFvR0NDcUdTTTQ5QkFNQ01DTXhJVEFmQmdOVkJBTU1HR3N6Y3kxelpYSjIKWlhJdFkyRkFNVFUzTURJNE9Ea3hOVEFlRncweE9URXdNRFV4TlRJeE5UVmFGdzB5T1RFd01ESXhOVEl4TlRWYQpNQ014SVRBZkJnTlZCQU1NR0dzemN5MXpaWEoyWlhJdFkyRkFNVFUzTURJNE9Ea3hOVEJaTUJNR0J5cUdTTTQ5CkFnRUdDQ3FHU000OUF3RUhBMElBQkw3VnhxY2VJL1dyVFRyZmhxeUxWMDVZaXBzNlJseGxXNHNXN3dNTEhjdy8KYUJjbHl3ZTdzdmxtbDZOZG1JSmF3MUgzS0d6NkZ3NVMzL3pPSU5TSkU0T2pJekFoTUE0R0ExVWREd0VCL3dRRQpBd0lDcERBUEJnTlZIUk1CQWY4RUJUQURBUUgvTUFvR0NDcUdTTTQ5QkFNQ0EwY0FNRVFDSUEzUkl3MmhQS05zCktoU1RYaFFrZTdXZVo5U0VTZEhZRjdUbklEQ3pwOFdzQWlBend4RU5HeFlvV2Q2T2FmbzBBUUZRRFowcE4xQTgKS3pCSmQzZ2Jnb1BRS0E9PQotLS0tLUVORCBDRVJUSUZJQ0FURS0tLS0tCg==
    server: https://127.0.0.1:6443
  name: default
contexts:
- context:
    cluster: default
    user: default
  name: default
current-context: default
kind: Config
preferences: {}
users:
- name: default
  user:
    password: e2fbe383931c1b5f9500219a1272b570
    username: admin
We can save that locally and just change the “server” line to match our master node:
JOHNSI10-M1:~ johnsi10$ sed -i.bak -e 's/127.0.0.1:6443/192.168.64.3/g' myk3sconfig
JOHNSI10-M1:~ johnsi10$ !cat
cat myk3sconfig | grep server
    server: https://192.168.64.3
Now we can test locally:
JOHNSI10-M1:~ johnsi10$ export KUBECONFIG=$(pwd)/myk3sconfig
JOHNSI10-M1:~ johnsi10$ kubectl get nodes
NAME      STATUS   ROLES    AGE     VERSION
foo       Ready    worker   4m18s   v1.15.4-k3s.1
primary   Ready    master   35m     v1.15.4-k3s.1
However, we don’t have any resources.. Which seems a bit odd:
JOHNSI10-M1:~ johnsi10$ kubectl api-resources --insecure-skip-tls-verify
NAME   SHORTNAMES   APIGROUP   NAMESPACED   KIND
JOHNSI10-M1:~ johnsi10$
It is working, however, with k3s:
multipass@foo2:~$ sudo cp /etc/rancher/k3s/k3s.yaml ~/.kube/config
multipass@foo2:~$ sudo chmod 644 ~/.kube/config
multipass@foo2:~$ kubectl get pods --all-namespaces
NAMESPACE     NAME                         READY   STATUS      RESTARTS   AGE
kube-system   coredns-66f496764-s5bgd      1/1     Running     0          15m
kube-system   helm-install-traefik-m6jlr   0/1     Completed   0          15m
kube-system   svclb-traefik-5z86d          3/3     Running     0          15m
kube-system   traefik-d869575c8-6pts7      1/1     Running     0          15m
When trying this way - using with sudo ./k3s server & from foo2, it worked fine. . I just used the same kubeconfig
JOHNSI10-M1:~ johnsi10$ vi ~/.kube/config
JOHNSI10-M1:~ johnsi10$ cat ~/.kube/config
apiVersion: v1
clusters:
- cluster:
    certificate-authority-data: LS0tLS1CRUdJTiBDRVJUSUZJQ0FURS0tLS0tCk1JSUJWekNCL3FBREFnRUNBZ0VBTUFvR0NDcUdTTTQ5QkFNQ01DTXhJVEFmQmdOVkJBTU1HR3N6Y3kxelpYSjIKWlhJdFkyRkFNVFUzTURJNU16Z3hNREFlRncweE9URXdNRFV4TmpRek16QmFGdzB5T1RFd01ESXhOalF6TXpCYQpNQ014SVRBZkJnTlZCQU1NR0dzemN5MXpaWEoyWlhJdFkyRkFNVFUzTURJNU16Z3hNREJaTUJNR0J5cUdTTTQ5CkFnRUdDQ3FHU000OUF3RUhBMElBQkVNbGp4YzVXdnNDdHlUSEpOWDZTV3A3NEE1QnhkWWNQSjhSZjI0MjM0SW0KSUFQaGkrYjNrRzl0aDVEWjlFZ05xVjJlUDZ4WGRmR2IrSHFFU0Qrck55YWpJekFoTUE0R0ExVWREd0VCL3dRRQpBd0lDcERBUEJnTlZIUk1CQWY4RUJUQURBUUgvTUFvR0NDcUdTTTQ5QkFNQ0EwZ0FNRVVDSUE0U0FKbDBkbHdPCk1raFdQVTVqZUxqbHFsVGtUT3I5akpaV2RxNXdOQS9NQWlFQTh0b2hiWDFXdjA3ZEN4clIzME9aVy9RMytxV28Kd0FFMmd2ckVESk54QU1FPQotLS0tLUVORCBDRVJUSUZJQ0FURS0tLS0tCg==
    server: https://192.168.64.4:6443
  name: default
contexts:
- context:
    cluster: default
    user: default
  name: default
current-context: default
kind: Config
preferences: {}
users:
- name: default
  user:
    password: 235c8033da3e36820d379b2c0d3011d3
    username: admin
JOHNSI10-M1:~ johnsi10$ unset KUBECONFIG
JOHNSI10-M1:~ johnsi10$ kubectl get pods --all-namespaces
NAMESPACE     NAME                         READY   STATUS      RESTARTS   AGE
kube-system   coredns-66f496764-s5bgd      1/1     Running     0          19m
kube-system   helm-install-traefik-m6jlr   0/1     Completed   0          19m
kube-system   svclb-traefik-5z86d          3/3     Running     0          18m
kube-system   traefik-d869575c8-6pts7      1/1     Running     0          18m

JOHNSI10-M1:~ johnsi10$ kubectl get nodes
NAME   STATUS   ROLES    AGE   VERSION
foo2   Ready    master   19m   v1.15.4-k3s.1
Let’s try adding that foo node again:
root@foo:~# curl -sfL https://get.k3s.io | K3S_URL=https://192.168.64.4:6443 K3S_TOKEN=K109b57bbfe0e3251481743ed00c79a323e9792eababc18ff7505a7e10f84c8e6cf::node:c9416ab5ca8157b919e331b1a4a0878d sh -
[INFO]  Finding latest release
[INFO]  Using v0.9.1 as release
[INFO]  Downloading hash https://github.com/rancher/k3s/releases/download/v0.9.1/sha256sum-amd64.txt
[INFO]  Skipping binary downloaded, installed k3s matches hash
[INFO]  Skipping /usr/local/bin/kubectl symlink to k3s, already exists
[INFO]  Skipping /usr/local/bin/crictl symlink to k3s, already exists
[INFO]  Skipping /usr/local/bin/ctr symlink to k3s, already exists
[INFO]  Creating killall script /usr/local/bin/k3s-killall.sh
[INFO]  Creating uninstall script /usr/local/bin/k3s-agent-uninstall.sh
[INFO]  env: Creating environment file /etc/systemd/system/k3s-agent.service.env
[INFO]  systemd: Creating service file /etc/systemd/system/k3s-agent.service
[INFO]  systemd: Enabling k3s-agent unit
Created symlink /etc/systemd/system/multi-user.target.wants/k3s-agent.service → /etc/systemd/system/k3s-agent.service.
[INFO]  systemd: Starting k3s-agent
That worked!
JOHNSI10-M1:Documents johnsi10$ kubectl get nodes
NAME   STATUS   ROLES    AGE   VERSION
foo2   Ready    master   23m   v1.15.4-k3s.1
foo    Ready    worker   27s   v1.15.4-k3s.1
Testing with SonarQube chart
Let’s fire up Tiller then SQube..
First we need to get tiller working with RBAC:
JOHNSI10-M1:Documents johnsi10$ cat rbac-config.yaml
apiVersion: v1
kind: ServiceAccount
metadata:
  name: tiller
  namespace: kube-system
---
apiVersion: rbac.authorization.k8s.io/v1
kind: ClusterRoleBinding
metadata:
  name: tiller
roleRef:
  apiGroup: rbac.authorization.k8s.io
  kind: ClusterRole
  name: cluster-admin
subjects:
  - kind: ServiceAccount
    name: tiller
    namespace: kube-system
JOHNSI10-M1:Documents johnsi10$ kubectl create -f rbac-config.yaml
serviceaccount/tiller created
clusterrolebinding.rbac.authorization.k8s.io/tiller created
JOHNSI10-M1:Documents johnsi10$ helm init --service-account tiller --history-max 200
$HELM_HOME has been configured at /Users/johnsi10/.helm.
Warning: Tiller is already installed in the cluster.
(Use --client-only to suppress this message, or --upgrade to upgrade Tiller to the current version.)
Then install the chart
$ helm install stable/sonarqube
NAME:   eating-bobcat
LAST DEPLOYED: Sat Oct  5 13:35:26 2019
NAMESPACE: default
STATUS: DEPLOYED

RESOURCES:
==> v1/ConfigMap
NAME                                     DATA  AGE
eating-bobcat-sonarqube-config           0     1s
eating-bobcat-sonarqube-copy-plugins     1     1s
eating-bobcat-sonarqube-install-plugins  1     1s
eating-bobcat-sonarqube-tests            1     1s

==> v1/PersistentVolumeClaim
NAME                      STATUS   VOLUME  CAPACITY  ACCESS MODES  STORAGECLASS  AGE
eating-bobcat-postgresql  Pending  1s

==> v1/Pod(related)
NAME                                      READY  STATUS    RESTARTS  AGE
eating-bobcat-postgresql-d6d94dcb4-cg2nq  0/1    Pending   0         0s
eating-bobcat-sonarqube-7c84f8b789-r6zm7  0/1    Init:0/1  0         0s

==> v1/Secret
NAME                      TYPE    DATA  AGE
eating-bobcat-postgresql  Opaque  1     1s

==> v1/Service
NAME                      TYPE          CLUSTER-IP     EXTERNAL-IP  PORT(S)         AGE
eating-bobcat-postgresql  ClusterIP     10.43.140.71   <none>       5432/TCP        0s
eating-bobcat-sonarqube   LoadBalancer  10.43.175.110  <pending>    9000:31481/TCP  0s

==> v1beta1/Deployment
NAME                      READY  UP-TO-DATE  AVAILABLE  AGE
eating-bobcat-postgresql  0/1    1           0          0s
eating-bobcat-sonarqube   0/1    1           0          0s


NOTES:
1. Get the application URL by running these commands:
     NOTE: It may take a few minutes for the LoadBalancer IP to be available.
           You can watch the status of by running 'kubectl get svc -w eating-bobcat-sonarqube'
  export SERVICE_IP=$(kubectl get svc --namespace default eating-bobcat-sonarqube -o jsonpath='{.status.loadBalancer.ingress[0].ip}')
  echo http://$SERVICE_IP:9000
Ahh.. but we forgot - k3s has no default storage class so we’ll have a pvc hung..
$ kubectl get pvc
NAME                       STATUS    VOLUME   CAPACITY   ACCESS MODES   STORAGECLASS   AGE
eating-bobcat-postgresql   Pending                                                     26s
Let’s set a storage class, make it default and try again:
JOHNSI10-M1:Documents johnsi10$ kubectl apply -f https://raw.githubusercontent.com/rancher/local-path-provisioner/master/deploy/local-path-storage.yaml

namespace/local-path-storage created
serviceaccount/local-path-provisioner-service-account created
clusterrole.rbac.authorization.k8s.io/local-path-provisioner-role created
clusterrolebinding.rbac.authorization.k8s.io/local-path-provisioner-bind created
deployment.apps/local-path-provisioner created
storageclass.storage.k8s.io/local-path created
configmap/local-path-config created

JOHNSI10-M1:Documents johnsi10$ kubectl get storageclass
NAME         PROVISIONER             AGE
local-path   rancher.io/local-path   5s
JOHNSI10-M1:Documents johnsi10$ kubectl patch storageclass local-path -p '{"metadata": {"annotations":{"storageclass.kubernetes.io/is-default-class":"false"}}}'å
storageclass.storage.k8s.io/local-path patched
Try again…
JOHNSI10-M1:Documents johnsi10$ helm list
NAME         	REVISION	UPDATED                 	STATUS  	CHART          	APP VERSION	NAMESPACE
eating-bobcat	1       	Sat Oct  5 13:35:26 2019	DEPLOYED	sonarqube-2.3.0	7.9        	default
JOHNSI10-M1:Documents johnsi10$ helm delete eating-bobcat
release "eating-bobcat" deleted
JOHNSI10-M1:Documents johnsi10$ helm install --name mytest2 stable/sonarqube --set=postgresql.persistence.storageClass=local-path,persistence.storageClass=local-path
NAME:   mytest2
LAST DEPLOYED: Sat Oct  5 14:11:56 2019
NAMESPACE: default
STATUS: DEPLOYED

RESOURCES:
==> v1/ConfigMap
NAME                               DATA  AGE
mytest2-sonarqube-config           0     0s
mytest2-sonarqube-copy-plugins     1     0s
mytest2-sonarqube-install-plugins  1     0s
mytest2-sonarqube-tests            1     0s

==> v1/PersistentVolumeClaim
NAME                STATUS   VOLUME      CAPACITY  ACCESS MODES  STORAGECLASS  AGE
mytest2-postgresql  Pending  local-path  0s

==> v1/Pod(related)
NAME                                 READY  STATUS   RESTARTS  AGE
mytest2-postgresql-569679476d-qw8t4  0/1    Pending  0         0s
mytest2-sonarqube-7bfc4cf66f-ktlbs   0/1    Pending  0         0s

==> v1/Secret
NAME                TYPE    DATA  AGE
mytest2-postgresql  Opaque  1     0s

==> v1/Service
NAME                TYPE          CLUSTER-IP     EXTERNAL-IP  PORT(S)         AGE
mytest2-postgresql  ClusterIP     10.43.156.202  <none>       5432/TCP        0s
mytest2-sonarqube   LoadBalancer  10.43.160.188  <pending>    9000:30171/TCP  0s

==> v1beta1/Deployment
NAME                READY  UP-TO-DATE  AVAILABLE  AGE
mytest2-postgresql  0/1    1           0          0s
mytest2-sonarqube   0/1    1           0          0s


NOTES:
1. Get the application URL by running these commands:
     NOTE: It may take a few minutes for the LoadBalancer IP to be available.
           You can watch the status of by running 'kubectl get svc -w mytest2-sonarqube'
  export SERVICE_IP=$(kubectl get svc --namespace default mytest2-sonarqube -o jsonpath='{.status.loadBalancer.ingress[0].ip}')
  echo http://$SERVICE_IP:9000
While the PVCs were satisfied, the main pod kept crashing:
Every 2.0s: kubectl get pods --all-namespaces                                                                             JOHNSI10-M1: Sat Oct  5 15:16:36 2019

NAMESPACE            NAME                                     READY   STATUS      RESTARTS   AGE
kube-system          coredns-66f496764-s5bgd                  1/1     Running     0          3h32m
kube-system          helm-install-traefik-m6jlr               0/1     Completed   0          3h32m
kube-system          svclb-traefik-5z86d                      3/3     Running     0          3h32m
kube-system          traefik-d869575c8-6pts7                  1/1     Running     0          3h32m
kube-system          tiller-deploy-8557598fbc-r7mgs           1/1     Running     0          3h6m
kube-system          svclb-traefik-f9sq6                      3/3     Running     0          3h9m
default              svclb-mytest2-sonarqube-lgwml            1/1     Running     0          64m
default              mytest2-postgresql-569679476d-qw8t4      1/1     Running     0          64m
local-path-storage   local-path-provisioner-ccbdd96dc-xcsft   1/1     Running     0          21m
default              svclb-mytest2-sonarqube-fk4lz            1/1     Running     0          64m
default              mytest2-sonarqube-7bfc4cf66f-kxzcn       0/1     Running     5          17m
So let's try adding another worker
JOHNSI10-M1:Documents johnsi10$ multipass launch --name foo3
Launched: foo3
JOHNSI10-M1:Documents johnsi10$ multipass shell foo3
Welcome to Ubuntu 18.04.3 LTS (GNU/Linux 4.15.0-65-generic x86_64)

multipass@foo3:~$ sudo su -
root@foo3:~# curl -sfL https://get.k3s.io | K3S_URL=https://192.168.64.4:6443 K3S_TOKEN=K109b57bbfe0e3251481743ed00c79a323e9792eababc18ff7505a7e10f84c8e6cf::node:c9416ab5ca8157b919e331b1a4a0878d sh -

JOHNSI10-M1:Documents johnsi10$ kubectl get nodes
NAME   STATUS   ROLES    AGE     VERSION
foo    Ready    worker   3h15m   v1.15.4-k3s.1
foo2   Ready    master   3h38m   v1.15.4-k3s.1
foo3   Ready    worker   12s     v1.15.4-k3s.1
And we can manually try restarting the pod
default              mytest2-sonarqube-7bfc4cf66f-kxzcn       0/1     Running     7          24m
JOHNSI10-M1:Documents johnsi10$ kubectl delete pod mytest2-sonarqube-7bfc4cf66f-kxzcn
pod "mytest2-sonarqube-7bfc4cf66f-kxzcn" deleted
I'll save you a lot more debugging and "watch" commands. In the end, I really just needed to create a worker with sufficient CPU and RAM. SQube is a rather fat java app and the meager memory requirements were causing the health checks to fail during startup.
Then and only then did the application pod finally come up:
JOHNSI10-M1:elasticsearch-cloud-deploy johnsi10$ multipass launch -c 2 -m 2G -n foo4
Launched: foo4
JOHNSI10-M1:elasticsearch-cloud-deploy johnsi10$ multipass shell foo4
Welcome to Ubuntu 18.04.3 LTS (GNU/Linux 4.15.0-65-generic x86_64)

 * Documentation:  https://help.ubuntu.com
 * Management:     https://landscape.canonical.com
 * Support:        https://ubuntu.com/advantage

  System information as of Sat Oct  5 15:41:42 CDT 2019

  System load:  1.13              Processes:             125
  Usage of /:   20.8% of 4.67GB   Users logged in:       0
  Memory usage: 6%                IP address for enp0s2: 192.168.64.6
  Swap usage:   0%


0 packages can be updated.
0 updates are security updates.


To run a command as administrator (user "root"), use "sudo <command>".
See "man sudo_root" for details.

multipass@foo4:~$ sudo su -
root@foo4:~# curl -sfL https://get.k3s.io | K3S_URL=https://192.168.64.4:6443 K3S_TOKEN=K109b57bbfe0e3251481743ed00c79a323e9792eababc18ff7505a7e10f84c8e6cf::node:c9416ab5ca8157b919e331b1a4a0878d sh -
and one more restart
JOHNSI10-M1:Documents johnsi10$ kubectl delete pod mytest2-sonarqube-7bfc4cf66f-st7nm
pod "mytest2-sonarqube-7bfc4cf66f-st7nm" deleted
JOHNSI10-M1:Documents johnsi10$ kubectl get pods --all-namespaces
NAMESPACE            NAME                                     READY   STATUS      RESTARTS   AGE
...
default              mytest2-sonarqube-7bfc4cf66f-mffp9       1/1     Running     0          9m26s
JOHNSI10-M1:Documents johnsi10$ kubectl describe pod mytest2-sonarqube-7bfc4cf66f-mffp9
Name:               mytest2-sonarqube-7bfc4cf66f-mffp9
Namespace:          default
Priority:           0
PriorityClassName:  <none>
Node:               foo4/192.168.64.6
Start Time:         Sat, 05 Oct 2019 15:42:21 -0500
Labels:             app=sonarqube
                    pod-template-hash=7bfc4cf66f
                    release=mytest2
Annotations:        <none>
Status:             Running
IP:                 10.42.3.4
K3s worked great, but could we use this for a full k8s cluster?
Kubernetes with Kubespray on Multipass
Following the kubespray guide from a previous blog entry we had (The Other Clouds: Vultr) let’s install k8s.
root@ks000b:/home/multipass/kubespray# cat inventory/mycluster/hosts.yaml
all:
  hosts:
    node1:
      ansible_host: 192.168.64.7
      ip: 192.168.64.7
      access_ip: 192.168.64.7
    node2:
      ansible_host: 192.168.64.8
      ip: 192.168.64.8
      access_ip: 192.168.64.8
    node3:
      ansible_host: 192.168.64.9
      ip: 192.168.64.9
      access_ip: 192.168.64.9
  children:
    kube-master:
      hosts:
        node1:
    kube-node:
      hosts:
        node1:
        node2:
        node3:
    etcd:
      hosts:
        node1:
    k8s-cluster:
      children:
        kube-master:
        kube-node:
    calico-rr:
      hosts: {}
We followed the linked guide and after a few fixing of root ssh keys and authorized hosts, as well as py2 and 3 installs, we wrapped up the k8s install
TASK [kubernetes/preinstall : run xfs_growfs] *****************************************************************************************************************
Saturday 05 October 2019  22:59:31 -0500 (0:00:00.199)       0:18:39.727 ******

PLAY RECAP ****************************************************************************************************************************************************
localhost                  : ok=1    changed=0    unreachable=0    failed=0    skipped=0    rescued=0    ignored=0
node1                      : ok=709  changed=144  unreachable=0    failed=0    skipped=933  rescued=0    ignored=1
node2                      : ok=447  changed=88   unreachable=0    failed=0    skipped=508  rescued=0    ignored=0
node3                      : ok=447  changed=88   unreachable=0    failed=0    skipped=508  rescued=0    ignored=0

Saturday 05 October 2019  22:59:31 -0500 (0:00:00.185)       0:18:39.913 ******
===============================================================================
download : download_container | Download image if required ------------------------------------------------------------------------------------------- 107.62s
container-engine/docker : ensure docker packages are installed --------------------------------------------------------------------------------------- 102.11s
download : download_file | Download item -------------------------------------------------------------------------------------------------------------- 85.97s
download : download_file | Download item -------------------------------------------------------------------------------------------------------------- 46.43s
download : download_file | Download item -------------------------------------------------------------------------------------------------------------- 45.35s
bootstrap-os : Install python ------------------------------------------------------------------------------------------------------------------------- 45.33s
kubernetes/kubeadm : Join to cluster ------------------------------------------------------------------------------------------------------------------ 34.98s
kubernetes/master : kubeadm | Initialize first master ------------------------------------------------------------------------------------------------- 32.56s
download : download_container | Download image if required -------------------------------------------------------------------------------------------- 30.57s
download : download_file | Download item -------------------------------------------------------------------------------------------------------------- 25.77s
download : download_container | Download image if required -------------------------------------------------------------------------------------------- 21.53s
download : download_container | Download image if required -------------------------------------------------------------------------------------------- 20.51s
download : download_container | Download image if required -------------------------------------------------------------------------------------------- 19.50s
download : download_container | Download image if required -------------------------------------------------------------------------------------------- 15.30s
download : download_container | Download image if required -------------------------------------------------------------------------------------------- 14.83s
download : download_container | Download image if required -------------------------------------------------------------------------------------------- 11.86s
kubernetes/preinstall : Install packages requirements ------------------------------------------------------------------------------------------------- 10.87s
download : download_file | Download item -------------------------------------------------------------------------------------------------------------- 10.78s
kubernetes/master : Master | wait for kube-scheduler --------------------------------------------------------------------------------------------------- 9.82s
download : download_container | Download image if required --------------------------------------------------------------------------------------------- 7.49s
root@ks000b:/home/multipass/kubespray#
I then pulled the kubeconfig
root@node1:~# cat ~/.kube/config
apiVersion: v1
clusters:
- cluster:
    certificate-authority-data: LS0tLS1CRUdJTiBDRVJUSUZJQ0FURS0tLS0tCk1JSUN5RENDQWJDZ0F3SUJBZ0lCQURBTkJna3Foa2lHOXcwQkFRc0ZBREFWTVJNd0VRWURWUVFERXdwcmRXSmwKY201bGRHVnpNQjRYRFRFNU1UQXdOakF6TlRZek5Gb1hEVEk1TVRBd016QXpOVFl6TkZvd0ZURVRNQkVHQTFVRQpBeE1LYTNWaVpYSnVaWFJsY3pDQ0FTSXdEUVlKS29aSWh2Y05BUUVCQlFBRGdnRVBBRENDQVFvQ2dnRUJBTGIrCm1tNngxd0lxckdDOUczRTF2VlhBRmtZdExqeEQ5QmVUTURQVGNBYzVNaFBZY0Q3Qm5jbG00dy9hK1FweGpGWWoKZmRFaUJuQkZaRnFtZkY0ZGZIc3lSbzBFNzdLTmJjc2dCdTBldE13UG9JUGFZRDU5RUtDbjBDenl6THdSU1BaNwpsOGl2WE5iWEgrRndMcWdiY3NiaXBmNlFUN2RUUlRtM3RvVW53QklXRjVVNGRsNjVzMmtOUkQxWWVQRVliMWNnCjJnNW5sSUt0V3VjNzlWNDlZSjh5Qm1MNFV3NkhVdXZFeHl6MXpkWExyWWVrci9ybTdhVWw0U0RYWm96cEJSS3AKNFZKQ21nYkVZcWpoQXMybE5RTjB3aFk3VWx2NlVJNzRKR1JKVkdhejhrVzRGdm5QUThQWW1tRlB3VnhFUzhFMgpXbVZLNnNvVmtNWmRiUHFKcnlNQ0F3RUFBYU1qTUNFd0RnWURWUjBQQVFIL0JBUURBZ0trTUE4R0ExVWRFd0VCCi93UUZNQU1CQWY4d0RRWUpLb1pJaHZjTkFRRUxCUUFEZ2dFQkFLU1ZnTmlQWkhURkEyaHRIQlV1cy9xVG93R1kKL3JscGdaR09DKy9yaUxCalBLOElWSWUydXVzUjFzOXZaWjVIeCtMTWNqVCtMUGdqcWJFdkI4dHFLTk4wZTdRRwp4VFNEenAxWmFnMmVKa1Y5WXQ1UnJNZVZCaG91Z3BPZm55NUR1QlRUaVFTeXVYN3pWWUIzZGsvTVMrdWFmVWttCng1elFCd0FGYVhsUFZ6RWpaL2V2T1N3U2JhS3Z6N3VWRlNTUGdlSmpiOXNoM01hRG1Keml5TW1IMVQvTUhpU0MKeXZvSzB5NDlnQjVEdS81Z1dNN0swRUV6U2RxbmtOSGhDOGJGL1lsSzM2VndyYU9WcW04YS9zODhOSTF4UE96NwpobDQ2eTM0YnVGMDQ4a3BNVHNLV1p3cWpOVWJJUlNXeDB3MURrenQreEp2OTNrRjJVanI5dHJvVk5oMD0KLS0tLS1FTkQgQ0VSVElGSUNBVEUtLS0tLQo=
    server: https://192.168.64.7:6443
and checked for running pods
$ kubectl get pods --all-namespaces
NAMESPACE     NAME                                       READY   STATUS    RESTARTS   AGE
kube-system   calico-kube-controllers-586d5d67cb-gvvnd   1/1     Running   0          3m44s
kube-system   calico-node-ndqsh                          1/1     Running   0          4m28s
kube-system   calico-node-whr5v                          1/1     Running   1          4m28s
kube-system   calico-node-zhl8g                          1/1     Running   0          4m28s
kube-system   coredns-58687784f9-7dw4l                   1/1     Running   0          3m4s
kube-system   coredns-58687784f9-jfvsp                   1/1     Running   0          3m23s
kube-system   dns-autoscaler-79599df498-76rd6            1/1     Running   0          3m19s
kube-system   kube-apiserver-node1                       1/1     Running   0          5m28s
kube-system   kube-controller-manager-node1              1/1     Running   0          5m28s
kube-system   kube-proxy-sjhvs                           1/1     Running   0          4m42s
kube-system   kube-proxy-tcdpj                           1/1     Running   0          4m42s
kube-system   kube-proxy-tmdvf                           1/1     Running   0          4m42s
kube-system   kube-scheduler-node1                       1/1     Running   0          5m28s
kube-system   kubernetes-dashboard-556b9ff8f8-nxvpf      1/1     Running   0          3m15s
kube-system   nginx-proxy-node2                          1/1     Running   0          4m44s
kube-system   nginx-proxy-node3                          1/1     Running   0          4m46s
kube-system   nodelocaldns-pj29s                         1/1     Running   0          3m18s
kube-system   nodelocaldns-qfgdm                         1/1     Running   0          3m18s
kube-system   nodelocaldns-qjjrq                         1/1     Running   0          3m18s
We can port-forward to the dashboard
JOHNSI10-M1:Documents johnsi10$ kubectl port-forward kubernetes-dashboard-556b9ff8f8-nxvpf -n kube-system 8443:8443
Forwarding from 127.0.0.1:8443 -> 8443
Forwarding from [::1]:8443 -> 8443
Handling connection for 8443

One note, getting a functional service user and token took a few. In short, you’ll want to apply a ClusterAdmin role to the default token
apiVersion: rbac.authorization.k8s.io/v1
kind: ClusterRoleBinding
metadata:
  name: admin-user
roleRef:
  apiGroup: rbac.authorization.k8s.io
  kind: ClusterRole
  name: cluster-admin
subjects:
- kind: ServiceAccount
  name: admin-user
  namespace: kube-system
- kind: ServiceAccount
  name: default
  namespace: default

Summary
Ubuntu multipass offers a nice fast alternative to Docker. It uses HyperKit for MacOS under the covers (more here https://github.com/CanonicalLtd/multipass) and was rather easy to get a k3s and k8s cluster up and running.
It supports metadata for cloud-init - basically you can create a config file to set up users and groups and even run arbitrary setup code. This means one could likely automate the creation of local clusters.
I hope to dig into multipass on Windows next time and explore cloud-init in greater detail.